Real Apple-style "Liquid Glass" edge refraction for React/Next.js using a single SVG feDisplacementMap filter | no WebGL, no canvas rendering, ~5KB
TypeScript
7
10 commits
updated Oct 12, 2026
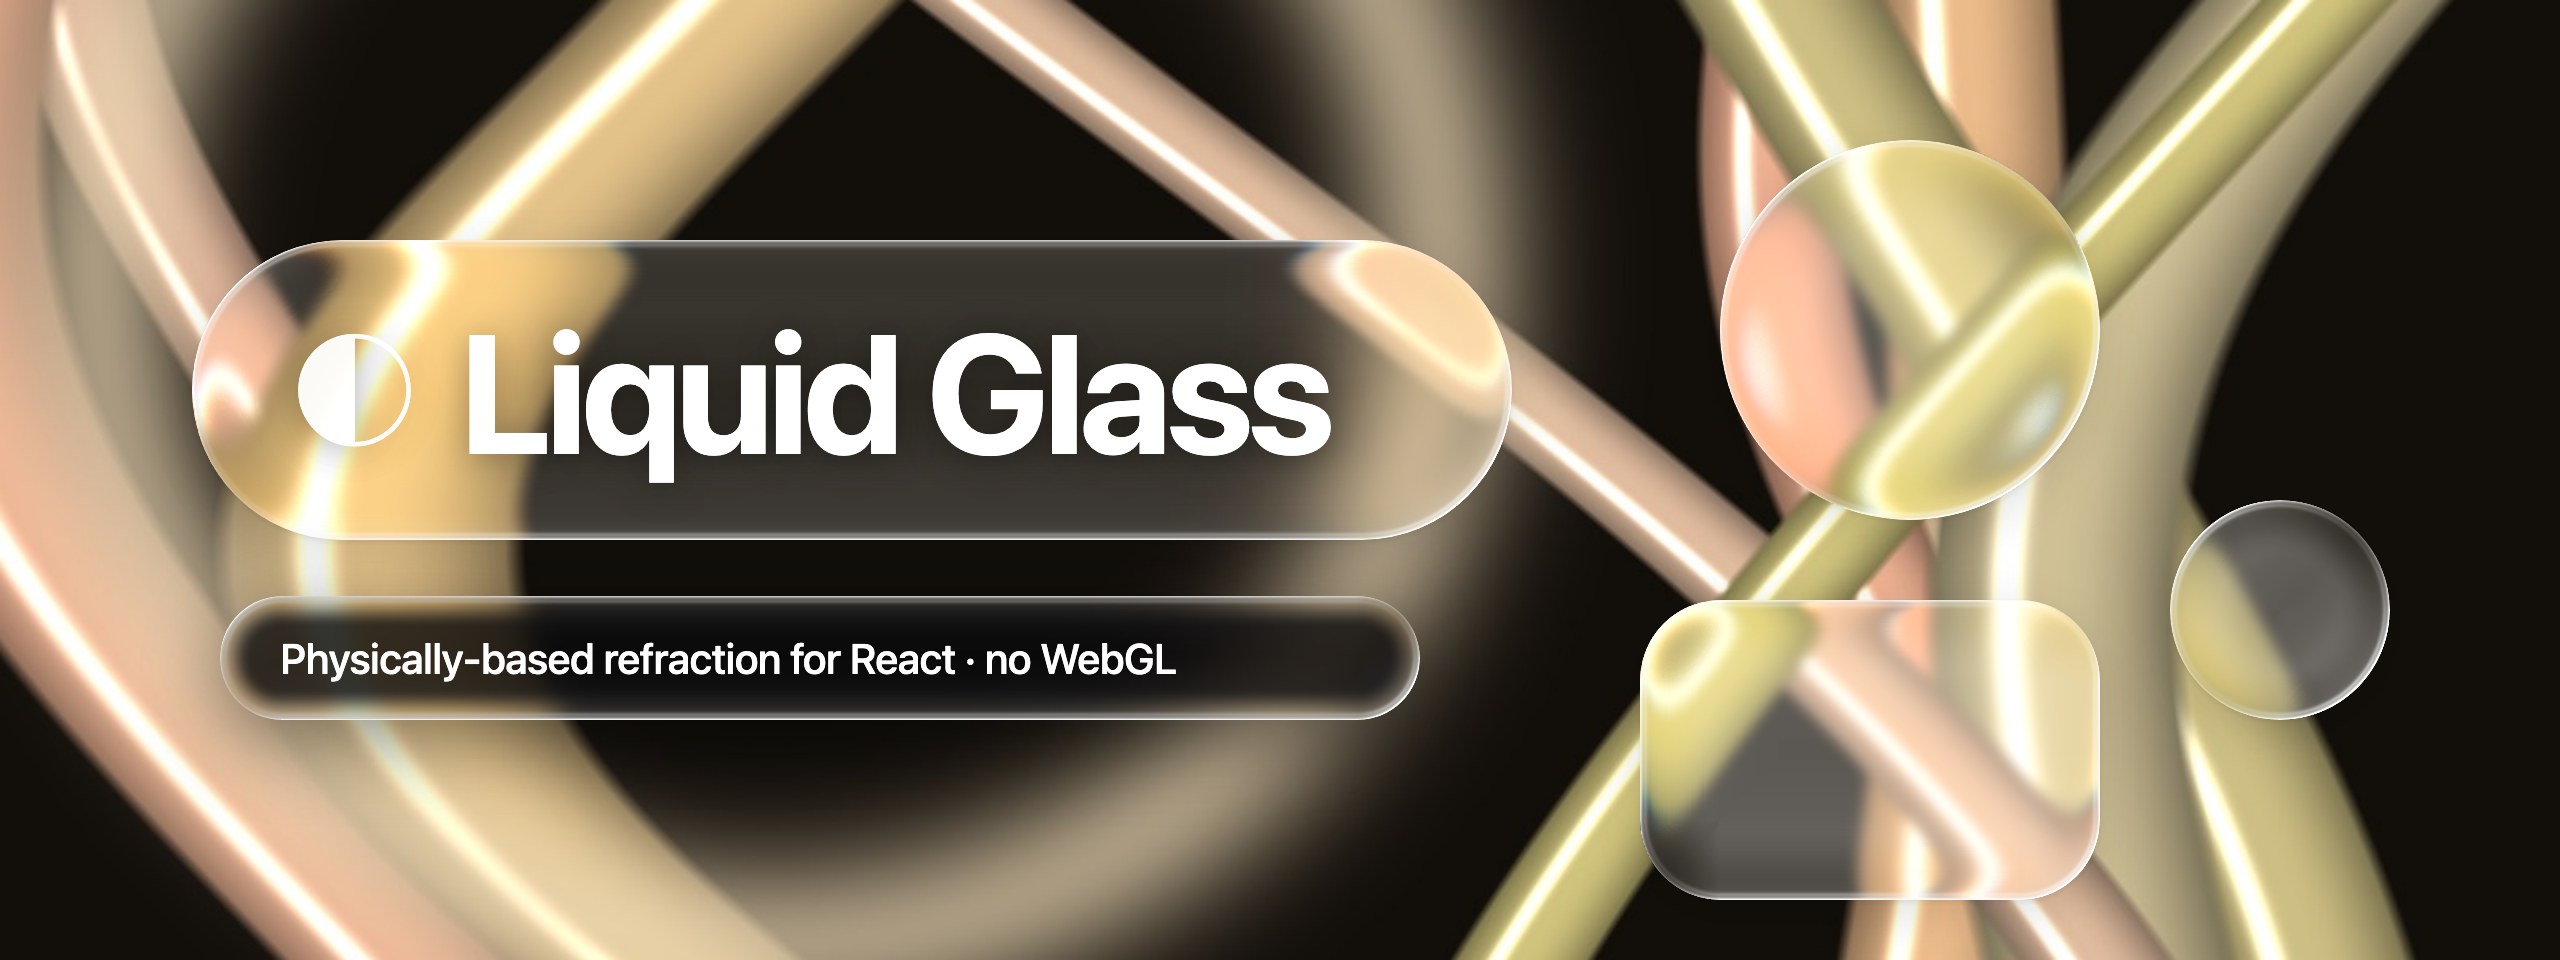
Apple's iOS 26 / macOS 26 Liquid Glass material for the web.
Physically based refraction, a specular rim and touch-reactive glass.
No WebGL, no canvas snapshots, no per-frame JavaScript.





Try the live demo — no installation needed
https://leonardseo.github.io/liquid-glass-react/
Most "liquid glass" CSS on the web is backdrop-filter: blur() in a
rounded box. Real Liquid Glass bends light: the centre stays clear,
while the curved rim magnifies and stretches whatever is behind it and
catches a bright edge highlight.
This library models that rim as an actual lens. It traces light through
it with Snell's law, writes the result into an SVG displacement map
sized to each element, and lets the browser apply it in its normal
backdrop-filter pass.
npm install @vepando/liquid-glass-react
import "@vepando/liquid-glass-react/style.css"
import { LiquidGlass } from "@vepando/liquid-glass-react"

<LiquidGlass radius={999} interactive style={{ height: 64 }}>
  <nav>…</nav>
</LiquidGlass>
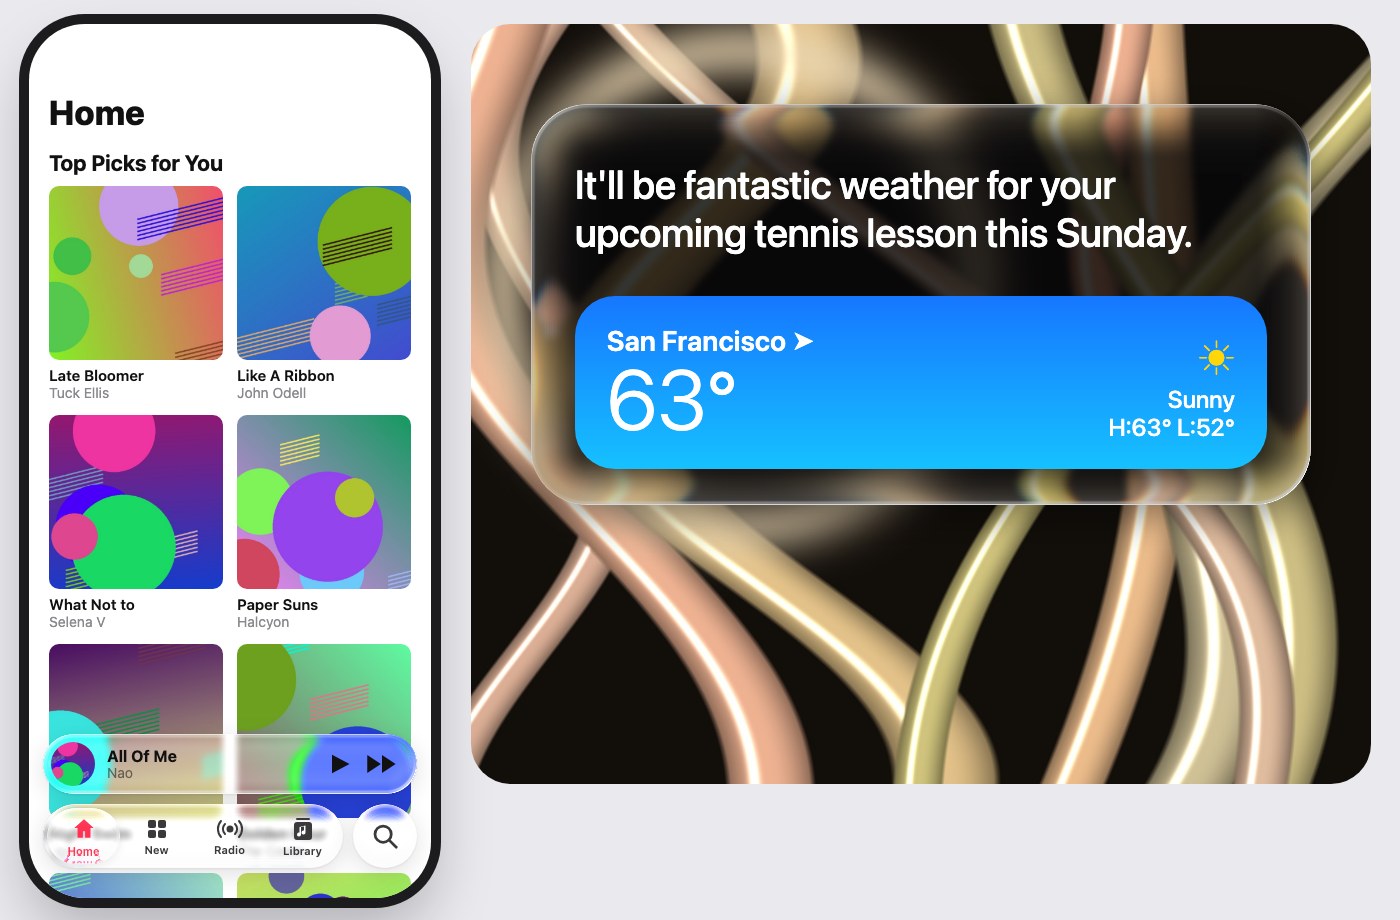
interactive adds a springy press-to-grow and a
glow from the touch point.npm install @vepando/liquid-glass-react
# or: pnpm add @vepando/liquid-glass-react · yarn add @vepando/liquid-glass-react · bun add @vepando/liquid-glass-react
Import the stylesheet once, e.g. in your root layout or entry file:
import "@vepando/liquid-glass-react/style.css"
Then use the component anywhere:
import { LiquidGlass } from "@vepando/liquid-glass-react"
Next.js App Router: the bundle is already marked "use client", so
you can render <LiquidGlass> straight from a server component. Put the
CSS import in app/layout.tsx. Tested with next build and React 18/19
SSR.
Prefer to own the code? The source is three files in src/.
The copy-paste version in
skills/liquid-glass/assets/ works without
the package.
Floating navbar
<LiquidGlass radius={999} className="h-16 w-full max-w-3xl">
  <nav className="h-full flex items-center justify-between px-6">…</nav>
</LiquidGlass>
Round icon button
<LiquidGlass radius={999} interactive className="h-16 w-16">
  <button type="button" aria-label="Search" onClick={openSearch}
    className="h-full w-full rounded-full border-0 bg-transparent cursor-pointer focus-visible:outline focus-visible:outline-2 focus-visible:outline-offset-2">
    <SearchIcon aria-hidden="true" />
  </button>
</LiquidGlass>
interactive adds a pointer animation to a div; it does not turn it
into a button. Put a native button or link inside for keyboard access,
activation and focus. The utility classes in these examples assume
Tailwind; equivalent CSS works too.
Dark sheet / panel
<LiquidGlass radius={56} tint="dark" className="p-12">
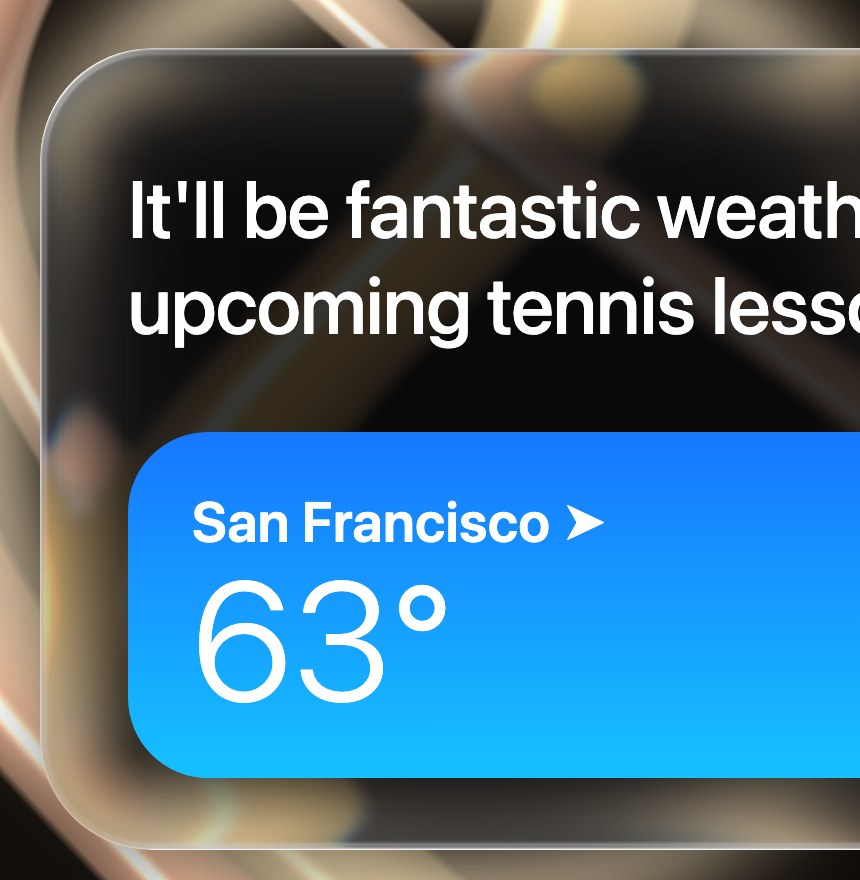
  <p className="text-white text-4xl">It'll be fantastic weather…</p>
</LiquidGlass>
Glass on glass (e.g. a tab bar selection droplet). Render the inner glass as a sibling positioned over the outer one, not as a child (see Gotchas):
<div className="relative">
  <LiquidGlass radius={999} className="h-16">{tabs}</LiquidGlass>
  <div className="absolute inset-1 pointer-events-none">
    <LiquidGlass radius={999} blur={0} tint="rgba(255,255,255,.05)"
      style={{ width: "25%", height: "100%", transform: `translateX(${active * 100}%)` }} />
  </div>
</div>
A full working version, including the stretch while it slides, is in
demo/src/Scenes.tsx.
For most uses, set the size with CSS and optionally choose radius,
tint and interactive. The optical controls below are optional tuning;
leave bezel and thickness unset to derive them from the measured size.
| Prop | Default | Description |
|---|---|---|
radius | 32 | Corner radius in px. 999 for pills and circles. |
bezel | auto | Width of the curved, light-bending rim. Auto ≈ ¼ of the short side, capped by radius and 56. |
thickness | 1.5 × bezel | Glass height. Taller glass bends more. |
ior | 1.5 | Index of refraction (water ≈ 1.33). |
profile | "squircle" | Rim surface: "squircle", "circle" or "lip". |
refraction | 1 | Multiplier on top of the physical bend. |
dispersion | 0.06 | Colour separation. 0 disables it (single filter pass). |
blur | 3 | Frost in px. 0 = perfectly clear glass. |
saturation | 1.5 | Backdrop vibrancy. |
tint | "light" | "light", "dark" or any CSS colour. |
specular | 1 | Edge highlight strength, 0-1. |
lightAngle | -135 | Light direction in degrees (-90 = top, -135 = top-left). |
interactive | false | Press-to-grow and touch glow. |
Every other div prop (className, style, onClick, role, …) is
passed through.
Width and height can use rem, %, vw, grid or flex layouts. The
component measures the border box in CSS pixels and regenerates its maps
when that box changes, including padding and borders. CSS pixels are the
coordinate system of the generated filter, not physical device pixels.
<LiquidGlass radius={999} style={{ width: "100%", maxWidth: "40rem", height: "4rem" }}>
  <nav>…</nav>
</LiquidGlass>
The geometry props (radius, bezel, thickness, blur) take numbers
in CSS pixels. Explicit values stay fixed when the root font size
changes; they do not accept rem strings or CSS variables. A design
system that needs those values to follow font-relative tokens must
resolve the tokens to CSS pixels and update the props. The default bezel
adapts within its documented limits; it is not proportional scaling of
every optical parameter.
ior must be finite and greater than zero, and thickness must be finite
and non-negative. Invalid optical inputs throw a RangeError. The map
builders clamp the bezel to at least one CSS pixel and at most half the
short side (with a one-pixel minimum); the low-level refractionProfile
requires a finite positive bezel.
flowchart LR
  A[ResizeObserver<br/>element size] --> B[Snell's law over<br/>squircle bezel]
  B --> C[Displacement map<br/>R = x, G = y]
  A --> D[Specular rim map]
  A --> E[Tint mask]
  C --> F["SVG filter<br/>feImage → feDisplacementMap ×3"]
  F --> G["backdrop-filter:<br/>blur() url(#filter) saturate()"]
  D --> H[plus-lighter overlay]
  E --> I[masked tint layer]
feDisplacementMap then samples the backdrop from further inside the
glass near the rim, which reads as magnification.backdrop-filter on the
component root. A masked tint, the specular map
(mix-blend-mode: plus-lighter) and your content sit on top.The deep dive is in
skills/liquid-glass/references/theory.md.
| Engine | Result |
|---|---|
| Blink: Chrome, Edge, Arc, Brave, Opera | Full effect: refraction, dispersion, specular, frost |
| WebKit: Safari and every iOS browser | Frosted fallback: blur, tint and specular rim, no refraction |
| Gecko: Firefox | Same frosted fallback |
Only Blink renders SVG filters referenced from backdrop-filter. The
other engines accept the syntax but draw nothing, so a CSS cascade
fallback isn't reliable there. The component detects Blink and only adds
url(#filter) there.
No refraction at all, the page just shows through the glass? You have a backdrop root in the way.
filter, opacity < 1, mask, clip-path,
mix-blend-mode, backdrop-filter, or children that blend into it,
cuts the backdrop off at that ancestor. The glass then refracts an empty
image. That's why backdrop-filter sits on the component root, never on
an inner layer. transform and overflow: hidden are fine.For fixed-size elements, the same optics are available as a Python script
that writes a PNG and prints the matching scale:
pip install -r scripts/requirements.txt
python3 scripts/generate-displacement-map.py --width 700 --height 64 --radius 32 \
  --output public/liquid-lens-map.png
# → Use it with: <feDisplacementMap scale="24.0" xChannelSelector="R" yChannelSelector="G" />
Generate the map at the element's exact CSS size; a stretched map puts the bend in the wrong place.
Open the live demo — no installation required.
Glass lab · Showcase · Classic demo
Chromium shows the full refraction effect; other browsers get the frosted
fallback. The demo deploys to GitHub Pages after successful checks on main.
To run locally:
cd demo
npm install
npm run dev
| URL | Scene |
|---|---|
/ | Homepage with draggable glass and links to all demos |
/?page=lab | Squircle, orb and pill lenses; draggable with mouse, touch or arrow keys; live backdrop, refraction and frost controls |
/?page=showcase | Interactive artwork gallery, music interface and weather panel |
/?page=classic | The original Music and Siri collection |
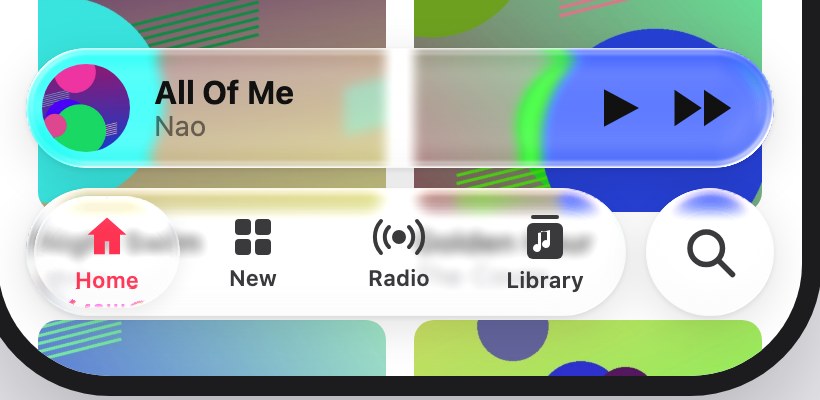
/?scene=music | Apple Music style tab bar with sliding droplet, mini player and search button over album art |
/?scene=siri | Dark glass panel over a ribbon wallpaper |
/?scene=playground | Draggable lenses over text, stripes and a grid |
/?scene=banner | The header image of this README |
/?scene=original | The v1 technique, for comparison |
Every prop can be tuned from the URL, for example
/?scene=playground&thickness=80&dispersion=0.2&blur=0.
The demo imports @vepando/liquid-glass-react by name; Vite aliases that name to
src/, so you get HMR on the library source without a build step.
| v1: one stretched static map, milky tint | v2: physical, per-element, clear rim |
|---|---|
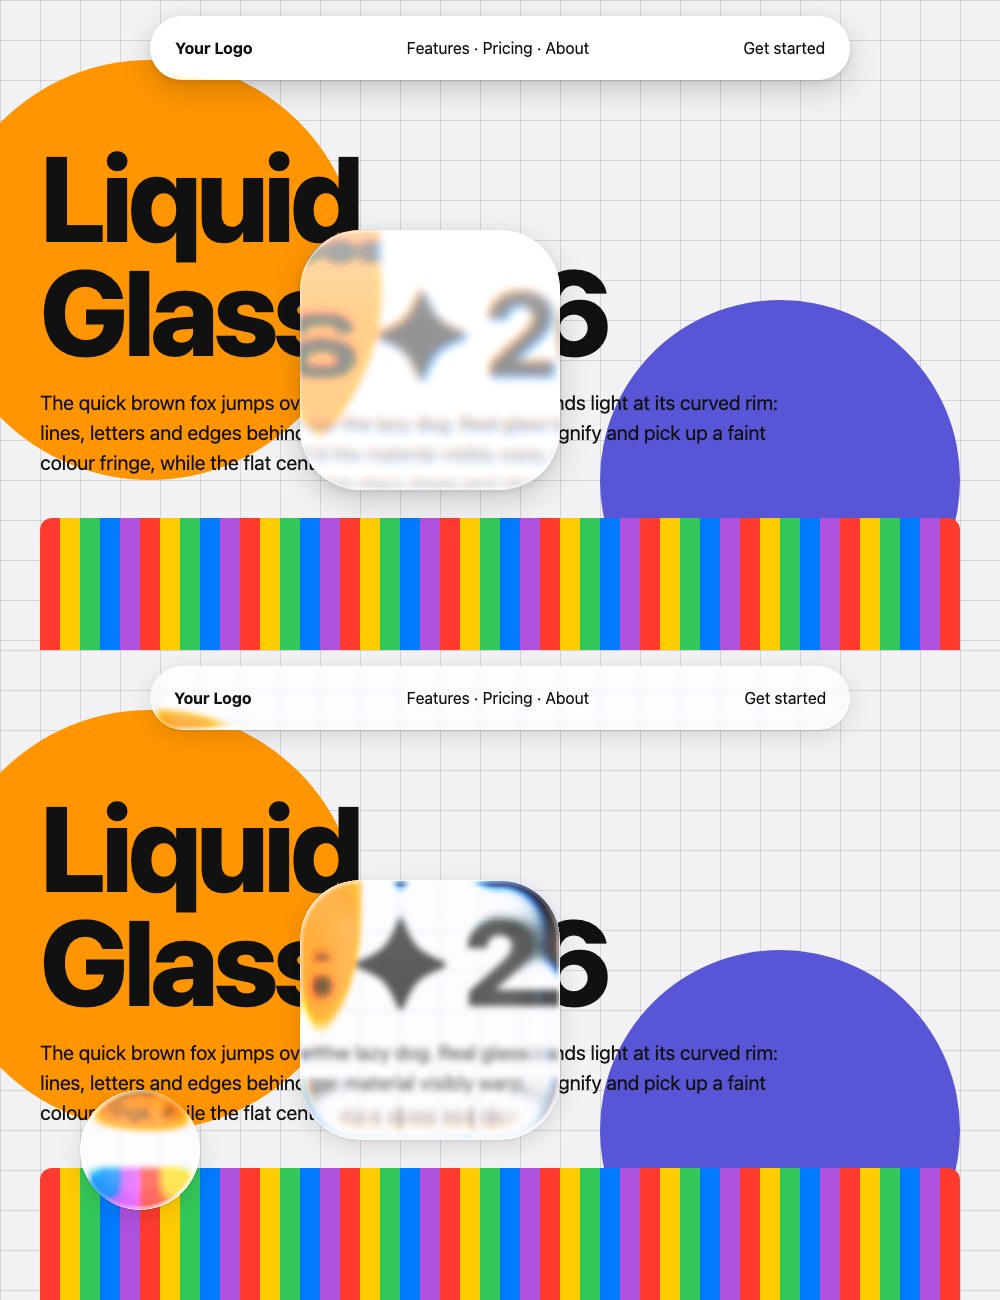 |
|
skills/liquid-glass/ is a self-contained skill
(SKILL.md, assets and theory) that you can hand to Claude Code or any
other coding agent to implement the effect end-to-end, including the
troubleshooting table for the common failure modes.
src/                  the package: LiquidGlass.tsx · maps.ts · liquid-glass.css · index.ts
dist/                 build output (npm run build), published to npm
examples/             LiquidGlassPill.tsx
demo/                 Vite + React showcase
scripts/              generate-displacement-map.py (static variant)
skills/liquid-glass/  skill for AI coding agents
docs/                 images used in this README
The refraction model follows the approach described by kube.io in Liquid Glass in the browser: refraction with CSS and SVG. Liquid Glass is a design language by Apple; this project is not affiliated with Apple.
npm install
npm run build      # tsup → dist/ (ESM, CJS, .d.ts, style.css)
npm run typecheck
npm test           # geometry regressions; Node 22.18+ or 24+
cd demo && npm install && npm run dev
Publishing: npm publish (runs typecheck and build first via
prepublishOnly).
Real Apple-style "Liquid Glass" edge refraction for React/Next.js using a single SVG feDisplacementMap filter | no WebGL, no canvas rendering, ~5KB
TypeScript
7
10 commits
updated Oct 12, 2026
Apple's iOS 26 / macOS 26 Liquid Glass material for the web.
Physically based refraction, a specular rim and touch-reactive glass.
No WebGL, no canvas snapshots, no per-frame JavaScript.
Try the live demo — no installation needed
https://leonardseo.github.io/liquid-glass-react/
Most "liquid glass" CSS on the web is backdrop-filter: blur() in a
rounded box. Real Liquid Glass bends light: the centre stays clear,
while the curved rim magnifies and stretches whatever is behind it and
catches a bright edge highlight.
This library models that rim as an actual lens. It traces light through
it with Snell's law, writes the result into an SVG displacement map
sized to each element, and lets the browser apply it in its normal
backdrop-filter pass.
npm install @vepando/liquid-glass-react
import "@vepando/liquid-glass-react/style.css"
import { LiquidGlass } from "@vepando/liquid-glass-react"

<LiquidGlass radius={999} interactive style={{ height: 64 }}>
  <nav>…</nav>
</LiquidGlass>
interactive adds a springy press-to-grow and a
glow from the touch point.npm install @vepando/liquid-glass-react
# or: pnpm add @vepando/liquid-glass-react · yarn add @vepando/liquid-glass-react · bun add @vepando/liquid-glass-react
Import the stylesheet once, e.g. in your root layout or entry file:
import "@vepando/liquid-glass-react/style.css"
Then use the component anywhere:
import { LiquidGlass } from "@vepando/liquid-glass-react"
Next.js App Router: the bundle is already marked "use client", so
you can render <LiquidGlass> straight from a server component. Put the
CSS import in app/layout.tsx. Tested with next build and React 18/19
SSR.
Prefer to own the code? The source is three files in src/.
The copy-paste version in
skills/liquid-glass/assets/ works without
the package.
Floating navbar
<LiquidGlass radius={999} className="h-16 w-full max-w-3xl">
  <nav className="h-full flex items-center justify-between px-6">…</nav>
</LiquidGlass>
Round icon button
<LiquidGlass radius={999} interactive className="h-16 w-16">
  <button type="button" aria-label="Search" onClick={openSearch}
    className="h-full w-full rounded-full border-0 bg-transparent cursor-pointer focus-visible:outline focus-visible:outline-2 focus-visible:outline-offset-2">
    <SearchIcon aria-hidden="true" />
  </button>
</LiquidGlass>
interactive adds a pointer animation to a div; it does not turn it
into a button. Put a native button or link inside for keyboard access,
activation and focus. The utility classes in these examples assume
Tailwind; equivalent CSS works too.
Dark sheet / panel
<LiquidGlass radius={56} tint="dark" className="p-12">
  <p className="text-white text-4xl">It'll be fantastic weather…</p>
</LiquidGlass>
Glass on glass (e.g. a tab bar selection droplet). Render the inner glass as a sibling positioned over the outer one, not as a child (see Gotchas):
<div className="relative">
  <LiquidGlass radius={999} className="h-16">{tabs}</LiquidGlass>
  <div className="absolute inset-1 pointer-events-none">
    <LiquidGlass radius={999} blur={0} tint="rgba(255,255,255,.05)"
      style={{ width: "25%", height: "100%", transform: `translateX(${active * 100}%)` }} />
  </div>
</div>
A full working version, including the stretch while it slides, is in
demo/src/Scenes.tsx.
For most uses, set the size with CSS and optionally choose radius,
tint and interactive. The optical controls below are optional tuning;
leave bezel and thickness unset to derive them from the measured size.
| Prop | Default | Description |
|---|---|---|
radius | 32 | Corner radius in px. 999 for pills and circles. |
bezel | auto | Width of the curved, light-bending rim. Auto ≈ ¼ of the short side, capped by radius and 56. |
thickness | 1.5 × bezel | Glass height. Taller glass bends more. |
ior | 1.5 | Index of refraction (water ≈ 1.33). |
profile | "squircle" | Rim surface: "squircle", "circle" or "lip". |
refraction | 1 | Multiplier on top of the physical bend. |
dispersion | 0.06 | Colour separation. 0 disables it (single filter pass). |
blur | 3 | Frost in px. 0 = perfectly clear glass. |
saturation | 1.5 | Backdrop vibrancy. |
tint | "light" | "light", "dark" or any CSS colour. |
specular | 1 | Edge highlight strength, 0-1. |
lightAngle | -135 | Light direction in degrees (-90 = top, -135 = top-left). |
interactive | false | Press-to-grow and touch glow. |
Every other div prop (className, style, onClick, role, …) is
passed through.
Width and height can use rem, %, vw, grid or flex layouts. The
component measures the border box in CSS pixels and regenerates its maps
when that box changes, including padding and borders. CSS pixels are the
coordinate system of the generated filter, not physical device pixels.
<LiquidGlass radius={999} style={{ width: "100%", maxWidth: "40rem", height: "4rem" }}>
  <nav>…</nav>
</LiquidGlass>
The geometry props (radius, bezel, thickness, blur) take numbers
in CSS pixels. Explicit values stay fixed when the root font size
changes; they do not accept rem strings or CSS variables. A design
system that needs those values to follow font-relative tokens must
resolve the tokens to CSS pixels and update the props. The default bezel
adapts within its documented limits; it is not proportional scaling of
every optical parameter.
ior must be finite and greater than zero, and thickness must be finite
and non-negative. Invalid optical inputs throw a RangeError. The map
builders clamp the bezel to at least one CSS pixel and at most half the
short side (with a one-pixel minimum); the low-level refractionProfile
requires a finite positive bezel.
flowchart LR
  A[ResizeObserver<br/>element size] --> B[Snell's law over<br/>squircle bezel]
  B --> C[Displacement map<br/>R = x, G = y]
  A --> D[Specular rim map]
  A --> E[Tint mask]
  C --> F["SVG filter<br/>feImage → feDisplacementMap ×3"]
  F --> G["backdrop-filter:<br/>blur() url(#filter) saturate()"]
  D --> H[plus-lighter overlay]
  E --> I[masked tint layer]
feDisplacementMap then samples the backdrop from further inside the
glass near the rim, which reads as magnification.backdrop-filter on the
component root. A masked tint, the specular map
(mix-blend-mode: plus-lighter) and your content sit on top.The deep dive is in
skills/liquid-glass/references/theory.md.
| Engine | Result |
|---|---|
| Blink: Chrome, Edge, Arc, Brave, Opera | Full effect: refraction, dispersion, specular, frost |
| WebKit: Safari and every iOS browser | Frosted fallback: blur, tint and specular rim, no refraction |
| Gecko: Firefox | Same frosted fallback |
Only Blink renders SVG filters referenced from backdrop-filter. The
other engines accept the syntax but draw nothing, so a CSS cascade
fallback isn't reliable there. The component detects Blink and only adds
url(#filter) there.
No refraction at all, the page just shows through the glass? You have a backdrop root in the way.
filter, opacity < 1, mask, clip-path,
mix-blend-mode, backdrop-filter, or children that blend into it,
cuts the backdrop off at that ancestor. The glass then refracts an empty
image. That's why backdrop-filter sits on the component root, never on
an inner layer. transform and overflow: hidden are fine.For fixed-size elements, the same optics are available as a Python script
that writes a PNG and prints the matching scale:
pip install -r scripts/requirements.txt
python3 scripts/generate-displacement-map.py --width 700 --height 64 --radius 32 \
  --output public/liquid-lens-map.png
# → Use it with: <feDisplacementMap scale="24.0" xChannelSelector="R" yChannelSelector="G" />
Generate the map at the element's exact CSS size; a stretched map puts the bend in the wrong place.
Open the live demo — no installation required.
Glass lab · Showcase · Classic demo
Chromium shows the full refraction effect; other browsers get the frosted
fallback. The demo deploys to GitHub Pages after successful checks on main.
To run locally:
cd demo
npm install
npm run dev
| URL | Scene |
|---|---|
/ | Homepage with draggable glass and links to all demos |
/?page=lab | Squircle, orb and pill lenses; draggable with mouse, touch or arrow keys; live backdrop, refraction and frost controls |
/?page=showcase | Interactive artwork gallery, music interface and weather panel |
/?page=classic | The original Music and Siri collection |
/?scene=music | Apple Music style tab bar with sliding droplet, mini player and search button over album art |
/?scene=siri | Dark glass panel over a ribbon wallpaper |
/?scene=playground | Draggable lenses over text, stripes and a grid |
/?scene=banner | The header image of this README |
/?scene=original | The v1 technique, for comparison |
Every prop can be tuned from the URL, for example
/?scene=playground&thickness=80&dispersion=0.2&blur=0.
The demo imports @vepando/liquid-glass-react by name; Vite aliases that name to
src/, so you get HMR on the library source without a build step.
| v1: one stretched static map, milky tint | v2: physical, per-element, clear rim |
|---|---|
|
|
skills/liquid-glass/ is a self-contained skill
(SKILL.md, assets and theory) that you can hand to Claude Code or any
other coding agent to implement the effect end-to-end, including the
troubleshooting table for the common failure modes.
src/                  the package: LiquidGlass.tsx · maps.ts · liquid-glass.css · index.ts
dist/                 build output (npm run build), published to npm
examples/             LiquidGlassPill.tsx
demo/                 Vite + React showcase
scripts/              generate-displacement-map.py (static variant)
skills/liquid-glass/  skill for AI coding agents
docs/                 images used in this README
The refraction model follows the approach described by kube.io in Liquid Glass in the browser: refraction with CSS and SVG. Liquid Glass is a design language by Apple; this project is not affiliated with Apple.
npm install
npm run build      # tsup → dist/ (ESM, CJS, .d.ts, style.css)
npm run typecheck
npm test           # geometry regressions; Node 22.18+ or 24+
cd demo && npm install && npm run dev
Publishing: npm publish (runs typecheck and build first via
prepublishOnly).



