Personal Website & Blog Theme for Hugo
See the codeEnglish | Français | Deutsch | Português (PT) | Português (BR) | Español | 日本語 | 简体中文 | Indonesian



Blowfish is designed to be a powerful, lightweight theme for Hugo. It's built using Tailwind CSS with a clean and minimalist design that prioritises to your content.
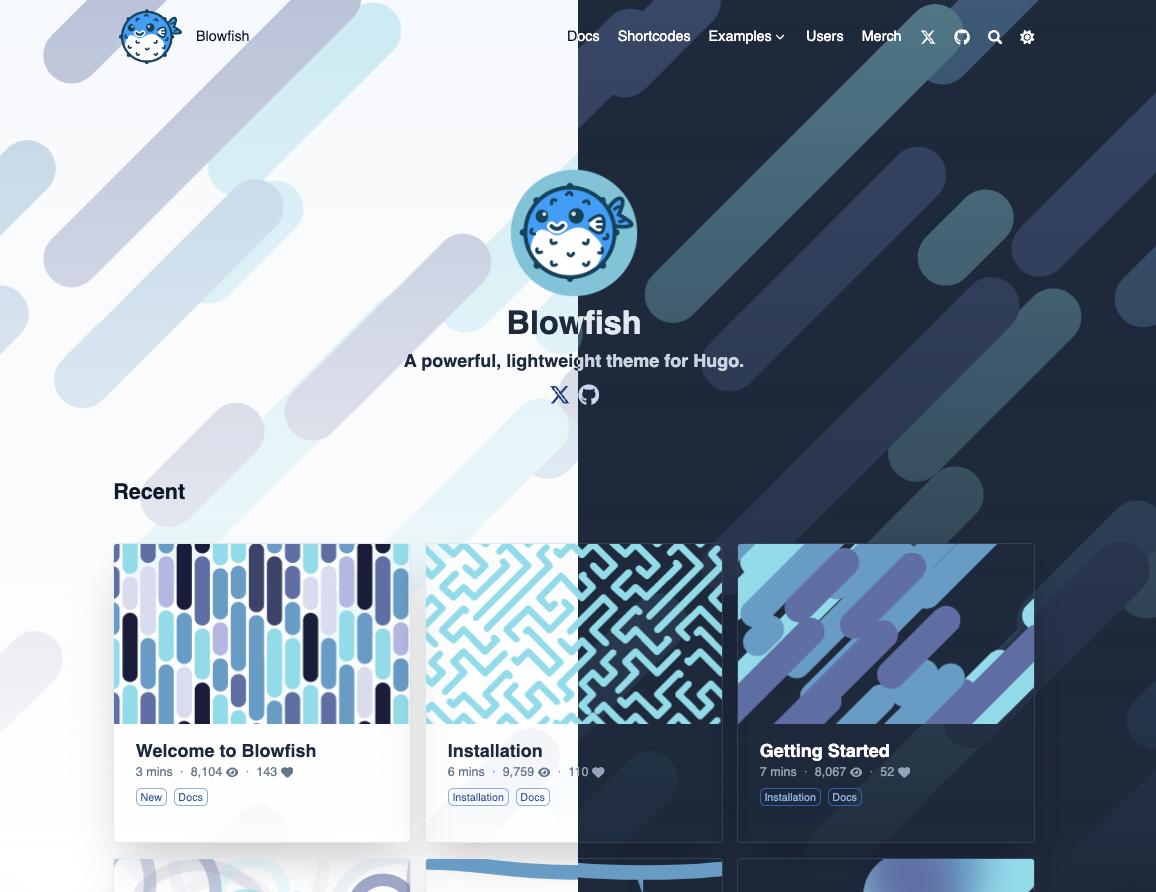
🌏 Demo site
📑 Theme documentation
🐛 Bug reports & issues
💡 Questions & feature requests


Blowfish has extensive documentation that covers all aspects of the theme. Be sure to read the docs to learn more about how to use the theme and its features.
Blowfish supports several installation methods - as a git submodule, a Hugo Module, or as a completely manual install.
Detailed instructions for each method can be found in the Installation docs. You should consult the documentation for the simplest setup experience. Below is a quick start guide using submodules if you are using git, or Hugo modules if you're already confident installing Hugo themes.
Blowfish ships an agent skill that teaches AI coding agents — like Claude Code — how to install, configure, and build sites with the theme. Install it from the Blowfish plugin marketplace in Claude Code:
/plugin marketplace add nunocoracao/blowfish
/plugin install blowfish@blowfish
Or simply copy the skill folder into your site repository at .claude/skills/blowfish/ — agents pick up project skills automatically. Then ask your agent to set up Blowfish for you.
Note: Ensure you have Node.js, Git and Hugo installed, and that you have created a new Hugo project before proceeding.
Blowfish Tools is a CLI that helps you get started with Blowfish. It will create a new Hugo project, install the theme and set up the theme configuration files for you. Please report any issues you find.
Install the CLI tool globally using npm (or other package manager):
npm i -g blowfish-tools
Then run the command blowfish-tools to start an interactive run which will guide you through creation and configuration use-cases.
blowfish-tools
You can also run the command blowfish-tools new to create a new Hugo project and install the theme in one go. Check the CLI help for more information.
blowfish-tools new mynewsite
Note: Ensure you have Git and Hugo installed, and that you have created a new Hugo project before proceeding.
From your project directory, initialise git:
git init
Configure Blowfish as a git submodule:
git submodule add -b main https://github.com/nunocoracao/blowfish.git themes/blowfish
In the root folder of your website, delete the hugo.toml file that was generated by Hugo. Copy the *.toml config files from the theme into your config/_default/ folder.
You will find these theme config files in the Hugo cache directory, or download a copy from GitHub.
Follow the Getting Started instructions to configure your website.
Note: Ensure you have Go and Hugo installed, and that you have created a new Hugo project before proceeding.
From your project directory, initialise Hugo Modules:
hugo mod init github.com/<username>/<repo-name>
Create config/_default/module.toml and add the following:
[[imports]]
path = "github.com/nunocoracao/blowfish/v3"
Start your server using hugo server and the theme will be downloaded automatically.
In the root folder of your website, delete the hugo.toml file that was generated by Hugo. Copy the *.toml config files from the theme into your config/_default/ folder.
Note: Do not overwrite the
module.tomlfile you created above!
You will find these theme config files in the Hugo cache directory, or download a copy from GitHub.
Follow the Getting Started instructions to configure your website.
As new releases are posted, you can update the theme using Hugo. Simply run hugo mod get -u from your project directory and the theme will automatically update to the latest release.
Detailed update instructions are available in the docs.
Blowfish v3 is fully backwards compatible: every new feature is opt-in and no configuration options or templates were removed. Git submodule and manual installs upgrade as usual with no changes; Hugo module users just change the import path in config/_default/module.toml from github.com/nunocoracao/blowfish/v2 to github.com/nunocoracao/blowfish/v3 and run hugo mod get -u. See the upgrade instructions for details.
Blowfish is expected to evolve over time. I intend to keep adding features and making changes as required.
Feel free to get in touch with any issues or suggestions for new features you'd like to see.
If you're able to fix a bug or implement a new feature, I welcome PRs for this purpose. Learn more in the contributing guidelines.
3,475 followers · starred Feb 2026
828 followers · starred Jan 2025
620 followers · starred Jun 2024
113 followers · starred Jun 2025
Personal Website & Blog Theme for Hugo
See the codeEnglish | Français | Deutsch | Português (PT) | Português (BR) | Español | 日本語 | 简体中文 | Indonesian
Blowfish is designed to be a powerful, lightweight theme for Hugo. It's built using Tailwind CSS with a clean and minimalist design that prioritises to your content.
🌏 Demo site
📑 Theme documentation
🐛 Bug reports & issues
💡 Questions & feature requests
Blowfish has extensive documentation that covers all aspects of the theme. Be sure to read the docs to learn more about how to use the theme and its features.
Blowfish supports several installation methods - as a git submodule, a Hugo Module, or as a completely manual install.
Detailed instructions for each method can be found in the Installation docs. You should consult the documentation for the simplest setup experience. Below is a quick start guide using submodules if you are using git, or Hugo modules if you're already confident installing Hugo themes.
Blowfish ships an agent skill that teaches AI coding agents — like Claude Code — how to install, configure, and build sites with the theme. Install it from the Blowfish plugin marketplace in Claude Code:
/plugin marketplace add nunocoracao/blowfish
/plugin install blowfish@blowfish
Or simply copy the skill folder into your site repository at .claude/skills/blowfish/ — agents pick up project skills automatically. Then ask your agent to set up Blowfish for you.
Note: Ensure you have Node.js, Git and Hugo installed, and that you have created a new Hugo project before proceeding.
Blowfish Tools is a CLI that helps you get started with Blowfish. It will create a new Hugo project, install the theme and set up the theme configuration files for you. Please report any issues you find.
Install the CLI tool globally using npm (or other package manager):
npm i -g blowfish-tools
Then run the command blowfish-tools to start an interactive run which will guide you through creation and configuration use-cases.
blowfish-tools
You can also run the command blowfish-tools new to create a new Hugo project and install the theme in one go. Check the CLI help for more information.
blowfish-tools new mynewsite
Note: Ensure you have Git and Hugo installed, and that you have created a new Hugo project before proceeding.
From your project directory, initialise git:
git init
Configure Blowfish as a git submodule:
git submodule add -b main https://github.com/nunocoracao/blowfish.git themes/blowfish
In the root folder of your website, delete the hugo.toml file that was generated by Hugo. Copy the *.toml config files from the theme into your config/_default/ folder.
You will find these theme config files in the Hugo cache directory, or download a copy from GitHub.
Follow the Getting Started instructions to configure your website.
Note: Ensure you have Go and Hugo installed, and that you have created a new Hugo project before proceeding.
From your project directory, initialise Hugo Modules:
hugo mod init github.com/<username>/<repo-name>
Create config/_default/module.toml and add the following:
[[imports]]
path = "github.com/nunocoracao/blowfish/v3"
Start your server using hugo server and the theme will be downloaded automatically.
In the root folder of your website, delete the hugo.toml file that was generated by Hugo. Copy the *.toml config files from the theme into your config/_default/ folder.
Note: Do not overwrite the
module.tomlfile you created above!
You will find these theme config files in the Hugo cache directory, or download a copy from GitHub.
Follow the Getting Started instructions to configure your website.
As new releases are posted, you can update the theme using Hugo. Simply run hugo mod get -u from your project directory and the theme will automatically update to the latest release.
Detailed update instructions are available in the docs.
Blowfish v3 is fully backwards compatible: every new feature is opt-in and no configuration options or templates were removed. Git submodule and manual installs upgrade as usual with no changes; Hugo module users just change the import path in config/_default/module.toml from github.com/nunocoracao/blowfish/v2 to github.com/nunocoracao/blowfish/v3 and run hugo mod get -u. See the upgrade instructions for details.
Blowfish is expected to evolve over time. I intend to keep adding features and making changes as required.
Feel free to get in touch with any issues or suggestions for new features you'd like to see.
If you're able to fix a bug or implement a new feature, I welcome PRs for this purpose. Learn more in the contributing guidelines.
3,475 followers · starred Feb 2026
828 followers · starred Jan 2025
620 followers · starred Jun 2024
113 followers · starred Jun 2025