Self improving Dog Detector for when your dog is in an area they shouldn't be in
Python
8
256 commits
updated Oct 12, 2026
A Raspberry Pi that keeps a dog off the kitchen counter. A USB webcam watches the counter, a YOLO model running on the Pi's CPU looks for the dog, and when the dog steps into an area you've marked, a speaker plays a deterrent sound.
Live detection runs entirely on the Pi, and the video stream never leaves your network. Cloud training is optional. If you turn it on, the camera frames the Pi saves for training are uploaded to your own Modal account, where the model is retrained.
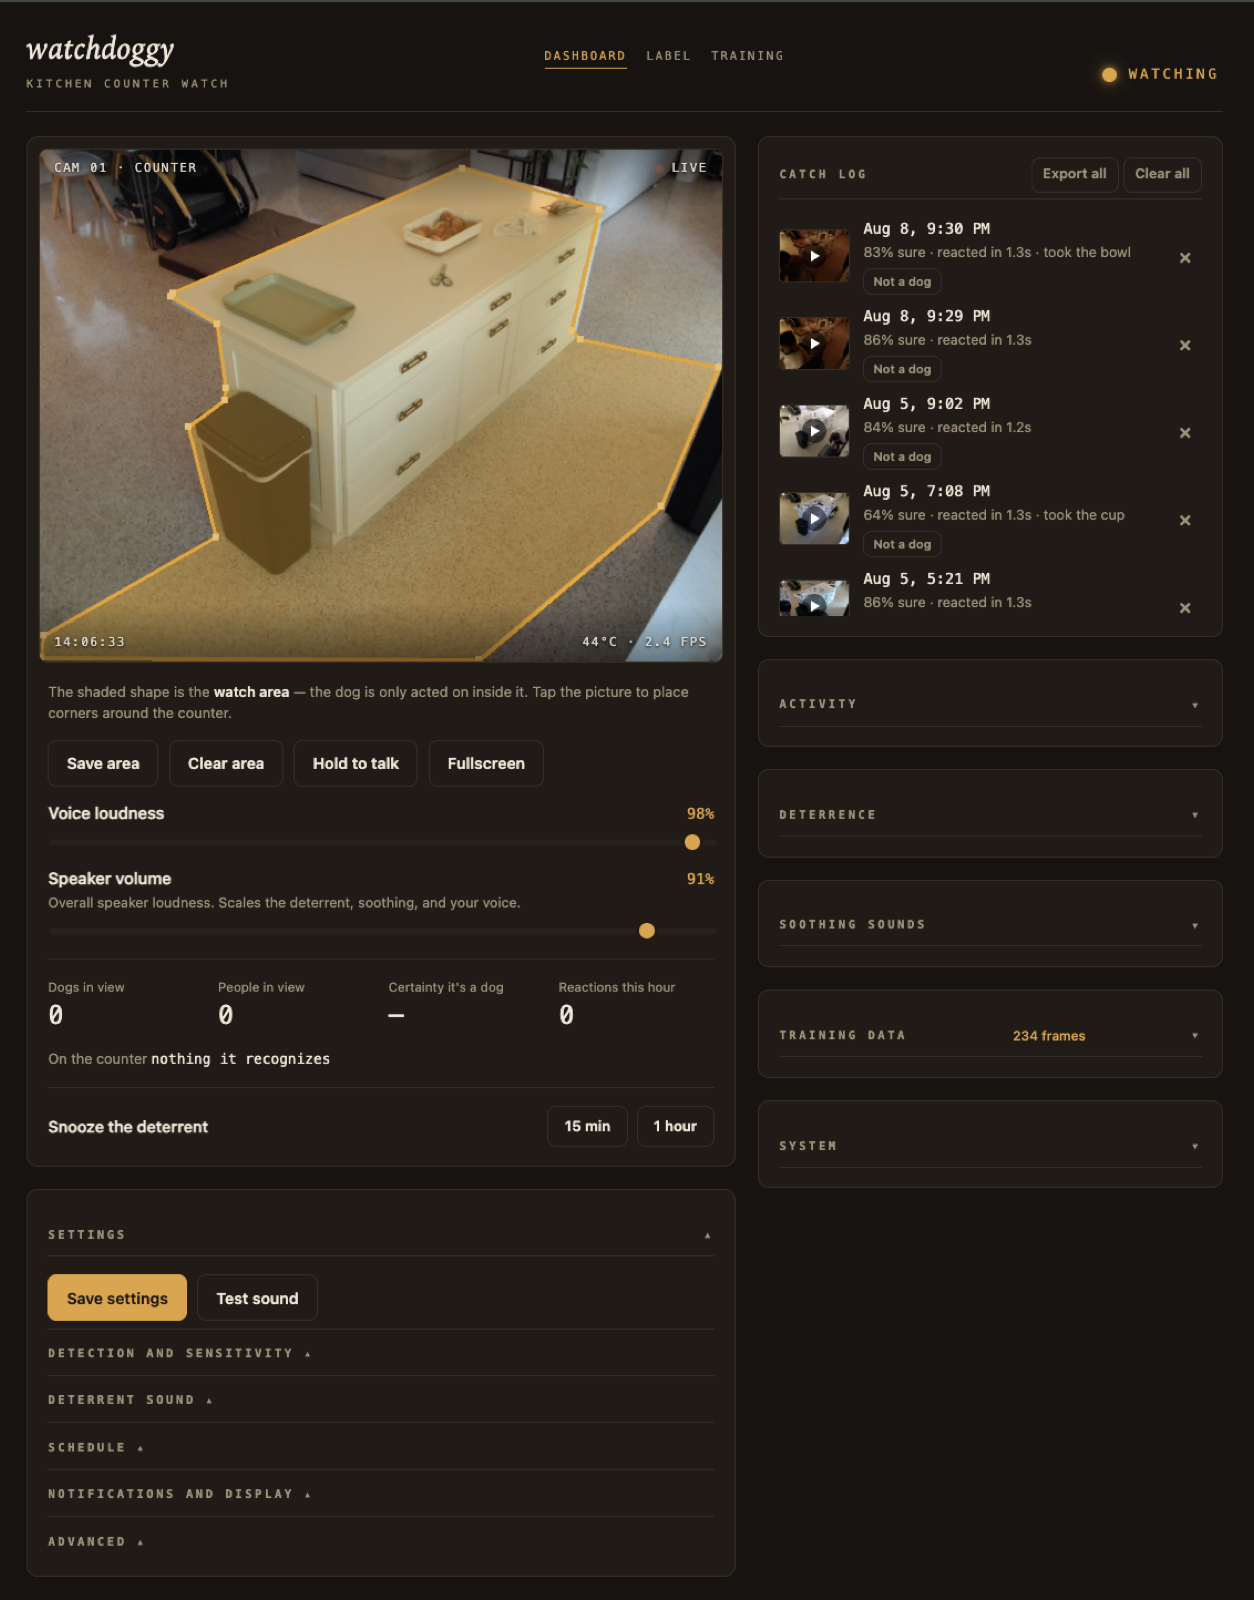
With the optional trainer user set up (scripts/setup-pi-trainer.sh):
Stock COCO weights caught 15 of 61 dog moments in this kitchen, with 5 false alarms. The current fine-tuned model catches 113 of 127 with no false alarms across 215 dog-free frames. That's on a later, larger held-out set, scored at this appliance's 0.6 threshold using the exported NCNN model the Pi actually runs.
USB webcam -> capture thread -> YOLO (NCNN, separate inference process)
           -> watch-area filter -> person suppression -> oversize filter
           -> M-of-N window + confirm timer -> cooldown / hourly cap
           -> sound + catch log + clip + training-frame capture
A FastAPI app serves the dashboard, streams the annotated video over MJPEG, and
exposes the settings you can change live. A thermal governor slows detection as
the CPU heats up, so a fanless Pi doesn't throttle. Training runs as a separate
trainer user, the only user allowed through the firewall. It picks up job files
written by the dashboard or by its schedule, runs them on Modal, and installs the
result only if it passes the gate.
See ARCHITECTURE.md for the code layout.
| Part | Approx. price |
|---|---|
| Raspberry Pi 4 Model B | $35 |
| Aluminum heatsink case (passive) | $12 |
| 1080p USB webcam (e.g. Logitech C922) | $15 |
You also need a Bluetooth or USB speaker (this build uses a JBL Go) and a 5V/3A power supply. Cloud training is optional and needs a Modal account. A training run costs well under $2.
Requires Python 3.11+ and uv.
git clone https://github.com/devjerry0/watchdoggy.git
cd watchdoggy
uv sync
cp .env.example .env    # set DOGGY_CAMERA_INDEX to your webcam
uv run doggy            # dashboard at http://127.0.0.1:8000
The YOLO26n weights download to models/ on first run. One default alarm sound
ships in sounds/. You can add more there; see sounds/README.md.
On macOS, give your terminal camera access (System Settings > Privacy & Security > Camera). Without it, OpenCV returns empty frames and doesn't report an error.
./scripts/deploy-to-pi.sh doggy@doggypi.local
This syncs the code, installs dependencies, exports the model to NCNN for ARM,
writes the Pi's .env, and installs a systemd service that starts on boot. After
that the dashboard is at http://doggypi.local:8000.
For the full setup, see docs/pi/README.md. It covers flashing the SD card, Bluetooth speaker auto-reconnect, the egress firewall, HTTPS, and enabling cloud training.
.env holds structural settings only: camera, model path, audio backend, ports,
and TLS. See .env.example; changes need a restart.
Everything you can adjust from the dashboard is saved to settings.json and takes
effect immediately. Every change is logged to settings-changes.jsonl.
Live detection stays local. Optional cloud training sends saved camera frames to your own cloud account.
scripts/harden-pi.sh). The live video stream is only served on
your LAN.trainer user can reach the
internet, and only Modal and the GitHub API (for release checks and the
clock).scripts/train_kitchen_model.py.See step 6 of the Pi guide for details and how to turn it off.
uv run pytest -m "not slow"   # fast suite, no camera or model weights needed
uv run pytest -m slow         # detector tests; need the model and local photo fixtures
The code is MIT licensed. See LICENSE.
The project depends on Ultralytics, which is AGPL-3.0. None of its code is in this repository, but installing the dependencies and running the combined software puts the combination under AGPL terms, unless you have an Ultralytics commercial license. The YOLO26 weights, and any model fine-tuned from them, are also under Ultralytics' license. The MIT license covers this repository's code only.
Self improving Dog Detector for when your dog is in an area they shouldn't be in
Python
8
256 commits
updated Oct 12, 2026
A Raspberry Pi that keeps a dog off the kitchen counter. A USB webcam watches the counter, a YOLO model running on the Pi's CPU looks for the dog, and when the dog steps into an area you've marked, a speaker plays a deterrent sound.
Live detection runs entirely on the Pi, and the video stream never leaves your network. Cloud training is optional. If you turn it on, the camera frames the Pi saves for training are uploaded to your own Modal account, where the model is retrained.
With the optional trainer user set up (scripts/setup-pi-trainer.sh):
Stock COCO weights caught 15 of 61 dog moments in this kitchen, with 5 false alarms. The current fine-tuned model catches 113 of 127 with no false alarms across 215 dog-free frames. That's on a later, larger held-out set, scored at this appliance's 0.6 threshold using the exported NCNN model the Pi actually runs.
USB webcam -> capture thread -> YOLO (NCNN, separate inference process)
           -> watch-area filter -> person suppression -> oversize filter
           -> M-of-N window + confirm timer -> cooldown / hourly cap
           -> sound + catch log + clip + training-frame capture
A FastAPI app serves the dashboard, streams the annotated video over MJPEG, and
exposes the settings you can change live. A thermal governor slows detection as
the CPU heats up, so a fanless Pi doesn't throttle. Training runs as a separate
trainer user, the only user allowed through the firewall. It picks up job files
written by the dashboard or by its schedule, runs them on Modal, and installs the
result only if it passes the gate.
See ARCHITECTURE.md for the code layout.
| Part | Approx. price |
|---|---|
| Raspberry Pi 4 Model B | $35 |
| Aluminum heatsink case (passive) | $12 |
| 1080p USB webcam (e.g. Logitech C922) | $15 |
You also need a Bluetooth or USB speaker (this build uses a JBL Go) and a 5V/3A power supply. Cloud training is optional and needs a Modal account. A training run costs well under $2.
Requires Python 3.11+ and uv.
git clone https://github.com/devjerry0/watchdoggy.git
cd watchdoggy
uv sync
cp .env.example .env    # set DOGGY_CAMERA_INDEX to your webcam
uv run doggy            # dashboard at http://127.0.0.1:8000
The YOLO26n weights download to models/ on first run. One default alarm sound
ships in sounds/. You can add more there; see sounds/README.md.
On macOS, give your terminal camera access (System Settings > Privacy & Security > Camera). Without it, OpenCV returns empty frames and doesn't report an error.
./scripts/deploy-to-pi.sh doggy@doggypi.local
This syncs the code, installs dependencies, exports the model to NCNN for ARM,
writes the Pi's .env, and installs a systemd service that starts on boot. After
that the dashboard is at http://doggypi.local:8000.
For the full setup, see docs/pi/README.md. It covers flashing the SD card, Bluetooth speaker auto-reconnect, the egress firewall, HTTPS, and enabling cloud training.
.env holds structural settings only: camera, model path, audio backend, ports,
and TLS. See .env.example; changes need a restart.
Everything you can adjust from the dashboard is saved to settings.json and takes
effect immediately. Every change is logged to settings-changes.jsonl.
Live detection stays local. Optional cloud training sends saved camera frames to your own cloud account.
scripts/harden-pi.sh). The live video stream is only served on
your LAN.trainer user can reach the
internet, and only Modal and the GitHub API (for release checks and the
clock).scripts/train_kitchen_model.py.See step 6 of the Pi guide for details and how to turn it off.
uv run pytest -m "not slow"   # fast suite, no camera or model weights needed
uv run pytest -m slow         # detector tests; need the model and local photo fixtures
The code is MIT licensed. See LICENSE.
The project depends on Ultralytics, which is AGPL-3.0. None of its code is in this repository, but installing the dependencies and running the combined software puts the combination under AGPL terms, unless you have an Ultralytics commercial license. The YOLO26 weights, and any model fine-tuned from them, are also under Ultralytics' license. The MIT license covers this repository's code only.



