
A calm, open system for organizing life and work. Tasks, projects, notes, areas, and smart workflows - self-hosted or hosted.
See the codeSee what people are saying
README

Productivity made simple
Organize your life and projects with a clear, hierarchical structure,
smart recurring tasks, and seamless Telegram integration.
Get focused, stay productive, and keep your data private.
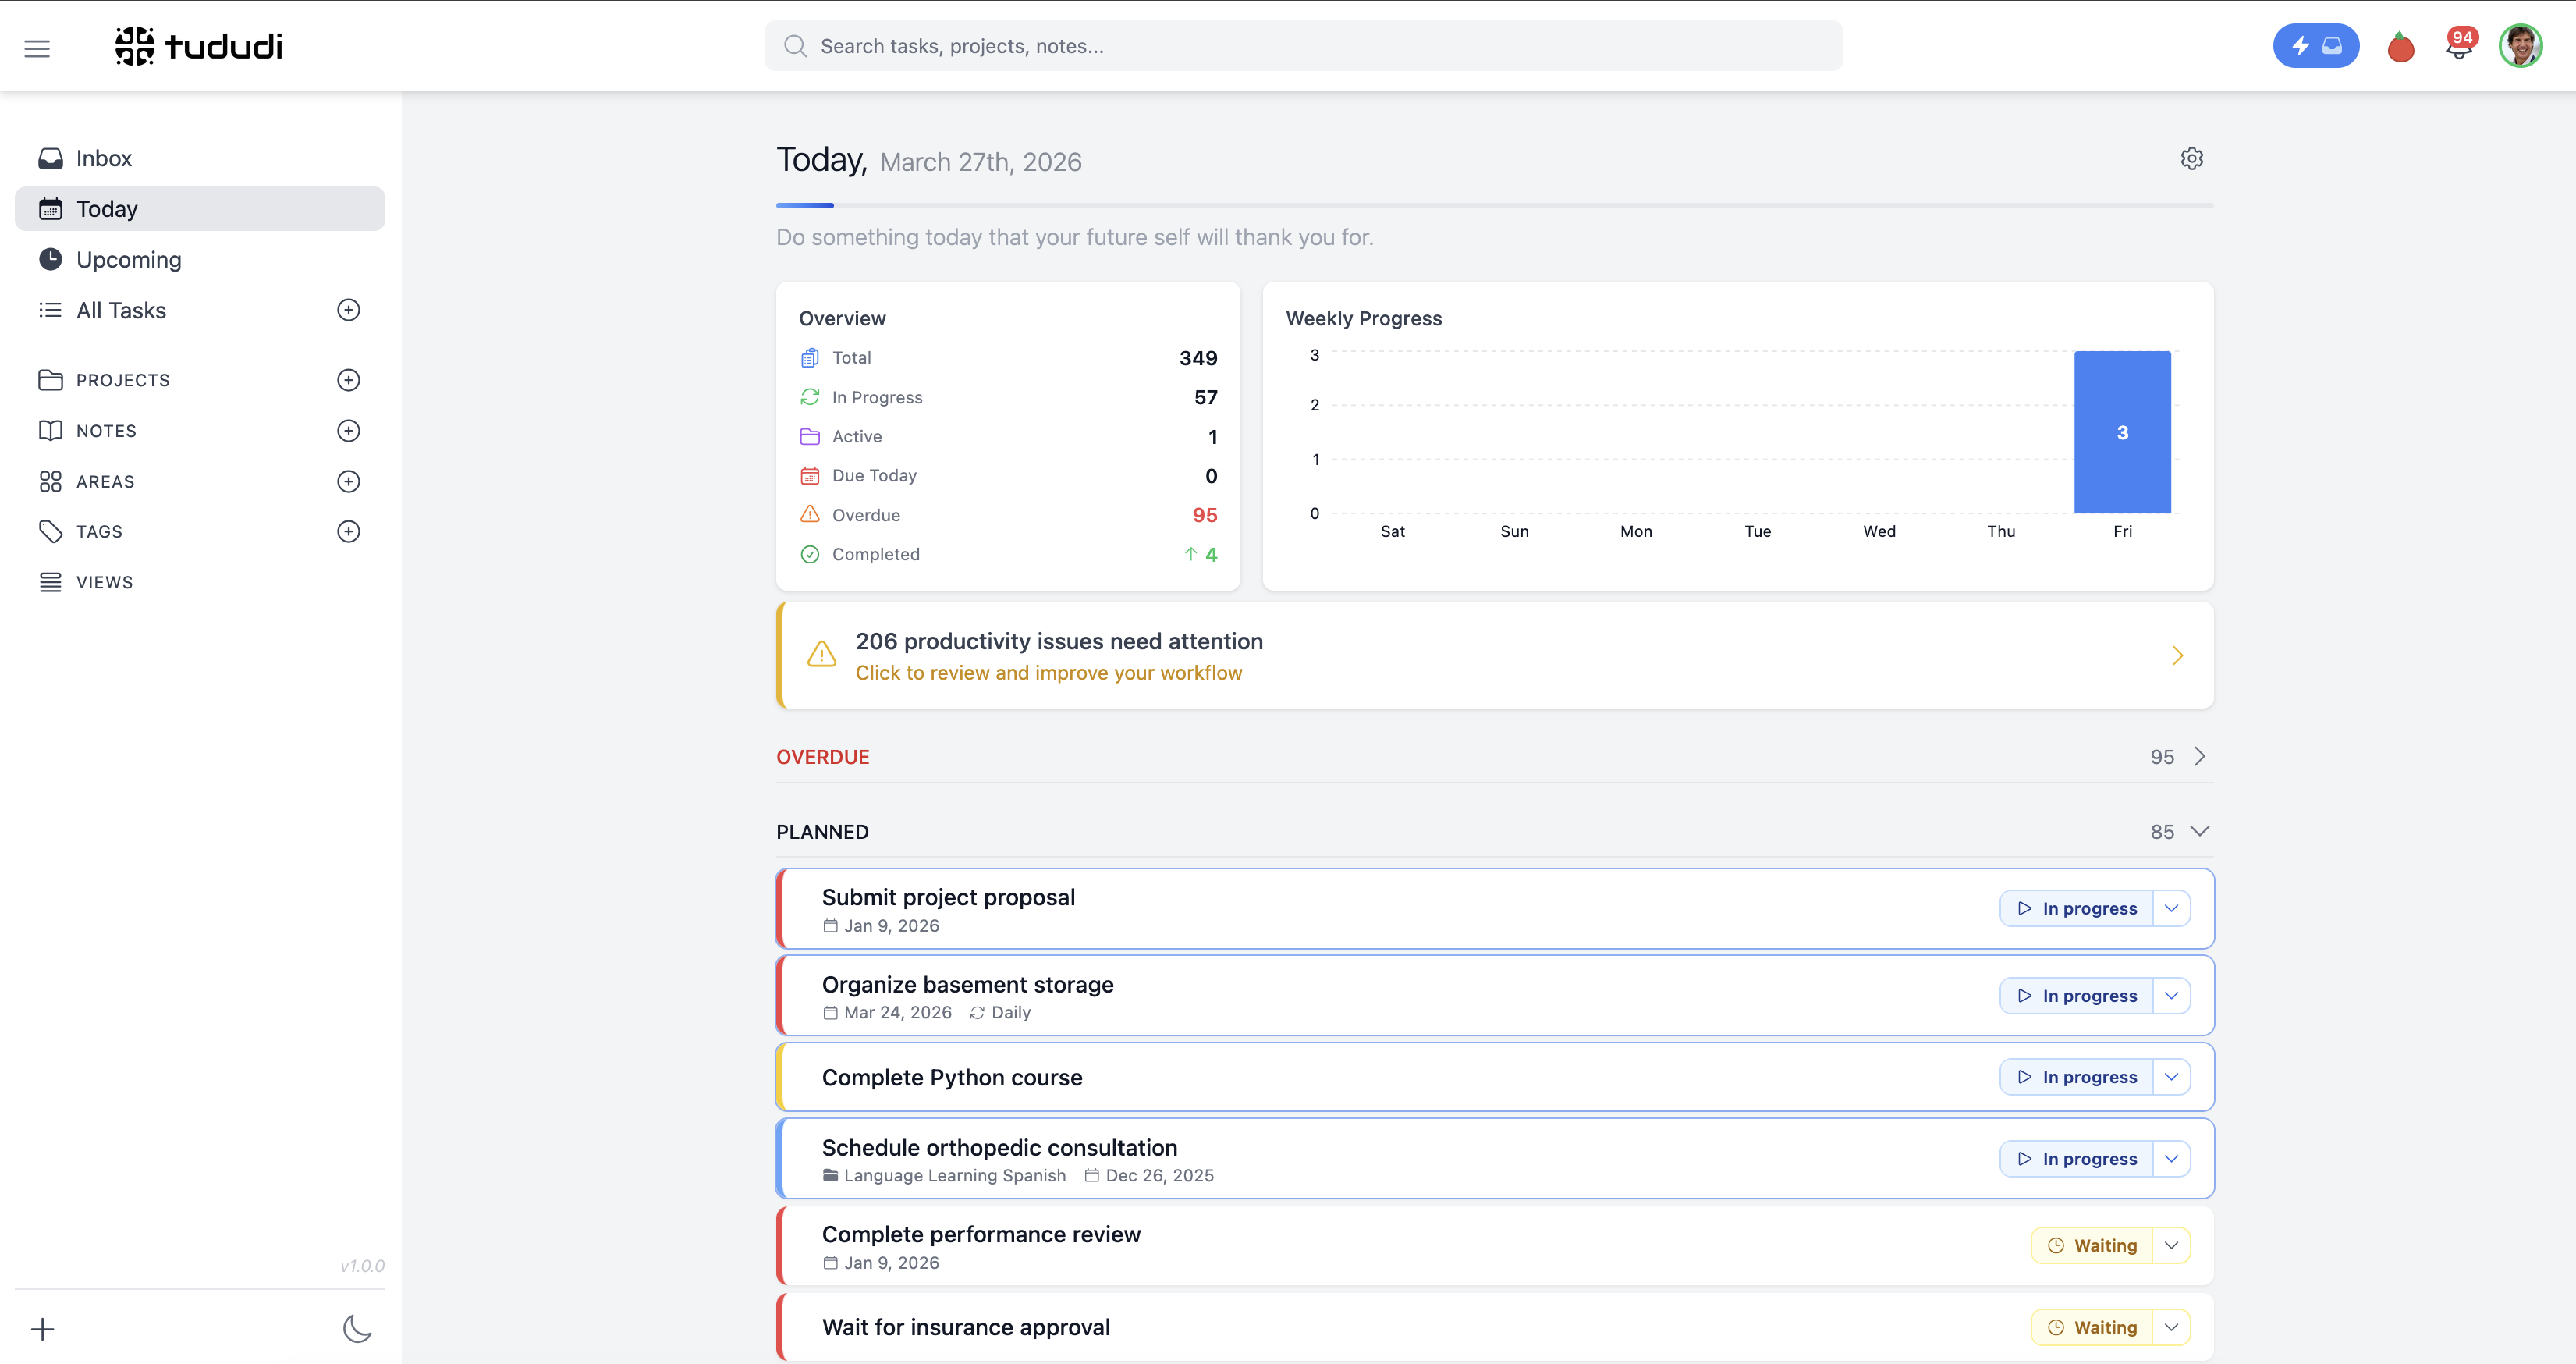
More screenshots are available here.
💖 Enjoying tududi?
Help keep it free and actively developed by buying me a coffee ☕, becoming a sponsor, or supporting on Patreon. You can also support the project by purchasing a hosted subscription for a hassle-free, managed solution. Every contribution helps maintain this project and build new features!
🚀 How It Works
This app allows users to manage their tasks, projects, areas, notes, and tags in an organized way. Users can create tasks, projects, areas (to group projects), notes, and tags. Each task can be associated with a project, and both tasks and notes can be tagged for better organization. Projects can belong to areas and can also have multiple notes and tags. This structure helps users categorize and track their work efficiently, whether they’re managing individual tasks, larger projects, or keeping detailed notes.
🧠 Philosophy
For the thinking behind tududi, read:
- Designing a Life Management System That Doesn't Fight Back
- From Task to Table: How I Finally Got to the Korean Burger
✨ Features
- Task Management: Create, update, and delete tasks. Mark tasks as completed and view them by different filters (Today, Upcoming, Someday). Order them by Name, Due Date, Date Created, or Priority.
- Subtasks: Break down complex tasks into smaller, manageable subtasks with progress tracking and seamless navigation.
- Recurring Tasks: Comprehensive recurring task system with intelligent parent-child relationships:
- Multiple Recurrence Patterns: Daily, weekly, monthly, monthly on specific weekdays, and monthly last day
- Completion-Based Recurrence: Option to repeat based on completion date rather than due date
- Smart Parent-Child Linking: Generated task instances maintain connection to their original recurring pattern
- Direct Parent Editing: Edit recurrence settings directly from any generated task instance
- Flexible Scheduling: Set custom intervals (every 2 weeks, every 3 months, etc.)
- End Date Control: Optional end dates for recurring series
- Project Sharing & Collaboration: Share projects with team members and collaborate effectively
- Families & Small Teams: One workspace for a household or a team, described in People, Members and Roles:
- Roles: Admin, user and guest, each with a list of what it can do
- Groups: Share a project, area or goal with several people at once
- Members without an email: Add a child or another household member who has no email, put them in a group, assign them tasks and give them a sign-in link so they can sign in
- One People list: Members and contacts in one list. Add members yourself with the invite permission, or turn a contact into a member without losing the tasks assigned to them
- Assign to anyone: Give a task to a member or to a contact such as a plumber, and see everyone's day on one Everyone board
- Quick Notes: Create, update, delete, or assign text notes to projects.
- Tags: Create tags for tasks and notes to enhance organization.
- Project Tracking: Organize tasks into projects. Each project can contain multiple tasks and/or multiple notes.
- Area Categorization: Group projects into areas for better organization and focus.
- Due Date Tracking: Set due dates for tasks and view them based on due date categories.
- Responsive Design: Accessible from various devices, ensuring a consistent experience across desktops, tablets, and mobile phones.
- Installable PWA: Add tududi to your home screen on Android, iOS, and desktop browsers for a native app-like experience. The app stays readable from cache when offline, and write operations are queued and synced automatically when connectivity returns.
- Multi-Language Support: Available in 25 languages with full localization support for a truly global productivity experience.
- Telegram Integration:
- Create tasks directly through Telegram messages
- Receive daily digests of your tasks
- Quick capture of ideas and todos on the go
- Open API & Access Tokens: Versioned Swagger docs exposed at
/api/v1plus personal API keys for integrating tududi with your own tooling or automations. - OIDC/SSO Authentication: Enterprise-ready Single Sign-On support with:
- Multiple OIDC providers (Google, Okta, Keycloak, Authentik, PocketID, Azure AD, and more)
- Just-In-Time (JIT) user provisioning
- Account linking for hybrid authentication
- Simple .env-based configuration perfect for self-hosters
- Automatic admin role assignment based on email domains
- CalDAV Synchronization: Industry-standard CalDAV protocol support for seamless task syncing:
- Bidirectional sync with CalDAV servers (Nextcloud, Baikal, and more)
- Access tasks from popular clients (tasks.org, Apple Reminders, Thunderbird, Evolution)
- Full recurring task support with RRULE
- Conflict detection and resolution
- Background automatic synchronization
- HTTP Basic Authentication for CalDAV clients
🗺️ Roadmap
Check out our GitHub Project for planned features and progress.
🛠️ Getting Started
Get up and running quickly with our comprehensive documentation:
Quick Start
docker pull chrisvel/tududi:latest

docker run \
  -e TUDUDI_USER_EMAIL=admin@example.com \
  -e TUDUDI_USER_PASSWORD=your-secure-password \
  -e TUDUDI_SESSION_SECRET=$(openssl rand -hex 64) \
  -v ~/tududi_db:/app/db \
  -v ~/tududi_uploads:/app/uploads \
  -v ~/tududi_backups:/app/backups \
  -p 3002:3002 \
  -d chrisvel/tududi:latest
Navigate to http://localhost:3002 and login with your credentials.
If people reach tududi at another address (for example http://zima.local:3002 or https://tududi.example.com), add -e BASE_URL=<that address> so links in emails (account verification, password reset) point there instead of localhost.
Using docker-compose
The repo also includes a docker-compose.yml. It reads its configuration from a .env file, so copy the example first:
cp .env.example .env
# edit .env with your values, then:
docker-compose up -d
Reverse Proxy Setup
When running behind a reverse proxy (Caddy, Nginx, Traefik, etc.), set TUDUDI_TRUST_PROXY so that Express correctly reads client IPs from X-Forwarded-For headers. Without this, express-rate-limit will log a validation error.
docker run \
  -e TUDUDI_TRUST_PROXY=true \
  -e TUDUDI_ALLOWED_ORIGINS=https://your-domain.com \
  ...
| Value | Meaning |
|---|---|
true | Trust all proxies (simplest option for single-proxy setups) |
1 | Trust the first hop only |
loopback | Trust loopback addresses (127.0.0.1/::1) |
172.16.0.0/12 | Trust a specific subnet |
OIDC/SSO Authentication
Tududi supports Single Sign-On via OpenID Connect (OIDC), allowing users to authenticate with external identity providers.
Quick Setup (Single Provider):
docker run \
  -e OIDC_ENABLED=true \
  -e OIDC_PROVIDER_NAME=Google \
  -e OIDC_PROVIDER_SLUG=google \
  -e OIDC_ISSUER_URL=https://accounts.google.com \
  -e OIDC_CLIENT_ID=your-client-id.apps.googleusercontent.com \
  -e OIDC_CLIENT_SECRET=your-client-secret \
  -e OIDC_SCOPE="openid profile email" \
  -e OIDC_AUTO_PROVISION=true \
  -e BASE_URL=https://your-domain.com \
  ...
Multiple Providers:
# Provider 1: Google
-e OIDC_PROVIDER_1_NAME=Google \
-e OIDC_PROVIDER_1_SLUG=google \
-e OIDC_PROVIDER_1_ISSUER=https://accounts.google.com \
-e OIDC_PROVIDER_1_CLIENT_ID=xxx \
-e OIDC_PROVIDER_1_CLIENT_SECRET=xxx \

# Provider 2: Company SSO
-e OIDC_PROVIDER_2_NAME="Company SSO" \
-e OIDC_PROVIDER_2_SLUG=okta \
-e OIDC_PROVIDER_2_ISSUER=https://company.okta.com \
-e OIDC_PROVIDER_2_CLIENT_ID=yyy \
-e OIDC_PROVIDER_2_CLIENT_SECRET=yyy \
-e OIDC_PROVIDER_2_ADMIN_EMAIL_DOMAINS=company.com \
Supported Providers: Google, Okta, Keycloak, Authentik, PocketID, Azure AD, and any OIDC-compliant provider
Key Features:
- Automatic user provisioning on first login
- Account linking for existing users
- Admin role assignment based on email domains
- Hybrid authentication (email/password + SSO)
Documentation: See docs/10-oidc-sso.md for detailed setup guides and provider-specific configuration.
CalDAV Synchronization
Tududi supports the industry-standard CalDAV protocol, enabling seamless task synchronization with popular CalDAV clients and servers. It's enabled by default.
Quick Setup:
docker run \
  -e ENCRYPTION_KEY=$(openssl rand -hex 32) \
  ...
Supported Clients:
- tasks.org (Android/iOS) - Full task management with recurring tasks
- Apple Reminders (iOS/macOS) - Native iOS/macOS integration
- Thunderbird (Desktop) - Advanced task features
- Evolution (Linux) - Full CalDAV compatibility
Sync with External Servers:
Connect Tududi to external CalDAV servers like Nextcloud, Baikal, or other CalDAV-compatible services for bidirectional synchronization.
Key Features:
- Bidirectional sync (local ↔ remote)
- Full recurring task support with RRULE
- Conflict detection and resolution
- Background automatic synchronization
- HTTP Basic Authentication
- Encrypted password storage (AES-256-GCM)
Documentation: See docs/11-caldav-sync.md for client setup guides, server configuration, and troubleshooting.
Database: SQLite or PostgreSQL
Tududi stores everything in a single SQLite file by default, which is all a personal instance needs. For larger or multi-user deployments you can point it at PostgreSQL instead by setting DATABASE_URL (for example postgres://tududi:secret@db:5432/tududi). The database may be empty; the schema is created on first start. A complete compose setup with a bundled PostgreSQL service is in docs/examples/docker-compose.postgres.yml (copy it next to your .env as docker-compose.yml), and the deployment guide is docs/16-postgresql.md.
Upgrading
Every start backs up the SQLite file next to it (db-backup-<timestamp>.sqlite3), then runs pending migrations; the container refuses to start if a migration fails, so the backup is always the state before the upgrade.
Upgrading to a release with PostgreSQL support
SQLite stays the default and existing databases are used as they are. Make sure your .env does not contain a DATABASE_URL or DB_DIALECT left over from another application: either one switches tududi to PostgreSQL. As a safety net, the container refuses to start when PostgreSQL is selected but a populated SQLite database is present at DB_FILE; unset the variable to keep your data, or set TUDUDI_ALLOW_DIALECT_SWITCH=true if you really want an empty PostgreSQL database.
v1.1.x to v1.2.x: Volume path change
The Docker volume mount path changed in v1.2.0 from /app/backend/db to /app/db. If you are upgrading from v1.1.x and your docker-compose.yml still uses the old path, new data will be lost on container recreation because writes go to an anonymous Docker volume that is discarded when the container is recreated.
How to check: Look at your docker-compose.yml volumes section:
# OLD (v1.1.x) - update this
volumes:
  - ./tududi_db:/app/backend/db
  - ./uploads:/app/backend/uploads

# NEW (v1.2.x+) - use these paths
volumes:
  - ./tududi_db:/app/db
  - ./uploads:/app/uploads
  - ./backups:/app/backups
Migration steps:
- Stop the container:
docker-compose down - Update
docker-compose.ymlto use the new volume paths (see above) - Start the container:
docker-compose up -d
Your existing data directory (./tududi_db) stays the same - only the mount point inside the container changes. No data copying is needed when using bind mounts.
Note: While you still use the old path, Tududi will print a warning at startup and continue using the old location to prevent data loss. Once you update the volume mount, the warning disappears and writes go to the correct persistent location.
📚 Documentation
For detailed setup instructions, configuration options, and getting started guides, visit:
- Installation Guide - Docker, development setup, and deployment
- Configuration - Environment variables and advanced settings
- First Steps - Learn the basics and get productive
- Project Sharing - Collaborate with your team
- People, Members and Roles - Families and teams: roles, groups, members without an email and assigning tasks
🚧 Development
Want to contribute or run Tududi from source? Check out our comprehensive development guide:
Quick overview:
# Clone and install
git clone https://github.com/chrisvel/tududi.git
cd tududi
npm install

# Start development servers
npm run backend:dev   # Terminal 1 - Backend on :3001
npm run frontend:dev  # Terminal 2 - Frontend on :8080
For database management, testing, and detailed development instructions, see docs.tududi.com
🔌 API
Tududi provides a comprehensive REST API for integration with external tools and automation workflows.
Base URL: http://localhost:8080/api/v1
Key Features:
- Complete CRUD operations for tasks, projects, notes, and areas
- Personal API keys for secure access
- Swagger documentation available at
/api-docs(requires authentication) - Support for recurring tasks, subtasks, and tag management
- Real-time task metrics and productivity insights
Authentication: Uses session cookies or Bearer token authentication. Generate personal API keys through the web interface for programmatic access.
Quick Example:
# Get all tasks
curl -H "Authorization: Bearer YOUR_API_KEY" \
     http://localhost:3002/api/v1/tasks

# Create a new task
curl -X POST \
     -H "Authorization: Bearer YOUR_API_KEY" \
     -H "Content-Type: application/json" \
     -d '{"name":"Complete API documentation","priority":"medium"}' \
     http://localhost:3002/api/v1/task
For full API documentation, visit /api-docs after authentication or check the Swagger schema definitions in backend/config/swagger.js.
🤝 Contributing
Contributions to tududi are welcome! Whether it's bug fixes, new features, documentation improvements, or translations, we appreciate your help.
Before you start:
- Check existing issues and discussions to avoid duplicate work
- For bugs, open an issue with the bug report template
- For feature requests, start a discussion
Quick contribution workflow:
- Fork the repository
- Create a feature branch (
git checkout -b feature/amazing-feature) - Make your changes following our code standards
- Run linting and tests:
npm run pre-push - Commit your changes with a clear message
- Push to your fork and open a Pull Request
Read our Contributing Guide for:
- Development setup and workflow
- Code standards and best practices
- Testing requirements
- Database migrations
- Translation guidelines
- Pull request checklist
📜 License
This project is licensed under the MIT License.
📬 Contact
For questions or comments, please open an issue or contact the developer directly.
Join the tududi community:


🌟 Please check my other projects!
- Reconya - Network reconnaissance and asset discovery tool
- BreachHarbor - Cybersecurity suite for digital asset protection
- Hevetra - Digital tracking for child health milestones
Screenshots
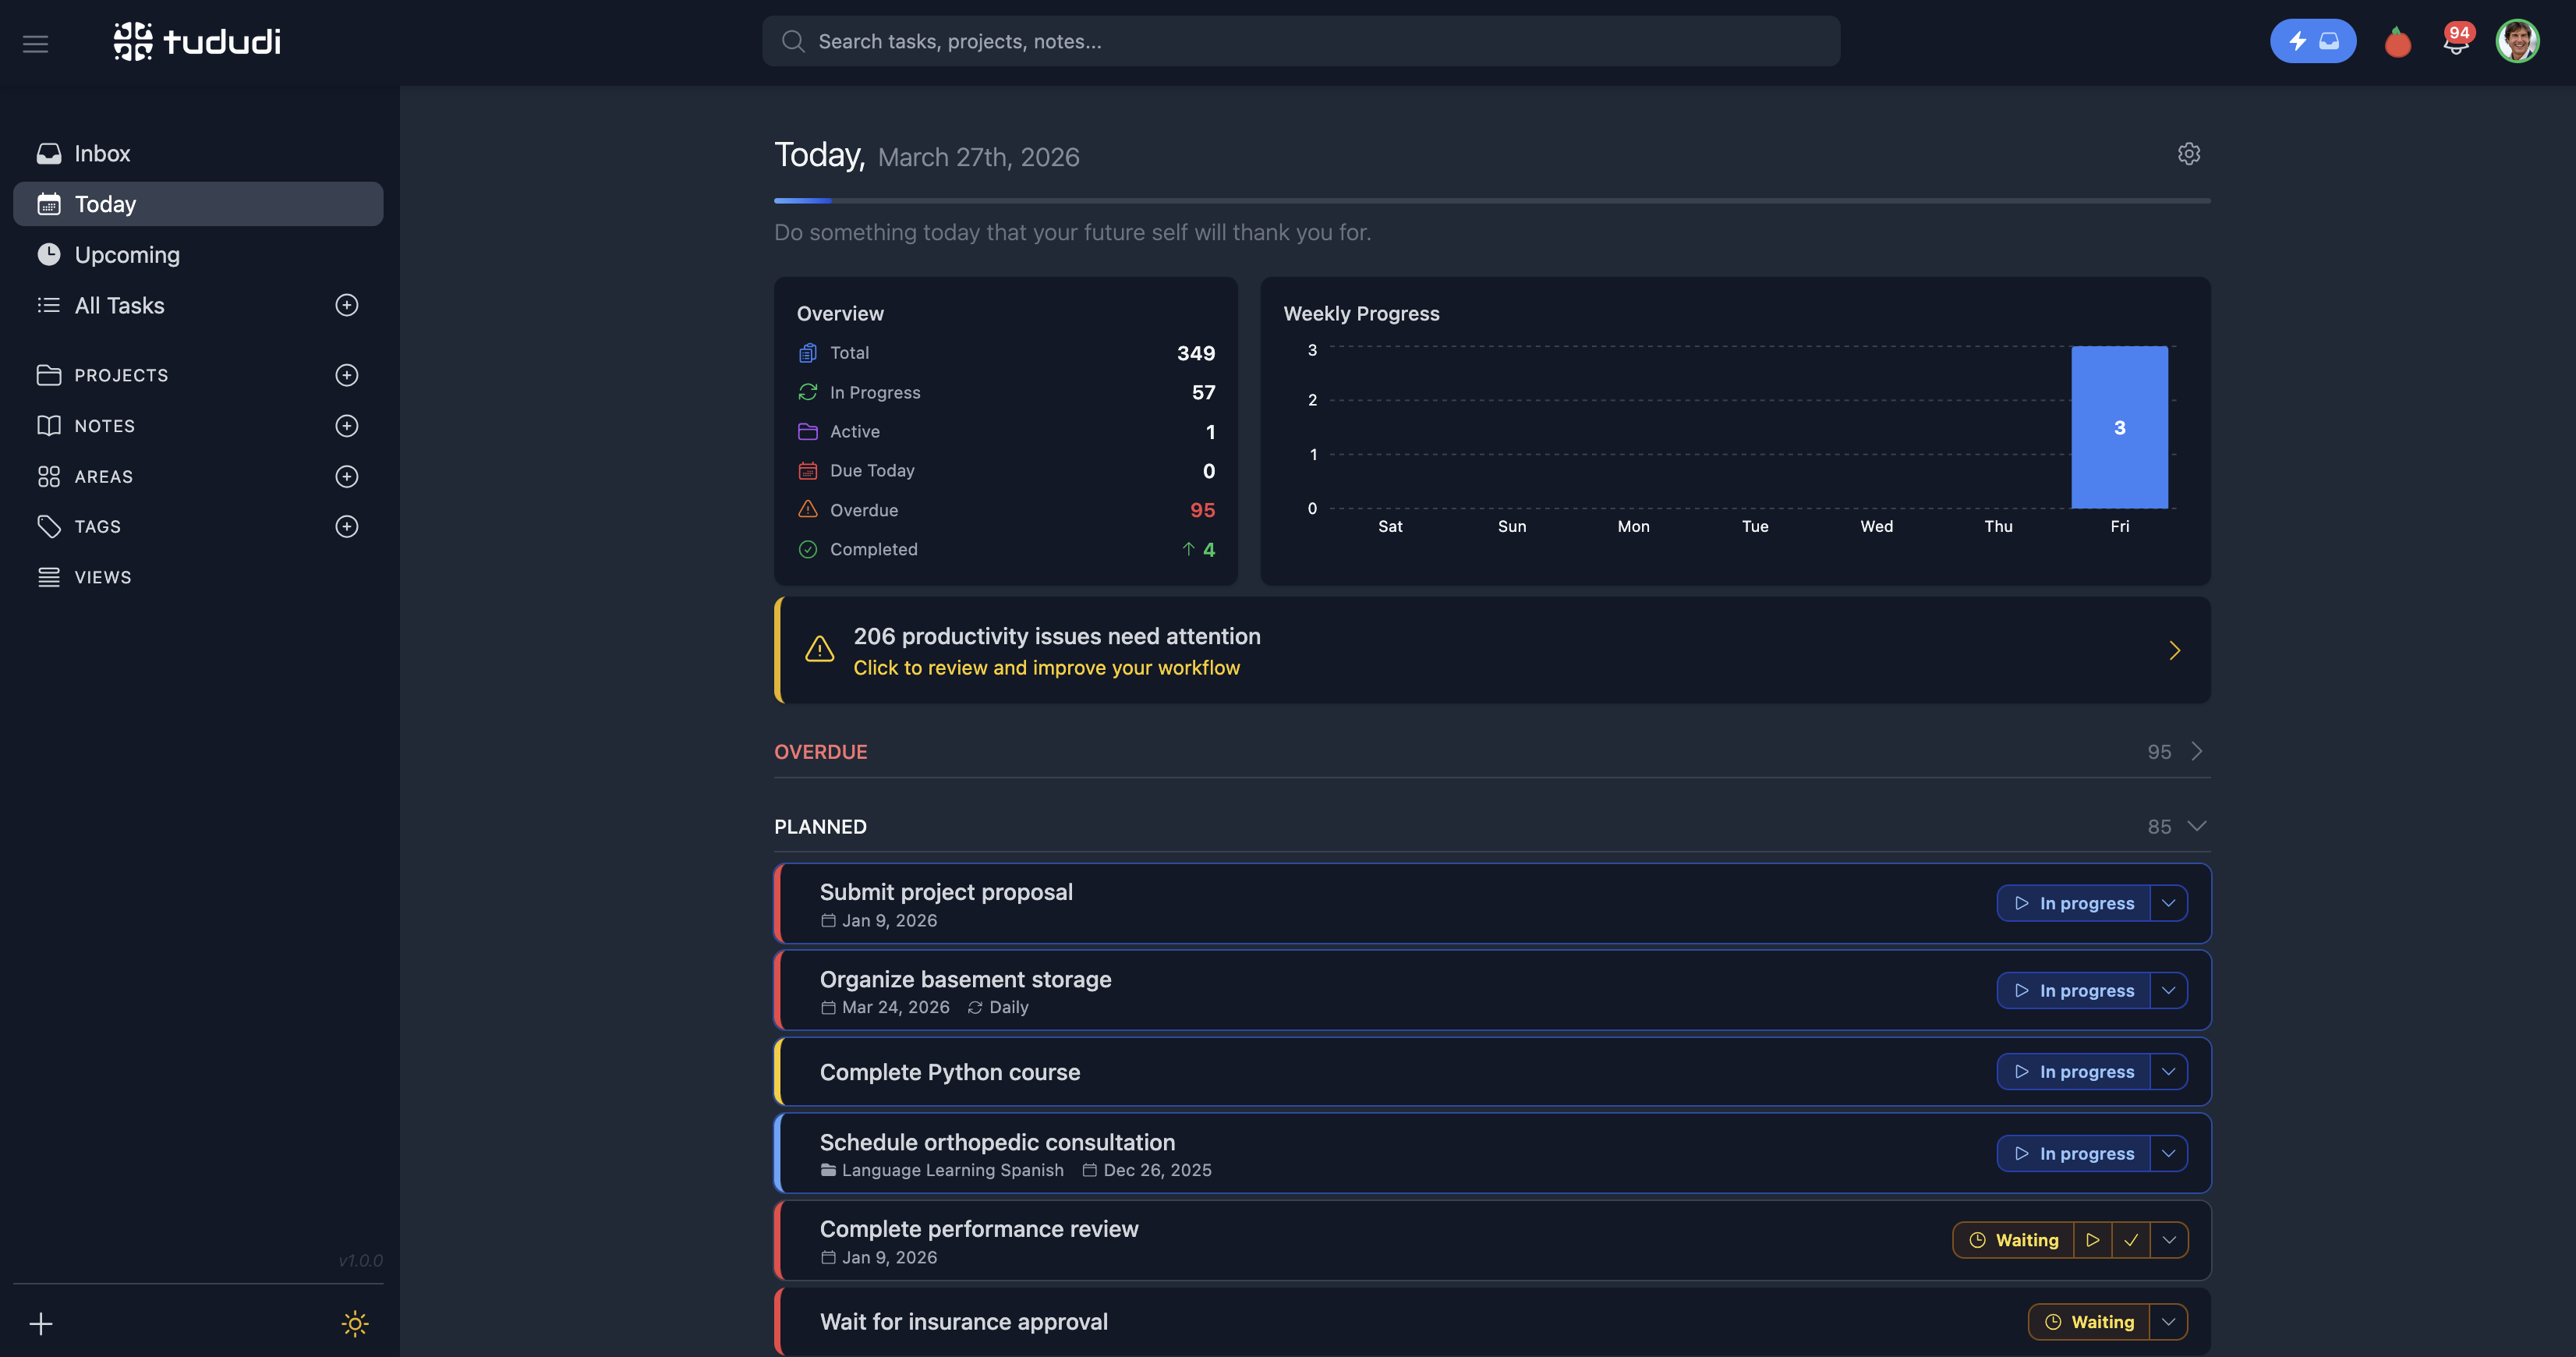
README created by Chris Veleris for tududi.
Significant stargazers

241 followers · starred Sep 2024

15 followers · starred May 2026

361 followers · starred May 2026

56 followers · starred Apr 2026
Similar repos


A calm, open system for organizing life and work. Tasks, projects, notes, areas, and smart workflows - self-hosted or hosted.
See the codeSee what people are saying
README
Productivity made simple
Organize your life and projects with a clear, hierarchical structure,
smart recurring tasks, and seamless Telegram integration.
Get focused, stay productive, and keep your data private.
More screenshots are available here.
💖 Enjoying tududi?
Help keep it free and actively developed by buying me a coffee ☕, becoming a sponsor, or supporting on Patreon. You can also support the project by purchasing a hosted subscription for a hassle-free, managed solution. Every contribution helps maintain this project and build new features!
🚀 How It Works
This app allows users to manage their tasks, projects, areas, notes, and tags in an organized way. Users can create tasks, projects, areas (to group projects), notes, and tags. Each task can be associated with a project, and both tasks and notes can be tagged for better organization. Projects can belong to areas and can also have multiple notes and tags. This structure helps users categorize and track their work efficiently, whether they’re managing individual tasks, larger projects, or keeping detailed notes.
🧠 Philosophy
For the thinking behind tududi, read:
- Designing a Life Management System That Doesn't Fight Back
- From Task to Table: How I Finally Got to the Korean Burger
✨ Features
- Task Management: Create, update, and delete tasks. Mark tasks as completed and view them by different filters (Today, Upcoming, Someday). Order them by Name, Due Date, Date Created, or Priority.
- Subtasks: Break down complex tasks into smaller, manageable subtasks with progress tracking and seamless navigation.
- Recurring Tasks: Comprehensive recurring task system with intelligent parent-child relationships:
- Multiple Recurrence Patterns: Daily, weekly, monthly, monthly on specific weekdays, and monthly last day
- Completion-Based Recurrence: Option to repeat based on completion date rather than due date
- Smart Parent-Child Linking: Generated task instances maintain connection to their original recurring pattern
- Direct Parent Editing: Edit recurrence settings directly from any generated task instance
- Flexible Scheduling: Set custom intervals (every 2 weeks, every 3 months, etc.)
- End Date Control: Optional end dates for recurring series
- Project Sharing & Collaboration: Share projects with team members and collaborate effectively
- Families & Small Teams: One workspace for a household or a team, described in People, Members and Roles:
- Roles: Admin, user and guest, each with a list of what it can do
- Groups: Share a project, area or goal with several people at once
- Members without an email: Add a child or another household member who has no email, put them in a group, assign them tasks and give them a sign-in link so they can sign in
- One People list: Members and contacts in one list. Add members yourself with the invite permission, or turn a contact into a member without losing the tasks assigned to them
- Assign to anyone: Give a task to a member or to a contact such as a plumber, and see everyone's day on one Everyone board
- Quick Notes: Create, update, delete, or assign text notes to projects.
- Tags: Create tags for tasks and notes to enhance organization.
- Project Tracking: Organize tasks into projects. Each project can contain multiple tasks and/or multiple notes.
- Area Categorization: Group projects into areas for better organization and focus.
- Due Date Tracking: Set due dates for tasks and view them based on due date categories.
- Responsive Design: Accessible from various devices, ensuring a consistent experience across desktops, tablets, and mobile phones.
- Installable PWA: Add tududi to your home screen on Android, iOS, and desktop browsers for a native app-like experience. The app stays readable from cache when offline, and write operations are queued and synced automatically when connectivity returns.
- Multi-Language Support: Available in 25 languages with full localization support for a truly global productivity experience.
- Telegram Integration:
- Create tasks directly through Telegram messages
- Receive daily digests of your tasks
- Quick capture of ideas and todos on the go
- Open API & Access Tokens: Versioned Swagger docs exposed at
/api/v1plus personal API keys for integrating tududi with your own tooling or automations. - OIDC/SSO Authentication: Enterprise-ready Single Sign-On support with:
- Multiple OIDC providers (Google, Okta, Keycloak, Authentik, PocketID, Azure AD, and more)
- Just-In-Time (JIT) user provisioning
- Account linking for hybrid authentication
- Simple .env-based configuration perfect for self-hosters
- Automatic admin role assignment based on email domains
- CalDAV Synchronization: Industry-standard CalDAV protocol support for seamless task syncing:
- Bidirectional sync with CalDAV servers (Nextcloud, Baikal, and more)
- Access tasks from popular clients (tasks.org, Apple Reminders, Thunderbird, Evolution)
- Full recurring task support with RRULE
- Conflict detection and resolution
- Background automatic synchronization
- HTTP Basic Authentication for CalDAV clients
🗺️ Roadmap
Check out our GitHub Project for planned features and progress.
🛠️ Getting Started
Get up and running quickly with our comprehensive documentation:
Quick Start
docker pull chrisvel/tududi:latest

docker run \
  -e TUDUDI_USER_EMAIL=admin@example.com \
  -e TUDUDI_USER_PASSWORD=your-secure-password \
  -e TUDUDI_SESSION_SECRET=$(openssl rand -hex 64) \
  -v ~/tududi_db:/app/db \
  -v ~/tududi_uploads:/app/uploads \
  -v ~/tududi_backups:/app/backups \
  -p 3002:3002 \
  -d chrisvel/tududi:latest
Navigate to http://localhost:3002 and login with your credentials.
If people reach tududi at another address (for example http://zima.local:3002 or https://tududi.example.com), add -e BASE_URL=<that address> so links in emails (account verification, password reset) point there instead of localhost.
Using docker-compose
The repo also includes a docker-compose.yml. It reads its configuration from a .env file, so copy the example first:
cp .env.example .env
# edit .env with your values, then:
docker-compose up -d
Reverse Proxy Setup
When running behind a reverse proxy (Caddy, Nginx, Traefik, etc.), set TUDUDI_TRUST_PROXY so that Express correctly reads client IPs from X-Forwarded-For headers. Without this, express-rate-limit will log a validation error.
docker run \
  -e TUDUDI_TRUST_PROXY=true \
  -e TUDUDI_ALLOWED_ORIGINS=https://your-domain.com \
  ...
| Value | Meaning |
|---|---|
true | Trust all proxies (simplest option for single-proxy setups) |
1 | Trust the first hop only |
loopback | Trust loopback addresses (127.0.0.1/::1) |
172.16.0.0/12 | Trust a specific subnet |
OIDC/SSO Authentication
Tududi supports Single Sign-On via OpenID Connect (OIDC), allowing users to authenticate with external identity providers.
Quick Setup (Single Provider):
docker run \
  -e OIDC_ENABLED=true \
  -e OIDC_PROVIDER_NAME=Google \
  -e OIDC_PROVIDER_SLUG=google \
  -e OIDC_ISSUER_URL=https://accounts.google.com \
  -e OIDC_CLIENT_ID=your-client-id.apps.googleusercontent.com \
  -e OIDC_CLIENT_SECRET=your-client-secret \
  -e OIDC_SCOPE="openid profile email" \
  -e OIDC_AUTO_PROVISION=true \
  -e BASE_URL=https://your-domain.com \
  ...
Multiple Providers:
# Provider 1: Google
-e OIDC_PROVIDER_1_NAME=Google \
-e OIDC_PROVIDER_1_SLUG=google \
-e OIDC_PROVIDER_1_ISSUER=https://accounts.google.com \
-e OIDC_PROVIDER_1_CLIENT_ID=xxx \
-e OIDC_PROVIDER_1_CLIENT_SECRET=xxx \

# Provider 2: Company SSO
-e OIDC_PROVIDER_2_NAME="Company SSO" \
-e OIDC_PROVIDER_2_SLUG=okta \
-e OIDC_PROVIDER_2_ISSUER=https://company.okta.com \
-e OIDC_PROVIDER_2_CLIENT_ID=yyy \
-e OIDC_PROVIDER_2_CLIENT_SECRET=yyy \
-e OIDC_PROVIDER_2_ADMIN_EMAIL_DOMAINS=company.com \
Supported Providers: Google, Okta, Keycloak, Authentik, PocketID, Azure AD, and any OIDC-compliant provider
Key Features:
- Automatic user provisioning on first login
- Account linking for existing users
- Admin role assignment based on email domains
- Hybrid authentication (email/password + SSO)
Documentation: See docs/10-oidc-sso.md for detailed setup guides and provider-specific configuration.
CalDAV Synchronization
Tududi supports the industry-standard CalDAV protocol, enabling seamless task synchronization with popular CalDAV clients and servers. It's enabled by default.
Quick Setup:
docker run \
  -e ENCRYPTION_KEY=$(openssl rand -hex 32) \
  ...
Supported Clients:
- tasks.org (Android/iOS) - Full task management with recurring tasks
- Apple Reminders (iOS/macOS) - Native iOS/macOS integration
- Thunderbird (Desktop) - Advanced task features
- Evolution (Linux) - Full CalDAV compatibility
Sync with External Servers:
Connect Tududi to external CalDAV servers like Nextcloud, Baikal, or other CalDAV-compatible services for bidirectional synchronization.
Key Features:
- Bidirectional sync (local ↔ remote)
- Full recurring task support with RRULE
- Conflict detection and resolution
- Background automatic synchronization
- HTTP Basic Authentication
- Encrypted password storage (AES-256-GCM)
Documentation: See docs/11-caldav-sync.md for client setup guides, server configuration, and troubleshooting.
Database: SQLite or PostgreSQL
Tududi stores everything in a single SQLite file by default, which is all a personal instance needs. For larger or multi-user deployments you can point it at PostgreSQL instead by setting DATABASE_URL (for example postgres://tududi:secret@db:5432/tududi). The database may be empty; the schema is created on first start. A complete compose setup with a bundled PostgreSQL service is in docs/examples/docker-compose.postgres.yml (copy it next to your .env as docker-compose.yml), and the deployment guide is docs/16-postgresql.md.
Upgrading
Every start backs up the SQLite file next to it (db-backup-<timestamp>.sqlite3), then runs pending migrations; the container refuses to start if a migration fails, so the backup is always the state before the upgrade.
Upgrading to a release with PostgreSQL support
SQLite stays the default and existing databases are used as they are. Make sure your .env does not contain a DATABASE_URL or DB_DIALECT left over from another application: either one switches tududi to PostgreSQL. As a safety net, the container refuses to start when PostgreSQL is selected but a populated SQLite database is present at DB_FILE; unset the variable to keep your data, or set TUDUDI_ALLOW_DIALECT_SWITCH=true if you really want an empty PostgreSQL database.
v1.1.x to v1.2.x: Volume path change
The Docker volume mount path changed in v1.2.0 from /app/backend/db to /app/db. If you are upgrading from v1.1.x and your docker-compose.yml still uses the old path, new data will be lost on container recreation because writes go to an anonymous Docker volume that is discarded when the container is recreated.
How to check: Look at your docker-compose.yml volumes section:
# OLD (v1.1.x) - update this
volumes:
  - ./tududi_db:/app/backend/db
  - ./uploads:/app/backend/uploads

# NEW (v1.2.x+) - use these paths
volumes:
  - ./tududi_db:/app/db
  - ./uploads:/app/uploads
  - ./backups:/app/backups
Migration steps:
- Stop the container:
docker-compose down - Update
docker-compose.ymlto use the new volume paths (see above) - Start the container:
docker-compose up -d
Your existing data directory (./tududi_db) stays the same - only the mount point inside the container changes. No data copying is needed when using bind mounts.
Note: While you still use the old path, Tududi will print a warning at startup and continue using the old location to prevent data loss. Once you update the volume mount, the warning disappears and writes go to the correct persistent location.
📚 Documentation
For detailed setup instructions, configuration options, and getting started guides, visit:
- Installation Guide - Docker, development setup, and deployment
- Configuration - Environment variables and advanced settings
- First Steps - Learn the basics and get productive
- Project Sharing - Collaborate with your team
- People, Members and Roles - Families and teams: roles, groups, members without an email and assigning tasks
🚧 Development
Want to contribute or run Tududi from source? Check out our comprehensive development guide:
Quick overview:
# Clone and install
git clone https://github.com/chrisvel/tududi.git
cd tududi
npm install

# Start development servers
npm run backend:dev   # Terminal 1 - Backend on :3001
npm run frontend:dev  # Terminal 2 - Frontend on :8080
For database management, testing, and detailed development instructions, see docs.tududi.com
🔌 API
Tududi provides a comprehensive REST API for integration with external tools and automation workflows.
Base URL: http://localhost:8080/api/v1
Key Features:
- Complete CRUD operations for tasks, projects, notes, and areas
- Personal API keys for secure access
- Swagger documentation available at
/api-docs(requires authentication) - Support for recurring tasks, subtasks, and tag management
- Real-time task metrics and productivity insights
Authentication: Uses session cookies or Bearer token authentication. Generate personal API keys through the web interface for programmatic access.
Quick Example:
# Get all tasks
curl -H "Authorization: Bearer YOUR_API_KEY" \
     http://localhost:3002/api/v1/tasks

# Create a new task
curl -X POST \
     -H "Authorization: Bearer YOUR_API_KEY" \
     -H "Content-Type: application/json" \
     -d '{"name":"Complete API documentation","priority":"medium"}' \
     http://localhost:3002/api/v1/task
For full API documentation, visit /api-docs after authentication or check the Swagger schema definitions in backend/config/swagger.js.
🤝 Contributing
Contributions to tududi are welcome! Whether it's bug fixes, new features, documentation improvements, or translations, we appreciate your help.
Before you start:
- Check existing issues and discussions to avoid duplicate work
- For bugs, open an issue with the bug report template
- For feature requests, start a discussion
Quick contribution workflow:
- Fork the repository
- Create a feature branch (
git checkout -b feature/amazing-feature) - Make your changes following our code standards
- Run linting and tests:
npm run pre-push - Commit your changes with a clear message
- Push to your fork and open a Pull Request
Read our Contributing Guide for:
- Development setup and workflow
- Code standards and best practices
- Testing requirements
- Database migrations
- Translation guidelines
- Pull request checklist
📜 License
This project is licensed under the MIT License.
📬 Contact
For questions or comments, please open an issue or contact the developer directly.
Join the tududi community:
🌟 Please check my other projects!
- Reconya - Network reconnaissance and asset discovery tool
- BreachHarbor - Cybersecurity suite for digital asset protection
- Hevetra - Digital tracking for child health milestones
Screenshots
README created by Chris Veleris for tududi.
Similar repos
Significant stargazers
241 followers · starred Sep 2024
15 followers · starred May 2026
361 followers · starred May 2026
56 followers · starred Apr 2026