
Personal self-hosted infrastructure setup for N100-based mini PC
PowerShell
1
48 commits
updated Sep 27, 2026
See what people are saying
README

Personal self-hosting guide



This project describes my personal self-hosted infrastructure setup, running on a mini PC (N100 based).
This was meant to be just a reminder for me, but I wrote it as a guide, in case it might help someone.
It uses only free and open source software.

[!NOTE] This project is based on my previous home lab setup running on a Banana Pi board, this one contains more up-to-date instructions.
The original project can be found at https://github.com/Yann39/self-hosted.
[!IMPORTANT] The content of this repository is provided "as is", with no guarantee that the information is complete or error-free. The techniques and tools discussed here come with inherent risks. The author takes absolutely no responsibility for possible consequences due to the use of the related software.
Table of Content
Overview
Plan
The goal is still the same : learning, and have an environment :
- 100% self-hosted (privacy preserving, full control over data and software)
- Secure (authentication, SSL/TLS, reverse proxy, firewall, ad blocking, DDOS protection, rate limiting, custom DNS resolver, ...)
- Lightweight (runs smoothly with minimal hardware and software requirements)
- Container-ready (isolated, portable, scalable applications)
- Accessible (some services accessible only locally, some only through VPN, some publicly)
- Supervised (monitoring, alerting, tracking, backup tools)
These are the tools we are going to run :
| Logo | Name | Repository | Description |
|---|---|---|---|
 | Docker | https://github.com/docker | Help to build, share, and run container applications |
 | Docker Compose | https://github.com/docker/compose | Run multi-container applications with Docker |
 | Arcane | https://github.com/getarcaneapp/arcane | Management platform for containerized applications |
 | Traefik | https://github.com/traefik/traefik | Modern HTTP reverse proxy and load balancer |
 | Sablier | https://github.com/sablierapp/sablier | Workload scaling on demand |
 | PocketID | https://github.com/pocket-id/pocket-id | Simple OIDC provider for passkey authentication |
 | CrowdSec | https://github.com/crowdsecurity/crowdsec | Collaborative intrusion prevention, bans attackers |
 | CrowdSec Web UI | https://github.com/TheDuffman85/crowdsec-web-ui | Web dashboard for CrowdSec alerts and decisions |
 | Wireguard | https://github.com/WireGuard | Simple yet fast and modern VPN |
 | WGDashboard | https://github.com/WGDashboard/WGDashboard | Web interface to manage WireGuard peers |
 | Pi-hole | https://github.com/pi-hole/pi-hole | Network-wide ad blocking |
 | Unbound | https://github.com/NLnetLabs/unbound | Validating, recursive, and caching DNS resolver |
 | Homer | https://github.com/bastienwirtz/homer | Static application dashboard |
 | Homebox | https://github.com/sysadminsmedia/homebox | Inventory and organisation system for the home |
 | Omnitools | https://github.com/iib0011/omni-tools | Various online tools for everyday tasks |
 | Dashdot | https://github.com/MauriceNino/dashdot | Minimal server dashboard and monitoring |
 | Prometheus | https://github.com/prometheus/prometheus | Metrics collection and time series database |
 | Grafana | https://github.com/grafana/grafana | Dashboards and visualization for metrics |
 | Gatus | https://github.com/TwiN/gatus | Uptime monitoring and alerting, status page |
 | Ghostfolio | https://github.com/ghostfolio/ghostfolio | Wealth management and portfolio tracking |
 | Backrest | https://github.com/garethgeorge/backrest | Web UI for restic backups (snapshots, encryption) |
 | GoatCounter | https://github.com/arp242/goatcounter | Privacy-friendly web analytics, no cookies |
 | Lychee | https://github.com/LycheeOrg/Lychee | Free photo-management tool |
 | PhpMyAdmin | https://github.com/phpmyadmin/phpmyadmin | Web user interface to manage MySQL databases |
And also some personal applications :
- My first PHP / MySQL website from the early 2000's ! : https://github.com/Yann39/defrag-life
- A GraphQL API (Java / Spring Boot) for one of my Flutter mobile applications : https://github.com/Yann39/ccteam-graphql
All of this runs on a Trigkey G4 mini PC ! With the following specifications :

|
|
[!NOTE] This hardware is not designed for high loads, I only have a few users on my public applications, of course if you need to handle more load you might consider a better machine.
It should also work on many other x86 based computers.
Target architecture
Here is a chart representing the global network "architecture" we are going to set up, simplified with only the most relevant services. See Network flow for more detailed schemas.
This architecture allows exposing applications to the internet while restricting access to some of them only through VPN or from the local network. It's up to you to choose the accessibility level you need for each service, you may want some to be accessible only from your local network, some only via VPN, and others to anyone from the internet.
flowchart TB
   style HOSTING_PROVIDER fill: #4d683b
   style DDNS_PROVIDER fill: #69587b
   style INTERNET_SERVICE_PROVIDER fill: #205566
   style SERVER_DEVICE fill: #665151
   style CONTAINER_ENGINE fill: #664343
   style TRAEFIK_CONTAINER fill: #663535
   style PIHOLE_CONTAINER fill: #663535
   style UNBOUND_CONTAINER fill: #663535
   style MYAPP_CONTAINER fill: #663535
   style CROWDSEC_CONTAINER fill: #663535
   style SABLIER_CONTAINER fill: #663535
   style WIREGUARD_HOST fill: #663535
   style TRAEFIK_ROUTER fill: #806030
   style TRAEFIK_MIDDLEWARE fill: #806030
   style VPN_CLIENT fill: #105040
   style PIHOLE_DNS_RECORDS fill: #806030
   style CROWDSEC_COMMUNITY fill: #4d683b
   DOMAIN(example.com)
   SUBDOMAIN_WIREGUARD(wireguard.example.com)
   SUBDOMAIN_MYAPP(myapp.example.com)
   DDNS(myddns.ddns.net)
   ROUTER[public IP]
   ROUTER_PORT80{{80/tcp}}
   ROUTER_PORT443{{443/tcp}}
   ROUTER_PORT51820{{51820/udp}}
   DOCKER_WIREGUARD_PORT51820{{51820/udp}}
   DOCKER_MYAPP_PORT5000{{5000/tcp}}
   DOCKER_PIHOLE_PORT80{{80/tcp}}
   DOCKER_PIHOLE_PORT53{{53/udp}}
   DOCKER_TRAEFIK_PORT443{{443/tcp}}
   DOCKER_TRAEFIK_PORT80{{80/tcp}}
   DOCKER_TRAEFIK_PORT8080{{8080/tcp}}
   DOCKER_UNBOUND_PORT53{{53/udp}}
   TRAEFIK_ROUTER_MYAPP(myapp\n.example.com)
   TRAEFIK_ROUTER_PIHOLE(pihole\n.example.com)
   TRAEFIK_ROUTER_TRAEFIK(traefik\n.example.com)
   ROOT_DNS_SERVERS[Root DNS servers]
   DNS_ISP[DNS 1 & 2]
   DOCKER_PIHOLE_DNS[DNS 1 & 2]
   PIHOLE_DNS_PIHOLE[pihole\n.example.com]
   PIHOLE_DNS_TRAEFIK[traefik\n.example.com]
   PIHOLE_DNS_MYAPP[myapp\n.example.com]
   CROWDSEC_BOUNCER(CrowdSec bouncer)
   CROWDSEC_ENGINE[Security engine\n+ local API]
   ACCESS_LOG[(access log)]
   CROWDSEC_COMMUNITY[CrowdSec\ncommunity blocklist]

   subgraph VPN_CLIENT[VPN CLIENT]
      WIREGUARD_CLIENT_ENDPOINT[Endpoint]
      WIREGUARD_CLIENT_DNS[DNS]
   end

   subgraph HOSTING_PROVIDER[DOMAIN NAME REGISTRAR]
      DOMAIN -->|subdomain| SUBDOMAIN_MYAPP
      DOMAIN -->|subdomain| SUBDOMAIN_WIREGUARD
   end

   subgraph DDNS_PROVIDER[DYNAMIC DNS PROVIDER]
      SUBDOMAIN_MYAPP --->|CNAME| DDNS
      SUBDOMAIN_WIREGUARD --->|CNAME| DDNS
   end

   subgraph INTERNET_SERVICE_PROVIDER[INTERNET SERVICE PROVIDER]
      DDNS --->|DynDNS| ROUTER
      ROUTER --> ROUTER_PORT443
      ROUTER --> ROUTER_PORT80
      ROUTER --> ROUTER_PORT51820
      DNS_ISP
   end

   subgraph SERVER_DEVICE[MINI PC]

      subgraph CONTAINER_ENGINE[DOCKER]

         subgraph TRAEFIK_CONTAINER[TRAEFIK CONTAINER]

            subgraph TRAEFIK_ROUTER[TRAEFIK HTTP ROUTER]
            TRAEFIK_ROUTER_TRAEFIK
            TRAEFIK_ROUTER_MYAPP
            TRAEFIK_ROUTER_PIHOLE
            end

            subgraph TRAEFIK_MIDDLEWARE[TRAEFIK MIDDLEWARE]
               REDIRECT(HTTPS redirect)
               IP_WHITELISTING(IP whitelist)
               SABLIER(Sablier dynamic)
               AUTH(PocketID auth)
            end

            CROWDSEC_BOUNCER
            ACCESS_LOG
            DOCKER_TRAEFIK_PORT80
            DOCKER_TRAEFIK_PORT443
            DOCKER_TRAEFIK_PORT8080
         end

         subgraph SABLIER_CONTAINER[SABLIER CONTAINER]
            DOCKER_SABLIER_PORT10000
            WAITING_PAGE(Waiting page)
         end

         subgraph PIHOLE_CONTAINER[PIHOLE CONTAINER]

            subgraph PIHOLE_DNS_RECORDS[LOCAL DNS RECORDS]
               PIHOLE_DNS_TRAEFIK ~~~
               PIHOLE_DNS_PIHOLE ~~~
               PIHOLE_DNS_MYAPP
            end

            DOCKER_PIHOLE_PORT53
            DOCKER_PIHOLE_PORT80
            DOCKER_PIHOLE_DNS
         end

         subgraph WIREGUARD_HOST[WIREGUARD CONTAINER]
           DOCKER_WIREGUARD_PORT51820
         end

         subgraph MYAPP_CONTAINER[MYAPP CONTAINER]
           DOCKER_MYAPP_PORT5000
         end

         subgraph UNBOUND_CONTAINER[UNBOUND CONTAINER]
           DOCKER_UNBOUND_PORT53
         end

         subgraph CROWDSEC_CONTAINER[CROWDSEC CONTAINER]
           CROWDSEC_ENGINE
         end

      end

   end

   CLIENT((User )) -.-> VPN_CLIENT
   BROWSER((Browser)) --> HOSTING_PROVIDER
   CLIENT -.-> BROWSER
   VPN_CLIENT --> BROWSER
   WIREGUARD_CLIENT_ENDPOINT -.->|Server static IP\n192 . 168. 0 . 16|SERVER_DEVICE
   WIREGUARD_CLIENT_DNS -->|Server tunnel address\n10 . 0 . 0 . 1| SERVER_DEVICE
   ROUTER_PORT51820 -->|port forward|DOCKER_WIREGUARD_PORT51820
   ROUTER_PORT443 ------>|port forward|DOCKER_TRAEFIK_PORT443
   ROUTER_PORT80 -->|port forward|DOCKER_TRAEFIK_PORT80
   DNS_ISP ------>|Server static IP|DOCKER_PIHOLE_PORT53
   PIHOLE_DNS_MYAPP --->|Server internal IP|DOCKER_TRAEFIK_PORT443
   PIHOLE_DNS_PIHOLE --->|Server internal IP|DOCKER_TRAEFIK_PORT443
   PIHOLE_DNS_TRAEFIK --->|Server internal IP| DOCKER_TRAEFIK_PORT443
   DOCKER_TRAEFIK_PORT443 --> CROWDSEC_BOUNCER
   CROWDSEC_BOUNCER ----->|IP not banned|TRAEFIK_ROUTER
   DOCKER_TRAEFIK_PORT80 --> TRAEFIK_ROUTER
   CROWDSEC_BOUNCER -.->|every request logged|ACCESS_LOG
   ACCESS_LOG -.........->|reads, detects attacks|CROWDSEC_ENGINE
   CROWDSEC_ENGINE -.->|decisions|CROWDSEC_BOUNCER
   CROWDSEC_ENGINE <-...->|signals / community blocklist|CROWDSEC_COMMUNITY
   TRAEFIK_ROUTER_MYAPP --> REDIRECT
   TRAEFIK_ROUTER_PIHOLE --> REDIRECT
   TRAEFIK_ROUTER_TRAEFIK -->|Dashboard / API|REDIRECT
   IP_WHITELISTING --> AUTH
   IP_WHITELISTING --> DOCKER_PIHOLE_PORT80
   REDIRECT ----> SABLIER
   SABLIER <-..->|return status|DOCKER_SABLIER_PORT10000
   SABLIER --->|not ready|WAITING_PAGE
   SABLIER --->|ready|DOCKER_MYAPP_PORT5000
   REDIRECT --> IP_WHITELISTING
   DOCKER_SABLIER_PORT10000 <-.->|check status|DOCKER_MYAPP_PORT5000
   AUTH --> DOCKER_TRAEFIK_PORT8080
   DOCKER_PIHOLE_DNS ---> DOCKER_UNBOUND_PORT53
   UNBOUND_CONTAINER <----> ROOT_DNS_SERVERS
Basically all services will be accessible via dedicated subdomains which will point to our local network, either through dynamic DNS or through local DNS records, then a reverse proxy will be responsible for routing the requests to the right application running in Docker containers.
We make the ISP upstream DNS (from router configuration) point to the server IP address, so that we reroute the entire Internet traffic through Pi-hole and thus take advantage of its benefits.
In this example Traefik (traefik.example.com) and Pi-Hole (pihole.example.com) are only accessible through VPN and from the local network thanks to local DNS records and IP whitelisting, while Myapp (myapp.example.com) is also accessible from the internet publicly. In addition, Traefik dashboard is behind OIDC authentication through PocketID, see PocketID.
On top of that, CrowdSec watches the Traefik access log and its bouncer, plugged on the HTTPS entrypoint, rejects the IP addresses flagged as malicious (by our own scenarios or by the community blocklist) before they reach any service, see CrowdSec.
You will find more details on how all this has been implemented later in this guide.
Install and prepare system

By default, the Mni PC came with Windows 11, I simply installed Debian 12 instead (then followed version up to 13.4, which is the version I use at the time of writing this guide). Backup the Windows key before, just in case.
- Download latest Debian image for amd64 :
- debian-12.5.0-amd64-netinst.iso
- Download Rufus or equivalent software to be able to write the image to a USB key
- Simply select the image in Rufus and write it to the USB key with the default proposed options
- Insert the USB key into the mini PC and start it, you may need to access the bios to change the boot device priority, to boot on the USB key
- Then follow the Debian installation instructions, I personally installed the basic system without GUI (no desktop environment)
System user
When installing Debian, you should have been asked to create a regular user account. We will simply use that user for the whole guide.
For security reasons, do not use the root user directly.
If you run a program as root and a security flaw is exploited, the attacker has access to the whole system without
restriction.
Using a regular user, even with sudo enabled, will require running sudo and will still prompt for the account password
as an additional security step.
It is also safer in case you unintentionally issue a command that could hurt the system (like deleting system files,
etc.).
[!NOTE] We may also create specific users inside Docker containers for some applications, specially when creating our own Dockerfile, but we'll clarify then whether additional permissions need to be added in case they need access to the local filesystem through a bind mount.
sudo is not installed on Debian by default. You have to install it.
So, become root and install sudo :
su -
apt install sudo
Then add user in the sudoers :
/sbin/adduser username sudo
SSH access
Generally, you'll want to leave your machine in a cool, quiet corner, rather than letting it land around in your feet and having to connect a keyboard/mouse/screen every time you want to access it.
A solution is simply to access it as a remote computer via SSH, from your main computer.
In the normal Debian images, SSH is not enabled by default, so you need to install openssh server to allow SSH connections :
apt update
apt install openssh-server
Then simply use the ssh command from the client machine to establish a secure and authenticated SSH connection to the
mini PC (here named n100) :
ssh username@n100
Enter your password then you are ready to go !
You can also use your preferred SSH client.
Unless you want to be able to do some operations from outside your local network, there is no need to open the SSH port to the internet. If you do so consider using it behind a VPN (even if SSH itself is very secure).
Basic tools
We need to install some basic tools which will be useful for the next steps.
Install curl (for transferring data through URLs) :
sudo apt install curl
Install netstat (to check network connections) :
sudo apt install net-tools
Optionally install vim (improved vi) :
sudo apt install vim
Directory structure
We will place every application configuration into the /opt/apps directory, as follows :
/
|- opt
    |- apps
        |- traefik
        |- arcane
        |- phpmyadmin
        |- dashdot
        |- ...
Usually this directory (/opt) is reserved for any software and packages that are not part of the default installation, but feel free to choose another location.
You can already create the directory :
sudo mkdir /opt/apps
We will create the subdirectories associated with each application when we install them.
Docker & Docker Compose
|
|
|
We will use Docker to containerize and run our different applications.
Docker enables to separate applications from the infrastructure, it provides the ability to package and run an application in an isolated environment called a container. Containers contain everything needed to run the application, so you don't need to rely on what's installed on the host.
We will also install Docker Compose, so we can define and run multi-container Docker applications.
Docker provides an installation script, but in Debian 13, we can install the Docker engine through the package manager and a more modern version of Docker Compose is available as a plugin.
Complete Docker setup on Debian 13 :
# 1. Remove any conflicting packages
sudo dpkg --remove --force-depends docker-buildx-plugin docker-compose-plugin docker-compose
sudo apt --fix-broken install
sudo apt autoremove

# 2. Install Docker Engine + plugins
sudo apt update
sudo apt install docker.io docker-compose-plugin docker-buildx-plugin

# 3. Enable and start Docker
sudo systemctl enable --now docker
sudo systemctl status docker

# 4. Add user to docker group
sudo usermod -aG docker $USER
newgrp docker  # or log out/in

# 5. Check Docker installation
sudo docker info
[!NOTE] In this guide I systematically use latest images (
:latesttag), but usually you better want to avoid using:latesttags in production. Anyway if you uselatesttags and want to update an image in the future, simply pull it again and rerun your container / compose file, i.e. :sudo docker-compose pull sudo docker-compose up -dThen remove any old images.
Network configuration
Before installing our services, we need to configure the network, so we can reach our applications from different locations.
The idea is to have :
- A main domain name
- A subdomain name for each application that must be reachable from the internet
- A dynamic DNS name to avoid having to use a static public IP address
- A Traefik reverse proxy to handle HTTP request that will be port forwarded to the applications
For services that will not be accessible to the internet, we will use Pi-Hole’s ability to manage local DNS records (each record will point to server's internal IP address) so that they are also reachable using a subdomain name.
Here is an overview of the route for each case, when a client request myapp.example.com :
:small_blue_diamond: Internet access :
flowchart LR
    style HOSTING_PROVIDER fill: #4d683b
    style DDNS_PROVIDER fill: #69587b
    style INTERNET_SERVICE_PROVIDER fill: #205566
    style TRAEFIK_CONTAINER fill: #663535
    style APPLICATION fill: #663535
    style SERVER_DEVICE fill: #665151
    CLIENT((Client))
    SUBDOMAIN_MYAPP(myapp\n.example.com)
    DDNS(myddns\n.ddns.net)
    ROUTER[public IP]
    ROUTER_PORT{{port}}
    DOCKER_TRAEFIK_PORT{{port}}
    APPLICATION_PORT{{port}}

    subgraph HOSTING_PROVIDER[DOMAIN NAME REGISTRAR]
        SUBDOMAIN_MYAPP
    end

    subgraph DDNS_PROVIDER[DYNAMIC DNS PROVIDER]
        DDNS
    end

    subgraph INTERNET_SERVICE_PROVIDER[INTERNET SERVICE PROVIDER]
        ROUTER
        ROUTER_PORT
    end

    subgraph SERVER_DEVICE[MINI PC]
        subgraph TRAEFIK_CONTAINER[TRAEFIK]
            DOCKER_TRAEFIK_PORT
        end

        subgraph APPLICATION[APPLICATION]
            APPLICATION_PORT
        end
    end

    CLIENT --> SUBDOMAIN_MYAPP
    SUBDOMAIN_MYAPP -->|CNAME| DDNS
    DDNS -->|DynDNS| ROUTER
    ROUTER --> ROUTER_PORT
    ROUTER_PORT -->|port forward| DOCKER_TRAEFIK_PORT
    DOCKER_TRAEFIK_PORT -->|HTTP router| APPLICATION_PORT
:small_blue_diamond: VPN access :
flowchart LR
    style VPN fill: #4d683b
    style TRAEFIK_CONTAINER fill: #663535
    style PI_HOLE fill: #663535
    style APPLICATION fill: #663535
    style WIREGUARD fill: #663535
    style SERVER_DEVICE fill: #665151
    CLIENT((Client))
    VPN_CLIENT(DNS)
    VPN_ENDPOINT(Endpoint)
    PIHOLE_DNS_MYAPP(myapp\n.example.com)
    DOCKER_TRAEFIK_PORT{{port}}
    APPLICATION_PORT{{port}}
    WIREGUARD_PORT{{port}}
    PIHOLE_DNS{{port}}

    subgraph VPN[VPN]
        VPN_CLIENT
        VPN_ENDPOINT
    end

    subgraph SERVER_DEVICE[MINI PC]
        subgraph PI_HOLE[PI-HOLE]
            PIHOLE_DNS
            PIHOLE_DNS_MYAPP
        end

        subgraph TRAEFIK_CONTAINER[TRAEFIK]
            DOCKER_TRAEFIK_PORT
        end

        subgraph APPLICATION[APPLICATION]
            APPLICATION_PORT
        end

        subgraph WIREGUARD[WIREGUARD]
            WIREGUARD_PORT
        end
    end

    VPN_ENDPOINT --> WIREGUARD_PORT
    CLIENT --> VPN_CLIENT
    VPN_CLIENT --> PIHOLE_DNS
    PIHOLE_DNS_MYAPP --->|A| TRAEFIK_CONTAINER
    DOCKER_TRAEFIK_PORT -->|HTTP router| APPLICATION_PORT
:small_blue_diamond: Local network access :
flowchart LR
    style INTERNET_SERVICE_PROVIDER fill: #205566
    style TRAEFIK_CONTAINER fill: #663535
    style PI_HOLE fill: #663535
    style APPLICATION fill: #663535
    style SERVER_DEVICE fill: #665151
    CLIENT((Client))
    ISP_DNS(DNS)
    PIHOLE_DNS_MYAPP(myapp\n.example.com)
    DOCKER_TRAEFIK_PORT{{port}}
    APPLICATION_PORT{{port}}
    PIHOLE_DNS{{port}}

    subgraph INTERNET_SERVICE_PROVIDER[INTERNET SERVICE PROVIDER]
        ISP_DNS
    end

    subgraph SERVER_DEVICE[MINI PC]
        subgraph PI_HOLE[PI-HOLE]
            PIHOLE_DNS
            PIHOLE_DNS_MYAPP
        end

        subgraph TRAEFIK_CONTAINER[TRAEFIK]
            DOCKER_TRAEFIK_PORT
        end

        subgraph APPLICATION[APPLICATION]
            APPLICATION_PORT
        end

    end

    CLIENT ---> ISP_DNS
    ISP_DNS ---> PIHOLE_DNS
    PIHOLE_DNS_MYAPP --->|A| TRAEFIK_CONTAINER
    DOCKER_TRAEFIK_PORT -->|HTTP router| APPLICATION_PORT
[!NOTE] My router offers all the required features (DHCP server, DNS server, port forwarding, dynDNS, etc.) for the steps described below. Most of the routers also have those features (they rarely purely route packets), but if this is not your case, you may have to perform double NAT to allow more advanced configurations. I obviously cannot go through the configuration specific to each router.
IP settings
The following changes to the IP settings are required if you want the DNS requests of your whole local network to go through Pi-Hole and the custom DNS resolver (Unbound) (only the DNS requests : the ad blocking is done at DNS level, the traffic itself does not need to go through the mini PC) :
- Assign a static IP address to the mini PC, for example
192.168.0.16(I have local DHCP enabled) - Make the devices use the mini PC as DNS server (
192.168.0.16), either through the router (the DNS server it hands out with DHCP), or manually on each device
Of course Pi-Hole container have to expose port 53 to receive incoming DNS requests. Refer to Pi-hole setup for more details.
[!WARNING] Setting the mini PC as "DNS server" in the router configuration is not always enough : many ISP boxes keep answering the DNS queries of the LAN devices themselves with the ISP resolvers, and the devices silently bypass Pi-Hole. Always verify from a device which server actually answers :
nslookup doubleclick.netThe answering server must be the mini PC (
192.168.0.16), and a domain from the block lists must resolve to0.0.0.0. If the router does not hand out the mini PC address, set the DNS manually on each device (on Windows : Settings -> Network -> Ethernet -> DNS server assignment -> Manual). In that case :
- leave the alternate DNS empty : Windows does not strictly respect the primary/secondary order, a public secondary DNS ends up bypassing Pi-Hole
- leave "DNS over HTTPS" off : Pi-Hole only speaks plain DNS on port
53, and this leg never leaves your LAN anyway (the privacy part is Unbound resolving directly from the root servers)- disable "secure DNS" / DNS-over-HTTPS in the browsers too, else they use their own resolver and bypass Pi-Hole
If you don't want the whole network to use Pi-Hole, skip the second point, then only the VPN clients (and the devices you configure manually) will use it.
Dynamic DNS
When connecting from outside our network (from the internet), we need to know the public IP address of our router to connect to. But unless we have a static public IP (not necessarily the safest option), we are getting dynamically-assigned public IP addresses (via DHCP), so we would need to update the configuration everytime the IP changes, which is very uncomfortable.
Fortunately we can register a dynamic host record (DynDNS), and configure it in our router configuration so that when the public IP address changes, a call is made to the DynDNS service provider to update the record. That way our network will always be reachable from the internet via the DynDNS record no matter the IP address.
Well, simply register a dynamic DNS hostname from a provider (there are free ones), for example No-IP, DuckDNS, etc. :
- hostname :
myddns.ddns.net - IP / target : internet box external IP (public IP)
- type :
A
Then activate DynDNS on the router :
- Service provider :
No-IP(adapt to your provider) - Hostname :
myddns.ddns.net - Username : xxxxxxxx
- Password : xxxxxxxx
The IP will be updated automatically when a change will be detected.
[!NOTE] Your ISP may only support some dynamic DNS provider that can be configured in the router, so you may want to pick one that is supported natively, else you will have to set up an update client that will be responsible to regularly check for IP change.
Domain and subdomains
You will need to buy a domain from you preferred domain provider, for this guide I will use example.com.
[!IMPORTANT] I advise you to also subscribe to a domain privacy option in order to hide you personal data. Domain Privacy protects the contact information of the owner of a domain name in the WHOIS directory. Normally, this public database is used to verify the availability of a domain name and who it belongs to, but marketing companies and scammers can also exploit it for other purposes, like sending spam or identity theft.
You can check the information that are available publicly about your domain using the whois command :
whois example.com
Right, we will then use subdomains to locate each service as a separate website to avoid having to buy a new domain name for each. A subdomain is simply a prefix added to the original domain name, it functions as a separate website from its domain.
So, let's create subdomains from the domain name registrar settings, for every service to be exposed on the internet :
wireguard.example.com: To access the WireGuard serverquake.example.com: To access the Defrag-life websitelychee.example.com: To access the Lychee websiteccteam.example.com: To access the CCTeam APIsgoatcounter.example.com: So that GoatCounter can track the traffic on the exposed websites
Then add corresponding CNAME records to point to the dynamic DNS myddns.ddns.net :
CNAME wireguard myddns.ddns.netCNAME quake myddns.ddns.netCNAME lychee myddns.ddns.netCNAME ccteam myddns.ddns.netCNAME goatcounter myddns.ddns.net
A CNAME record is just a records which points a name to another name instead of pointing to an IP address (like A records).
[!NOTE] Services that will only be accessible from the local network or through VPN do not need to have a subdomain defined at this level. We will use Pi-Hole's local DNS records for that. See Pi-Hole configuration.
However, while the VPN stuff is fully functional and to be able to do the configuration easily from your client machine, you may want to temporarily create subdomains and add CNAME records for the following subdomains (also remove the IP whitelisting middleware in the corresponding service configuration), else you will be blocked by IP whitelisting :
arcane.example.com: To manage Docker containers (start/stop, check logs, etc.)pihole.example.com: To configure the local DNS records
Port forwarding
For our services to be reachable from the internet, we need to forward incoming requests to our mini PC so that they will be handled by our Traefik reverse proxy. This can be done through port forwarding.
Port forwarding directs the router to send any incoming data from the internet to a specified device on the network. It is safe to forward ports on your router as long as you have a reverse proxy or a firewall running in between.
Allow access without VPN
If you decide that at least one of the applications must be reachable from the outside directly through HTTP or HTTPS without requiring a VPN, then simply port forward the related TCP ports to the mini PC.
Go to your router configuration and add a port forward rule for the TCP port 80 :
- Name :
Traefik - Input port :
80 - Target port :
80 - Device :
n100 - Protocol :
TCP
and 443 :
- Name :
Traefik SSL - Input port :
443 - Target port :
443 - Device :
n100 - Protocol :
TCP
We will configure Traefik later to redirect HTTP requests to HTTPS. But if you prefer you can only open the HTTPS port (if you are going to use Let's encrypt' HTTP challenge, it's enough for the TLS certificates to be generated, see the warning box a little further below though).
Allow access through VPN
If you want some applications to be available from the outside through VPN, then open the VPN port :
Go to your router configuration and add a port forward rule for the UDP port 51820 :
- Name :
VPN - Input port :
51820 - Target port :
51820 - Device :
n100 - Protocol :
UDP
Of course if you want the applications to be available only through VPN, then only open the VPN port, remove any opened HTTP/HTTPS port.
[!WARNING] Note that if you use Let's Encrypt' HTTP challenge to issue and renew SSL/TLS certificates, target websites must be reachable from the internet. That mean you will have to open the HTTP (S) port at least when issuing/renewing certificates, you could also keep them open and restrict access to the necessary IP ranges, if your router supports that. If you really don't want to open HTTP (S) ports (better for security), then you will have to configure DNS challenge instead of HTTP challenge, if your DNS provider support it. See HTTP challenge and DNS challenge below when configuring Traefik.
Reverse proxy
Traefik is an open source HTTP reverse proxy and load balancer that can integrate easily with our Docker infrastructure. We will use it to intercept and route every incoming request to the corresponding backend services.
It will listen to our services and instantly generates the routes, so that they are connected to the outside world. We will also use it to automatically generate and renew SSL/TLS certificates through Let's Encrypt.
Here is an overview of the network flow on our setup :
flowchart LR
    style INCOMING_REQUEST fill: #205566
    style TRAEFIK_CONTAINER fill: #663535
    style MYAPP1_CONTAINER fill: #663535
    style MYAPP2_CONTAINER fill: #663535
    style TRAEFIK_ROUTER fill: #806030
    style TRAEFIK_MIDDLEWARE fill: #806030
    style SERVER_DEVICE fill: #665555
    style CONTAINER_ENGINE fill: #664545
    INCOMING_REQUEST((INCOMING\nREQUEST))
    DOCKER_TRAEFIK_PORT443{{443/tcp}}
    DOCKER_TRAEFIK_PORT80{{80/tcp}}
    DOCKER_TRAEFIK_PORT8080{{8080/tcp}}
    DOCKER_MYAPP1_PORT{{exposed port}}
    DOCKER_MYAPP2_PORT{{exposed port}}
    TRAEFIK_ROUTER_MYAPP1(myapp1.example.com)
    TRAEFIK_ROUTER_MYAPP2(myapp2.example.com)
    TRAEFIK_ROUTER_TRAEFIK(traefik.example.com)

    subgraph SERVER_DEVICE[MINI PC]
        subgraph CONTAINER_ENGINE[DOCKER]
            subgraph MYAPP1_CONTAINER[MYAPP1 CONTAINER]
                DOCKER_MYAPP1_PORT
            end
            subgraph MYAPP2_CONTAINER[MYAPP2 CONTAINER]
                DOCKER_MYAPP2_PORT
            end

            subgraph TRAEFIK_CONTAINER[TRAEFIK CONTAINER]
                subgraph TRAEFIK_ROUTER[TRAEFIK HTTP ROUTER]
                    TRAEFIK_ROUTER_TRAEFIK
                    TRAEFIK_ROUTER_MYAPP1
                    TRAEFIK_ROUTER_MYAPP2
                end
                subgraph TRAEFIK_MIDDLEWARE[TRAEFIK MIDDLEWARE]
                    REDIRECT(HTTPS redirect)
                    IP_WHITELISTING(IP whitelist)
                    AUTH(PocketID auth)
                end
                DOCKER_TRAEFIK_PORT80
                DOCKER_TRAEFIK_PORT443
                DOCKER_TRAEFIK_PORT8080
            end

        end
    end

    INCOMING_REQUEST --> DOCKER_TRAEFIK_PORT80
    INCOMING_REQUEST --> DOCKER_TRAEFIK_PORT443
    DOCKER_TRAEFIK_PORT80 --> TRAEFIK_ROUTER
    DOCKER_TRAEFIK_PORT443 --> TRAEFIK_ROUTER
    TRAEFIK_ROUTER_TRAEFIK --> REDIRECT
    TRAEFIK_ROUTER_MYAPP1 --> REDIRECT
    TRAEFIK_ROUTER_MYAPP2 --> REDIRECT
    REDIRECT -.-> DOCKER_TRAEFIK_PORT443
    IP_WHITELISTING --> AUTH
    IP_WHITELISTING ---> DOCKER_MYAPP2_PORT
    REDIRECT --> IP_WHITELISTING
    REDIRECT ---> DOCKER_MYAPP1_PORT
    AUTH --> DOCKER_TRAEFIK_PORT8080
It handles HTTP to HTTPS redirection, IP whitelisting and authentication (through PocketID, or basic authentication)
through custom middlewares.
In this example myapp1 is accessible from the internet, myapp2 is accessible only through VPN,
and Traefik (dashboard and APIs) is accessible only through VPN after OIDC authentication.
I've deliberately left out Sablier for the moment, to keep things simple, but basically this would simply add a middleware that checks the state of the application, in order to temporarily display a waiting page while not ready, refer to Scale to zero with Sablier for more information.
Installation
First, create a folder to hold data and configuration :
sudo mkdir /opt/apps/traefik
Then copy the files from this project's traefik directory into the /opt/apps/traefik directory :
- docker-compose.yml : The Traefik service definition
- traefik.yml : The Traefik static configuration
- .env : The secrets read by the service (DNS provider token, CrowdSec bouncer key), to fill in
- credentials.txt : A file that will hold users credentials to access the Traefik dashboard (if you want it restricted with basic authentication), see Generate basic authentication credentials
Files should be ready to use, simply replace the e-mail address (admin@example.com) in the traefik.yaml file with
your e-mail address.
You will also need to create the JSON file to hold the certificates, see TLS certificates.
Anyway you will find below more details about each file (see Configuration files details) and some further configuration.
Generate basic authentication credentials
If you want the Traefik dashboard to be protected with basic authentication rather than via PocketID, allowed users have to be added to the credentials.txt file.
You can generate a user/password using htpasswd :
-
Install the needed package if not present :
sudo apt install apache2-util -
Generate the credentials (we use bcrypt with a computing time of 10) :
htpasswd -nbBC 10 admin xxxxxxxx
Then copy the output to the credentials.txt file.
[!NOTE] Actually as Traefik will be accessible only from local network and through VPN, we don't really need to set up authentication, but it's more for demonstration, and it's always better to have 2 layers of security than one.
TLS certificates

To enable HTTPS on our websites, we need to get TLS certificates from a certificate authority. A TLS certificate certifies, in a way, the authenticity of a website (actually it proves that we have the ownership of the public key used for TLS encryption), preventing hackers from intercepting any data transmitted between a device and the site.
We will use Let's Encrypt, a nonprofit certificate authority which provide free TLS certificates.
Let's Encrypt can automatically generate certificates via Traefik, for that we need to create a acme.json file
that will hold the generated certificates (file is mapped to a volume in the Compose file), so that the certificates
are persisted between container restarts (not generated each time which could raise Let's Encrypt rate limits), we also
need to change the permissions so that Traefik can access and edit this file :
cd /opt/apps/traefik
touch /opt/apps/traefik/acme.json
chmod 600 /opt/apps/traefik/acme.json
HTTP challenge
If you use HTTP challenge, Let's Encrypt will validate that you control the domain names by trying to reach the web
server through HTTP or HTTPS.
So you must open and port forward ports 80 or 443 for the TLS certificate to be issued correctly.
The corresponding certificate resolver configuration would be :
tlsChallenge: { }
[!WARNING] Note that Let’s Encrypt will not let you use this challenge to issue wildcard certificates.
DNS challenge
When using DNS challenge, Let's Encrypt will validate that you control the domain names by querying the DNS system for a TXT record under the target domain name. So you don't need to open HTTP or HTTPS port on your router.
First, check that your DNS provider is supported by Traefik to automate the DNS verification, a list can be found here : https://doc.traefik.io/traefik/https/acme/.
Then :
- Create an access token / API key from your provider interface
- Add the necessary environment variables required by your provider to the .env file next to the Compose file
(loaded with
env_file), i.e. :MYPROVIDER_ACCESS_TOKEN=<access_token_here>
The corresponding certificate resolver configuration would be :
dnsChallenge:
  provider: <your_provider_here>
IP whitelisting
We will set up IP whitelisting so that we can allow only traffic from the local network or from the VPN for some of our services. Indeed, even if we do not have defined public subdomains for these services, they can still be reached via the IP address (actually in that case Traefik will not route the request, but it is still better to have this additional security).
Basically it involves creating a Traefik middleware for defining the IP whitelist and apply it to the needed services. It is declared once, in the dynamic configuration directory :
:page_facing_up: traefik/dynamic/vpn-whitelist.yml :
http:
  middlewares:
    vpn-whitelist:
      ipAllowList:
        sourceRange:
          - "192.168.0.0/24" # your LAN
          - "10.0.0.0/24" # Wireguard subnet
So we allow exactly 2 IP ranges :
- the local IP range : IPs assigned to the devices on your local network (computers, mobile devices, ...)
- the WireGuard subnet : the VPN peers keep their tunnel address when they reach Traefik, as WireGuard runs on the host and the peers' traffic is not NATed towards the containers
That way :
- Requests coming from the local network come with a local address assigned by the router DHCP, and are accepted.
- Requests coming from the internet through VPN come with a
10.0.0.xaddress, and are accepted. - Requests coming from the internet without VPN come with a public IP address and are rejected, as it does not match any whitelisted address.
[!NOTE] A request from your own network to a name that resolves to your public IP goes through the NAT loopback of the router and reaches Traefik with the public IP as source : rejected as well. So the private services must resolve to the LAN address of the mini PC for the devices that use them (Pi-Hole's local DNS records, see Pi-hole), and a container that has to call another one (the Traefik plugin fetching a token from PocketID for instance) must use the internal name (i.e.
http://pocketid:1411), or a public name that Traefik carries as a network alias on the private network (see PocketID), never a public URL resolving to the public IP.
[!WARNING] Never whitelist a Docker network range. A container is not a trusted client, and with the network segmentation below, a whitelisted Docker range would let a compromised public container walk straight into the private services.
Then it just needs to be referenced in the middlewares list of every router that must stay private
(vpn-whitelist@file), as you will see in the services definitions.
Keep in mind that it only protects the requests that go through Traefik : what a container can reach directly on the
Docker networks is the job of the network segmentation.
Network segmentation
Every service behind the reverse proxy must share a Docker network with Traefik to be reachable by name, but containers on the same network can also talk to each other directly, without going through Traefik and its middlewares. With a single shared network, a vulnerability in one of the applications exposed to the internet (an old PHP website, a photo gallery, an API) gives an attacker a foothold from which every other container is one HTTP request away : Pi-Hole's admin interface, Arcane (and through it the Docker socket, i.e. root on the host), the Traefik dashboard, ... The IP whitelist does not help there, it never sees this traffic.
So Traefik sits on two networks, and nothing else is allowed to be on both :
| Network | Who | Reachable from |
|---|---|---|
traefik-private-net | Traefik and the private services : Pi-Hole, Arcane, Dashdot, Homer, PhpMyAdmin, PocketID, Sablier, ... | local network and VPN only (vpn-whitelist) |
traefik-public-net | Traefik and the services exposed to the internet : Lychee, Defrag-life, ... | anyone |
A compromised public container can then only see Traefik and the other public applications, never the private ones. A few rules go with it :
- a public application never joins
traefik-private-net, a private one never joinstraefik-public-net, and no application joins both - the databases stay on the private network of their own stack (
lychee-net,defrag-life-net, ...), never on a Traefik network - containers holding the Docker socket (Arcane, Sablier) are private by construction
- PocketID stays private : a public application that would authenticate through it does so with the browser, through the public URL and Traefik, it does not need a shared network
- a public application monitored by Prometheus shares a dedicated network with Prometheus only
(
prometheus-<app>-net), neverprometheus-netnor its own database network, see Prometheus
Configuration files details
Static configuration file :
:page_facing_up: traefik.yaml :
api:
  dashboard: true

# Health check endpoint (/ping) for Gatus, served on the internal "traefik" entrypoint (8080), not published on the host
ping: {}

entryPoints:
  web:
    address: ':80'

  websecure:
    address: ':443'
    http:
      middlewares:
        # Every request on 443 is checked against the CrowdSec decisions first (see the CrowdSec section)
        - crowdsec@file

providers:
  docker:
    watch: true
    exposedByDefault: false
  file:
    directory: /etc/traefik/dynamic
    watch: true

certificatesResolvers:
  default:
    acme:
      email: admin@example.com
      storage: acme.json
      caServer: 'https://acme-v02.api.letsencrypt.org/directory'
      dnsChallenge:
        provider: <your_provider_here>

experimental:
  plugins:
    sablier:
      moduleName: "github.com/sablierapp/sablier-traefik-plugin"
      version: "v1.1.0"
    traefik-oidc-auth:
      moduleName: "github.com/sevensolutions/traefik-oidc-auth"
      version: "v0.18.0"
    crowdsec-bouncer-traefik-plugin:
      moduleName: "github.com/maxlerebourg/crowdsec-bouncer-traefik-plugin"
      version: "v1.7.1"
log:
  level: info

accessLog:
  # One JSON line per request, written to a file shared (read-only) with the CrowdSec container
  filePath: /var/log/traefik/access.log
  format: json
  fields:
    headers:
      names:
        # Request headers are dropped from the log by default, the User-Agent is needed by the CrowdSec scenarios
        User-Agent: keep
This config file :
- enables the Traefik dashboard (UI that provides a detailed overview of the current configuration)
- enables the ping endpoint (
/ping), used by Gatus to check that Traefik is alive. It is served on the internaltraefikentrypoint (port8080), created automatically and not published on the host - defines 2 entrypoints, named
web(for port80) andwebsecure(for port443) so that we can receive requests on these ports - defines a
dockerprovider so that we can use container labels for retrieving routing configuration. We have configured it to not expose containers by default, so that containers that do not have atraefik.enable=truelabel are ignored from the resulting routing configuration - defines a
defaultcertificate resolver for Let's Encrypt to automatically generate certificates - set log level to
info(you can set it todebugwhen you need more information on what's going on) - writes the access log as JSON lines in /var/log/traefik/access.log (a folder bound in the Compose file), one
line per request with the client IP, the router and the status code :
the fastest way to understand why a request is rejected, and the input of CrowdSec. Request headers are
dropped from the log by default, the
User-Agentis kept for the CrowdSec scenarios - declares the Traefik plugins used by the middlewares (Sablier, OIDC authentication, CrowdSec bouncer), downloaded when Traefik starts
- sets the
crowdsecmiddleware on thewebsecureentrypoint, so that every HTTPS request is checked against the CrowdSec decisions before reaching any router
Service definition :
:page_facing_up: docker-compose.yml :
services:

  traefik:
    image: traefik:latest
    container_name: traefik
    restart: unless-stopped
    ports:
      - "80:80"
      - "443:443"
    volumes:
      - /var/run/docker.sock:/var/run/docker.sock:ro    # So that Traefik can listen to the Docker events
      - ./traefik.yml:/etc/traefik/traefik.yml:ro       # Traefik static configuration
      - ./dynamic:/etc/traefik/dynamic:ro               # Traefik dynamic configuration
      - ./acme.json:/acme.json                          # For Let's Encrypt certificate storage
      - ./credentials.txt:/credentials.txt:ro           # For Traefik dashboard credentials
      - ./logs:/var/log/traefik                         # Access log, shared (read-only) with CrowdSec
    networks:
      # private : services reachable from the local network and the VPN only
      traefik-private-net:
        aliases:
          # Lets the containers of the private network resolve the public name of the OIDC provider to Traefik itself,
          # so that applications authenticating natively against PocketID can use its public issuer URL (see PocketID)
          - pocketid.example.com
          # Same for the public services, so that Gatus checks them through Traefik with their real name
          # (routing, TLS certificate, CrowdSec), without joining the public network nor depending on Pi-hole
          - lychee.example.com
          - quake.example.com
          - goatcounter.example.com
          - ccteam.example.com
      # public : services exposed to the internet
      traefik-public-net:
    env_file: .env    # DNS provider token for the DNS challenge, CrowdSec bouncer key
    labels:
      - "traefik.enable=true"

      # Redirect all HTTP requests to HTTPS
      - "traefik.http.middlewares.httpsonly.redirectscheme.scheme=https"
      - "traefik.http.middlewares.httpsonly.redirectscheme.permanent=true"
      - "traefik.http.routers.httpsonly.rule=HostRegexp(`{any:.*}`)"
      - "traefik.http.routers.httpsonly.middlewares=httpsonly"

      # Configure dashboard with HTTPS
      - "traefik.http.routers.dashboard.rule=Host(`traefik.example.com`)"
      - "traefik.http.routers.dashboard.entrypoints=websecure"
      - "traefik.http.routers.dashboard.service=dashboard@internal"
      - "traefik.http.routers.dashboard.tls=true"
      - "traefik.http.routers.dashboard.tls.certresolver=default"

      # Configure API with HTTPS
      - "traefik.http.routers.api.rule=Host(`traefik.example.com`) && PathPrefix(`/api`)"
      - "traefik.http.routers.api.entrypoints=websecure"
      - "traefik.http.routers.api.service=api@internal"
      - "traefik.http.routers.api.tls=true"
      - "traefik.http.routers.api.tls.certresolver=default"

      # Secure dashboard/API behind VPN and PocketID authentication (or basic authentication)
      - "traefik.http.routers.dashboard.middlewares=vpn-whitelist@file,traefik-auth@file"
      - "traefik.http.routers.api.middlewares=vpn-whitelist@file,traefik-auth@file"
      # - "traefik.http.middlewares.auth.basicauth.usersfile=/credentials.txt" # only if you use basic auth

networks:

  traefik-private-net:
    name: traefik-private-net

  traefik-public-net:
    name: traefik-public-net
This Compose file mainly :
- exposes ports
80and443to receive incoming HTTP/HTTPS requests - binds the logs folder where the access log is written, shared read-only with the CrowdSec container
- defines two networks :
traefik-private-netfor the services that must stay private (reachable from the local network and the VPN only) andtraefik-public-netfor the services exposed to the internet, see Network segmentation - gives Traefik network aliases on the private network : the containers of that network resolve these public names
to Traefik itself.
pocketid.example.comis used by the applications authenticating natively against PocketID (see PocketID), the public services by Gatus to check them through Traefik - loads its secrets from the .env file (see Environment variables) : the DNS provider access token used to issue Let's Encrypt certificates through DNS challenge, and the CrowdSec bouncer key
- defines an HTTP router that will match
traefik.example.comURL on ourwebsecureentrypoint to point to our service - defines
httpsonlyrouter and middleware responsible for automatically redirecting HTTP requests to HTTPS - configures
dashboardandapirouters to use secure HTTPS endpoint with our certificate resolver to generate related Let's Encrypt certificates - secures dashboard and API endpoints with the
vpn-whitelistmiddleware (requests from the local network and the VPN only) and thetraefik-authmiddleware (authentication through PocketID, basic authentication being the alternative)
[!CAUTION] The order in which the middlewares are defined in relation to a router is important, they will be applied in the same order as their declaration.
Environment variables :
:page_facing_up: .env :
# Access token / API key of your DNS provider, used by the Let's Encrypt DNS challenge (variable name depends on the provider, see Traefik documentation)
MYPROVIDER_ACCESS_TOKEN=<access_token_here>
# Key of the CrowdSec bouncer (same value as BOUNCER_KEY_traefik in crowdsec/.env), read by traefik/dynamic/crowdsec.yml
CROWDSEC_BOUNCER_KEY=<bouncer_key>
MYPROVIDER_ACCESS_TOKENis the token of your DNS provider, its name depends on the provider (see DNS challenge)CROWDSEC_BOUNCER_KEYis read by thecrowdsecmiddleware in dynamic/crowdsec.yml through a template (dynamic configuration files are Go templates,{{ env "..." }}reads a variable of the Traefik container), so that no secret sits in a configuration file. Same value asBOUNCER_KEY_traefikin crowdsec/.env (see CrowdSec)
Run
Finally, run the Compose file :
sudo docker-compose -f /opt/apps/traefik/docker-compose.yml up -d
# You may need to force recreate if you changed a config from an already running configuration
sudo docker-compose -f /opt/apps/traefik/docker-compose.yml up -d --force-recreate
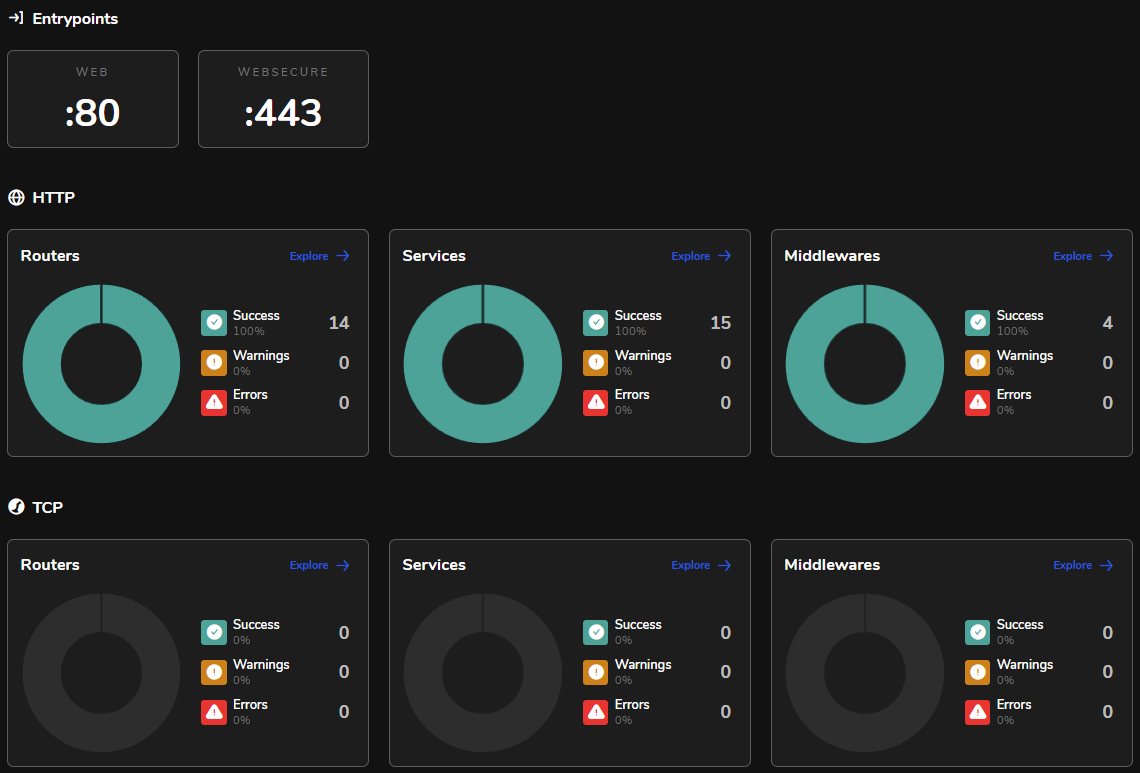
You should end-up with a running traefik container.
It should also have generated the needed Let's Encrypt certificates in the acme.json file.
So you can reach the dashboard at https://traefik.example.com.
VPN and ad-blocking
|
|
|
|
We will install WireGuard, Pi-hole and Unbound to create a virtual private network (VPN) with ad-blocking and DNS privacy/caching capabilities.
WireGuard is a free and open-source modern VPN that utilizes state-of-the-art cryptography to securely encapsulates IP packets over UDP, in order to lower the environment attack surface. As a VPN it establishes a secure connection between a computer and the internet by making all the traffic going through an encrypted tunnel. The point of self-hosting our own VPN server is to ensure a private and secure connection to our services from the internet, without having to trust third-party VPN providers, and to keep complete freedom and control over the browsing data.
Pi-hole is a network-level ad blocking and internet tracker blocking application. It has the ability to block traditional website advertisements as well as advertisements in unconventional places such as mobile apps ads. It can also be used as a DNS server and has a built-in DHCP server.
Unbound is a validating, recursive, caching DNS resolver, that has the ability to contact DNS authority servers directly in order to validate and cache the queries on your network and serve them to you directly, so you don’t have to rely on your ISP or third-party DNS resolvers (like Cloudflare or Google).
So the idea is that every client in any network can use the VPN to reach our applications while taking advantage of Pi-Hole and Unbound :
flowchart TB
    style WINDOWS11 fill: #205566
    style LAPTOP fill: #205566
    style MOBILE fill: #205566
    style MACOS fill: #205566
    style WIREGUARD_SERVER fill: #764545
    style PIHOLE fill: #663535
    style UNBOUND fill: #562525
    style INTERNET fill: #4d683b
    style HOME_NETWORK fill: #263555
    style 5G_NETWORK fill: #263555
    style WORK_NETWORK fill: #263555
    style MINI_PC fill: #504255
    WINDOWS11(Peer 1 \n Home PC - Windows 11)
    LAPTOP(Peer 2 \n Home laptop - Ubuntu 22)
    MOBILE(Peer 3 \n Phone - Android 14)
    MACOS(Peer 4 \n Work PC - MacOS 13)
    WIREGUARD_SERVER(WireGuard server - Secure VPN)
    PIHOLE(Pi-Hole - Firewall & ad-blocking)
    UNBOUND(Unbound - Custom DNS resolver)
    INTERNET((Internet))

    subgraph HOME_NETWORK[Home network]
        WINDOWS11
        LAPTOP
    end

    subgraph 5G_NETWORK[Mobile network]
        MOBILE
    end

    subgraph WORK_NETWORK[Work network]
        MACOS
    end

    subgraph MINI_PC[Mini PC]
        WIREGUARD_SERVER
        PIHOLE
        UNBOUND
    end

    WINDOWS11 -- WireGuard tunnel --> WIREGUARD_SERVER
    LAPTOP -- WireGuard tunnel --> WIREGUARD_SERVER
    MOBILE -- WireGuard tunnel --> WIREGUARD_SERVER
    MACOS -- WireGuard tunnel --> WIREGUARD_SERVER
    WIREGUARD_SERVER -- DNS queries --> PIHOLE
    PIHOLE -- Filtered DNS queries --> UNBOUND
    UNBOUND -- DNS resolution --> INTERNET
WireGuard runs directly on the host (kernel module, managed by wg-quick), Pi-Hole and Unbound run as two
small Compose stacks.
Everything about performance is in VPN connection speed.
Installation
First, create the folders that will hold data and configuration :
sudo mkdir -p /opt/apps/pihole /opt/apps/unbound /opt/apps/wgdashboard/data
Then from this project's pihole, unbound and wgdashboard directories, copy the docker-compose.yml files into the matching /opt/apps folders. For more details about these files, see Configuration files details.
WireGuard itself is a Debian package :
sudo apt install wireguard
Now let's take a look at the configuration for each service.
Configuration
WireGuard

WireGuard runs directly on the host : the kernel module is part of Debian, wg-quick manages the interface, and the
peers are managed in the configuration file (or with the wg command). Compared to running it in a container, this
removes a few hops for every packet (Docker bridge, veth pair, a second NAT layer and the userland proxy)
and makes the network stack much easier to observe and tune.
Generate the keys (wg genkey | tee private.key | wg pubkey > public.key, on the server and on each peer) and create
the configuration :
sudo nano /etc/wireguard/wg0.conf
:page_facing_up: /etc/wireguard/wg0.conf (enp1s0 is the LAN interface of the mini PC, %i is replaced by the
interface name) :
[Interface]
Address = 10.0.0.1/24
ListenPort = 51820
MTU = 1420
PrivateKey = <server private key>
PostUp = iptables -N DOCKER-USER 2>/dev/null || true; iptables -C DOCKER-USER -i %i -j ACCEPT 2>/dev/null || iptables -I DOCKER-USER 1 -i %i -j ACCEPT; iptables -C DOCKER-USER -o %i -j ACCEPT 2>/dev/null || iptables -I DOCKER-USER 2 -o %i -j ACCEPT; iptables -A FORWARD -i %i -j ACCEPT; iptables -A FORWARD -o %i -j ACCEPT; iptables -t nat -C POSTROUTING -s 10.0.0.0/24 -o enp1s0 -j MASQUERADE 2>/dev/null || iptables -t nat -A POSTROUTING -s 10.0.0.0/24 -o enp1s0 -j MASQUERADE; iptables -t mangle -C FORWARD -p tcp --tcp-flags SYN,RST SYN -j TCPMSS --clamp-mss-to-pmtu 2>/dev/null || iptables -t mangle -A FORWARD -p tcp --tcp-flags SYN,RST SYN -j TCPMSS --clamp-mss-to-pmtu; iptables -t raw -C PREROUTING -i enp1s0 -p udp --dport 51820 -j NOTRACK 2>/dev/null || iptables -t raw -A PREROUTING -i enp1s0 -p udp --dport 51820 -j NOTRACK; iptables -t raw -C OUTPUT -o enp1s0 -p udp --sport 51820 -j NOTRACK 2>/dev/null || iptables -t raw -A OUTPUT -o enp1s0 -p udp --sport 51820 -j NOTRACK; tc qdisc replace dev %i root cake bandwidth 860mbit besteffort || true
PostDown = iptables -D DOCKER-USER -i %i -j ACCEPT || true; iptables -D DOCKER-USER -o %i -j ACCEPT || true; iptables -D FORWARD -i %i -j ACCEPT || true; iptables -D FORWARD -o %i -j ACCEPT || true; iptables -t nat -D POSTROUTING -s 10.0.0.0/24 -o enp1s0 -j MASQUERADE || true; iptables -t mangle -D FORWARD -p tcp --tcp-flags SYN,RST SYN -j TCPMSS --clamp-mss-to-pmtu || true; iptables -t raw -D PREROUTING -i enp1s0 -p udp --dport 51820 -j NOTRACK || true; iptables -t raw -D OUTPUT -o enp1s0 -p udp --sport 51820 -j NOTRACK || true

[Peer]
# desktop-home
PublicKey = <peer public key>
AllowedIPs = 10.0.0.2/32

[Peer]
# phone
PublicKey = <peer public key>
AllowedIPs = 10.0.0.3/32
Then protect and enable it :
sudo chmod 600 /etc/wireguard/wg0.conf
sudo systemctl enable --now wg-quick@wg0
The PostUp line looks scary, but each piece has a reason (and wg-quick runs the hooks with set -e, so anything
that may legitimately fail has to be guarded with || true or a -C check, else the interface is torn down) :
DOCKER-USERfast path : Docker sets theFORWARDpolicy toDROPand inserts about a hundred rules (four per bridge network) that every relayed packet walks through. TheDOCKER-USERchain is evaluated first and is never flushed by Docker, so accepting the tunnel traffic there short-circuits the whole chain. The plainFORWARDrules are a fallback in casewg0comes up before Docker at boot.- NAT : the peers' traffic leaves with the mini PC address (on my machine the rule was already set globally, keeping it here makes the file self-contained).
- TCPMSS clamp : TCP inside the tunnel can carry
1380bytes per segment at most, clamping the MSS on the SYN packets prevents fragmentation and black holes for the relayed connections. NOTRACK: connection tracking is useless for the encrypted UDP flow (WireGuard authenticates every packet itself), this saves a lookup per packet.cake: gives every flow inside the tunnel its own queue and keeps the latency low. Without it, thefq_codelqueue of the physical interface sees the whole tunnel as a single flow, so a big download can starve a video stream or a call.860mbitis what a gigabit link carries once the tunnel overhead is added, it costs nothing measurable.
The DNS pushed to the peers is the tunnel address of the server, 10.0.0.1 : Docker publishes Pi-Hole's port 53
on every address of the host, including this one, so the peers reach Pi-Hole (then Unbound) without any extra route,
and it also works in split tunnel mode since the address is inside the tunnel subnet.
Peers configuration
On each device, the client configuration looks like this :
[Interface]
PrivateKey = <peer private key>
Address = 10.0.0.2/32
DNS = 10.0.0.1
MTU = 1420

[Peer]
PublicKey = <server public key>
Endpoint = 192.168.0.16:51820
# full tunnel : 0.0.0.0/1, 128.0.0.0/1 — split tunnel : 10.0.0.0/24
AllowedIPs = 0.0.0.0/1, 128.0.0.0/1
PersistentKeepalive = 25
[!TIP] A few things I learned the hard way about the peers configuration :
- At home, use the LAN IP address of the server as endpoint (
192.168.0.16:51820), not the public hostname : going through the public IP from inside the LAN makes the router do NAT loopback (hairpin) in software, which cost me about half of the throughput (350/440 Mbit/s instead of 570/860). Easiest is to keep two tunnels on the device : a "home" one with the LAN endpoint and an "away" one with the public hostname.- At home, a full tunnel brings nothing : the traffic leaves through the same router anyway, it only adds encryption and relaying work for the server (and costs about 40 % of the download speed, see VPN connection speed). Use a split tunnel (
AllowedIPslimited to the VPN subnet, here10.0.0.0/24, which contains the DNS address so that the DNS still goes through the tunnel), or simply no tunnel at all with the device DNS pointing to the mini PC : the ad blocking is done at DNS level, it is identical in all cases.0.0.0.0/1, 128.0.0.0/1also disables the kill switch and the DNS leak protection of the Windows client (only a0.0.0.0/0route enables them), so Windows silently falls back to the router DNS if Pi-Hole does not answer within about a second.- Never point a client to an address the server holds on a secondary interface (Wi-Fi, USB adapter), see the warning below.
[!WARNING] Connect the server to the LAN through one interface only. I had the Wi-Fi of the mini PC connected to the same network "just in case", plus a USB Ethernet adapter left over from a test. Linux answers ARP requests for all its addresses on all its interfaces, so the router could deliver traffic for the main address through the Wi-Fi or the USB adapter, NetworkManager detected its own Wi-Fi as an address conflict and dropped the USB adapter address for hours at each DHCP renewal, and the client I had pointed to that address lost its tunnel at random and got a fraction of the throughput when it worked. Disable the Wi-Fi (
sudo nmcli radio wifi off) and unplug what you don't use.
WGDashboard
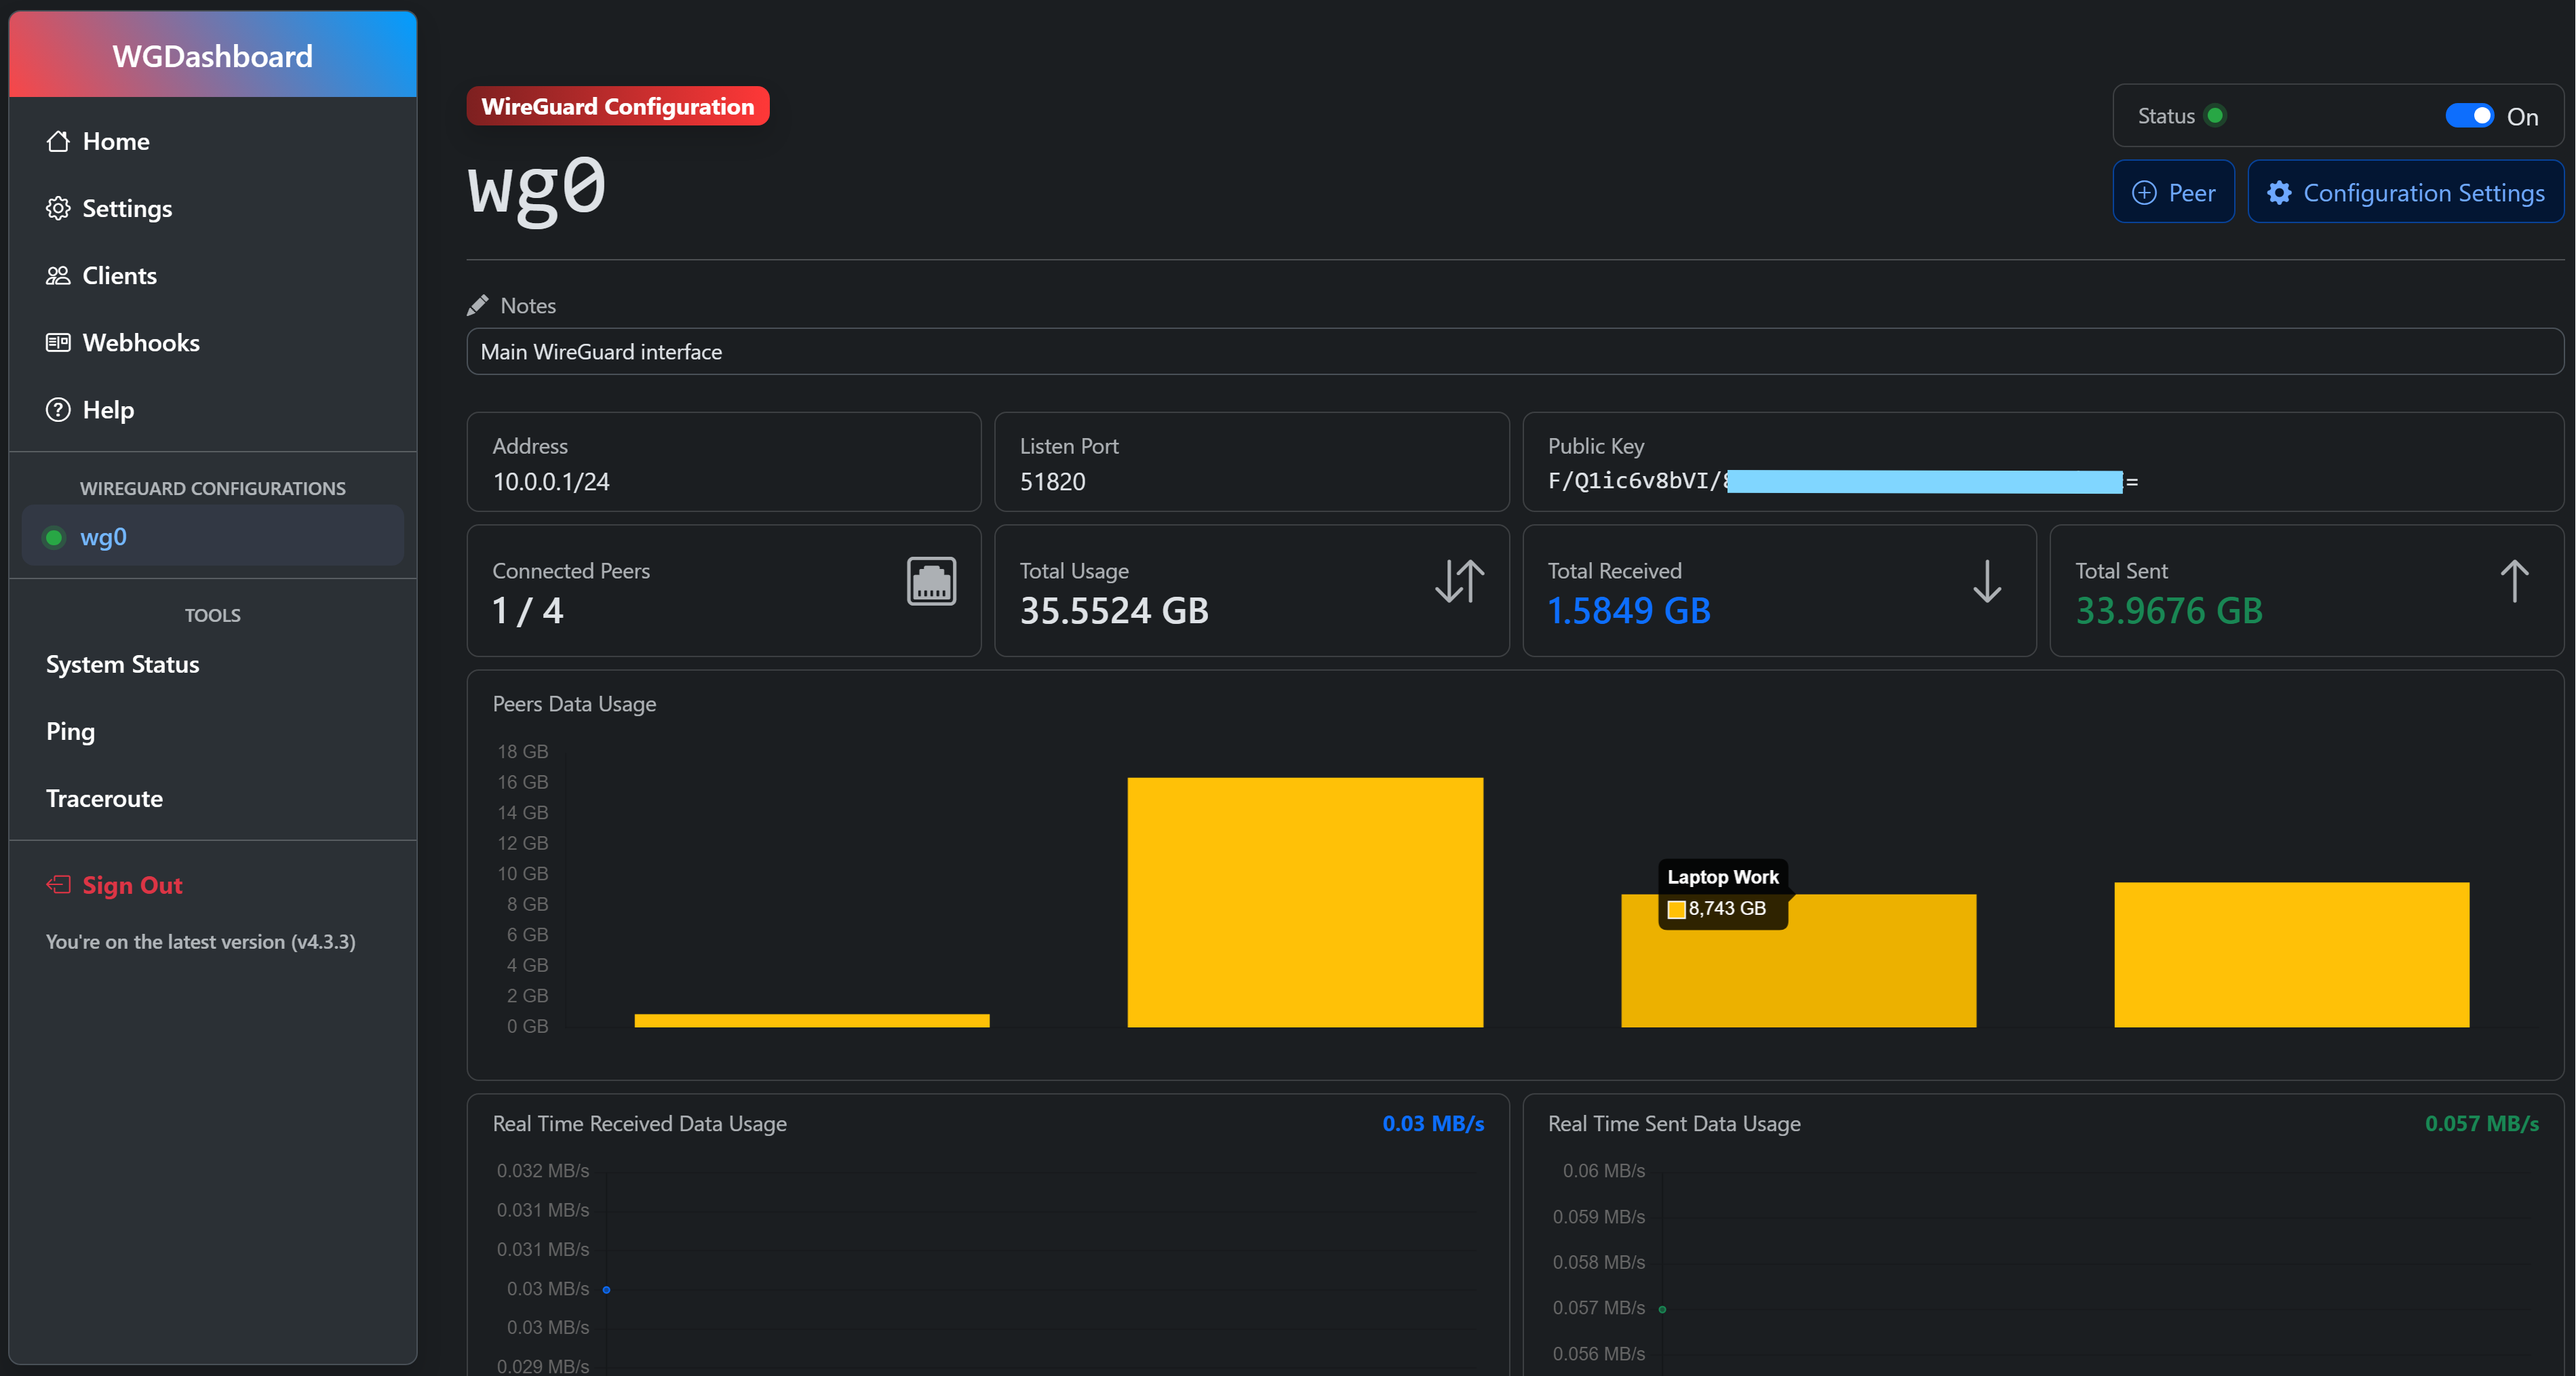
Managing the peers in wg0.conf with an editor works, but a web interface is more comfortable : WGDashboard shows the interfaces, the peers, their last handshake and their traffic, creates a peer with its keys and its QR code, and serves the configuration file to download. It is the replacement for WireGuard UI, which is no longer maintained and which could not be used with WireGuard running on the host.
[!IMPORTANT] The container must share the host's network namespace (
network_mode: host). WireGuard runs on the host, so thewg0interface lives in the host's namespace : a container with its own namespace can read wg0.conf through the bind mount, and will happily list your peers, but it cannot query the interface itself. The symptom is unmistakable : the peers are displayed but always as disconnected, with no handshake and no traffic, whatever their real state.
Two consequences follow from the host namespace, and they are the whole difficulty of this service :
- Traefik can no longer reach it by container name, since the container is on no Docker network. The service points at
the mini PC address instead,
http://192.168.0.16:10086 - the dashboard is reachable directly at that same address, hence bypassing Traefik, the IP whitelist and any authentication middleware. Its own login therefore remains the barrier that covers every path, and it is the reason we do not put PocketID in front of it : that would only protect the nice URL while leaving the direct one open
To close that direct path, app_ip in the [Server] section of wg-dashboard.ini can bind the dashboard to the
gateway address of the private Traefik network
(docker network inspect traefik-private-net --format '{{range .IPAM.Config}}{{.Gateway}}{{end}}') so that only Traefik
and the containers of that network can reach it.
Keep in mind that this address depends on the subnet Docker assigns, and would change if the network were recreated.
[!NOTE] OIDC is not available for the admin dashboard, only for the client side app. The
[OIDC] admin_enablesetting and the/api/oidc/toggleendpoint exist, and theAdminsection of wg-dashboard-oidc-providers.json can be filled, but nothing consumes them :dashboard.pynever instantiates theDashboardOIDCmodule, so no provider is registered, no request is made to the provider, nothing is logged, and no button appears. Don't spend an evening looking for a configuration mistake.The single sign-on documented by the project applies to the client side app (
/client), a self-service portal where people sign in to download the peers assigned to them : fill theClientsection instead, setclient_enable = true, and register the portal URL itself as the callback. The (empty) Clients tab of the admin dashboard lists those portal accounts, not your peers, an empty tab is normal when you are the only user.The
extra_hostsentry of the Compose file is there for that case : in the host namespace the container resolves names through the host resolver, which knows nothing of the private names, so the provider would not even be resolved. See PocketID for the general problem and its other solutions.
Setting up
Create the folder, then copy the docker-compose.yml file from this project's wgdashboard directory into /opt/apps/wgdashboard, and the wgdashboard.yml file from traefik/dynamic into /opt/apps/traefik/dynamic :
sudo mkdir -p /opt/apps/wgdashboard/data
Then add a local DNS record wgdashboard.example.com pointing to the mini PC (see Pi-hole), start the
container (see Run) and open https://wgdashboard.example.com. The default credentials are admin / admin,
change them immediately in the settings, where TOTP can also be enabled.
Your existing peers appear on their own : the dashboard reads the very wg0.conf the interface uses, so nothing has to be imported and nothing is duplicated.
[!WARNING] The dashboard can start and stop the interface, but
wg0is managed bywg-quick@wg0through systemd. Avoid switching it from both sides, otherwise systemd and the dashboard end up with diverging views of what is running.Peers created from the dashboard are written directly into wg0.conf. Keep a copy of that file with your backups : it holds the server's private key, and losing it means every client has to be reconfigured.
Pi-hole
The Compose file will run a Pi-Hole instance which need to be configured.
First, Pi-Hole must accept the queries coming from other interfaces than its own Docker network (the VPN peers, the
LAN) : by default it only answers "local" requests, and "local" for Pi-Hole is the Docker bridge network. The Compose
file sets this once and for all with theFTLCONF_dns_listeningMode: 'all' environment variable (the equivalent of
Settings -> DNS -> Interface settings -> "Permit all origins" in the web UI).
The web UI is reachable at https://pihole.example.com through Traefik : the Compose file does not carry Traefik labels anymore, the router is declared in a file of Traefik's dynamic configuration directory instead (see Traefik routing below), restricted to the local network and the VPN peers.
[!IMPORTANT] Chicken and egg : the private services have no public DNS record (see Domain and subdomains), so
pihole.example.comcan only be resolved by Pi-Hole itself through a local DNS record... which is created in the web UI you cannot reach yet. Until it exists the browser getsNXDOMAIN(or, if a public record for the name still exists, reaches Traefik through the NAT loopback of the router with the public IP as source and gets a403, see IP whitelisting). Create the first record from the command line, it is applied immediately :sudo docker exec pihole pihole-FTL --config dns.hosts '[ "192.168.0.16 pihole.example.com" ]' sudo docker exec pihole nslookup pihole.example.com 127.0.0.1Then make sure the device you use has Pi-Hole as DNS server (
192.168.0.16, see IP settings), flush its cache (ipconfig /flushdnson Windows) and restart the browser.--config dns.hostsreplaces the whole list : to add entries later from the command line, repeat the complete list, or simply use the web UI once it is reachable.
I don't set a Pi-Hole password : authentication is handled in front of it by the reverse proxy, with an OIDC middleware backed by PocketID (see PocketID), and the network segmentation keeps the container out of reach of the applications exposed to the internet. The image generates a random password at first start, remove it (or set yours) with :
sudo docker exec -it pihole pihole setpassword
In Settings -> DNS, untick every public upstream and add Unbound as custom upstream DNS server : 10.2.0.200#53
(its static address in the pihole-net Docker network, see Services definition).
Then we need to add local DNS records so that the domain names can be resolved from VPN or local network (remember the DNS requests of the VPN peers and of the configured devices go through Pi-Hole). We simply need to associate domain names with the internal IP address of the mini PC, so they can be handled by the reverse proxy.
Go to Settings -> Local DNS Records (or repeat the pihole-FTL --config dns.hosts command above with the complete
list) and add a DNS record entry for every subdomain that must only be reachable from the local network or through
VPN :
arcane.example.com                  192.168.0.16
ccteam.example.com                  192.168.0.16
crowdsec.example.com                192.168.0.16
dashboard.example.com               192.168.0.16
dashdot.example.com                 192.168.0.16
ghostfolio.example.com              192.168.0.16
goatcounter.example.com             192.168.0.16
homebox.example.com                 192.168.0.16
lychee.example.com                  192.168.0.16
omnitools.example.com               192.168.0.16
phpmyadmin.example.com              192.168.0.16
pihole.example.com                  192.168.0.16
pocketid.example.com                192.168.0.16
quake.example.com                   192.168.0.16
traefik.example.com                 192.168.0.16
wgdashboard.example.com             192.168.0.16
Add the public services as well (Lychee, Defrag-life, ...), even though they have a public DNS record. Without a local record, a device at home resolves them to the public IP and the traffic loops through the NAT loopback of the router : it costs about half of the throughput (measured in VPN connection speed), and Traefik sees the requests coming from your public IP address instead of the device's one, so they are treated like internet traffic by the IP whitelist and by CrowdSec (a misbehaving device at home could get your whole household banned from your own sites). With a local record, everything stays on the LAN.
[!NOTE] Consequence for the VPN peers away from home : they use Pi-Hole through the tunnel, so these names resolve to
192.168.0.16for them too, which is only reachable with a full tunnel or with192.168.0.0/24added toAllowedIPs. Do that on the away profile only : on the home profile, routing the LAN subnet through the tunnel would send the traffic to your printer or TV through the mini PC.
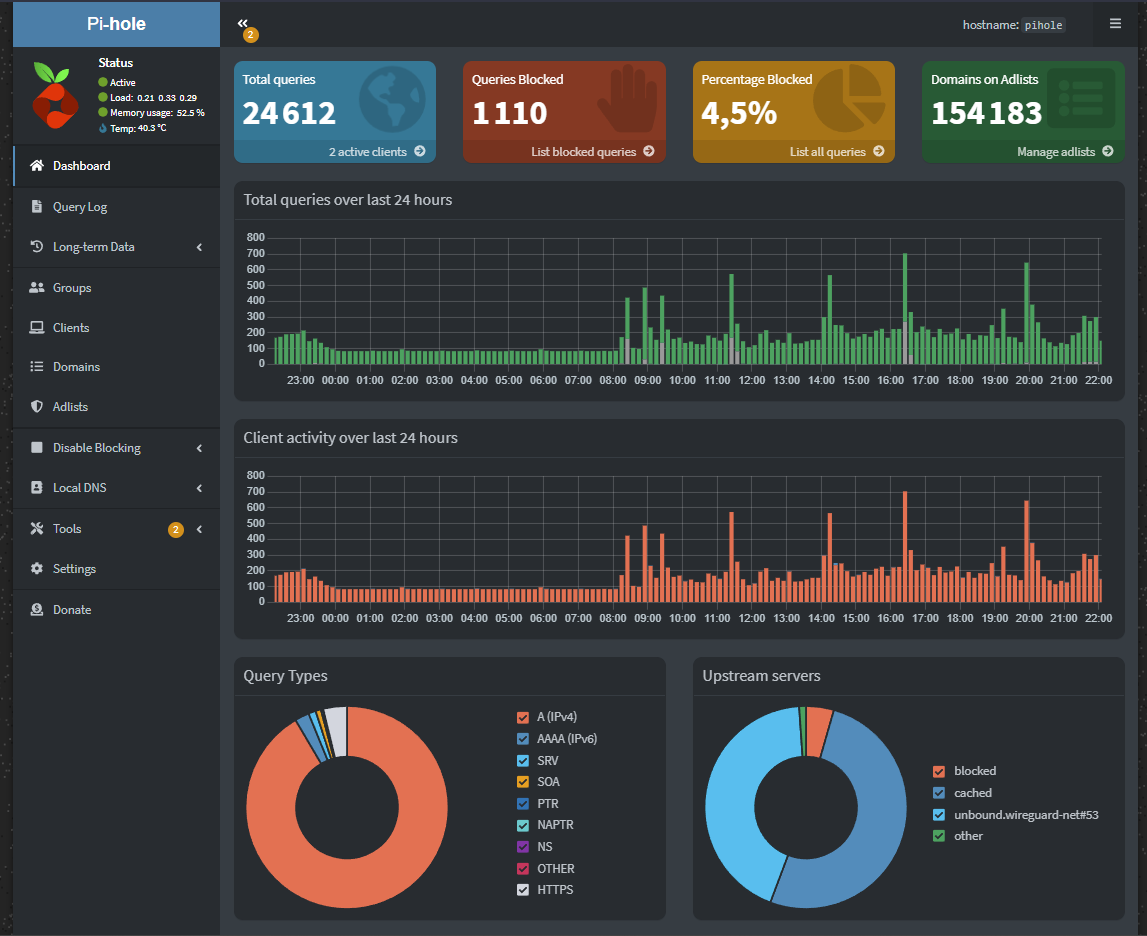
You can also configure rate limiting (default to 1000 queries per minute), domain whitelisting, DNS settings, etc. but I will not go through all Pi-Hole configuration, the default should work just fine.
If it is working you should be able to see activity in the dashboard.
Unbound
The first time you will run Unbound, it may fail because a few files included in the default configuration will be missing (at least in the image version I'm using), indeed the following files are included in the default unbound.conf file (which should have been created correctly in /etc/unbound/unbound.conf) :
- /opt/unbound/etc/unbound/a-records.conf
- /opt/unbound/etc/unbound/srv-records.conf
- /opt/unbound/etc/unbound/forward-records.conf
You could manually create these files (you can find default ones from the Unbound GitHub repository), and then mount them into the Unbound container, before running again the Compose file.
But that way it would run Unbound in forwarder mode, meaning that the DNS server will forward all the queries to Cloudflare. This was my first try and a DNS leak test confirmed that it uses Cloudflare, indeed the default forward-records.conf file includes the following forwarding rules :
forward-addr: 1.1.1.1@853#cloudflare-dns.com
forward-addr: 1.0.0.1@853#cloudflare-dns.com
So, if you want to run Unbound without forwarding, just remove or comment the lines that includes the above files from the unbound.conf file. Do not create any of these files at all and do not bind them in the container, just remove the includes from the unbound.conf file.
A DNS leak test should now show your IP address as DNS server.
[!IMPORTANT] If you use the default forward-records.conf file, Unbound will run in forwarder mode, meaning that it will forward all queries to Cloudflare. To remove the default forwarding to Cloudflare and make your unbound container a recursive-only server, edit the unbound.conf file and remove include of the forward-records.conf file.
Then there are a few settings in unbound.conf that are essential when Unbound runs in a container. I ran for
months with a resolver that returned SERVFAIL for most names that were not already in cache (login.live.com,
www.apple.com, the Twitch video servers, ...), cached names being served fine, which made streams randomly fail to
start and Windows painfully slow at boot when the tunnel was up :
server:
    # the container has no IPv6 connectivity : without this, Unbound keeps trying the IPv6 addresses of the authoritative
    # servers, burns its retry budget and ends up with SERVFAIL ("exceeded the maximum number of sends")
    do-ip6: no
    # 0x20 case randomization breaks with load balanced domains (Microsoft, Akamai, Twitch, ...) that answer differently
    # on each query, Unbound then cannot validate its fallback ("0x20 failed, then got different replies in fallback")
    use-caps-for-id: no
    # 1 is plenty, 5 (debug) formats a huge amount of text for every single query, even when it ends up in /dev/null
    verbosity: 1
    # log the reason of each SERVFAIL to the container output (sudo docker logs unbound)
    log-servfail: yes
    logfile: ""
    use-syslog: no
A quick way to validate such changes without touching the running resolver is to start a throwaway Unbound with the modified file on the same Docker network, and to compare both on names that are not cached :
sudo docker run -d --name unbound-test --network wireguard_net -v /tmp/unbound-test.conf:/opt/unbound/etc/unbound/unbound.conf:ro mvance/unbound:latest
dig @$(sudo docker inspect unbound-test --format '{{range .NetworkSettings.Networks}}{{.IPAddress}}{{end}}') login.live.com
sudo docker logs unbound-test | grep SERVFAIL
sudo docker rm -f unbound-test
With my original file 9 names out of 16 failed, with do-ip6: no alone all 16 succeeded, and use-caps-for-id: no on
top made them faster.
Do not enable log-queries for daily use, Unbound logs a lot.
Configuration files details
Services definition
:page_facing_up: pihole/docker-compose.yml :
services:

  pihole:
    container_name: pihole
    image: pihole/pihole:latest
    restart: unless-stopped
    ports:
      - "53:53/tcp"
      - "53:53/udp"
    environment:
      TZ: "Europe/Zurich"
      FTLCONF_dns_listeningMode: 'all'
    networks:
      pihole-net:
        ipv4_address: 10.2.0.100
      traefik-private-net:
    volumes:
      - "./etc-pihole/:/etc/pihole/"
    cap_add:
      - NET_ADMIN
      - SYS_TIME
      - SYS_NICE

networks:

  pihole-net:
    name: pihole-net
    ipam:
      driver: default
      config:
        - subnet: 10.2.0.0/24

  traefik-private-net:
    name: traefik-private-net
    external: true
:page_facing_up: traefik/dynamic/pihole.yml :
http:
  services:
    pihole:
      loadBalancer:
        servers:
          - url: http://pihole:80

  routers:
    pihole:
      rule: 'Host(`pihole.example.com`)'
      entryPoints:
        - websecure
      tls:
        certResolver: default
      service: pihole
      middlewares:
        - vpn-whitelist@file
        - pihole-auth@file
This Compose file :
- defines the
pihole-netnetwork with the subnet10.2.0.0/24(shared with Unbound) - references the
traefik-private-netTraefik network so that the web UI can be reached through the reverse proxy (the router itself is declared on the Traefik side, see below) - defines the
piholeservice :- publishes port
53(TCP and UDP) on every address of the host, which is what makes Pi-Hole reachable from the LAN (192.168.0.16) and from the VPN peers (10.0.0.1) without any extra rule - sets the timezone and
FTLCONF_dns_listeningMode: 'all'(see Pi-hole) - assigns the static IP address
10.2.0.100 - binds the /etc/pihole folder to keep the configuration and the databases
- adds the
NET_ADMIN,SYS_TIMEandSYS_NICEcapabilities recommended by the Pi-Hole image (DHCP server, time synchronisation, scheduling priority)
- publishes port
- it uses Traefik dynamic config file to :
- define the
piholeservice pointing to the container on port80(reachable by name thanks to the sharedtraefik-private-netnetwork) - define the router matching
pihole.example.comon thewebsecureentrypoint with a Let's Encrypt certificate - restrict the web UI to the local network and the VPN peers with the
vpn-whitelistmiddleware - add a forward-auth middleware
pihole-authin front of it (I use PocketID) to require authentication (see PocketID)
- define the
[!NOTE] Do not lower the MTU of the Docker networks "to fit the tunnel" (I had
com.docker.network.driver.mtu: "1280"on all of them for a long time) : the containers don't need it, MSS clamping and PMTU discovery take care of TCP through the tunnel and DNS answers fit anyway. A small bridge MTU only means more packets for the same data and a dependency on ICMP for the inbound traffic, and back when WireGuard itself ran in a container it forced the kernel to fragment every single encrypted packet.
:page_facing_up: unbound/docker-compose.yml :
services:

  unbound:
    image: "mvance/unbound:latest"
    container_name: unbound
    restart: unless-stopped
    hostname: "unbound"
    volumes:
      - "./unbound:/opt/unbound/etc/unbound/"
    networks:
      pihole-net:
        ipv4_address: 10.2.0.200

networks:

  pihole-net:
    name: pihole-net
    external: true
This Compose file only defines the unbound service, on the same (external) pihole-net network with the static
IP address 10.2.0.200, and binds the configuration folder so that unbound.conf can be edited
(see Unbound). Unbound is not exposed at all, only Pi-Hole talks to it.
:page_facing_up: wgdashboard/docker-compose.yml :
services:

  wgdashboard:
    image: ghcr.io/wgdashboard/wgdashboard:latest
    restart: unless-stopped
    container_name: wgdashboard
    volumes:
      - /etc/wireguard:/etc/wireguard
      - ./data:/data
    network_mode: host
    cap_add:
      - NET_ADMIN
    extra_hosts:
      - "pocketid.example.com:192.168.0.16"
This one is the odd one out : no network and no published port, because network_mode: host puts it in the host's
network namespace, the only way for it to see the live state of wg0 (see WGDashboard). NET_ADMIN
lets it act on the interface, /etc/wireguard is shared with the host so that it edits the very file wg-quick uses,
and data holds its own database and settings. extra_hosts is only useful if you enable the single sign-on of the
client side app.
Traefik routing
:page_facing_up: traefik/dynamic/pihole.yml (to copy into /opt/apps/traefik/dynamic/, the directory watched by the
file provider of traefik.yml) :
http:
  services:
    pihole:
      loadBalancer:
        servers:
          - url: http://pihole:80

  routers:
    pihole:
      rule: 'Host(`pihole.example.com`)'
      entryPoints:
        - websecure
      tls:
        certResolver: default
      service: pihole
      middlewares:
        - vpn-whitelist@docker
        - pihole-auth@file
It declares the pihole service pointing to the container on port 80 (reachable by name thanks to the shared
traefik-private-net network) and the router matching pihole.example.com on the websecure entrypoint with a
Let's Encrypt certificate, exactly what the Traefik labels used to do, but Traefik picks up the file without restarting
anything. The vpn-whitelist middleware keeps the web UI private (local network and VPN peers only).
The pihole-auth middleware is a forward-auth middleware (I use PocketID) to require authentication
(see PocketID).
:page_facing_up: traefik/dynamic/wgdashboard.yml :
http:
  services:
    wgdashboard:
      loadBalancer:
        servers:
          - url: http://192.168.0.16:10086

  routers:
    wgdashboard:
      rule: 'Host(`wgdashboard.example.com`)'
      entryPoints:
        - websecure
      tls:
        certResolver: default
      service: wgdashboard
      middlewares:
        - vpn-whitelist@file
The WGDashboard router is the same, with one difference : its service points at the mini PC address rather than at a container name, since the container has no Docker network of its own. Only the IP whitelist is applied, for the reason explained in WGDashboard.
Run
Once the tunnel is up (see WireGuard), run the three Compose files :
sudo docker-compose -f /opt/apps/pihole/docker-compose.yml up -d
sudo docker-compose -f /opt/apps/unbound/docker-compose.yml up -d
sudo docker-compose -f /opt/apps/wgdashboard/docker-compose.yml up -d
You should end up with the wg0 interface (sudo wg show) and 3 running containers, pihole, unbound and
wgdashboard.
Unbound is not exposed, Pi-Hole is reachable at https://pihole.example.com and WGDashboard
at https://wgdashboard.example.com.
Test the network
DNS resolution
Each service should be resolvable through its subdomain name.
When a user enters the URL in the browser, the browser need to know the IP address corresponding to the domain name, so it can send the queries to. For that it :
- Checks the browser cache (most browsers cache DNS data by default), and use the address corresponding to the provided name if found
- Checks the OS cache and return the address to the browser if found
- Checks the local host table file (usually /etc/hosts on Linux/Mac systems and C: \Windows\System32\Drivers\etc\hosts on Windows) to see if an entry matches the specified name, if so, it will directly return it to the browser
- Invokes the local resolver, on Windows, it is defined at the network adapter level, usually Control Panel > Network and Internet > Network Connections then in the advanced properties of the desired connection (Higher Priority Connection). On Linux/Mac it is usually /etc/resovl.conf. In my Windows system it is automatically configured to point to my router local IP Address. The resolver checks its cache to see if it already has the address for this name. If it does, it returns it immediately to the browser
- Checks the router cache and return the address to the browser if found
- Checks the ISP cache and return the address to the browser if found
- Checks the ISP resolving name server which will call the root DNS servers (root server <--> TLD server <--> Authoritative Name Server) to find the IP address from the DNS server responsible for the domain name
In our case the requests from the local network should reach Pi-hole (directly, or through the router if it really forwards them, see IP settings), so the IP resolving goes through Pi-Hole and Unbound. See Network flow later below for a more graphical representation of the network flow.
You can first test that each service is resolvable using nslookup command, i.e. :
C:\Users\Yann39>nslookup myapp.example.com
Server :   pi.hole
Address:  10.2.0.100

Name :     myapp.example.com
Address:  192.168.0.16
If the answering server is the router instead of Pi-Hole, the router does not forward the queries
(see IP settings).
If names resolve fine once cached but fail (SERVFAIL) or take a second the first time, the problem is on Unbound's
side, see the settings in Unbound.
Then you can look for DNS leak using any online checker, to determine which DNS servers the browser is using to resolve domain names, it should end up showing your public IP address, not Cloudflare or Google, etc. as we use Unbound (see Unbound for configuration).
You could also use tools like Wireshark to look closely at DNS resolution or to confirm that the traffic is
effectively going through the VPN when connected (in that case the "Protocol" column should be WireGuard for all
queries). I will not go through a Wireshark tutorial, but it is a very useful and interesting tool for viewing what
going on in your network.
Reachability
To verify that the network is set up correctly, we can simply try to access some services and see if we can reach them or not, from different device and connection type.
[!NOTE] I simply temporarily added a
CNAMErecord in my domain name registrar for the services to be checked, to point to my DDNS for testing the IP whitelisting, Traefik will not route request if you try to access a service via the public IP address.
For example if we try to access a service that must be accessible only through VPN (and local network), here are the results :
| Device | Connection | VPN status | Public IP | Remote address (request header) | Traefik | Response |
|---|---|---|---|---|---|---|
| PC | cable | :red_circle: off | 144.12.117.3 | 192.168.0.16 | 192.168.0.11 | :heavy_check_mark: 200 OK |
| PC | cable | :green_circle: on | 144.12.117.3 | 192.168.0.16 | 192.168.0.11 | :heavy_check_mark: 200 OK |
| Mobile | wifi | :red_circle: off | 144.12.117.3 | 192.168.0.16 | 192.168.0.12 | :heavy_check_mark: 200 OK |
| Mobile | wifi | :green_circle: on | 144.12.117.3 | 192.168.0.16 | 172.22.0.1 | :heavy_check_mark: 200 OK |
| Mobile | 4G | :red_circle: off | 81.165.84.189 | 144.12.117.3 | 81.165.84.189 | :x: 403 Forbidden |
| Mobile | 4G | :green_circle: on | 144.12.117.3 | 192.168.0.16 | 172.22.0.1 | :heavy_check_mark: 200 OK |
192.168.0.16is the mini PC's private IP address144.12.117.3is the router's public IP address192.168.0.11is the desktop PC's local IP address192.168.0.12is the mobile phone's local IP address172.22.0.1is the Traefik Bridge network IP address81.165.84.189is the public IP address on the mobile 4G network
These are expected results, we can see that the service is reachable from the local network and from anywhere when using the VPN, and it is not accessible outside the local network if we don't use the VPN.
We can also confirm this by looking at the Traefik logs (you have to set level to debug in traefik.yml file to
see the debug logs) which shows that the vpn-whitelist middleware blocks any IP address that is not whitelisted :
level=debug msg="Authentication succeeded" middlewareType=BasicAuth middlewareName=auth@docker
level=debug msg="Accepting IP 192.168.0.16" middlewareName=vpn-whitelist@docker middlewareType=IPWhiteLister
level=debug msg="Accepting IP 172.22.0.1" middlewareName=vpn-whitelist@docker middlewareType=IPWhiteLister
level=debug msg="Rejecting IP 81.165.84.189: \"81.165.84.189\" matched none of the trusted IPs" middlewareName=vpn-whitelist@docker middlewareType=IPWhiteLister
VPN connection speed
To verify that the VPN is not killing the connection speed, first run an online speed test with and without the tunnel, from a wired device (Wi-Fi adds its own variability). These are my results with a symmetric gigabit fiber line, from the home PC :
| Test (home PC, Ethernet) | Download / upload (Mbit/s) |
|---|---|
| No VPN | 920 / 920 |
| Split tunnel (only the VPN subnet routed) | 910 / 920 |
| Full tunnel, endpoint = LAN IP of the server | 570 / 860 |
| Full tunnel, endpoint = public hostname (router hairpin) | 350 / 440 |
The upload is fine, the hairpin case is explained in Peers configuration, and the download ceiling took me an evening of measurements to understand. Here is what I learned, so you don't have to.
Configure MTU
Most Ethernet connections have an MTU of 1500. You can confirm this on your network by running the ping command
with the right parameters :
ping www.google.com -f -l 1472
ping www.google.com -f -l 1473
1472 will work and 1473 will warn that the packet needs to be fragmented, because the IPv4 header is 20 bytes
and the ICMP header is 8 bytes (1472 + 20 + 8 = 1500).
WireGuard adds its own headers, 60 bytes on IPv4 and 80 bytes on IPv6, so the tunnel MTU must be 1500 - 80 = 1420
(the wg-quick default).
Beware of tools defaulting to 1450 (WireGuard UI did) : that produces 1510 bytes packets that get fragmented, and a
fragmented tunnel is dramatically slow (a few percent of the line rate).
Set 1420 on the server and on every peer, and don't go lower : a smaller MTU only means more packets for the same
data.
Measure where the limit is
Speed tests only give the end result. To know which part of the path limits, use iPerf 3 between the peer and
the server, in both directions, in UDP and in TCP.
Install iperf3 on the server (sudo apt install iperf3) and on the client (Windows builds are available on iperf.fr),
run iperf3 -s on the client (allow it in the Windows firewall), then from the server, with the tunnel up (10.0.0.2
being the tunnel address of the peer and 192.168.0.12 its LAN address) :
# reference : LAN, no tunnel, both directions
iperf3 -c 192.168.0.12 -t 10 -P 4
iperf3 -c 192.168.0.12 -t 10 -P 4 -R
# through the tunnel, UDP at a fixed rate : does the path carry the packets at all ?
iperf3 -c 10.0.0.2 -u -b 900M -l 1350 -t 10
# through the tunnel, TCP : what does a real transfer get ?
iperf3 -c 10.0.0.2 -t 10 -P 4
iperf3 -c 10.0.0.2 -t 10 -P 4 -R
And while a test runs, watch the receive drops of the network card and the state of the TCP connections on the server :
ethtool -S enp1s0 | grep rx_missed      # before / after : frames the card dropped because its receive ring was full
ss -ti dst 10.0.0.2                     # rtt, cwnd and retrans of the running connections
My results on the N100 :
- LAN without tunnel : 940 Mbit/s both ways, zero retransmission. Card, cable, router and PC are fine.
- Tunnel, UDP : 900+ Mbit/s both ways with 0.00 % loss at line rate. The whole path, encryption on the N100 and decryption on the PC included, carries the full gigabit.
- Tunnel, TCP, upload (peer to internet) : 860 to 930 Mbit/s.
- Tunnel, TCP, download (internet to peer) : 550 to 600 Mbit/s, whatever I tried, with
rx_missedclimbing on the server (50 to 1000 per second) while the CPU never went above 70 % on the busiest core.
So the limit is neither the CPU nor WireGuard, it is the network card. The Realtek RTL8168H of this mini PC (r8169
driver) has a single queue, a single interrupt handled by a single core, and a receive ring of 256 descriptors
(hardware maximum), which holds about 3 ms of gigabit traffic.
When the card receives and transmits at ~600 Mbit/s at the same time, which is exactly what relaying a download
through the tunnel does, the ring overflows during the small scheduling gaps of the receive path, and the dropped frames
make the TCP senders on the internet back off. "Polite" senders (speed test servers) settle around 560 Mbit/s,
aggressive ones (public iPerf servers with 10 Gbit/s uplinks) push ~850 Mbit/s through at the price of tens of thousands
of retransmissions.
The upload is not affected because the plaintext sent out benefits from segmentation offload (far fewer packets to
handle), and UDP is not affected because it does not react to drops.
For the record, here is what does not move that ceiling (I measured each one) : pinning the card interrupt to a
dedicated core and steering the rest with RPS, interrupt coalescing (receive coalescing even multiplied the drops by
30), threaded NAPI with real-time priority, real-time ksoftirqd, a bigger NAPI budget, disabling Ethernet flow
control, TSO/GSO, cake on the tunnel interface, an ingress shaper, a fast path in iptables. Some of them lower the CPU
usage, none of them changes the size of the receive ring.
What does help :
- Don't use a full tunnel at home, see Peers configuration : a split tunnel, or no tunnel at all with the DNS pointing to Pi-Hole, gives the same ad blocking at 920 Mbit/s. Away from home, the remote connection is the limit anyway.
- If you really want line rate through the tunnel, the fix is hardware : a multi-queue network card (for example an Intel i226 on an M.2 A+E adapter, in place of the unused Wi-Fi card, brings 4 queues and receive rings up to 4096 descriptors).
Network card settings
Two settings of the r8169 driver are worth changing anyway, they lower the CPU cost of the upload and of the LAN
traffic. Put them as post-up commands of the interface in /etc/network/interfaces so that they survive a reboot :
iface enp1s0 inet dhcp
    # the driver keeps scatter-gather and TCP segmentation offload off by default because of old reports of transmit timeouts, they work fine on the RTL8168H
    post-up ethtool -K enp1s0 sg on tso on gso on || true
    # one interrupt per transmitted packet by default : coalesce them (but do NOT coalesce the receive side, it makes the receive drops worse)
    post-up ethtool -C enp1s0 tx-usecs 120 tx-frames 16 || true
If dmesg ever shows NETDEV WATCHDOG for the interface, remove the first line.
Network flow
For the following examples, we will consider that the user enters http://myapp.example.com in the browser for the first time (no DNS record found in cache).
Without VPN
Here is what happen when you try to reach a service which is open to the internet, without using any VPN, from your local network holding your homelab (on the left), or from any other location (on the right) :
| From local network | From outside local network |
|---|---|

|
|
From the local network (left), Pi-Hole answers with its local DNS record (yellow dotted line), so the browser gets the mini PC's internal IP and reaches the reverse proxy directly on the LAN, without going through the public IP (no port forwarding, no NAT loopback). From any other location (right), the name is resolved publicly through the client's DNS resolver and the request reaches the mini PC on port 80 (HTTP) after being port forwarded by the ISP router. In both cases the reverse proxy redirects the request to port 443 (HTTPS) thanks to the HTTPS redirect middleware, which finally routes it to the target application (red line).
With VPN
If you try to reach the service through the WireGuard VPN, the flow will look like the following :
flowchart TB
    style HOSTING_PROVIDER fill: #4d683b
    style DDNS_PROVIDER fill: #69587b
    style INTERNET_SERVICE_PROVIDER fill: #205566
    style SERVER_DEVICE fill: #665151
    style CONTAINER_ENGINE fill: #664343
    style TRAEFIK_CONTAINER fill: #663535
    style PIHOLE_CONTAINER fill: #663535
    style UNBOUND_CONTAINER fill: #663535
    style WIREGUARD_HOST fill: #663535
    style MYAPP_CONTAINER fill: #663535
    style PIHOLE_DNS_RECORDS fill: #806030
    style TRAEFIK_ROUTER fill: #806030
    style TRAEFIK_MIDDLEWARE fill: #806030
    style VPN_CLIENT fill: #105040
    DOMAIN(example.com)
    SUBDOMAIN_MYAPP(myapp.example.com)
    SUBDOMAIN_WIREGUARD(wireguard.example.com)
    DDNS(myddns.ddns.net)
    ROUTER_PUBLIC_IP[public IP]
    ROUTER_PORT51820{{51820/udp}}
    WIREGUARD_PORT{{51820/udp}}
    ROUTER_DNS[DNS 1]
    DOCKER_PIHOLE_PORT53{{53/udp}}
    DOCKER_TRAEFIK_PORT443{{443/tcp}}
    DOCKER_TRAEFIK_PORT80{{80/tcp}}
    DOCKER_MYAPP_PORT{{port/tcp}}
    DOCKER_UNBOUND_PORT53{{53/udp}}
    TRAEFIK_ROUTER_MYAPP(myapp.example.com)
    TRAEFIK_MIDDLEWARE_REDIRECT(HTTPS redirect)
    TRAEFIK_MIDDLEWARE_WHITELIST(IP whitelist)
    ROOT_DNS_SERVERS[Root DNS servers]
    PIHOLE_DNS_MYAPP(myapp.example.com)

    subgraph VPN_CLIENT[VPN CLIENT]
        WIREGUARD_CLIENT_ENDPOINT[Endpoint]
        WIREGUARD_CLIENT_DNS[DNS]
    end

    subgraph HOSTING_PROVIDER[DOMAIN NAME REGISTRAR]
        DOMAIN
        SUBDOMAIN_MYAPP
        SUBDOMAIN_WIREGUARD
    end

    subgraph DDNS_PROVIDER[DYNAMIC DNS PROVIDER]
        DDNS
    end

    subgraph INTERNET_SERVICE_PROVIDER[INTERNET SERVICE PROVIDER]
        ROUTER_PUBLIC_IP
        ROUTER_PORT51820
        ROUTER_DNS
    end

    subgraph SERVER_DEVICE[MINI PC]
        subgraph CONTAINER_ENGINE[DOCKER]
            subgraph MYAPP_CONTAINER[MYAPP CONTAINER]
                DOCKER_MYAPP_PORT
            end

            subgraph UNBOUND_CONTAINER[UNBOUND CONTAINER]
                DOCKER_UNBOUND_PORT53
            end

            subgraph PIHOLE_CONTAINER[PIHOLE CONTAINER]
                DOCKER_PIHOLE_PORT53
                subgraph PIHOLE_DNS_RECORDS[LOCAL DNS RECORDS]
                    PIHOLE_DNS_MYAPP
                end
            end

            subgraph TRAEFIK_CONTAINER[TRAEFIK CONTAINER]
                DOCKER_TRAEFIK_PORT443
                DOCKER_TRAEFIK_PORT80

                subgraph TRAEFIK_ROUTER[TRAEFIK HTTP ROUTER]
                    TRAEFIK_ROUTER_MYAPP
                end

                subgraph TRAEFIK_MIDDLEWARE[TRAEFIK MIDDLEWARE]
                    TRAEFIK_MIDDLEWARE_REDIRECT
                    TRAEFIK_MIDDLEWARE_WHITELIST
                end
            end

        end

        subgraph WIREGUARD_HOST[WIREGUARD - on the host]
            WIREGUARD_PORT
        end

    end

    CLIENT((client)) --> VPN_CLIENT
    WIREGUARD_CLIENT_ENDPOINT --> SUBDOMAIN_WIREGUARD
    WIREGUARD_CLIENT_DNS -->|Server tunnel address| DOCKER_PIHOLE_PORT53
    VPN_CLIENT -->|" http://myapp.example.com "| BROWSER
    BROWSER((browser)) --> ROUTER_PUBLIC_IP
    DOMAIN -->|subdomain| SUBDOMAIN_MYAPP
    DOMAIN -->|subdomain| SUBDOMAIN_WIREGUARD
    SUBDOMAIN_MYAPP -->|CNAME| DDNS
    SUBDOMAIN_WIREGUARD -->|CNAME| DDNS
    DDNS -->|DynDNS| ROUTER_PUBLIC_IP
    ROUTER_PUBLIC_IP --> ROUTER_PORT51820
    ROUTER_PORT51820 ----->|port forward| WIREGUARD_PORT
    PIHOLE_DNS_MYAPP -->|mini PC internal IP| DOCKER_TRAEFIK_PORT80
    DOCKER_TRAEFIK_PORT443 --> TRAEFIK_ROUTER
    DOCKER_TRAEFIK_PORT80 --> TRAEFIK_ROUTER
    TRAEFIK_ROUTER_MYAPP --> TRAEFIK_MIDDLEWARE_REDIRECT
    TRAEFIK_MIDDLEWARE_REDIRECT --> DOCKER_TRAEFIK_PORT443
    TRAEFIK_MIDDLEWARE_REDIRECT --> TRAEFIK_MIDDLEWARE_WHITELIST
    TRAEFIK_MIDDLEWARE_WHITELIST --> DOCKER_MYAPP_PORT
    ROUTER_DNS <---->|mini PC static IP| DOCKER_PIHOLE_PORT53
    DOCKER_PIHOLE_PORT53 <-->|DNS| DOCKER_UNBOUND_PORT53
    UNBOUND_CONTAINER <------> ROOT_DNS_SERVERS
    linkStyle 0 stroke-width: 4px, stroke: red
    linkStyle 1 stroke-width: 4px, stroke: yellow, stroke-dasharray: 5
    linkStyle 2 stroke-width: 4px, stroke: yellow, stroke-dasharray: 5
    linkStyle 3 stroke-width: 4px, stroke: red
    linkStyle 4 stroke-width: 4px, stroke: red
    linkStyle 5 stroke-width: 4px, stroke: yellow, stroke-dasharray: 5
    linkStyle 6 stroke-width: 4px, stroke: yellow, stroke-dasharray: 5
    linkStyle 7 stroke-width: 4px, stroke: yellow, stroke-dasharray: 5
    linkStyle 8 stroke-width: 4px, stroke: yellow, stroke-dasharray: 5
    linkStyle 9 stroke-width: 4px, stroke: yellow, stroke-dasharray: 5
    linkStyle 10 stroke-width: 4px, stroke: red
    linkStyle 11 stroke-width: 4px, stroke: red
    linkStyle 12 stroke-width: 4px, stroke: red
    linkStyle 13 stroke-width: 4px, stroke: red
    linkStyle 14 stroke-width: 4px, stroke: red
    linkStyle 15 stroke-width: 4px, stroke: red
    linkStyle 16 stroke-width: 4px, stroke: red
    linkStyle 17 stroke-width: 4px, stroke: red
    linkStyle 18 stroke-width: 4px, stroke: red
    linkStyle 20 stroke-width: 4px, stroke: yellow, stroke-dasharray: 5
    linkStyle 21 stroke-width: 4px, stroke: yellow, stroke-dasharray: 5
Here, first the client needs to connect to the VPN server through his preferred VPN client. The request for VPN connection reaches the mini PC on UDP port 51820 (VPN port) after being routed by the CNAME record to our dynamic DNS and then port forwarded by our router.
The DNS resolving always go through Pi-Hole and Unbound (yellow dotted line), to resolve the VPN server and the application.
The request for the application is handled by Pi-Hole DNS local record which route it to the mini PC IP address, to be handled by the reverse proxy, and is then redirected to port 443 (HTTPS) thanks to the HTTPS redirect middleware, which finally route it to the target application (red line).
If in any way the request arrives to Traefik with an unauthorized IP address, it will be rejected thanks to the IP whitelist middleware.
Install services
PocketID
We will use PocketID to add a single sign-on in front of the services that don't have a proper authentication of their own (Pi-Hole, the Traefik dashboard), and as identity provider for the services that support OpenID Connect natively (Arcane, Grafana, ...).
PocketID is a small self-hosted OpenID Connect (OIDC) provider with a twist : users don't have passwords, they authenticate with passkeys only (a hardware key, or the passkey manager of the phone, the browser or a password manager). Nothing to remember, nothing to phish, and one login for every service.
There are two ways to plug a service on it :
- services that speak OIDC natively (Arcane, Grafana, ...) get their own OIDC client in PocketID and show a "login with PocketID" button
- services that don't (Pi-Hole, the Traefik dashboard) are put behind the traefik-oidc-auth Traefik plugin : a middleware that redirects the browser to PocketID, checks the token it comes back with and keeps a session cookie, so that the service behind never sees an unauthenticated request
Here is an overview of the network flow when a service is protected by the middleware :
flowchart LR
    style INCOMING_REQUEST fill: #205566
    style TRAEFIK_CONTAINER fill: #663535
    style APP_CONTAINER fill: #663535
    style POCKETID_CONTAINER fill: #663535
    style TRAEFIK_ROUTER fill: #806030
    style TRAEFIK_MIDDLEWARE fill: #806030
    style SERVER_DEVICE fill: #665555
    style CONTAINER_ENGINE fill: #664545
    DOCKER_TRAEFIK_PORT443{{443/tcp}}
    DOCKER_TRAEFIK_PORT80{{80/tcp}}
    DOCKER_APP_PORT{{80/tcp}}
    DOCKER_POCKETID_PORT{{1411/tcp}}
    TRAEFIK_ROUTER_APP(pihole.example.com)
    TRAEFIK_ROUTER_POCKETID(pocketid.example.com)
    TRAEFIK_MIDDLEWARE_REDIRECT(HTTPS redirect)
    TRAEFIK_MIDDLEWARE_IP_WHITELIST(IP whitelist)
    TRAEFIK_MIDDLEWARE_OIDC(OIDC auth\npihole-auth)
    INCOMING_REQUEST((INCOMING\nREQUEST))
    INCOMING_REQUEST --> DOCKER_TRAEFIK_PORT443
    INCOMING_REQUEST --> DOCKER_TRAEFIK_PORT80

    subgraph SERVER_DEVICE[MINI PC]
        subgraph CONTAINER_ENGINE[DOCKER]
            subgraph APP_CONTAINER[PI-HOLE CONTAINER]
                DOCKER_APP_PORT
            end

            subgraph POCKETID_CONTAINER[POCKETID CONTAINER]
                DOCKER_POCKETID_PORT
            end

            subgraph TRAEFIK_CONTAINER[TRAEFIK CONTAINER]
                DOCKER_TRAEFIK_PORT443 --> TRAEFIK_ROUTER
                DOCKER_TRAEFIK_PORT80 --> TRAEFIK_ROUTER

                subgraph TRAEFIK_ROUTER[TRAEFIK HTTP ROUTERS]
                    TRAEFIK_ROUTER_APP
                    TRAEFIK_ROUTER_POCKETID
                end

                subgraph TRAEFIK_MIDDLEWARE[TRAEFIK MIDDLEWARES]
                    TRAEFIK_MIDDLEWARE_REDIRECT
                    TRAEFIK_MIDDLEWARE_IP_WHITELIST
                    TRAEFIK_MIDDLEWARE_OIDC
                end

                TRAEFIK_ROUTER_APP --> TRAEFIK_MIDDLEWARE_REDIRECT
                TRAEFIK_MIDDLEWARE_REDIRECT --> TRAEFIK_MIDDLEWARE_IP_WHITELIST
                TRAEFIK_MIDDLEWARE_REDIRECT -.-> DOCKER_TRAEFIK_PORT443
                TRAEFIK_MIDDLEWARE_IP_WHITELIST --> TRAEFIK_MIDDLEWARE_OIDC
                TRAEFIK_MIDDLEWARE_OIDC -->|authenticated| DOCKER_APP_PORT
                TRAEFIK_MIDDLEWARE_OIDC -.->|not authenticated : browser redirected to the login page| TRAEFIK_ROUTER_POCKETID
                TRAEFIK_MIDDLEWARE_OIDC -.->|token validation through the Docker network| DOCKER_POCKETID_PORT
                TRAEFIK_ROUTER_POCKETID --> DOCKER_POCKETID_PORT
            end

        end
    end
Setting up
Create the folders and the encryption key (PocketID encrypts its secrets at rest with it : keep that file with your
backups, without it the database is unusable).
The container runs as user 1000:1001 (see the .env file), so give it the ownership of the data folder and of the
key :
sudo mkdir -p /opt/apps/pocketid/data
openssl rand -base64 32 | sudo tee /opt/apps/pocketid/encryption_key > /dev/null
sudo chown -R 1000:1001 /opt/apps/pocketid/data /opt/apps/pocketid/encryption_key
sudo chmod 600 /opt/apps/pocketid/encryption_key
Then :
- copy the .env and docker-compose.yml files from this project's pocketid directory into the /opt/apps/pocketid directory, and adapt the .env file to your domain
- copy the pocketid.yml file from this project's traefik/dynamic directory into the /opt/apps/traefik/dynamic directory
- declare the
traefik-oidc-authplugin in the traefik.yml static configuration (see below) and restart Traefik, plugins are downloaded when it starts
Run the Compose file (see Run), then open https://pocketid.example.com : on first start the setup page
(/setup) creates the administrator account and registers its first passkey.
Now create one OIDC client per service to protect (OIDC Clients -> Add) :
- for a service put behind the Traefik middleware, the callback URL is the service URL followed by
/oidc/callback(the defaultCallbackUriof the plugin), for examplehttps://pihole.example.com/oidc/callback, and PKCE enabled. Copy the generated client ID and secret into theClientId/ClientSecretfields of the corresponding middleware in pocketid.yml, and give the middleware a random 32 charactersSecret(openssl rand -base64 48 | tr -dc 'A-Za-z0-9' | head -c 32; echo) : this one is not a PocketID secret, it is the key the plugin uses to encrypt its own session cookie. The plugin expects exactly 32 characters, and each middleware must have its own. Traefik picks up the change without restart - for a service with native OIDC support, use the callback URL it documents, and disable PKCE on the PocketID side
if the application does not send a
code_challenge(a confidential client is protected by its secret anyway). Some applications ask for each endpoint separately instead of an issuer URL : the authorization URL is always the public one (https://pocketid.example.com/authorize, the browser follows it), while the token and user info URLs are called by the container itself. They can be the internal ones (http://pocketid:1411/api/oidc/tokenandhttp://pocketid:1411/api/oidc/userinfo), or the public ones thanks to the alias and thepocketid-whitelistmiddleware described below (this is what Grafana does) - most OIDC libraries, however, verify that the issuer announced by the provider matches the URL they queried
(Homebox and its
go-oidcfor instance), so they cannot use the internal URL at all : queryinghttp://pocketid:1411returnshttps://pocketid.example.comas issuer and they refuse. Those applications must use the public issuer URL, which means their container has to reach it. Two small additions make that work, and they serve every future application :- Traefik carries a network alias with the provider's public name on the private network (see Service definition), so that the containers resolve it to Traefik itself, without any hard coded IP address and without depending on Pi-Hole for the container DNS
- the PocketID router uses the
pocketid-whitelistmiddleware instead ofvpn-whitelist: same ranges plus the private Docker network, so that a container is allowed to fetch the discovery document and to exchange the token. The public Docker network is deliberately left out, an application exposed to the internet must not reach the provider this way
flowchart LR
    APP[application container] -->|1 . resolves pocketid.example.com| DNS[[Docker DNS : alias on Traefik]]
    APP -->|2 . HTTPS, source 172.21.x.x| TRAEFIK[Traefik]
    TRAEFIK -->|3 . pocketid-whitelist accepts the private network| POCKETID[PocketID]
Finally, to protect a service with the middleware, add it to the middlewares list of its router, after the IP
whitelist, as done for Pi-Hole :
      middlewares:
        - vpn-whitelist@file
        - pihole-auth@file
[!NOTE] The
pocketidrouter is itself behind thevpn-whitelistmiddleware because every service I protect with it is only reachable from the local network or the VPN. If one day a public service is put behind the middleware, the login page must be reachable from the internet too : remove the whitelist from thepocketidrouter only, the login page is designed to be public (passkeys cannot be brute-forced or phished). PocketID itself stays on the private network (see Network segmentation).
Details
Service definition
:page_facing_up: docker-compose.yml :
services:

  pocketid:
    image: ghcr.io/pocket-id/pocket-id:v2
    container_name: pocketid
    restart: unless-stopped
    env_file: .env
    volumes:
      - ./data:/app/data
      - /opt/apps/pocketid/encryption_key:/opt/pocket-id/encryption_key:ro
    networks:
      - pocketid-net
      - traefik-private-net

networks:

  pocketid-net:
    name: pocketid-net

  traefik-private-net:
    name: traefik-private-net
    external: true
:page_facing_up: pocketid.yml :
http:
  services:
    pocketid:
      loadBalancer:
        servers:
          - url: http://pocketid:1411

  routers:
    pocketid:
      rule: 'Host(`pocketid.example.com`)'
      entryPoints:
        - websecure
      tls:
        certResolver: default
      service: pocketid
      middlewares:
        - vpn-whitelist@file

  middlewares:
    traefik-auth:
      plugin:
        traefik-oidc-auth:
          Secret: "<secret>"
          Provider:
            Url: "http://pocketid:1411/"
            ClientId: "<oidc_client_id>"
            ClientSecret: "<oidc_client_secret>"
            UsePkce: true
          Scopes: [ "openid", "profile", "email" ]
    pihole-auth:
      plugin:
        traefik-oidc-auth:
          Secret: "<secret>"
          Provider:
            Url: "http://pocketid:1411/"
            ClientId: "<oidc_client_id>"
            ClientSecret: "<oidc_client_secret>"
            UsePkce: true
          Scopes: [ "openid", "profile", "email" ]
:page_facing_up: traefik.yml (plugin declaration, in the static configuration) :
experimental:
  plugins:
    traefik-oidc-auth:
      moduleName: "github.com/sevensolutions/traefik-oidc-auth"
      version: "v0.18.0"
Things to notice :
- PocketID's data (SQLite database, uploaded logos) lives in the data folder, and the encryption key is mounted read-only from the host
- the settings come from the .env file (see Environment variables)
- it runs in its own network (
pocketid-net) but must also share the same network as Traefik (traefik-private-net), both to be reachable by the reverse proxy and so that the plugin can talk to it directly by container name - the Traefik dynamic config file :
- creates a service which will point to our container application running on port
1411 - creates an HTTP router that will match
pocketid.example.comURL on ourwebsecureentrypoint to point to our service - assigns the
vpn-whitelistmiddleware so that the traffic will be restricted to allowed IPs only (application reachable only from local network or through VPN) - adds a TLS configuration that will use our
defaultcertificates resolver, so it can generate Let's encrypt certificates - defines one middleware per protected service (
traefik-authfor the Traefik dashboard,pihole-authfor Pi-Hole), each with its own OIDC client and session, all pointing to PocketID through the internal URLhttp://pocketid:1411/: the token exchange stays inside the Docker network instead of looping through the reverse proxy
- creates a service which will point to our container application running on port
- the plugin itself is declared once in the static configuration, Traefik downloads it from its plugin catalog at start
Environment variables
:page_facing_up: .env :
APP_URL=https://pocketid.example.com
ENCRYPTION_KEY_FILE=/opt/pocket-id/encryption_key
# These variables are optional but recommended to review:
TRUST_PROXY=true
MAXMIND_LICENSE_KEY=
PUID=1000
PGID=1001
APP_URLis the public URL, it is also the OIDC issuer written in every token, so it must match the router's host exactly- there is no
INTERNAL_APP_URLhere on purpose : it makes the discovery document advertise the token and userinfo endpoints ashttp://pocketid:1411/..., for every client and whatever URL the document was fetched from. Clients whose library refuses plain HTTP (CrowdSec Web UI) then break on the token exchange. With the network alias andpocketid-whitelist, the containers reach the public HTTPS endpoints directly, so it is no longer needed ENCRYPTION_KEY_FILEpoints to the key mounted read-only in the containerTRUST_PROXYmakes PocketID take the client IP addresses from the headers set by Traefik (audit log, rate limiting), which is required behind a reverse proxyMAXMIND_LICENSE_KEYis optional, with a free MaxMind license key the audit log shows where the logins come fromPUID/PGIDare the user and group the application runs as, hence the ownership of the data folder and of the key
Run
Finally, simply run the Compose file :
sudo docker-compose -f /opt/apps/pocketid/docker-compose.yml up -d
You should end-up with a running pocketid container.
It should also have generated the needed Let's Encrypt certificates in the acme.json file in the Traefik folder.
The application is available at https://pocketid.example.com, where the first visit creates the administrator account and its passkey (see Setting up).
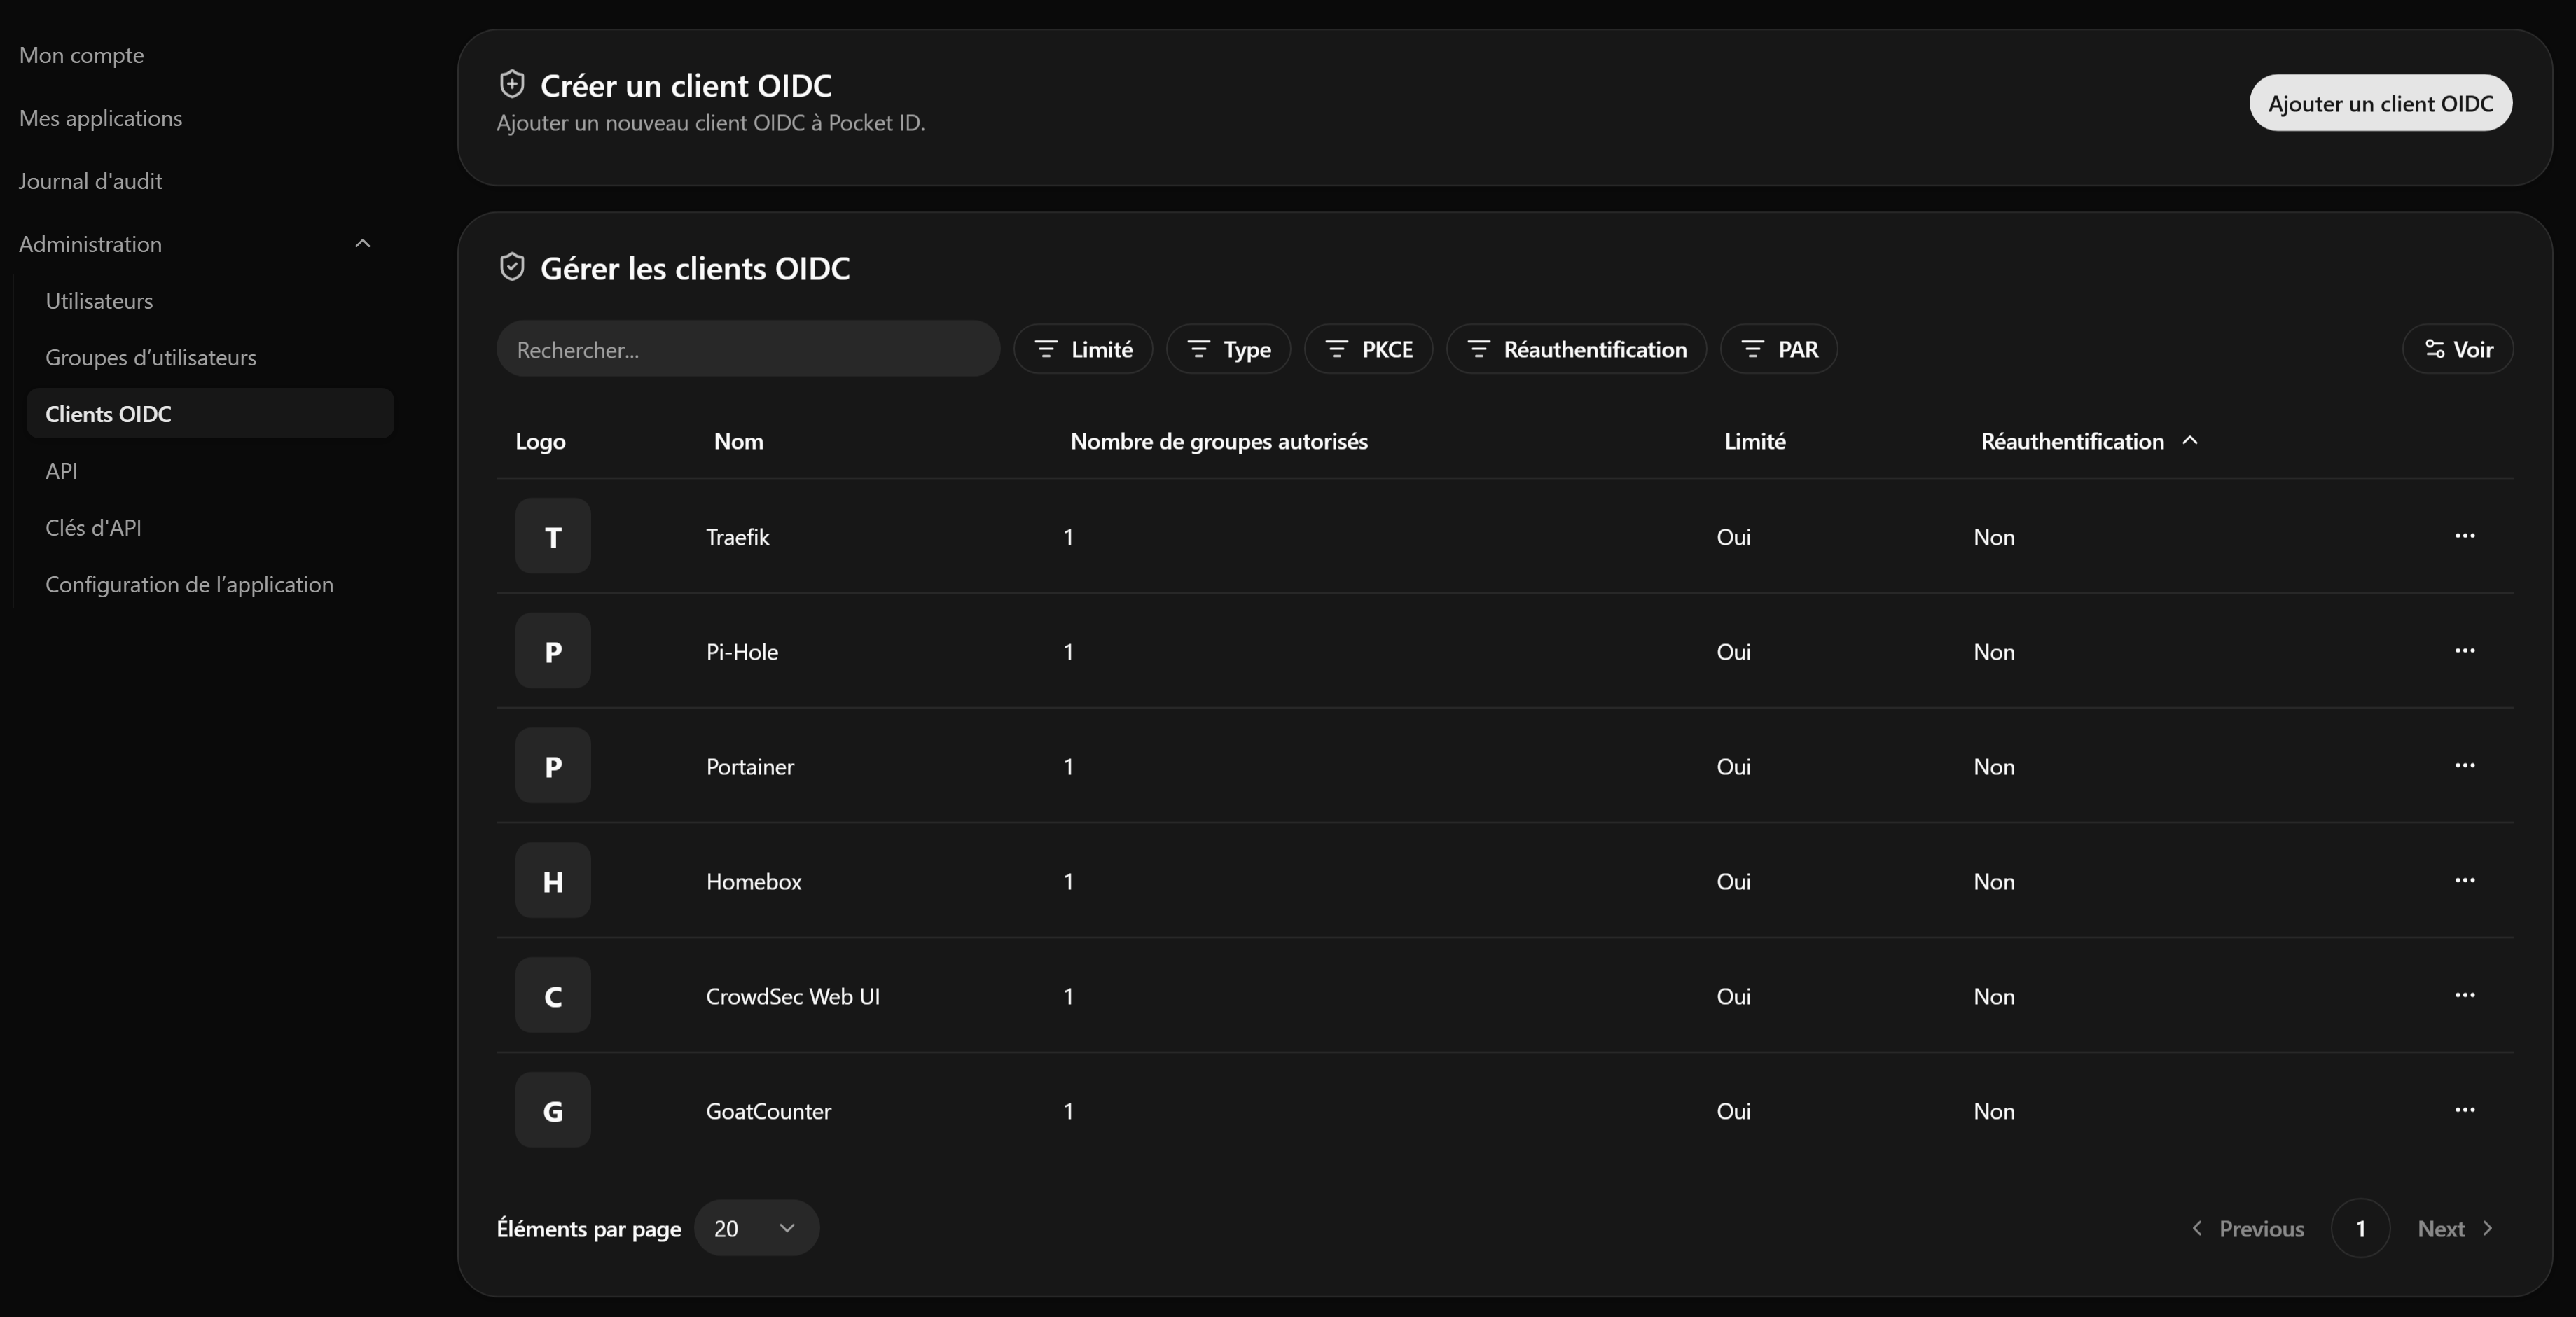
CrowdSec
We will use CrowdSec to detect and block the attackers knocking on the reverse proxy : scanners looking for /.env
or /wp-login.php, brute force attempts, known exploits, bad bots.
CrowdSec is an open source, collaborative intrusion prevention system : a security engine reads logs, matches them against scenarios from a community hub and takes decisions (ban an IP address for a few hours), and a bouncer enforces them where the traffic enters. In return for the signals it shares, the engine also receives the community blocklist : IP addresses currently attacking other CrowdSec users are blocked before they even try anything here.
In our setup the only door open to the internet is Traefik, so everything happens there :
- the security engine runs in a container on the private Traefik network and reads the Traefik access log through a shared folder (no Docker socket involved)
- the bouncer is a Traefik plugin, declared as a middleware on the
websecureentrypoint : every HTTPS request is checked against the current decisions before reaching any router, private services included (harmless : the local network and the VPN peers are trusted and never blocked)
Here is an overview of the network flow :
flowchart LR
    style INCOMING_REQUEST fill: #205566
    style TRAEFIK_CONTAINER fill: #663535
    style APP_CONTAINER fill: #663535
    style CROWDSEC_CONTAINER fill: #663535
    style TRAEFIK_ROUTER fill: #806030
    style TRAEFIK_MIDDLEWARE fill: #806030
    style SERVER_DEVICE fill: #665555
    style CONTAINER_ENGINE fill: #664545
    style HUB fill: #4d683b
    DOCKER_TRAEFIK_PORT443{{443/tcp}}
    DOCKER_APP_PORT{{80/tcp}}
    DOCKER_CROWDSEC_PORT{{8080/tcp\nlocal API}}
    TRAEFIK_ROUTER_APP(lychee.example.com)
    TRAEFIK_MIDDLEWARE_CROWDSEC(CrowdSec bouncer\non the websecure entrypoint)
    TRAEFIK_MIDDLEWARE_OTHERS(router middlewares)
    INCOMING_REQUEST((INCOMING\nREQUEST))
    HUB((CrowdSec hub\nand community))
    INCOMING_REQUEST --> DOCKER_TRAEFIK_PORT443

    subgraph SERVER_DEVICE[MINI PC]
        subgraph CONTAINER_ENGINE[DOCKER]
            subgraph TRAEFIK_CONTAINER[TRAEFIK CONTAINER]
                DOCKER_TRAEFIK_PORT443 --> TRAEFIK_MIDDLEWARE_CROWDSEC

                subgraph TRAEFIK_MIDDLEWARE[TRAEFIK MIDDLEWARES]
                    TRAEFIK_MIDDLEWARE_CROWDSEC
                    TRAEFIK_MIDDLEWARE_OTHERS
                end

                subgraph TRAEFIK_ROUTER[TRAEFIK HTTP ROUTER]
                    TRAEFIK_ROUTER_APP
                end

                TRAEFIK_MIDDLEWARE_CROWDSEC -->|IP not banned| TRAEFIK_ROUTER_APP
                TRAEFIK_MIDDLEWARE_CROWDSEC -.->|IP banned : 403| INCOMING_REQUEST
                TRAEFIK_ROUTER_APP --> TRAEFIK_MIDDLEWARE_OTHERS
            end

            subgraph APP_CONTAINER[APP CONTAINER]
                DOCKER_APP_PORT
            end

            subgraph CROWDSEC_CONTAINER[CROWDSEC CONTAINER]
                DOCKER_CROWDSEC_PORT
            end

            ACCESS_LOG[(access.log)]
            TRAEFIK_MIDDLEWARE_OTHERS --> DOCKER_APP_PORT
            TRAEFIK_CONTAINER -->|writes| ACCESS_LOG
            ACCESS_LOG -->|reads| CROWDSEC_CONTAINER
            TRAEFIK_MIDDLEWARE_CROWDSEC <-.->|pulls the decisions every minute| DOCKER_CROWDSEC_PORT
        end
    end

    CROWDSEC_CONTAINER <-->|scenarios, signals, community blocklist| HUB
Setting up
Create the folders, and a random key that will be shared between the security engine and the bouncer :
sudo mkdir -p /opt/apps/crowdsec /opt/apps/traefik/logs
openssl rand -base64 48
Then :
- copy the .env, docker-compose.yml and acquis.yml files from this project's crowdsec directory into the
/opt/apps/crowdsec directory, and put the key in
BOUNCER_KEY_traefikof the .env file - put the same key in
CROWDSEC_BOUNCER_KEYof Traefik's .env file, and copy the crowdsec.yml file from this project's traefik/dynamic directory into the /opt/apps/traefik/dynamic directory - update Traefik : the access log now goes to a file with the
User-Agentheader kept, the plugin is declared and thecrowdsec@filemiddleware is set on thewebsecureentrypoint in traefik.yml (see Static configuration file), and the logs folder is bound in Traefik's docker-compose.yml (see Service definition) - copy the logrotate file from this project's traefik directory to /etc/logrotate.d/traefik : the access log is
rotated daily and kept 7 days, Traefik reopens it on the
USR1signal
Details
Service definition
:page_facing_up: crowdsec/docker-compose.yml :
services:

  crowdsec:
    image: crowdsecurity/crowdsec:latest
    container_name: crowdsec
    restart: unless-stopped
    # Holds BOUNCER_KEY_traefik : registers the Traefik bouncer with this key at start (same value in traefik/.env)
    env_file: .env
    environment:
      TZ: "Europe/Zurich"
      # Hub items installed at start : Traefik log parser + HTTP scenarios, known CVE exploits, private IP ranges whitelist
      COLLECTIONS: "crowdsecurity/traefik crowdsecurity/http-cve"
      PARSERS: "crowdsecurity/whitelists"
    volumes:
      - ./acquis.yml:/etc/crowdsec/acquis.yaml:ro   # acquis.yaml is the path expected by CrowdSec's config.yaml
      - ./config:/etc/crowdsec
      - ./data:/var/lib/crowdsec/data
      - /opt/apps/traefik/logs:/var/log/traefik:ro
    networks:
      - traefik-private-net

networks:

  traefik-private-net:
    name: traefik-private-net
    external: true
:page_facing_up: crowdsec/.env :
# Key shared with the Traefik bouncer (same value as CROWDSEC_BOUNCER_KEY in traefik/.env), generate it with : openssl rand -base64 48
BOUNCER_KEY_traefik=<bouncer_key>
:page_facing_up: crowdsec/acquis.yml :
# Log sources read by the CrowdSec agent : the Traefik access log (bind mount shared with the Traefik container).
# A glob pattern, so that the file is picked up when it appears (Traefik may start after CrowdSec) or is recreated by logrotate.
filenames:
  - /var/log/traefik/*.log
labels:
  type: traefik
:page_facing_up: traefik/dynamic/crowdsec.yml :
http:
  middlewares:
    crowdsec:
      plugin:
        crowdsec-bouncer-traefik-plugin:
          enabled: true
          logLevel: INFO
          # stream mode : the plugin pulls the decisions from the CrowdSec local API every updateIntervalSeconds
          # and answers from its cache, nothing is called on the request path
          crowdsecMode: stream
          updateIntervalSeconds: 60
          crowdsecLapiScheme: http
          crowdsecLapiHost: crowdsec:8080
          # Dynamic files are Go templates : the key is read from the CROWDSEC_BOUNCER_KEY variable of the Traefik container (traefik/.env),
          # same value as BOUNCER_KEY_traefik in crowdsec/.env
          crowdsecLapiKey: '{{ env "CROWDSEC_BOUNCER_KEY" }}'
          # never block the local network and the VPN peers, whatever the decisions say
          clientTrustedIPs:
            - 192.168.0.0/24
            - 10.0.0.0/24
:page_facing_up: traefik/logrotate (to copy to /etc/logrotate.d/traefik) :
# Rotation of the Traefik access log (copy this file to /etc/logrotate.d/traefik on the host).
# Traefik reopens its log files when it receives the USR1 signal, no restart needed.
/opt/apps/traefik/logs/access.log {
    daily
    rotate 7
    compress
    delaycompress
    missingok
    notifempty
    create 0644 root root
    postrotate
        /usr/bin/docker kill --signal=USR1 traefik >/dev/null 2>&1 || true
    endscript
}
Things to notice :
- the security engine only joins
traefik-private-net: the bouncer reaches its local API atcrowdsec:8080by name, nothing is published on the host COLLECTIONSandPARSERSare installed from the hub at the first start :crowdsecurity/traefik(the access log parser and the base HTTP scenarios),crowdsecurity/http-cve(known exploits) andcrowdsecurity/whitelists(private IP ranges are never banned, so a misbehaving device at home cannot lock you out)BOUNCER_KEY_traefik(from the .env file) registers thetraefikbouncer with the given key at start, no manualcscli bouncers addneeded, the middleware reads the same key from Traefik's own .env file through a template, so that the key never appears in a configuration file- the volumes hold the acquisition file (which log to read, and which parser applies to it — mounted as /etc/crowdsec/acquis.yaml, the path CrowdSec expects), the configuration (hub items, local API and community API credentials, all created automatically) and the data (SQLite database of alerts and decisions, downloaded blocklists), the Traefik logs folder is mounted read-only
- the middleware runs in stream mode : it pulls the decisions from the local API every
updateIntervalSecondsand answers from its cache, nothing is called on the request path. If the local API becomes unreachable, the plugin keeps serving with the decisions it already has and logs errors clientTrustedIPsmakes the bouncer skip the local network and the VPN peers entirely, in addition to the CrowdSec side whitelist- as the middleware sits on the entrypoint, it runs before the routers and their own middlewares (IP whitelist,
authentication) for every request on
443, present and future services alike
[!NOTE] Your own public IP is not a private range. If some of your traffic reached Traefik through the NAT loopback of the router (a name resolving to the public IP, see IP whitelisting), a noisy test could ban you from your own services :
cscli decisions delete --ip <your_public_ip>lifts it. With local DNS records for the private and the public services (see Pi-hole), the devices at home never take that path.The engine shares the alerts it raises (attacking IP address and scenario) with CrowdSec's central API, that is what feeds the community blocklist everybody benefits from. If you don't want that, remove the
api.server.online_clientsection from config.yaml.
Run
Start the security engine first, so that the bouncer finds its local API, then recreate Traefik (the static configuration changed, and the plugin is downloaded at that moment) :
sudo docker-compose -f /opt/apps/crowdsec/docker-compose.yml up -d
sudo docker-compose -f /opt/apps/traefik/docker-compose.yml up -d --force-recreate
You should end-up with a running crowdsec container. Check that everything talks to everything :
sudo docker exec crowdsec cscli bouncers list          # the "traefik" bouncer, with a recent "last pull"
sudo docker exec crowdsec cscli collections list       # crowdsecurity/traefik and http-cve installed
sudo docker exec crowdsec cscli metrics                # "Acquisition Metrics" : lines read and parsed from access.log (browse a site first)
sudo docker logs traefik 2>&1 | grep -i crowdsec       # plugin loaded, no error
To test the bouncer independently of the scenarios, ban an outside address (your phone on 4G for example) for a few minutes and try to reach a public service from it :
sudo docker exec crowdsec cscli decisions add --ip <phone_public_ip> --duration 5m --reason "bouncer test"
sudo docker exec crowdsec cscli decisions list
sudo docker exec crowdsec cscli decisions delete --ip <phone_public_ip>
The phone must get a 403 from Traefik while the decision is active. To test the scenarios, from the same phone request
a dozen pages a scanner would try (/.env, /wp-login.php, /phpmyadmin/, /.git/config, ...) on a public service :
after a few of them cscli alerts list shows a http-probing or http-sensitive-files alert and the phone is banned
for four hours (the default duration), lift it with cscli decisions delete.
CrowdSec Web UI
CrowdSec is driven from the command line with cscli, which is fine for a check now and then but tedious
to browse. CrowdSec Web UI is a small third-party dashboard that reads the same local API and shows the alerts,
the active decisions, the bouncers and the metrics, with the country and the AS of every attacker, filters, and the
ability to ban or unban an address in two clicks.
It is a plain HTTP application, it holds no Docker socket and no privilege : it only needs a machine account on the CrowdSec local API, so it sits on the private network like the other administration tools. It authenticates its users against PocketID with its own OIDC support.
Here is an overview of the network flow :
flowchart LR
    style INCOMING_REQUEST fill: #205566
    style TRAEFIK_CONTAINER fill: #663535
    style APP_CONTAINER fill: #663535
    style CROWDSEC_CONTAINER fill: #663535
    style POCKETID_CONTAINER fill: #663535
    style TRAEFIK_ROUTER fill: #806030
    style TRAEFIK_MIDDLEWARE fill: #806030
    style SERVER_DEVICE fill: #665555
    style CONTAINER_ENGINE fill: #664545
    DOCKER_TRAEFIK_PORT443{{443/tcp}}
    DOCKER_APP_PORT{{3000/tcp}}
    DOCKER_CROWDSEC_PORT{{8080/tcp\nlocal API}}
    DOCKER_POCKETID_PORT{{1411/tcp}}
    TRAEFIK_ROUTER_APP(crowdsec.example.com)
    TRAEFIK_MIDDLEWARE_IP_WHITELIST(IP whitelist)
    INCOMING_REQUEST((INCOMING\nREQUEST))
    INCOMING_REQUEST --> DOCKER_TRAEFIK_PORT443

    subgraph SERVER_DEVICE[MINI PC]
        subgraph CONTAINER_ENGINE[DOCKER]
            subgraph TRAEFIK_CONTAINER[TRAEFIK CONTAINER]
                DOCKER_TRAEFIK_PORT443 --> TRAEFIK_ROUTER

                subgraph TRAEFIK_ROUTER[TRAEFIK HTTP ROUTER]
                    TRAEFIK_ROUTER_APP
                end

                subgraph TRAEFIK_MIDDLEWARE[TRAEFIK MIDDLEWARES]
                    TRAEFIK_MIDDLEWARE_IP_WHITELIST
                end

                TRAEFIK_ROUTER_APP --> TRAEFIK_MIDDLEWARE_IP_WHITELIST
            end

            subgraph APP_CONTAINER[CROWDSEC WEB UI CONTAINER]
                DOCKER_APP_PORT
            end

            subgraph CROWDSEC_CONTAINER[CROWDSEC CONTAINER]
                DOCKER_CROWDSEC_PORT
            end

            subgraph POCKETID_CONTAINER[POCKETID CONTAINER]
                DOCKER_POCKETID_PORT
            end

            TRAEFIK_MIDDLEWARE_IP_WHITELIST --> DOCKER_APP_PORT
            DOCKER_APP_PORT -->|machine account : alerts, decisions, metrics| DOCKER_CROWDSEC_PORT
            DOCKER_APP_PORT -.->|OIDC single sign - on, through the Traefik alias| DOCKER_POCKETID_PORT
        end
    end
Setting up
Create the folders, then register the machine account the UI will use to read the local API :
sudo mkdir -p /opt/apps/crowdsec-web-ui/data
PW=$(openssl rand -base64 32); echo "machine password : $PW"
sudo docker exec crowdsec cscli machines add crowdsec-web-ui --password "$PW" -f /dev/null
Then :
- copy the .env and docker-compose.yml files from this project's crowdsec-web-ui directory into the
/opt/apps/crowdsec-web-ui directory, and put the generated password in
CONFIG_INSTANCE_LAPI_AUTH_PASSWORD - copy the crowdsec-web-ui.yml file from this project's traefik/dynamic directory into the /opt/apps/traefik/dynamic directory
- create an OIDC client in PocketID with the callback URL of the application :
https://crowdsec.example.com/api/auth/oidc/callback, and PKCE disabled, as the application does not send acode_challenge(it is a confidential client, the client secret is what protects the code exchange). Then put its client ID inCONFIG_AUTH_OIDC_CLIENT_IDand its secret inCONFIG_AUTH_OIDC_CLIENT_SECRET. No middleware on the router : the application talks to PocketID itself - add a local DNS record
crowdsec.example.compointing to the mini PC (see Pi-hole), the service is not published on the internet
[!TIP] If PocketID answers
access_denied, "you are not allowed to access this service" right after the login, the problem is not in the middleware : the OIDC client restricts access to some user groups and your account is not in them. Remove the restriction on the client, or add your group. The error comes from PocketID (look at the domain in the address bar), the application is not even reached.
[!NOTE] This service uses the native OIDC support of the application rather than the Traefik plugin used by Pi-Hole, so that the UI knows who is connected and can apply its admin / read-only roles. Its OIDC library only accepts HTTPS issuers (
only requests to HTTPS are allowed), so the internalhttp://pocketid:1411URL cannot be used : it goes through the public issuer, reachable from the container thanks to the Traefik network alias and thepocketid-whitelistmiddleware described in PocketID.
CONFIG_AUTH_ENABLEDstays onauto: the built-in account (password, TOTP, passkeys) created on the first visit remains available and is your way back in if the OIDC login ever breaks.Roles are decided by group mapping, and
CONFIG_AUTH_OIDC_UNMATCHED_ROLEdefaults todeny: without any group configured, a user who authenticates perfectly is still rejected with OIDC user is not authorized, and nothing is written in the logs since it is a decision, not an error. Either declare the groups as above, or setCONFIG_AUTH_OIDC_UNMATCHED_ROLEtoadminand let PocketID alone decide who may use the client.
Details
Service definition
:page_facing_up: docker-compose.yml :
services:

  crowdsec-web-ui:
    image: ghcr.io/theduffman85/crowdsec-web-ui:latest
    container_name: crowdsec-web-ui
    restart: unless-stopped
    # Holds the password of the CrowdSec machine account (see .env)
    env_file: .env
    environment:
      TZ: "Europe/Zurich"
      # Built-in authentication stays enabled : the local account (password, TOTP, passkeys) is the fallback
      # if the OIDC login ever fails, and it is what gives the UI a real identity and admin / read-only roles
      CONFIG_AUTH_ENABLED: "auto"
      # Single sign-on against PocketID, handled by the application itself (no middleware on the router).
      # The issuer is the PUBLIC URL, no trailing slash : the container reaches it through the Traefik network
      # alias and the pocketid-whitelist middleware, see the PocketID section
      CONFIG_AUTH_OIDC_ISSUER_URL: https://pocketid.example.com
      CONFIG_AUTH_OIDC_CLIENT_ID: <oidc_client_id>
      # CONFIG_AUTH_OIDC_CLIENT_SECRET comes from the .env file
      # Role given to a user matching no group. It defaults to "deny", which rejects every OIDC user with
      # "OIDC user is not authorized" as long as no group is mapped. With a single administrator, "admin" is
      # enough : PocketID already decides who may use the client, through the allowed groups of the client itself.
      # For real admin / read-only roles, set it back to "deny" and map the groups :
      #   CONFIG_AUTH_OIDC_SCOPE: "openid profile email groups"
      #   CONFIG_AUTH_OIDC_GROUPS_CLAIM: groups
      #   CONFIG_AUTH_OIDC_ADMIN_GROUPS_0: <admin_group>
      #   CONFIG_AUTH_OIDC_READ_ONLY_GROUPS_0: <read_only_group>
      CONFIG_AUTH_OIDC_UNMATCHED_ROLE: admin
      # CrowdSec local API, reached by container name on the private Traefik network
      CONFIG_INSTANCE_LAPI_URL: http://crowdsec:8080
      CONFIG_INSTANCE_LAPI_AUTH_TYPE: password
      CONFIG_INSTANCE_LAPI_AUTH_USERNAME: crowdsec-web-ui
      # CONFIG_INSTANCE_LAPI_AUTH_PASSWORD comes from the .env file
    volumes:
      # SQLite database of the UI (its own users, notification rules, GeoNames data)
      - ./data:/app/data
    networks:
      - traefik-private-net

networks:

  traefik-private-net:
    name: traefik-private-net
    external: true
:page_facing_up: .env :
# Password of the CrowdSec machine account the UI uses to read the local API.
# Generate it with `openssl rand -base64 32`, then register the machine in the CrowdSec container :
#   sudo docker exec crowdsec cscli machines add crowdsec-web-ui --password '<password>' -f /dev/null
CONFIG_INSTANCE_LAPI_AUTH_PASSWORD=<lapi_machine_password>

# Secret of the PocketID OIDC client used for the single sign-on
CONFIG_AUTH_OIDC_CLIENT_SECRET=<oidc_client_secret>
:page_facing_up: crowdsec-web-ui.yml :
http:
  services:
    crowdsec-web-ui:
      loadBalancer:
        servers:
          - url: http://crowdsec-web-ui:3000

  routers:
    crowdsec-web-ui:
      rule: 'Host(`crowdsec.example.com`)'
      entryPoints:
        - websecure
      tls:
        certResolver: default
      service: crowdsec-web-ui
      # Only the IP whitelist : the application handles the PocketID single sign-on itself (native OIDC),
      # so no authentication middleware here, otherwise you would log in twice
      middlewares:
        - vpn-whitelist@file
Things to notice :
- it only joins
traefik-private-net: it reaches the CrowdSec local API atcrowdsec:8080by container name, and nothing is published on the host CONFIG_INSTANCE_LAPI_AUTH_*are the credentials of the machine account registered withcscli machines add. A machine account is required : a bouncer API key like the one used by the Traefik plugin can only read the decisions, not the alerts- the data volume holds the UI's own SQLite database (its accounts, its notification rules, the GeoNames data used to locate the attackers), not CrowdSec data
- the router only carries the IP whitelist : the single sign-on is done by the application itself, adding an authentication middleware would mean logging in twice
- deleting alerts from the UI additionally requires its source IP to be trusted by CrowdSec, see the note below
[!WARNING] To allow alert deletion, the UI's IP must be listed in
api.server.trusted_ipsof CrowdSec's config.yaml (in /opt/apps/crowdsec/config/), then restart the container. Use the private network range only, never the172.16.0.0/12the project suggests : that range also coverstraefik-public-net, so the applications exposed to the internet would be trusted too, which is exactly what Network segmentation avoids.api: server: trusted_ips: - 127.0.0.1 - ::1 - 172.21.0.0/16 # traefik-private-net, check it with : docker network inspect traefik-private-netEverything else (reading the alerts, adding or lifting a ban) works without it.
Run
Simply run the Compose file :
sudo docker-compose -f /opt/apps/crowdsec-web-ui/docker-compose.yml up -d
You should end-up with a running crowdsec-web-ui container, and Traefik picks up the dynamic configuration file
without restarting.
The application is available at https://crowdsec.example.com. On the first visit it asks you to create the local administrator account, then the PocketID button appears on the login page.
[!NOTE] This is a third-party project, unrelated to the CrowdSec company, and it only publishes a
latesttag : keep an eye on it when you pull the images.
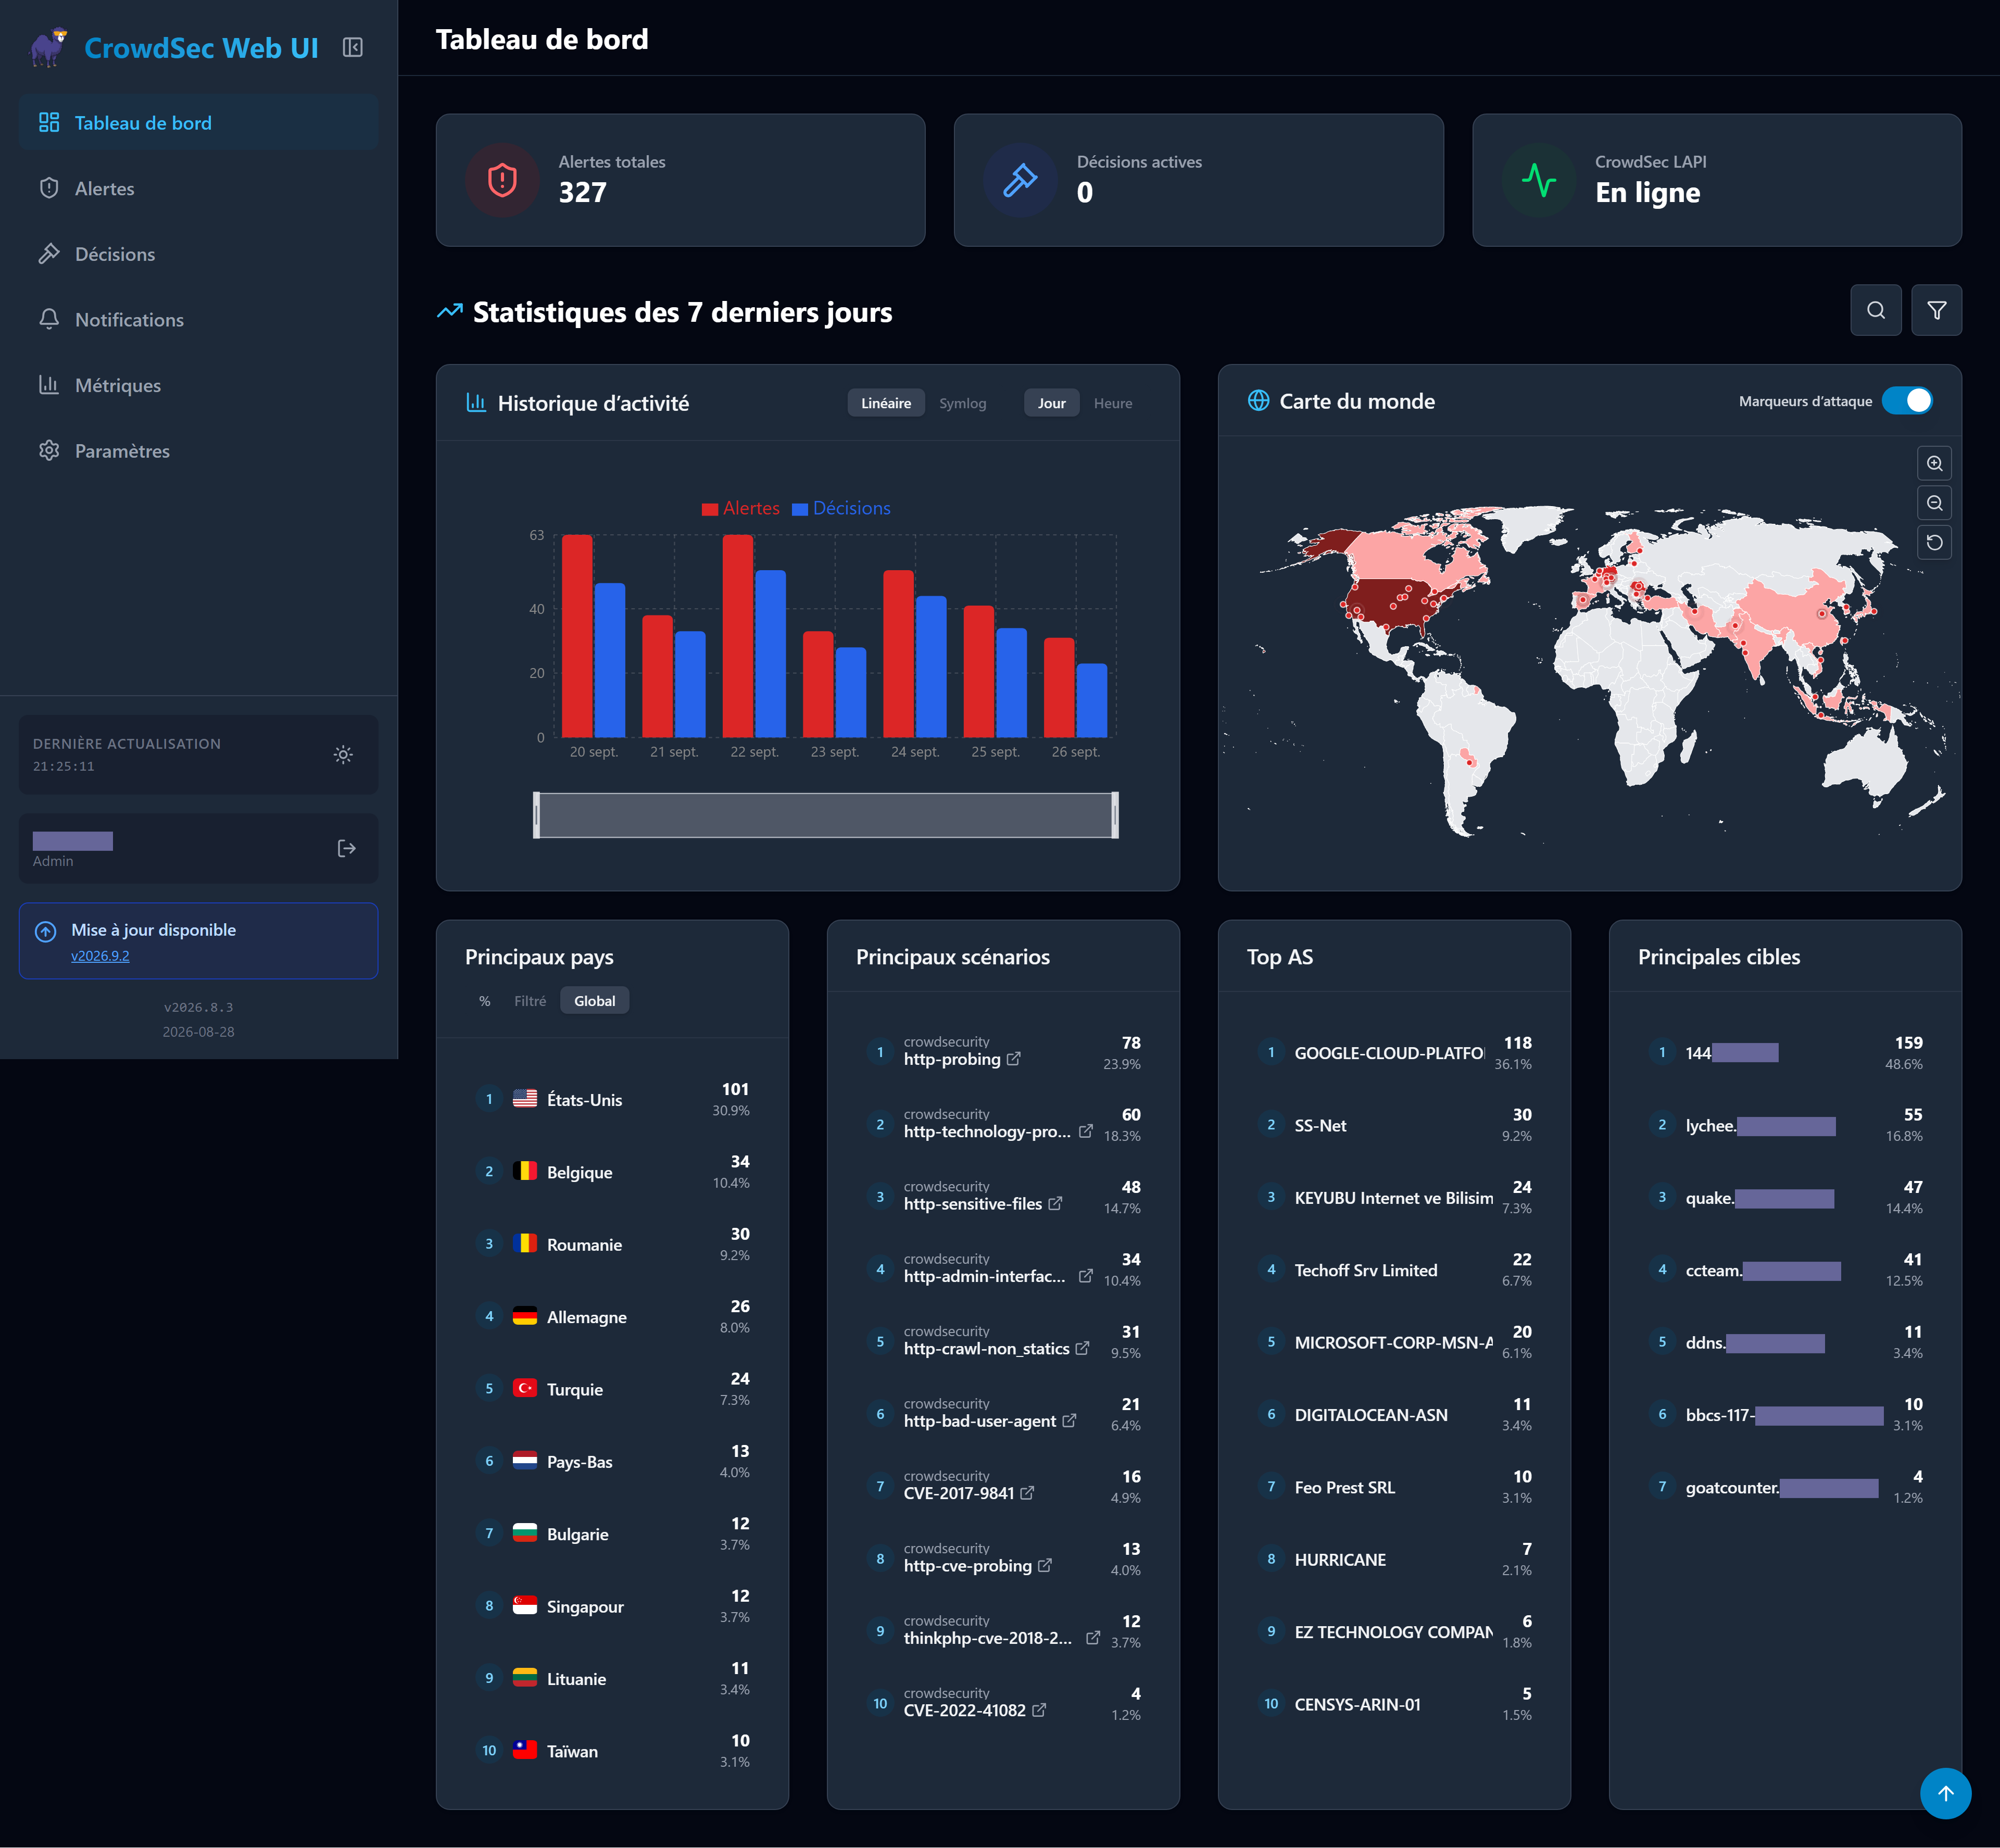
Arcane
We will use Arcane to easily manage our Docker containers.
Arcane is an open source web interface to start, stop, restart, update and inspect the containers, read their logs, open a shell in them, and manage the images, volumes, networks and Compose projects, with image update checks and vulnerability scanning.
It needs the Docker socket, which means full control over the Docker daemon, i.e. root on the host : it sits on the private network only, reachable from the local network and the VPN, see Network segmentation.
Here is an overview of the network flow :
flowchart LR
    style INCOMING_REQUEST fill: #205566
    style TRAEFIK_CONTAINER fill: #663535
    style APP_CONTAINER fill: #663535
    style POCKETID_CONTAINER fill: #663535
    style TRAEFIK_ROUTER fill: #806030
    style TRAEFIK_MIDDLEWARE fill: #806030
    style SERVER_DEVICE fill: #665555
    style CONTAINER_ENGINE fill: #664545
    DOCKER_TRAEFIK_PORT443{{443/tcp}}
    DOCKER_APP_PORT{{3552/tcp}}
    DOCKER_POCKETID_PORT{{1411/tcp}}
    DOCKER_SOCKET[(Docker socket)]
    TRAEFIK_ROUTER_APP(arcane.example.com)
    TRAEFIK_MIDDLEWARE_IP_WHITELIST(IP whitelist)
    INCOMING_REQUEST((INCOMING\nREQUEST))
    INCOMING_REQUEST --> DOCKER_TRAEFIK_PORT443

    subgraph SERVER_DEVICE[MINI PC]
        DOCKER_SOCKET

        subgraph CONTAINER_ENGINE[DOCKER]
            subgraph TRAEFIK_CONTAINER[TRAEFIK CONTAINER]
                DOCKER_TRAEFIK_PORT443 --> TRAEFIK_ROUTER

                subgraph TRAEFIK_ROUTER[TRAEFIK HTTP ROUTER]
                    TRAEFIK_ROUTER_APP
                end

                subgraph TRAEFIK_MIDDLEWARE[TRAEFIK MIDDLEWARES]
                    TRAEFIK_MIDDLEWARE_IP_WHITELIST
                end

                TRAEFIK_ROUTER_APP --> TRAEFIK_MIDDLEWARE_IP_WHITELIST
            end

            subgraph APP_CONTAINER[ARCANE CONTAINER]
                DOCKER_APP_PORT
            end

            subgraph POCKETID_CONTAINER[POCKETID CONTAINER]
                DOCKER_POCKETID_PORT
            end

            TRAEFIK_MIDDLEWARE_IP_WHITELIST --> DOCKER_APP_PORT
            DOCKER_APP_PORT -.->|OIDC single sign - on, through the Traefik alias| DOCKER_POCKETID_PORT
        end

        DOCKER_APP_PORT -->|containers, images, volumes, ...| DOCKER_SOCKET
    end
Setting up
Create a folder to hold the configuration :
sudo mkdir /opt/apps/arcane
Then :
- copy the .env and docker-compose.yml files from this project's arcane directory into the /opt/apps/arcane
directory, and generate the encryption key in the .env file (
openssl rand -hex 32). Keep it with your backups : it encrypts the secrets Arcane stores (registry credentials, ...) - copy the arcane.yml file from this project's traefik/dynamic directory into the /opt/apps/traefik/dynamic directory
- create an OIDC client in PocketID with the callback URL of the application :
https://arcane.example.com/auth/oidc/callback, and PKCE disabled (it is a confidential client, the client secret protects the code exchange). Restrict it to your administrators group (Allowed user groups), then put its client ID and secret inOIDC_CLIENT_IDandOIDC_CLIENT_SECRETof the .env file. No middleware on the router : the application talks to PocketID itself - add a local DNS record
arcane.example.compointing to the mini PC (see Pi-hole), the service is not published on the internet
Then start the service (see below) and finish the configuration in this order, the local admin account is needed until the OIDC login works :
- for the first start, set
OIDC_AUTO_REDIRECT_TO_PROVIDERto"false"in the docker-compose.yml file (the file of this project holds the final value,"true"), otherwise the login page redirects to PocketID before any role is mapped - log in with the default account,
arcane/arcane-admin, and change the password as requested - in Settings -> Authentication, map the PocketID group
super_adminsto the Admin role, Global scope - log out, log in through PocketID, and check that you are an admin
- disable the local login in Settings -> Authentication, set
OIDC_AUTO_REDIRECT_TO_PROVIDERback to"true"and recreate the container : the login page then redirects straight to PocketID
[!IMPORTANT] Configure the role mapping before relying on the OIDC login : Arcane creates the OIDC users automatically on their first login, but without a matching mapping they get no role, and therefore no permission at all. The groups are read again at every login, PocketID is the source of truth.
The mapping can also be declared in the docker-compose.yml file with
OIDC_ROLE_MAPPINGS, a JSON array such as[{"claimValue":"super_admins","roleId":"<admin_role_id>"}], but it references the role by its ID (see Settings -> Roles), not by its name.
[!NOTE] The default account is
arcane/arcane-admin, notadmin/adminas some pages of the documentation say. It is only created when the database holds no user : if the login fails on a fresh install, an earlier attempt already initialized thearcane-datavolume. As long as nothing is configured, delete it and start again :sudo docker-compose -f /opt/apps/arcane/docker-compose.yml down -v.
Details
Service definition
:page_facing_up: docker-compose.yml :
services:

  arcane:
    image: ghcr.io/getarcaneapp/manager:latest
    container_name: arcane
    restart: unless-stopped
    # Encryption key and OIDC client credentials (see .env)
    env_file: .env
    environment:
      TZ: "Europe/Zurich"
      APP_URL: https://arcane.example.com
      # X-Forwarded-* headers are only trusted from the private Traefik network. Never the 172.16.0.0/12 suggested by
      # the documentation : that range also covers traefik-public-net. Check it with : docker network inspect traefik-private-net
      TRUSTED_PROXIES: 172.21.0.0/16
      ANALYTICS_DISABLED: "true"

      # Native OIDC authentication against PocketID (callback URL : https://arcane.example.com/auth/oidc/callback)
      # The issuer is the PUBLIC URL, no trailing slash : the container resolves it to Traefik thanks to the alias on
      # traefik-private-net, and Traefik lets it through with the pocketid-whitelist middleware (see PocketID)
      OIDC_ENABLED: "true"
      OIDC_ISSUER_URL: https://pocketid.example.com
      OIDC_SCOPES: openid email profile groups
      OIDC_GROUPS_CLAIM: groups
      OIDC_PROVIDER_NAME: PocketID
      # Set it to "false" for the first start, until the role mapping is configured and the OIDC login validated
      # (the local admin is needed for that), then back to "true" once the local login is disabled in Settings -> Authentication
      OIDC_AUTO_REDIRECT_TO_PROVIDER: "true"
      # Roles can also be mapped declaratively (role referenced by its ID, see Settings -> Roles) :
      # OIDC_ROLE_MAPPINGS: '[{"claimValue":"super_admins","roleId":"<admin_role_id>"}]'
    volumes:
      # Full access to the Docker daemon, i.e. root on the host : private network only
      - /var/run/docker.sock:/var/run/docker.sock
      # SQLite database, projects, settings, session signing key
      - arcane-data:/app/data
    # Host cgroup namespace, so that Arcane reliably detects its own container
    cgroup: host
    healthcheck:
      test: [ "CMD", "./arcane", "health", "--timeout", "2s" ]
      interval: 30s
      timeout: 3s
      retries: 5
      start_period: 15s
    networks:
      - traefik-private-net

volumes:

  arcane-data:
    name: arcane-data

networks:

  traefik-private-net:
    name: traefik-private-net
    external: true
Environment variables
:page_facing_up: .env :
# Key encrypting the secrets stored by Arcane (registry credentials, ...), 32 bytes : openssl rand -hex 32
# Keep it with your backups, without it the encrypted data is lost
ENCRYPTION_KEY=<encryption_key>

# PocketID OIDC client (callback URL : https://arcane.example.com/auth/oidc/callback)
OIDC_CLIENT_ID=<oidc_client_id>
OIDC_CLIENT_SECRET=<oidc_client_secret>
Traefik routing
:page_facing_up: arcane.yml :
http:
  services:
    arcane:
      loadBalancer:
        servers:
          - url: http://arcane:3552

  routers:
    arcane:
      rule: 'Host(`arcane.example.com`)'
      entryPoints:
        - websecure
      tls:
        certResolver: default
      service: arcane
      # Only the IP whitelist : the application handles the PocketID single sign-on itself (native OIDC),
      # so no authentication middleware here, otherwise you would log in twice
      middlewares:
        - vpn-whitelist@file
Things to notice :
- it only joins
traefik-private-net, nothing is published on the host - the data (SQLite database, settings, the key Arcane generates to sign its sessions) lives in the
arcane-dataDocker volume, see Volumes to back it up TRUSTED_PROXIESis restricted to the private Traefik network, so that Arcane sees the real client IP in theX-Forwarded-Forheader set by Traefik. The documentation suggests172.16.0.0/12, which also coverstraefik-public-net- the stacks started with
docker-composefrom /opt/apps show up in Arcane as they are, through the labels Compose puts on the containers : nothing to import - the router only carries the IP whitelist : the single sign-on is done by the application itself, adding an authentication middleware would mean logging in twice
- the Traefik documentation of Arcane also describes a gRPC router and a
readtimeout=0son the entrypoint : they are only needed for the edge agents, used to manage remote Docker hosts. The WebSockets (logs, container shell) go through the regular router without any special configuration - the
arcane healthcommand of the health check calls/api/health, which Gatus uses too
Run
Simply run the Compose file :
sudo docker-compose -f /opt/apps/arcane/docker-compose.yml up -d
You should end-up with a running arcane container, and Traefik picks up the dynamic configuration file without
restarting.
The application is available at https://arcane.example.com, finish the configuration in the order described in Setting up above.
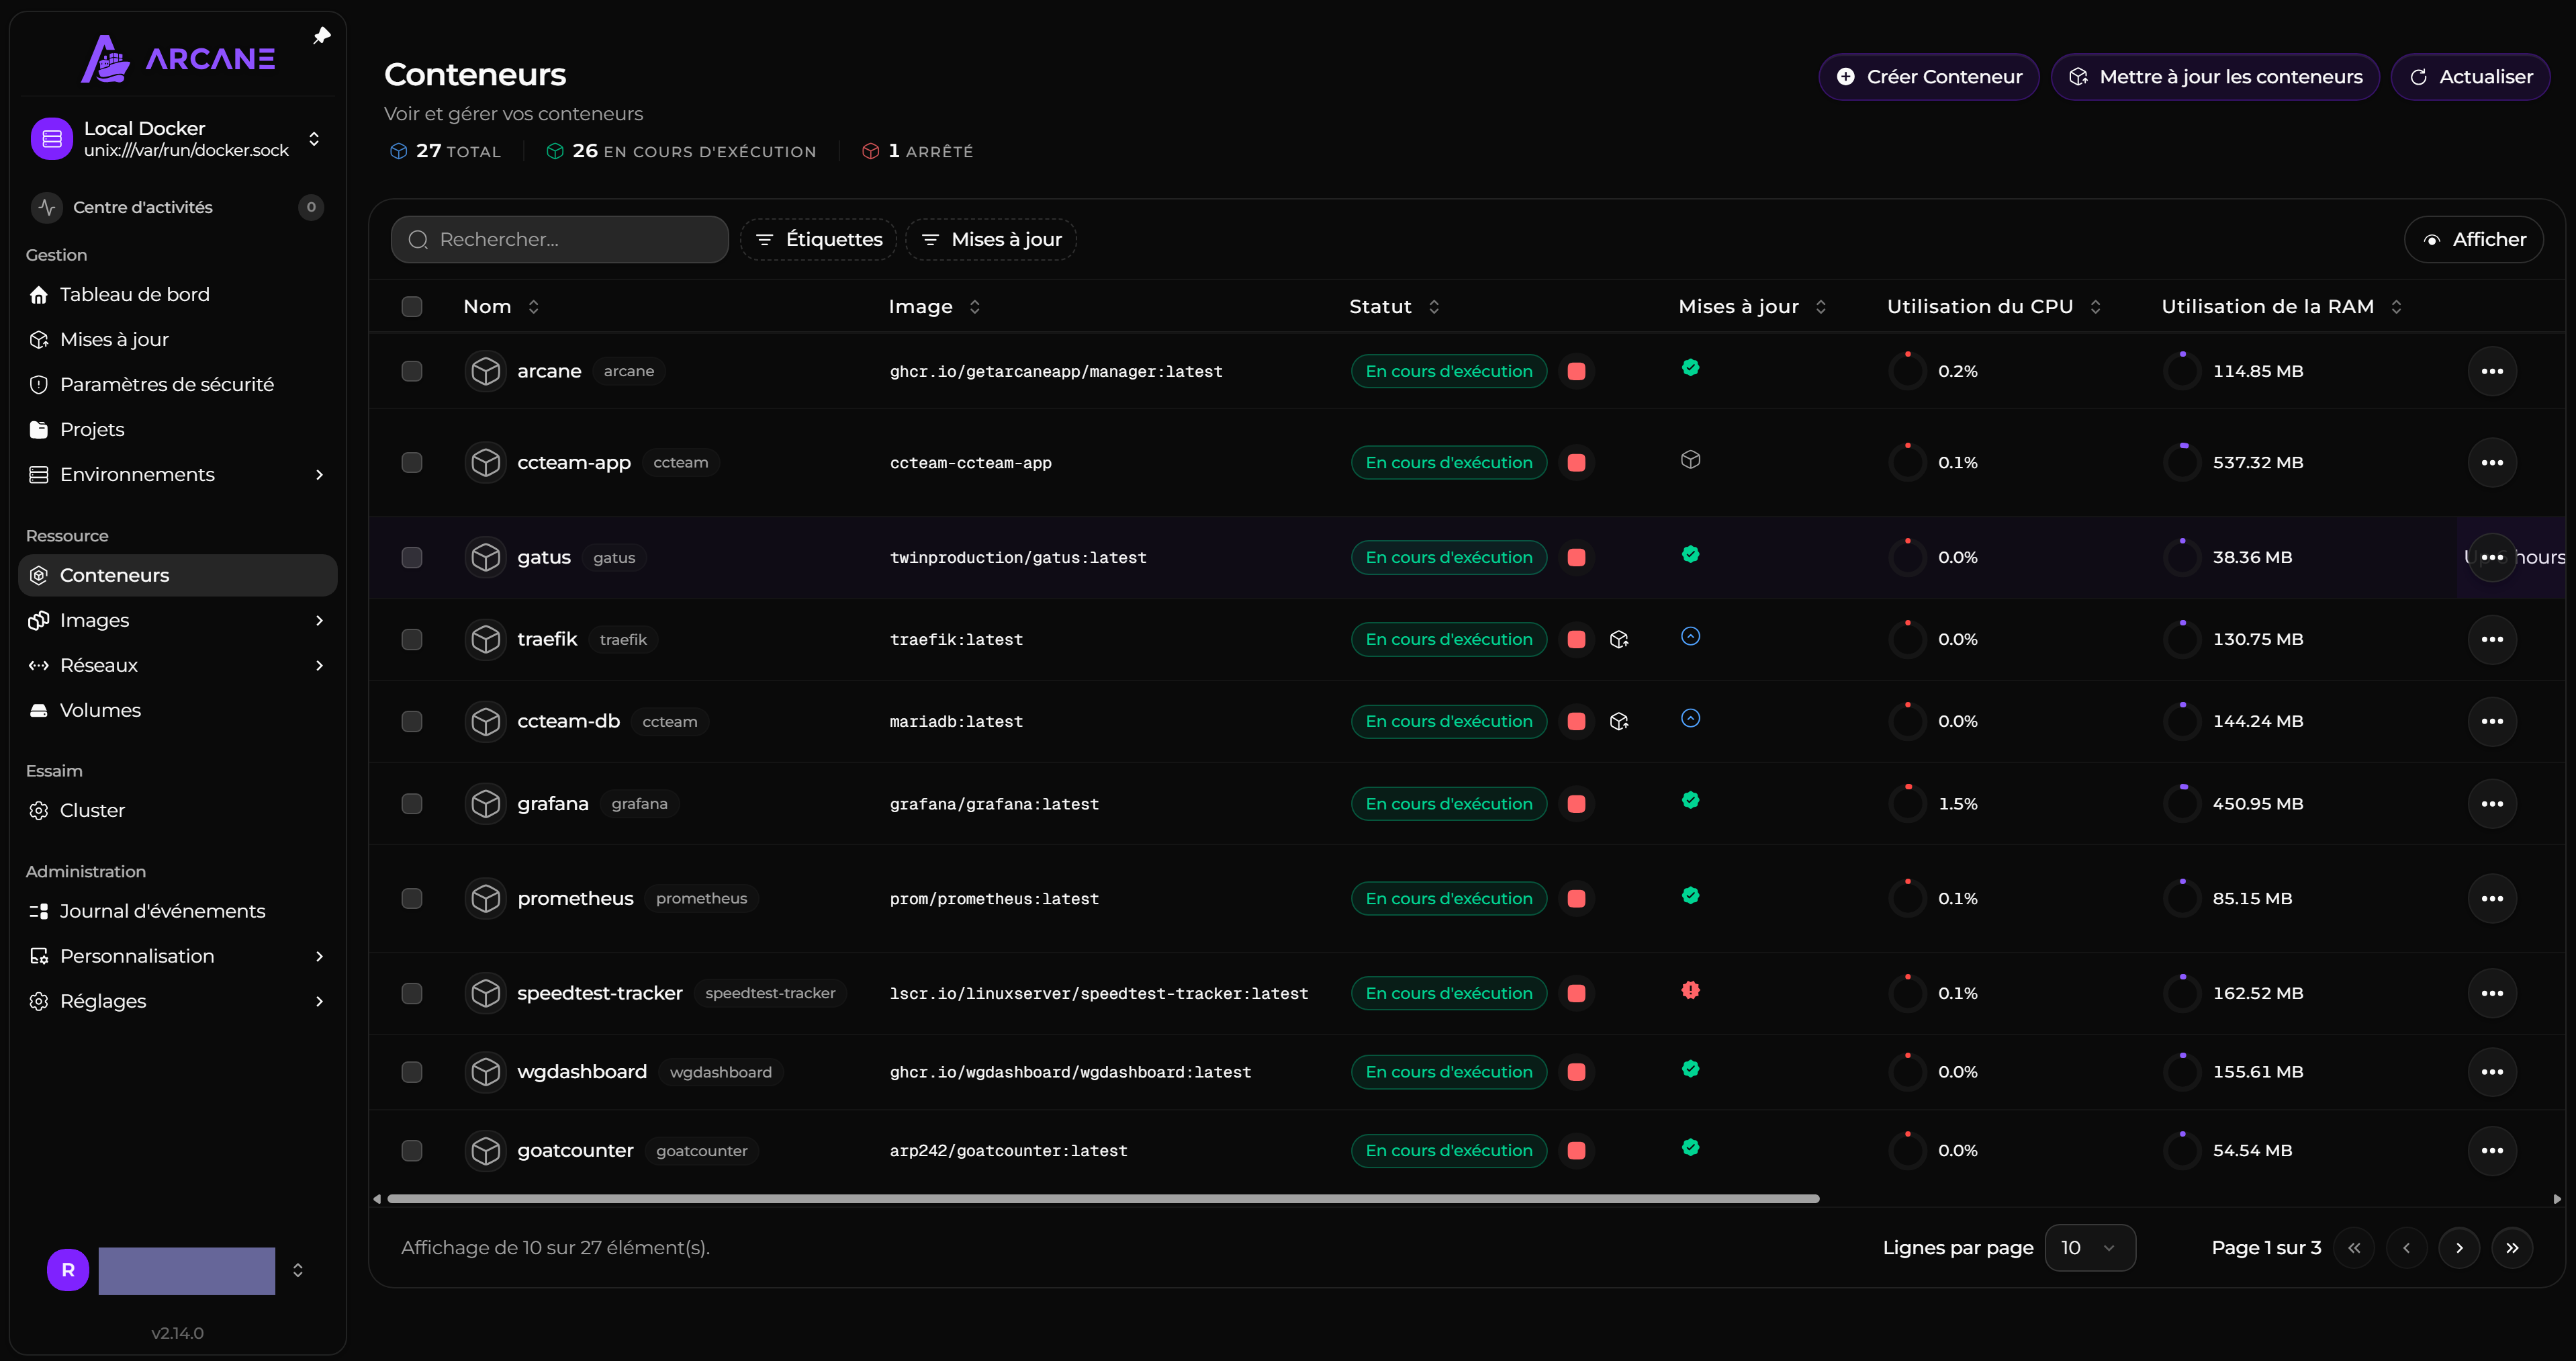
PhpMyAdmin
As our services will use some MySQL/MariaDB databases, we will use PhpMyAdmin to easily manage our databases.
PhpMyAdmin is a free software tool intended to handle the administration of MySQL over the Web, it supports a wide range of operations on MySQL and MariaDB (managing databases, tables, columns, relations, indexes, users, permissions, etc.).
Here is an overview of the network flow :
flowchart LR
    style INCOMING_REQUEST fill: #205566
    style TRAEFIK_CONTAINER fill: #663535
    style APP_CONTAINER fill: #663535
    style TRAEFIK_ROUTER fill: #806030
    style TRAEFIK_MIDDLEWARE fill: #806030
    style SERVER_DEVICE fill: #665555
    style CONTAINER_ENGINE fill: #664545
    DOCKER_TRAEFIK_PORT443{{443/tcp}}
    DOCKER_TRAEFIK_PORT80{{80/tcp}}
    DOCKER_APP_PORT{{80/tcp}}
    TRAEFIK_ROUTER_APP(phpmyadmin.example.com)
    TRAEFIK_MIDDLEWARE_REDIRECT(HTTPS redirect)
    TRAEFIK_MIDDLEWARE_IP_WHITELIST(IP whitelist)
    INCOMING_REQUEST((INCOMING\nREQUEST))
    INCOMING_REQUEST --> DOCKER_TRAEFIK_PORT443
    INCOMING_REQUEST --> DOCKER_TRAEFIK_PORT80

    subgraph SERVER_DEVICE[MINI PC]
        subgraph CONTAINER_ENGINE[DOCKER]
            subgraph APP_CONTAINER[PHPMYADMIN CONTAINER]
                DOCKER_APP_PORT
            end

            subgraph TRAEFIK_CONTAINER[TRAEFIK CONTAINER]
                DOCKER_TRAEFIK_PORT443 --> TRAEFIK_ROUTER
                DOCKER_TRAEFIK_PORT80 --> TRAEFIK_ROUTER

                subgraph TRAEFIK_ROUTER[TRAEFIK HTTP ROUTER]
                    TRAEFIK_ROUTER_APP
                end

                subgraph TRAEFIK_MIDDLEWARE[TRAEFIK MIDDLEWARES]
                    TRAEFIK_MIDDLEWARE_REDIRECT
                    TRAEFIK_MIDDLEWARE_IP_WHITELIST
                end

                TRAEFIK_MIDDLEWARE_REDIRECT --> TRAEFIK_MIDDLEWARE_IP_WHITELIST
                TRAEFIK_MIDDLEWARE_REDIRECT -.-> DOCKER_TRAEFIK_PORT443
                TRAEFIK_MIDDLEWARE_IP_WHITELIST --> DOCKER_APP_PORT
                TRAEFIK_ROUTER_APP --> TRAEFIK_MIDDLEWARE_REDIRECT
            end

        end
    end
Setting up
Create a folder to hold the configuration :
sudo mkdir /opt/apps/phpmyadmin
Then simply copy the docker-compose.yml file from this project's phpmyadmin directory into the /opt/apps/phpmyadmin directory.
Details
Service definition
:page_facing_up: docker-compose.yml :
services:

  phpmyadmin:
    image: phpmyadmin:latest
    container_name: phpmyadmin
    environment:
      - PMA_ARBITRARY=1
    restart: unless-stopped
    volumes:
      - ./darkwolf/:/var/www/html/themes/darkwolf/
    networks:
      - phpmyadmin-net
      - traefik-private-net

networks:

  phpmyadmin-net:
    name: phpmyadmin-net

  traefik-private-net:
    name: traefik-private-net
    external: true
:page_facing_up: phpmyadmin.yml :
http:
  services:
    phpmyadmin:
      loadBalancer:
        servers:
          - url: http://phpmyadmin:80

  routers:
    phpmyadmin:
      rule: 'Host(`phpmyadmin.example.com`)'
      entryPoints:
        - websecure
      tls:
        certResolver: default
      service: phpmyadmin
      middlewares:
        - vpn-whitelist@file
Things to notice :
- We mount a theme directory to use a custom theme (dark theme named
darkwolf), so just copy the theme data from official repository https://www.phpmyadmin.net/themes/ - It uses Traefik dynamic config file to :
- create a service which will point to our container application running on port
80 - create an HTTP router that will match
phpmyadmin.example.comURL on ourwebsecureentrypoint to point to our service - assign the
vpn-whitelistmiddleware so that the traffic will be restricted to allowed IPs only (application reachable only from local network or through VPN) - add a TLS configuration that will use our
defaultcertificates resolver, so it can generate Let's encrypt certificates
- create a service which will point to our container application running on port
- It runs in its own network (
phpmyadmin-net) but must also share the same network as Traefik (traefik-private-net) so it can be auto discovered - The
phpmyadminnetwork will have to be added to any MySQL/MariaDB database container that we want to make reachable from PhpMyAdmin - We set the environment variable
PMA_ARBITRARYto1to tell PhpMyAdmin to allow connection to any arbitrary database server (we will be able to specify the server on login screen)
Run
Finally, simply run the Compose file :
sudo docker-compose -f /opt/apps/phpmyadmin/docker-compose.yml up -d
You should end-up with a running phpmyadmin container.
It should also have generated the needed Let's Encrypt certificates in the acme.json file in the Traefik folder.
The application is available at https://phpmyadmin.example.com.
[!IMPORTANT] You will have to use the database service name as host to connect to a database
Homer
Homer is a simple application that allows to generate a static homepage from a simple yaml configuration file.
We will use it as a dashboard to list our services.
flowchart LR
    style INCOMING_REQUEST fill: #205566
    style TRAEFIK_CONTAINER fill: #663535
    style APP_CONTAINER fill: #663535
    style TRAEFIK_ROUTER fill: #806030
    style TRAEFIK_MIDDLEWARE fill: #806030
    style SERVER_DEVICE fill: #665555
    style CONTAINER_ENGINE fill: #664545
    DOCKER_TRAEFIK_PORT443{{443/tcp}}
    DOCKER_TRAEFIK_PORT80{{80/tcp}}
    DOCKER_APP_PORT{{8080/tcp}}
    TRAEFIK_ROUTER_APP(dashboard.example.com)
    TRAEFIK_MIDDLEWARE_REDIRECT(HTTPS redirect)
    TRAEFIK_MIDDLEWARE_IP_WHITELIST(IP whitelist)
    INCOMING_REQUEST((INCOMING\nREQUEST))
    INCOMING_REQUEST --> DOCKER_TRAEFIK_PORT443
    INCOMING_REQUEST --> DOCKER_TRAEFIK_PORT80

    subgraph SERVER_DEVICE[MINI_PC]
        subgraph CONTAINER_ENGINE[DOCKER]
            subgraph APP_CONTAINER[HOMER CONTAINER]
                DOCKER_APP_PORT
            end

            subgraph TRAEFIK_CONTAINER[TRAEFIK CONTAINER]
                DOCKER_TRAEFIK_PORT443 --> TRAEFIK_ROUTER
                DOCKER_TRAEFIK_PORT80 --> TRAEFIK_ROUTER

                subgraph TRAEFIK_ROUTER[TRAEFIK HTTP ROUTER]
                    TRAEFIK_ROUTER_APP
                end

                subgraph TRAEFIK_MIDDLEWARE[TRAEFIK MIDDLEWARES]
                    TRAEFIK_MIDDLEWARE_REDIRECT
                    TRAEFIK_MIDDLEWARE_IP_WHITELIST
                end

                TRAEFIK_MIDDLEWARE_REDIRECT --> TRAEFIK_MIDDLEWARE_IP_WHITELIST
                TRAEFIK_MIDDLEWARE_REDIRECT -.-> DOCKER_TRAEFIK_PORT443
                TRAEFIK_MIDDLEWARE_IP_WHITELIST --> DOCKER_APP_PORT
                TRAEFIK_ROUTER_APP --> TRAEFIK_MIDDLEWARE_REDIRECT
            end

        end
    end
Setting up
First, create a folder to hold the configuration :
sudo mkdir /opt/apps/homer
Also create an assets directory to hold the application assets and the main configuration file, it will be mounted in the container.
mkdir /opt/apps/homer/assets
By default, on first run, it installs in this directory some example configuration files and assets (favicons, ...), we
have disabled this by setting the environment variable INIT_ASSETS to 0 (default 1).
Note that this assets directory must have the same gid / uid that the container user have (default
1000:1000), so make sure to execute :
chown -R 1000:1000 /opt/apps/homer/assets/
Then copy :
- the docker-compose.yml file from this project's homer directory into the /opt/apps/homer directory
- the config.yml file from this project's homer directory into the /opt/apps/homer/assets directory
- the homer.yml file from this project's traefik/dynamic directory into the /opt/apps/traefik/dynamic directory
Details
Service definition
:page_facing_up: docker-compose.yml :
services:

  homer:
    image: b4bz/homer:latest
    container_name: homer
    volumes:
      - ./assets/:/www/assets
    user: 1000:1000
    restart: unless-stopped
    environment:
      - INIT_ASSETS=0
      - IPV6_DISABLE=1
    networks:
      - homer-net
      - traefik-private-net

networks:

  homer-net:
    name: homer-net

  traefik-private-net:
    name: traefik-private-net
    external: true
:page_facing_up: homer.yml :
http:
  services:
    homer:
      loadBalancer:
        servers:
          - url: http://homer:8080

  routers:
    homer:
      rule: 'Host(`dashboard.example.com`)'
      entryPoints:
        - websecure
      tls:
        certResolver: default
      service: homer
      middlewares:
        - vpn-whitelist@file
Things to notice :
- Homer's assets data is bound to a local directory named
assets - It sets the
INIT_ASSETSenvironment variable to0to avoid generating default example data - It sets the
IPV6_DISABLEenvironment variable to1to disable listening on IPv6 (we don't use IPv6) - It sets a user with uid and gid
1000to run the application in the container - It uses Traefik dynamic config file to :
- create a service which will point to our container application running on port
8080 - create an HTTP router that will match
dashboard.example.comURL on ourwebsecureentrypoint to point to our service - assign the
vpn-whitelistmiddleware so that the traffic will be restricted to allowed IPs only (application reachable only from local network or through VPN) - add TLS configuration that will use our
defaultcertificates resolver, so it can generate Let's encrypt certificates
- create a service which will point to our container application running on port
- It runs in its own network (
homer-net) but must also share the same network as Traefik (traefik-private-net) so it can be auto discovered
Configuration file
:page_facing_up: config.yml :
---
header: false
footer: '<p>Created with <span class="has-text-danger">❤️</span> with <a href="https://bulma.io/">bulma</a>, <a href="https://vuejs.org/">vuejs</a> & <a href="https://fontawesome.com/">font awesome</a> // Fork me on <a href="https://github.com/bastienwirtz/homer"><i class="fab fa-github-alt"></i></a></p>' # set false if you want to hide it.

columns: 3

# Optional theme customization
theme: default
colors:
  light:
    highlight-primary: "#3367d6"
    highlight-secondary: "#4285f4"
    highlight-hover: "#5a95f5"
    background: "#f5f5f5"
    card-background: "#ffffff"
    text: "#363636"
    text-header: "#ffffff"
    text-title: "#303030"
    text-subtitle: "#424242"
    card-shadow: rgba(0, 0, 0, 0.1)
    link: "#3273dc"
    link-hover: "#363636"
  dark:
    highlight-primary: "#3367d6"
    highlight-secondary: "#2b2b2b"
    highlight-hover: "#131313"
    background: "#131313"
    card-background: "#2b2b2b"
    text: "#eaeaea"
    text-header: "#ffffff"
    text-title: "#fafafa"
    text-subtitle: "#f5f5f5"
    card-shadow: rgba(0, 0, 0, 0.4)
    link: "#3273dc"
    link-hover: "#ffdd57"

links:
  - name: "GitHub"
    icon: "fab fa-github"
    url: "https://github.com/Yann39"
    target: "_blank"

services:
  - name: "Admin tools"
    icon: "fas fa-shield"
    items:
      - name: "Dashdot"
        logo: "assets/logos/logo-dashdot.png"
        subtitle: "Minimal server monitoring"
        tag: "monitoring"
        url: "https://dashdot.example.com"
      - name: "Traefik"
        logo: "assets/logos/logo-traefik.svg"
        subtitle: "HTTP reverse proxy"
        tag: "network"
        url: "https://traefik.example.com"
      - name: "Arcane"
        logo: "assets/logos/logo-arcane.svg"
        subtitle: "Container management platform"
        tag: "tool"
        url: "https://arcane.example.com"
      - name: "Backrest"
        logo: "assets/logos/logo-backrest.svg"
        subtitle: "Backup solution built on top of restic"
        tag: "tool"
        url: "https://backrest.example.com"
      - name: "Pi-Hole"
        logo: "assets/logos/logo-pihole.svg"
        subtitle: "Network-wide ad blocking"
        tag: "network"
        url: "https://pihole.example.com/admin"
      - name: "GoatCounter"
        logo: "assets/logos/logo-goatcounter.svg"
        subtitle: "Privacy-friendly web analytics"
        tag: "analytics"
        url: "https://goatcounter.example.com"
      - name: "PhpMyAdmin"
        logo: "assets/logos/logo-phpmyadmin.svg"
        subtitle: "MySQL database management"
        tag: "tool"
        url: "https://phpmyadmin.example.com"
  - name: "Applications"
    icon: "fas fa-globe"
    items:
      - name: "Motoclub GraphQL API"
        logo: "assets/logos/logo-ccteam.svg"
        subtitle: "GraphQL API for our motoclub mobile application"
        tag: "app"
        url: "https://ccteam.example.com/ccteam-gql/graphql"
      - name: "Defrag-life"
        logo: "https://cdn2.steamgriddb.com/file/sgdb-cdn/icon_thumb/946af3555203afdb63e571b873e419f6.png"
        subtitle: "Quake 3 arena Defrag website"
        tag: "app"
        url: "https://quake.example.com"
      - name: "Lychee"
        logo: "https://avatars.githubusercontent.com/u/37916028?s=200&v=4"
        subtitle: "Photo management tool"
        tag: "app"
        url: "https://lychee.example.com"
      - name: "Homebox"
        logo: "https://homebox.software/_astro/lilbox.CmeGTiwj_Z1HYzg2.svg"
        subtitle: "Home inventory management"
        tag: "app"
        url: "https://homebox.example.com"
      - name: "Omnitools"
        logo: "https://getumbrel.github.io/umbrel-apps-gallery/omnitools/icon.svg"
        subtitle: "Various user-friendly utilities"
        tag: "tool"
        url: "https://omnitools.example.com"
      - name: "Ghostfolio"
        logo: "assets/logos/logo-ghostfolio.svg"
        subtitle: "Wealth management and portfolio tracking"
        tag: "app"
        url: "https://ghostfolio.example.com"
  - name: "Internal"
    icon: "fas fa-microchip"
    items:
      - name: "Wireguard"
        logo: "assets/logos/logo-wireguard.svg"
        subtitle: "Simple yet fast and modern VPN"
        tag: "network"
      - name: "Sablier"
        logo: "https://avatars.githubusercontent.com/u/183561550?s=200&v=4"
        subtitle: "Workload scaling on demand"
        tag: "tool"
      - name: "Unbound"
        logo: "https://i.imgur.com/cnsNS1O.png"
        subtitle: "Validating, recursive, and caching DNS resolver"
        tag: "network"
      - name: "Pocket ID"
        logo: "assets/logos/logo-pocket-id.svg"
        subtitle: "Simple OIDC provider"
        tag: "authentication"
        url: "https://pocketid.example.com"
This is simply the configuration file that is used by the application to display the dashboard page.
Run
Finally, simply run the Compose file :
sudo docker-compose -f /opt/apps/homer/docker-compose.yml up -d
You should end-up with a running homer container.
It should also have generated the needed Let's Encrypt certificates in the acme.json file in the Traefik folder.
The application will be available at https://dashboard.example.com.
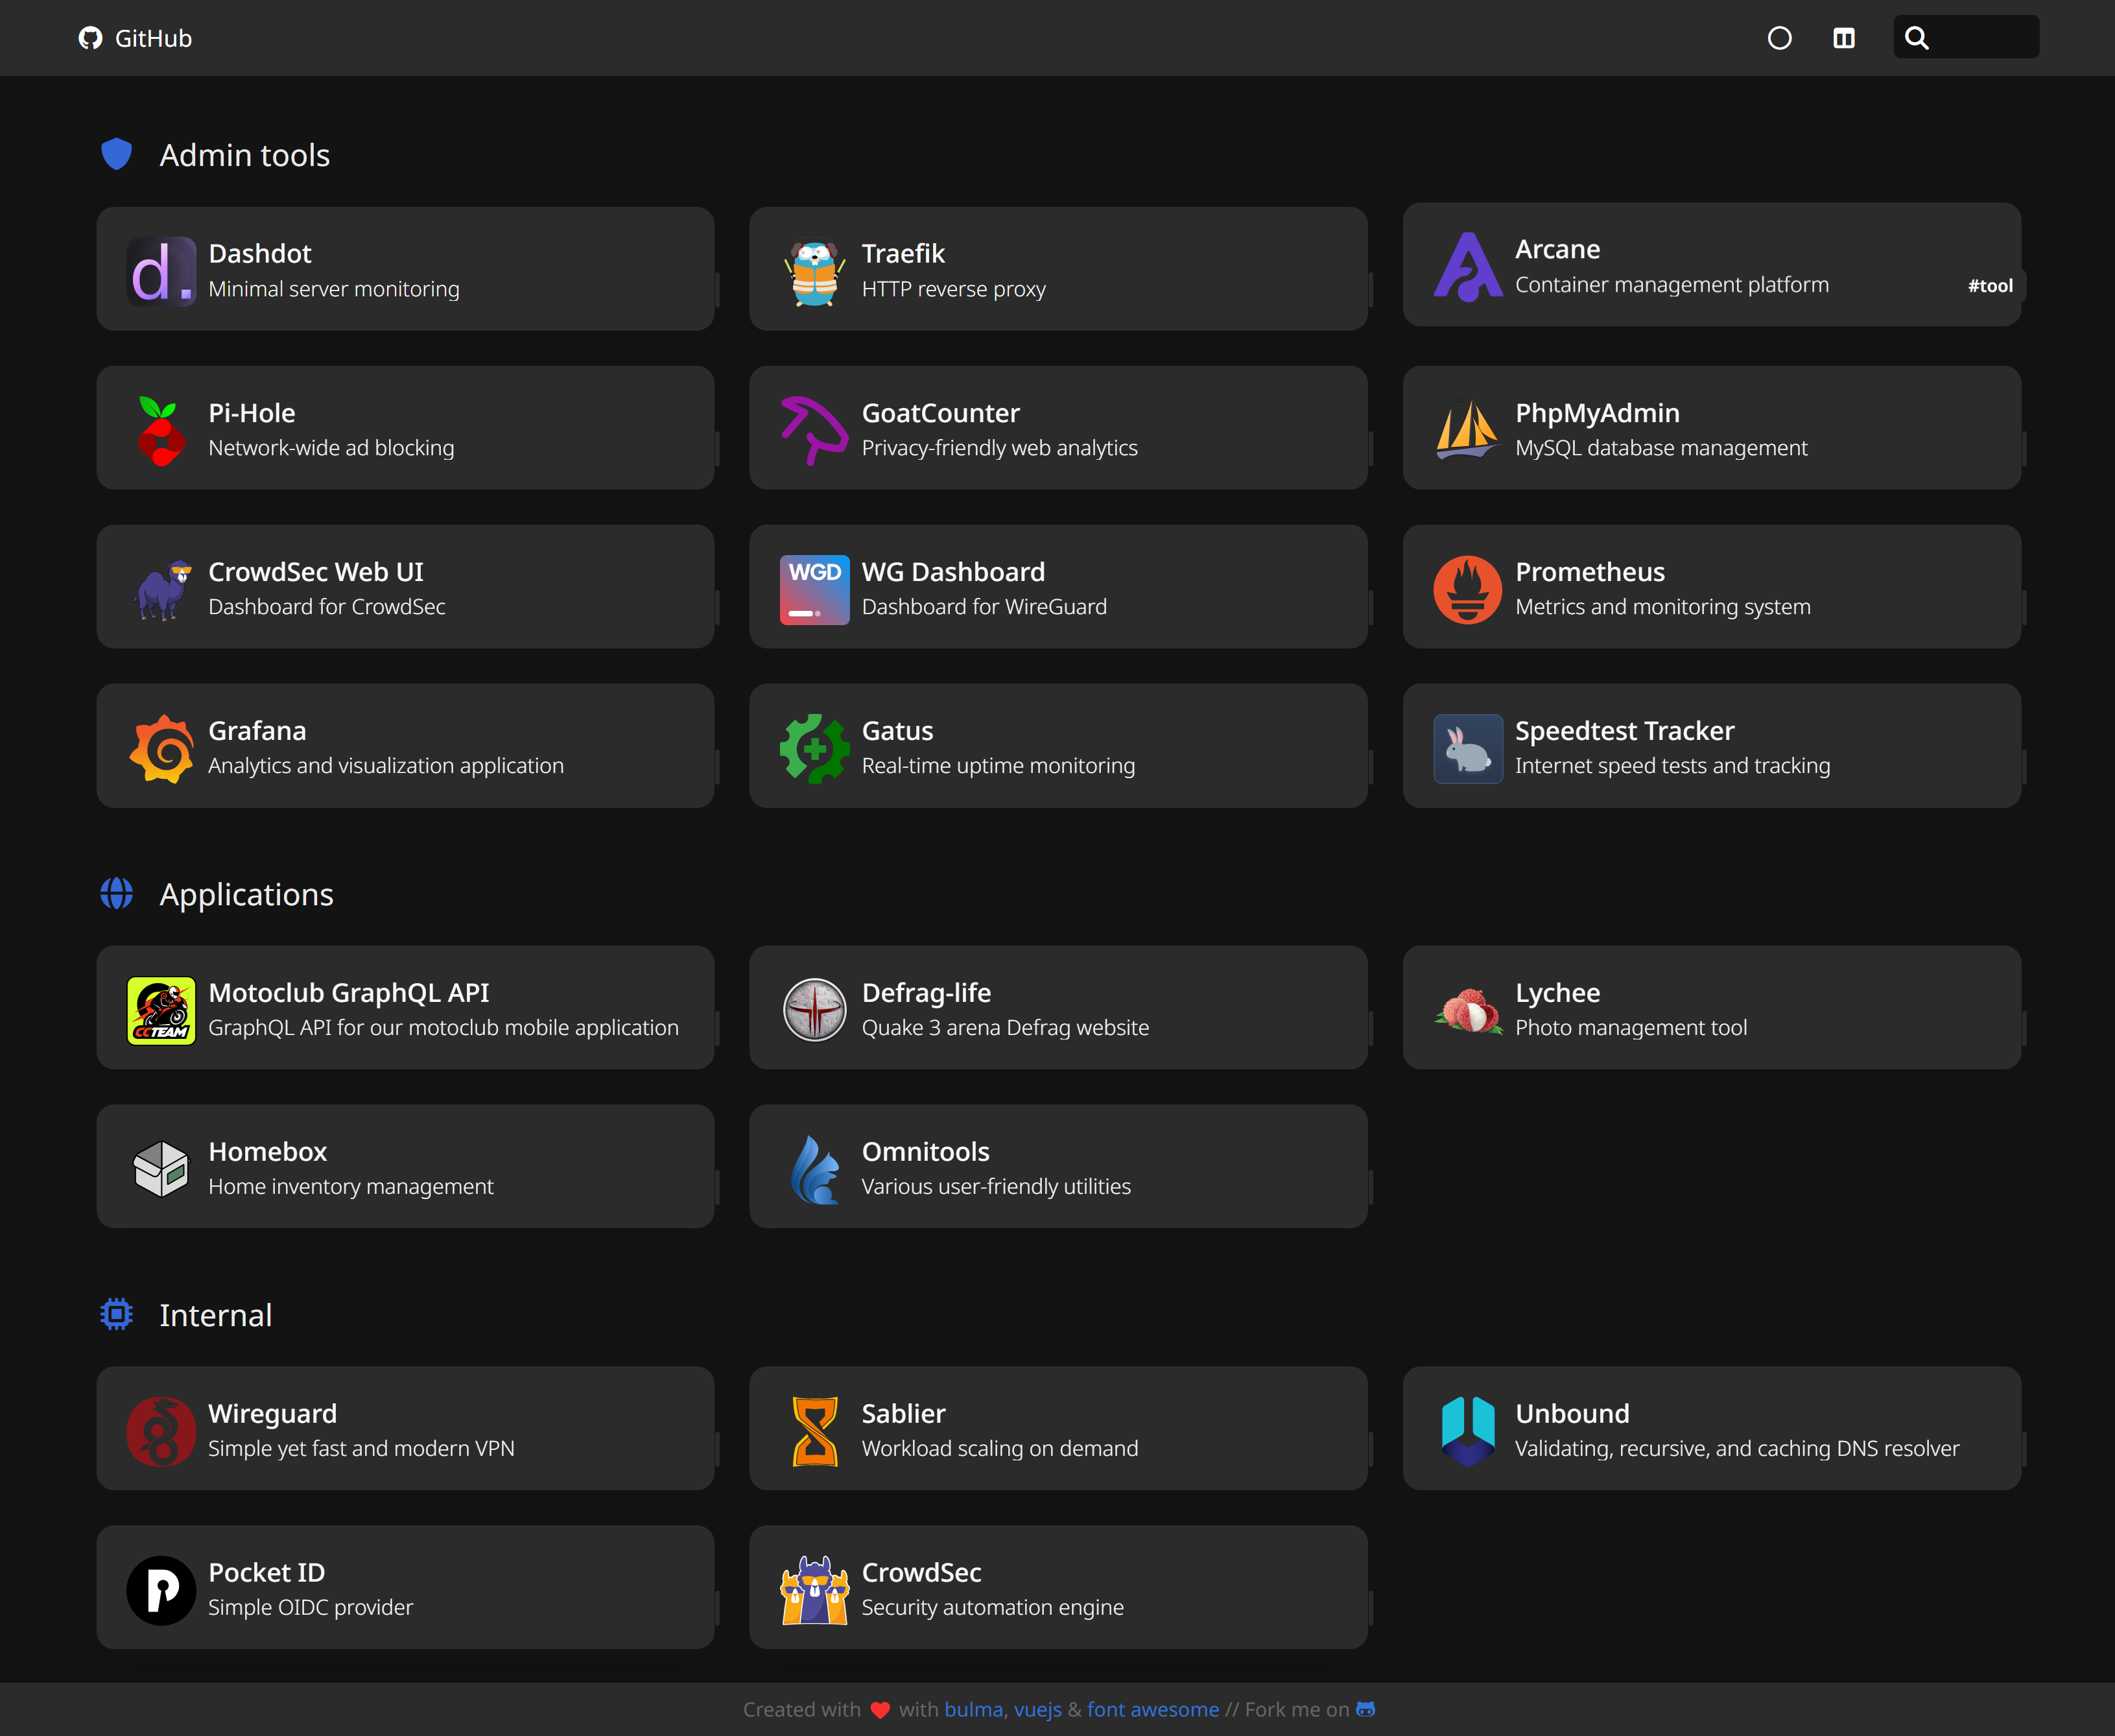
Dashdot
Dashdot is a modern application to monitor server resources through a basic UI.
flowchart LR
    style INCOMING_REQUEST fill: #205566
    style TRAEFIK_CONTAINER fill: #663535
    style APP_CONTAINER fill: #663535
    style TRAEFIK_ROUTER fill: #806030
    style TRAEFIK_MIDDLEWARE fill: #806030
    style SERVER_DEVICE fill: #665555
    style CONTAINER_ENGINE fill: #664545
    DOCKER_TRAEFIK_PORT443{{443/tcp}}
    DOCKER_TRAEFIK_PORT80{{80/tcp}}
    DOCKER_APP_PORT{{3001/tcp}}
    TRAEFIK_ROUTER_APP(dashdot.example.com)
    TRAEFIK_MIDDLEWARE_REDIRECT(HTTPS redirect)
    TRAEFIK_MIDDLEWARE_IP_WHITELIST(IP whitelist)
    INCOMING_REQUEST((INCOMING\nREQUEST))
    INCOMING_REQUEST --> DOCKER_TRAEFIK_PORT443
    INCOMING_REQUEST --> DOCKER_TRAEFIK_PORT80

    subgraph SERVER_DEVICE[MINI PC]
        subgraph CONTAINER_ENGINE[DOCKER]
            subgraph APP_CONTAINER[DASHDOT CONTAINER]
                DOCKER_APP_PORT
            end

            subgraph TRAEFIK_CONTAINER[TRAEFIK CONTAINER]
                DOCKER_TRAEFIK_PORT443 --> TRAEFIK_ROUTER
                DOCKER_TRAEFIK_PORT80 --> TRAEFIK_ROUTER

                subgraph TRAEFIK_ROUTER[TRAEFIK HTTP ROUTER]
                    TRAEFIK_ROUTER_APP
                end

                subgraph TRAEFIK_MIDDLEWARE[TRAEFIK MIDDLEWARES]
                    TRAEFIK_MIDDLEWARE_REDIRECT
                    TRAEFIK_MIDDLEWARE_IP_WHITELIST
                end

                TRAEFIK_MIDDLEWARE_REDIRECT --> TRAEFIK_MIDDLEWARE_IP_WHITELIST
                TRAEFIK_MIDDLEWARE_REDIRECT -.-> DOCKER_TRAEFIK_PORT443
                TRAEFIK_MIDDLEWARE_IP_WHITELIST --> DOCKER_APP_PORT
                TRAEFIK_ROUTER_APP --> TRAEFIK_MIDDLEWARE_REDIRECT
            end

        end
    end
Setting up
Create a folder to hold the configuration :
sudo mkdir /opt/apps/dashdot
Then :
- copy the docker-compose.yml file from this project's dashdot directory into the /opt/apps/dashdot directory
- copy the dashdot.yml file from this project's traefik/dynamic directory into the /opt/apps/traefik/dynamic directory
Details
Service definition
:page_facing_up: docker-compose.yml :
services:

  dashdot:
    image: mauricenino/dashdot:latest
    container_name: dashdot
    restart: unless-stopped
    volumes:
      - /:/mnt/host:ro
    networks:
      - dashdot-net
      - traefik-private-net

networks:

  dashdot-net:
    name: dashdot-net

  traefik-private-net:
    name: traefik-private-net
    external: true
:page_facing_up: dashdot.yml :
http:
  services:
    dashdot:
      loadBalancer:
        servers:
          - url: http://dashdot:3001

  routers:
    dashdot:
      rule: 'Host(`dashdot.example.com`)'
      entryPoints:
        - websecure
      tls:
        certResolver: default
      service: dashdot
      middlewares:
        - vpn-whitelist@file
        - sablier-dashdot@file
Things to notice :
- Dashdot's data is bound to the current directory (read-only)
- It uses Traefik dynamic config file to :
- create a service which will point to our container application running on port
3001 - create an HTTP router that will match
dashdot.example.comURL on ourwebsecureentrypoint to point to our service - add a TLS configuration that will use our
defaultcertificates resolver, so it can generate Let's encrypt certificates - assign the
vpn-whitelistmiddleware so that the traffic will be restricted to allowed IPs only (application reachable only from local network or through VPN) - assign the
sablier-dashdotmiddleware so that on-demand stop/start of the container can be done through Sablier
- create a service which will point to our container application running on port
- It runs in its own network (
dashdot-net) but must also share the same network as Traefik (traefik-private-net) so it can be auto discovered
Run
Finally, simply run the Compose file :
sudo docker-compose -f /opt/apps/dashdot/docker-compose.yml up -d
You should end-up with a running dashdot container.
It should also have generated the needed Let's Encrypt certificates in the acme.json file in the Traefik folder.
The application is available at https://dashdot.example.com.
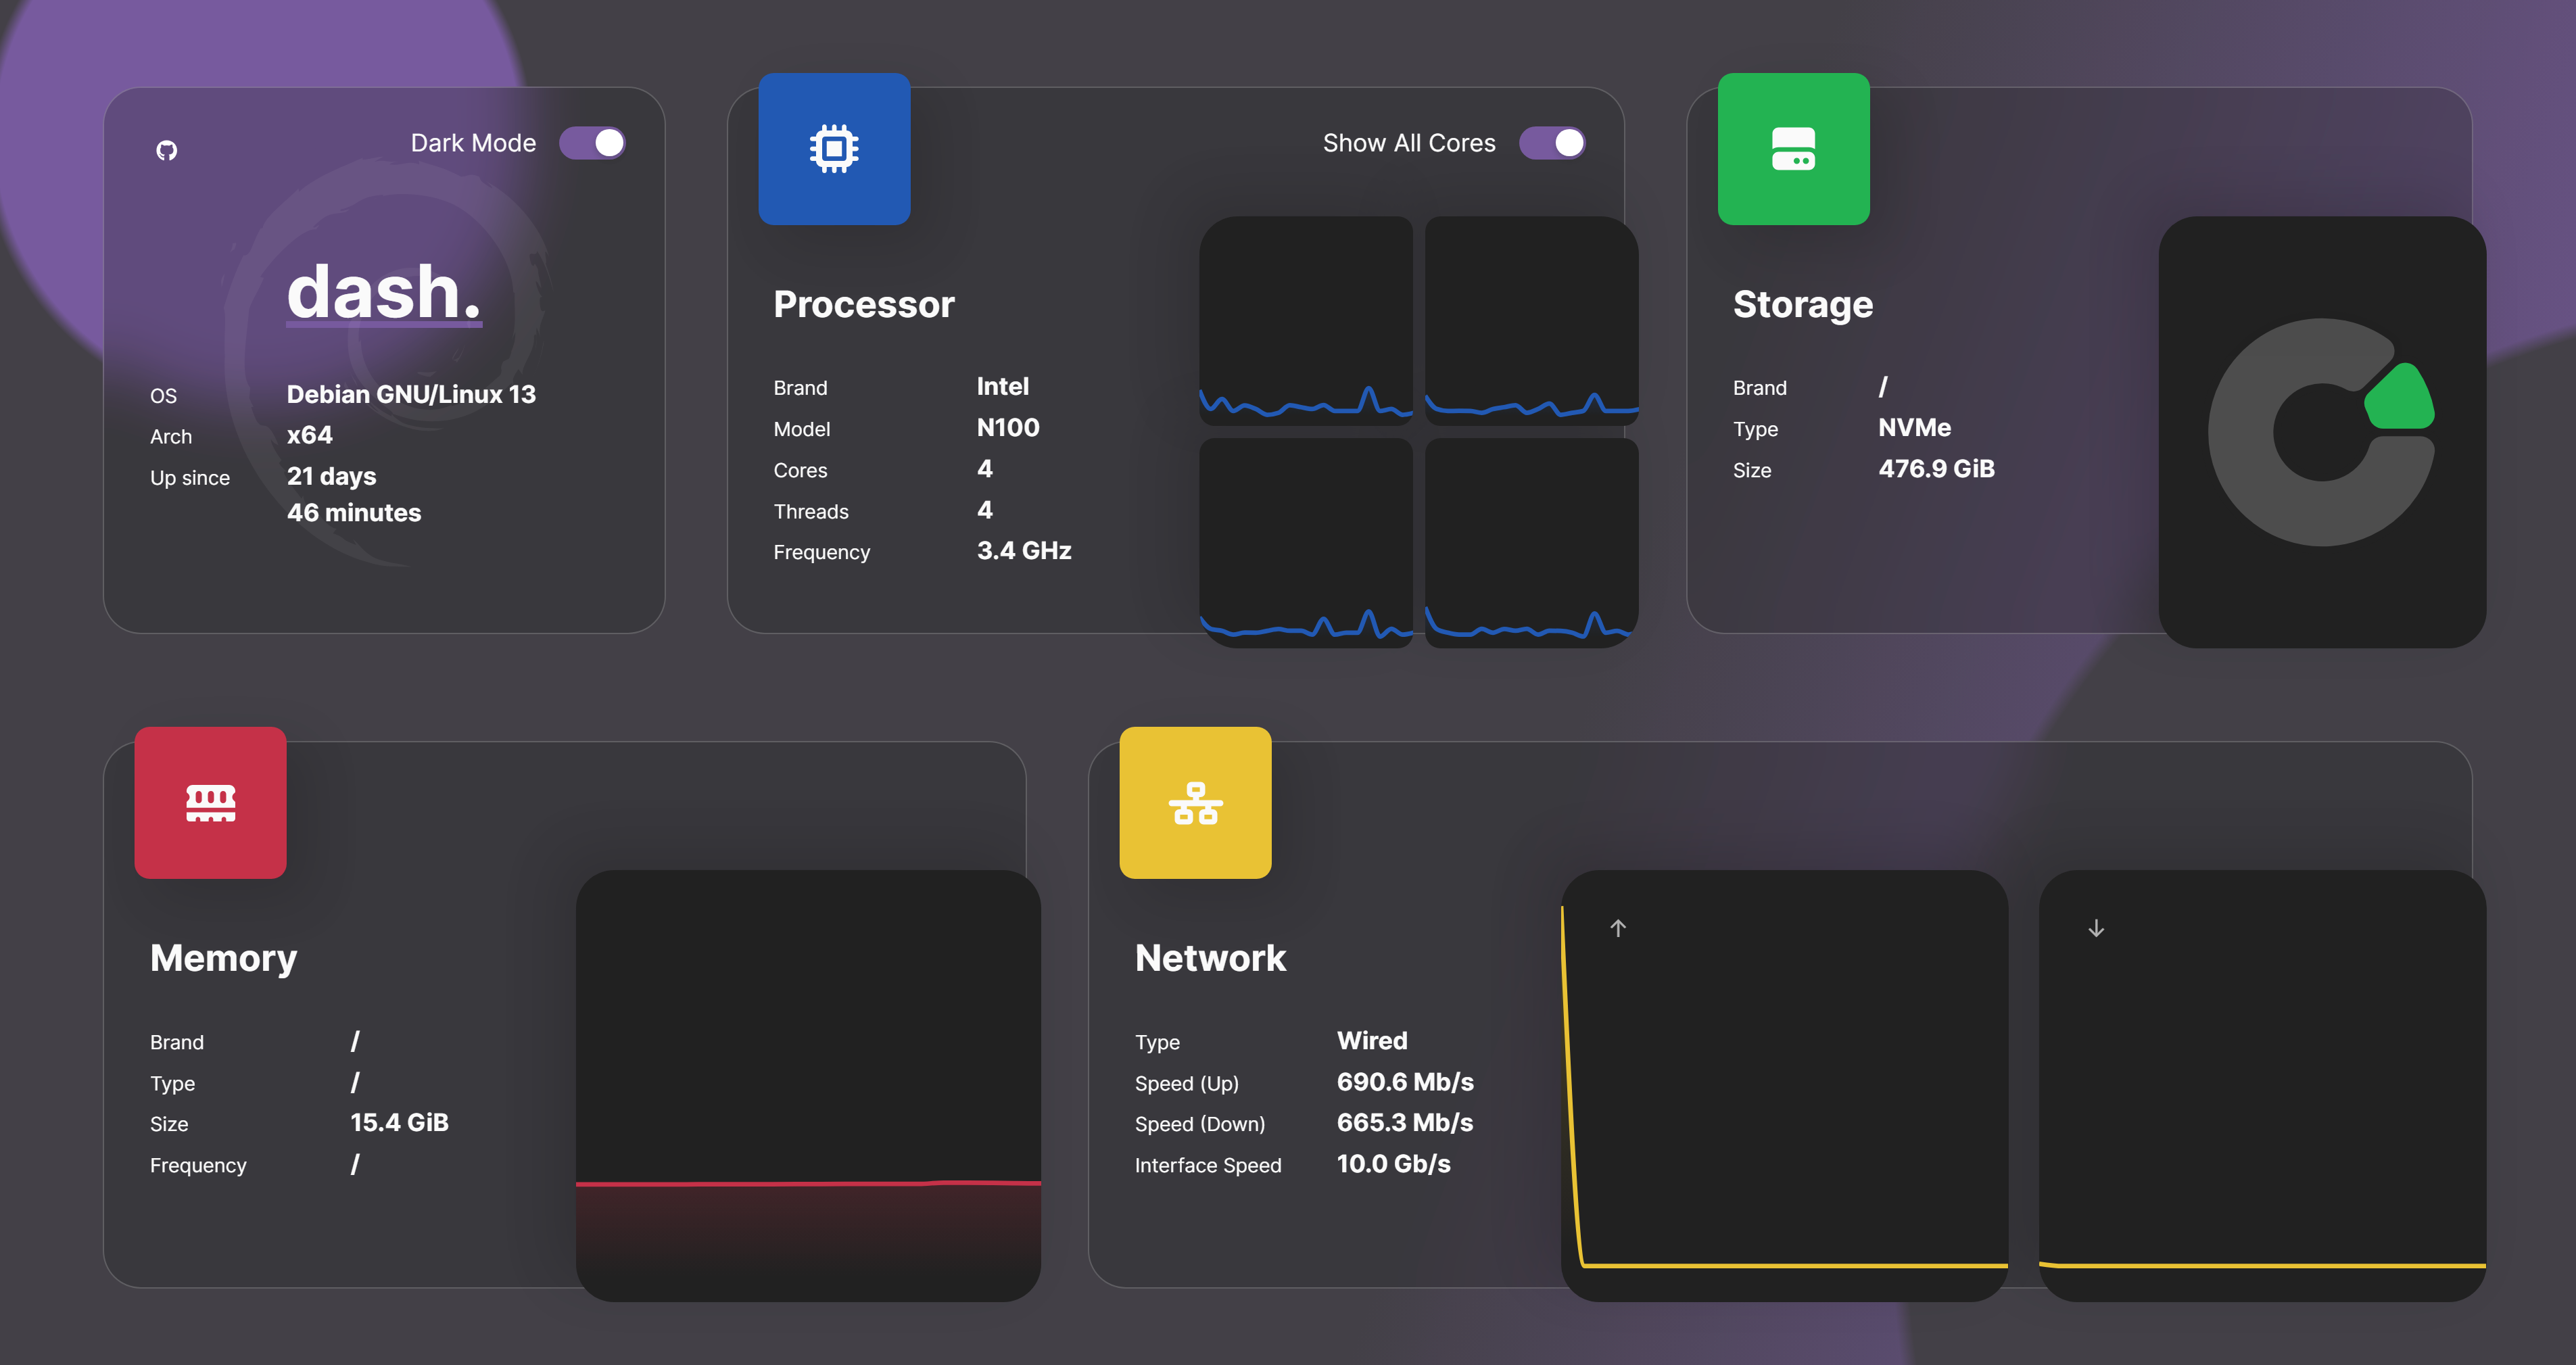
Lychee
Lychee is a robust, locally hosted web-based photo management tool. It enables you to carry out various operations on photos, including uploading, organizing, sharing, and more.
flowchart LR
    style INCOMING_REQUEST fill: #205566
    style TRAEFIK_CONTAINER fill: #663535
    style APP_CONTAINER fill: #663535
    style TRAEFIK_ROUTER fill: #806030
    style TRAEFIK_MIDDLEWARE fill: #806030
    style SERVER_DEVICE fill: #665555
    style CONTAINER_ENGINE fill: #664545
    DOCKER_TRAEFIK_PORT443{{443/tcp}}
    DOCKER_TRAEFIK_PORT80{{80/tcp}}
    DOCKER_APP_PORT{{80/tcp}}
    TRAEFIK_ROUTER_APP(lychee.example.com)
    TRAEFIK_MIDDLEWARE_REDIRECT(HTTPS redirect)
    INCOMING_REQUEST((INCOMING\nREQUEST))
    INCOMING_REQUEST --> DOCKER_TRAEFIK_PORT443
    INCOMING_REQUEST --> DOCKER_TRAEFIK_PORT80

    subgraph SERVER_DEVICE[MINI_PC]
        subgraph CONTAINER_ENGINE[DOCKER]
            subgraph APP_CONTAINER[LYCHEE CONTAINER]
                DOCKER_APP_PORT
            end

            subgraph TRAEFIK_CONTAINER[TRAEFIK CONTAINER]
                DOCKER_TRAEFIK_PORT443 --> TRAEFIK_ROUTER
                DOCKER_TRAEFIK_PORT80 --> TRAEFIK_ROUTER

                subgraph TRAEFIK_ROUTER[TRAEFIK HTTP ROUTER]
                    TRAEFIK_ROUTER_APP
                end

                subgraph TRAEFIK_MIDDLEWARE[TRAEFIK MIDDLEWARES]
                    TRAEFIK_MIDDLEWARE_REDIRECT
                end

                TRAEFIK_MIDDLEWARE_REDIRECT -.-> DOCKER_TRAEFIK_PORT443
                TRAEFIK_MIDDLEWARE_IP_WHITELIST --> DOCKER_APP_PORT
                TRAEFIK_ROUTER_APP --> TRAEFIK_MIDDLEWARE_REDIRECT
            end

        end
    end
Setting up
First, create a folder to hold the configuration :
sudo mkdir /opt/apps/lychee
Then copy :
- the docker-compose.yml file from this project's lychee directory into the /opt/apps/lychee directory.
- the lychee.yml file from this project's traefik/dynamic directory into the /opt/apps/traefik/dynamic directory.
Details
Service definition
:page_facing_up: docker-compose.yml :
services:

  lychee:
    image: lycheeorg/lychee:latest
    container_name: lychee
    volumes:
      - ./lychee/conf:/conf
      - ./lychee/uploads:/uploads
      - ./lychee/sym:/sym
      - ./lychee/logs:/logs
    environment:
      - PHP_TZ=UTC
      - TIMEZONE=UTC
      - DB_CONNECTION=mysql
      - DB_HOST=lychee-db
      - DB_PORT=3306
      - DB_DATABASE=lychee
      - DB_USERNAME=$MYSQL_USERNAME
      - DB_PASSWORD=$MYSQL_PASSWORD
      - STARTUP_DELAY=30
      - ADMIN_USER=$ADMIN_USER
      - ADMIN_PASSWORD=$ADMIN_PASSWORD
      - APP_URL=https://lychee.example.com
      - TRUSTED_PROXIES=*
    depends_on:
      - lychee-db
    restart: unless-stopped
    networks:
      - lychee-net
      - traefik-public-net

  lychee-db:
    container_name: lychee-db
    image: mariadb:latest
    restart: unless-stopped
    environment:
      - MARIADB_AUTO_UPGRADE=1
      - MYSQL_ROOT_PASSWORD=$MYSQL_ROOT_PASSWORD
      - MYSQL_DATABASE=lychee
      - MYSQL_USER=$MYSQL_USERNAME
      - MYSQL_PASSWORD=$MYSQL_PASSWORD
    volumes:
      - lychee-db-vol:/var/lib/mysql
    networks:
      - lychee-net

volumes:

  lychee-db-vol:
    name: lychee-db-vol

networks:

  lychee-net:
    name: lychee-net

  traefik-public-net:
    name: traefik-public-net
    external: true
:page_facing_up: lychee.yml :
http:
  services:
    lychee:
      loadBalancer:
        servers:
          - url: http://lychee:80

  routers:
    lychee:
      rule: 'Host(`lychee.example.com`)'
      entryPoints:
        - websecure
      tls:
        certResolver: default
      service: lychee
Things to notice :
- It binds some volumes for configuration, uploads, symbolic links and logs
- It sets some environment variables for timezone, database connection, admin user and password, application URL and trusted proxies
- It uses Traefik dynamic config file to :
- create a service which will point to our container application running on port
80 - create an HTTP router that will match
lychee.example.comURL on ourwebsecureentrypoint to point to our service - add TLS configuration that will use our
defaultcertificates resolver, so it can generate Let's encrypt certificates
- create a service which will point to our container application running on port
- It runs in its own network (
lychee-net) but must also join the public network of Traefik (traefik-public-net) to be reachable by the reverse proxy, as it is exposed to the internet (see Network segmentation)
Run
Finally, simply run the Compose file :
sudo docker-compose -f /opt/apps/lychee/docker-compose.yml up -d
You should end-up with a running lychee container.
It should also have generated the needed Let's Encrypt certificates in the acme.json file in the Traefik folder.
The application will be available at https://lychee.example.com.
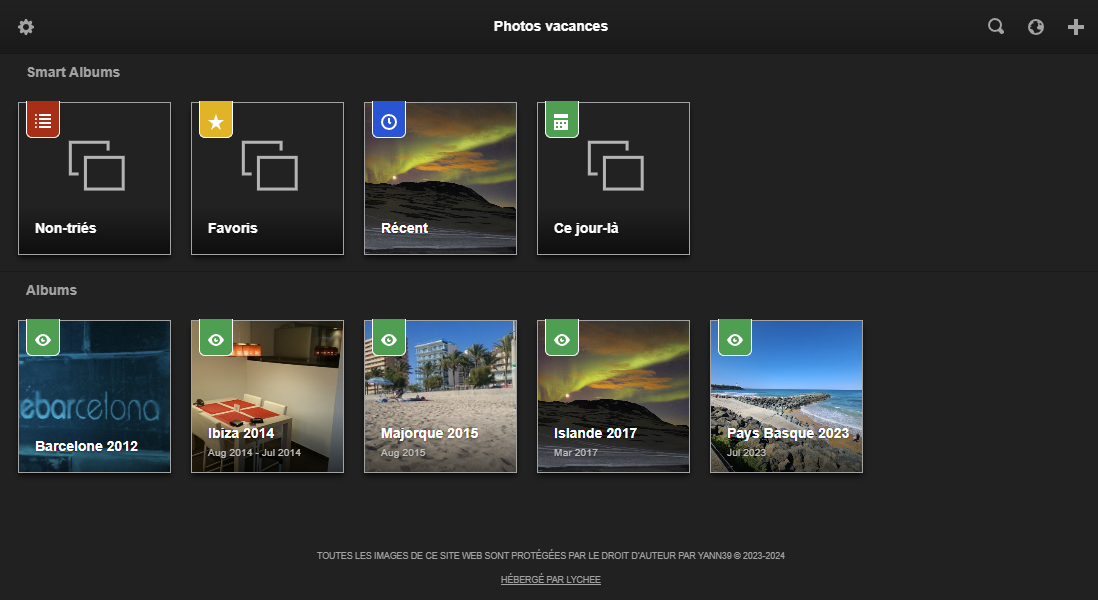
Homebox
Homebox is a simple inventory for the house : what you own, where it is stored, when it was bought, the warranty, the receipts and the manuals attached to it, with labels, a QR code per item and a full text search. Useful when the insurance asks for a list, or just to remember in which box something ended up.
It is a small Go application with an embedded database, it needs nothing else. It is reachable from the local network and the VPN only, and it is our example of an application doing OIDC natively against PocketID, with its public issuer URL.
Here is an overview of the network flow :
flowchart LR
    style INCOMING_REQUEST fill: #205566
    style TRAEFIK_CONTAINER fill: #663535
    style APP_CONTAINER fill: #663535
    style POCKETID_CONTAINER fill: #663535
    style TRAEFIK_ROUTER fill: #806030
    style TRAEFIK_MIDDLEWARE fill: #806030
    style SERVER_DEVICE fill: #665555
    style CONTAINER_ENGINE fill: #664545
    DOCKER_TRAEFIK_PORT443{{443/tcp}}
    DOCKER_APP_PORT{{7745/tcp}}
    DOCKER_POCKETID_PORT{{1411/tcp}}
    TRAEFIK_ROUTER_APP(homebox.example.com)
    TRAEFIK_MIDDLEWARE_IP_WHITELIST(IP whitelist)
    INCOMING_REQUEST((INCOMING\nREQUEST))
    INCOMING_REQUEST --> DOCKER_TRAEFIK_PORT443

    subgraph SERVER_DEVICE[MINI PC]
        subgraph CONTAINER_ENGINE[DOCKER]
            subgraph TRAEFIK_CONTAINER[TRAEFIK CONTAINER]
                DOCKER_TRAEFIK_PORT443 --> TRAEFIK_ROUTER

                subgraph TRAEFIK_ROUTER[TRAEFIK HTTP ROUTER]
                    TRAEFIK_ROUTER_APP
                end

                subgraph TRAEFIK_MIDDLEWARE[TRAEFIK MIDDLEWARES]
                    TRAEFIK_MIDDLEWARE_IP_WHITELIST
                end

                TRAEFIK_ROUTER_APP --> TRAEFIK_MIDDLEWARE_IP_WHITELIST
            end

            subgraph APP_CONTAINER[HOMEBOX CONTAINER]
                DOCKER_APP_PORT
            end

            subgraph POCKETID_CONTAINER[POCKETID CONTAINER]
                DOCKER_POCKETID_PORT
            end

            TRAEFIK_MIDDLEWARE_IP_WHITELIST --> DOCKER_APP_PORT
            DOCKER_APP_PORT -.->|OIDC single sign - on, through the Traefik alias| DOCKER_POCKETID_PORT
        end
    end
Setting up
Create a folder to hold the configuration :
sudo mkdir /opt/apps/homebox
Then :
- copy the .env and docker-compose.yml files from this project's homebox directory into the /opt/apps/homebox directory
- copy the homebox.yml file from this project's traefik/dynamic directory into the /opt/apps/traefik/dynamic directory
- create an OIDC client in PocketID with the callback URL Homebox documents, then fill
HBOX_OIDC_CLIENT_IDandHBOX_OIDC_CLIENT_SECRET - generate the pepper used to hash the API keys (
openssl rand -base64 32) and put it inHBOX_AUTH_API_KEY_PEPPER - add a local DNS record
homebox.example.compointing to the mini PC (see Pi-hole), the service is not published on the internet
[!IMPORTANT]
HBOX_OIDC_ISSUER_URLmust be the public URL, without a trailing slash (Homebox is sensitive to it), and it must match character for character theissuerreturned by the provider : its OIDC library refuses any difference. The internal URLhttp://pocketid:1411therefore cannot be used, it answers with the public issuer and Homebox rejects it withissuer URL provided to client ... did not match. That the container can nonetheless reach the public URL is exactly what the Traefik network alias and thepocketid-whitelistmiddleware are for, see PocketID. Without them the container does not even resolve the name, since the private services have no public DNS record.
Details
Service definition
:page_facing_up: docker-compose.yml :
services:

  homebox:
    image: ghcr.io/sysadminsmedia/homebox:latest
    container_name: homebox
    restart: always
    env_file: .env
    environment:
      - HBOX_LOG_LEVEL=debug
      - HBOX_LOG_FORMAT=text
      - HBOX_WEB_MAX_UPLOAD_SIZE=10
      - HBOX_OIDC_ENABLED=true
      - HBOX_OIDC_ISSUER_URL=https://pocketid.example.com
      - HBOX_OIDC_CLIENT_ID=f1644c44-4f50-458f-9043-2bad9224e09c
      #- HBOX_OIDC_AUTO_REDIRECT=true
      #- HBOX_OPTIONS_ALLOW_LOCAL_LOGIN=false
      - HBOX_OPTIONS_TRUST_PROXY=true
      # Please consider allowing analytics to help us improve Homebox (basic computer information, no personal data)
      - HBOX_OPTIONS_ALLOW_ANALYTICS=true
    volumes:
      - homebox-data:/data/
    networks:
      - homebox-net
      - traefik-private-net

volumes:

  homebox-data:
    name: homebox-data-vol

networks:

  homebox-net:
    name: homebox-net

  traefik-private-net:
    name: traefik-private-net
    external: true
:page_facing_up: homebox.yml :
http:
  services:
    homebox:
      loadBalancer:
        servers:
          - url: http://homebox:7745

  routers:
Truncated — view the full README on GitHub.
Contributors

48 commits
Similar repos


Languages
PowerShell
55.0%
Shell
33.3%
Dockerfile
11.7%
Personal self-hosted infrastructure setup for N100-based mini PC
PowerShell
1
48 commits
updated Sep 27, 2026
See what people are saying
README
Personal self-hosting guide
This project describes my personal self-hosted infrastructure setup, running on a mini PC (N100 based).
This was meant to be just a reminder for me, but I wrote it as a guide, in case it might help someone.
It uses only free and open source software.
[!NOTE] This project is based on my previous home lab setup running on a Banana Pi board, this one contains more up-to-date instructions.
The original project can be found at https://github.com/Yann39/self-hosted.
[!IMPORTANT] The content of this repository is provided "as is", with no guarantee that the information is complete or error-free. The techniques and tools discussed here come with inherent risks. The author takes absolutely no responsibility for possible consequences due to the use of the related software.
Table of Content
Overview
Plan
The goal is still the same : learning, and have an environment :
- 100% self-hosted (privacy preserving, full control over data and software)
- Secure (authentication, SSL/TLS, reverse proxy, firewall, ad blocking, DDOS protection, rate limiting, custom DNS resolver, ...)
- Lightweight (runs smoothly with minimal hardware and software requirements)
- Container-ready (isolated, portable, scalable applications)
- Accessible (some services accessible only locally, some only through VPN, some publicly)
- Supervised (monitoring, alerting, tracking, backup tools)
These are the tools we are going to run :
| Logo | Name | Repository | Description |
|---|---|---|---|
| Docker | https://github.com/docker | Help to build, share, and run container applications |
| Docker Compose | https://github.com/docker/compose | Run multi-container applications with Docker |
| Arcane | https://github.com/getarcaneapp/arcane | Management platform for containerized applications |
| Traefik | https://github.com/traefik/traefik | Modern HTTP reverse proxy and load balancer |
| Sablier | https://github.com/sablierapp/sablier | Workload scaling on demand |
| PocketID | https://github.com/pocket-id/pocket-id | Simple OIDC provider for passkey authentication |
| CrowdSec | https://github.com/crowdsecurity/crowdsec | Collaborative intrusion prevention, bans attackers |
| CrowdSec Web UI | https://github.com/TheDuffman85/crowdsec-web-ui | Web dashboard for CrowdSec alerts and decisions |
| Wireguard | https://github.com/WireGuard | Simple yet fast and modern VPN |
| WGDashboard | https://github.com/WGDashboard/WGDashboard | Web interface to manage WireGuard peers |
| Pi-hole | https://github.com/pi-hole/pi-hole | Network-wide ad blocking |
| Unbound | https://github.com/NLnetLabs/unbound | Validating, recursive, and caching DNS resolver |
| Homer | https://github.com/bastienwirtz/homer | Static application dashboard |
| Homebox | https://github.com/sysadminsmedia/homebox | Inventory and organisation system for the home |
| Omnitools | https://github.com/iib0011/omni-tools | Various online tools for everyday tasks |
| Dashdot | https://github.com/MauriceNino/dashdot | Minimal server dashboard and monitoring |
| Prometheus | https://github.com/prometheus/prometheus | Metrics collection and time series database |
| Grafana | https://github.com/grafana/grafana | Dashboards and visualization for metrics |
| Gatus | https://github.com/TwiN/gatus | Uptime monitoring and alerting, status page |
| Ghostfolio | https://github.com/ghostfolio/ghostfolio | Wealth management and portfolio tracking |
| Backrest | https://github.com/garethgeorge/backrest | Web UI for restic backups (snapshots, encryption) |
| GoatCounter | https://github.com/arp242/goatcounter | Privacy-friendly web analytics, no cookies |
| Lychee | https://github.com/LycheeOrg/Lychee | Free photo-management tool |
| PhpMyAdmin | https://github.com/phpmyadmin/phpmyadmin | Web user interface to manage MySQL databases |
And also some personal applications :
- My first PHP / MySQL website from the early 2000's ! : https://github.com/Yann39/defrag-life
- A GraphQL API (Java / Spring Boot) for one of my Flutter mobile applications : https://github.com/Yann39/ccteam-graphql
All of this runs on a Trigkey G4 mini PC ! With the following specifications :
|
|
|
[!NOTE] This hardware is not designed for high loads, I only have a few users on my public applications, of course if you need to handle more load you might consider a better machine.
It should also work on many other x86 based computers.
Target architecture
Here is a chart representing the global network "architecture" we are going to set up, simplified with only the most relevant services. See Network flow for more detailed schemas.
This architecture allows exposing applications to the internet while restricting access to some of them only through VPN or from the local network. It's up to you to choose the accessibility level you need for each service, you may want some to be accessible only from your local network, some only via VPN, and others to anyone from the internet.
flowchart TB
   style HOSTING_PROVIDER fill: #4d683b
   style DDNS_PROVIDER fill: #69587b
   style INTERNET_SERVICE_PROVIDER fill: #205566
   style SERVER_DEVICE fill: #665151
   style CONTAINER_ENGINE fill: #664343
   style TRAEFIK_CONTAINER fill: #663535
   style PIHOLE_CONTAINER fill: #663535
   style UNBOUND_CONTAINER fill: #663535
   style MYAPP_CONTAINER fill: #663535
   style CROWDSEC_CONTAINER fill: #663535
   style SABLIER_CONTAINER fill: #663535
   style WIREGUARD_HOST fill: #663535
   style TRAEFIK_ROUTER fill: #806030
   style TRAEFIK_MIDDLEWARE fill: #806030
   style VPN_CLIENT fill: #105040
   style PIHOLE_DNS_RECORDS fill: #806030
   style CROWDSEC_COMMUNITY fill: #4d683b
   DOMAIN(example.com)
   SUBDOMAIN_WIREGUARD(wireguard.example.com)
   SUBDOMAIN_MYAPP(myapp.example.com)
   DDNS(myddns.ddns.net)
   ROUTER[public IP]
   ROUTER_PORT80{{80/tcp}}
   ROUTER_PORT443{{443/tcp}}
   ROUTER_PORT51820{{51820/udp}}
   DOCKER_WIREGUARD_PORT51820{{51820/udp}}
   DOCKER_MYAPP_PORT5000{{5000/tcp}}
   DOCKER_PIHOLE_PORT80{{80/tcp}}
   DOCKER_PIHOLE_PORT53{{53/udp}}
   DOCKER_TRAEFIK_PORT443{{443/tcp}}
   DOCKER_TRAEFIK_PORT80{{80/tcp}}
   DOCKER_TRAEFIK_PORT8080{{8080/tcp}}
   DOCKER_UNBOUND_PORT53{{53/udp}}
   TRAEFIK_ROUTER_MYAPP(myapp\n.example.com)
   TRAEFIK_ROUTER_PIHOLE(pihole\n.example.com)
   TRAEFIK_ROUTER_TRAEFIK(traefik\n.example.com)
   ROOT_DNS_SERVERS[Root DNS servers]
   DNS_ISP[DNS 1 & 2]
   DOCKER_PIHOLE_DNS[DNS 1 & 2]
   PIHOLE_DNS_PIHOLE[pihole\n.example.com]
   PIHOLE_DNS_TRAEFIK[traefik\n.example.com]
   PIHOLE_DNS_MYAPP[myapp\n.example.com]
   CROWDSEC_BOUNCER(CrowdSec bouncer)
   CROWDSEC_ENGINE[Security engine\n+ local API]
   ACCESS_LOG[(access log)]
   CROWDSEC_COMMUNITY[CrowdSec\ncommunity blocklist]

   subgraph VPN_CLIENT[VPN CLIENT]
      WIREGUARD_CLIENT_ENDPOINT[Endpoint]
      WIREGUARD_CLIENT_DNS[DNS]
   end

   subgraph HOSTING_PROVIDER[DOMAIN NAME REGISTRAR]
      DOMAIN -->|subdomain| SUBDOMAIN_MYAPP
      DOMAIN -->|subdomain| SUBDOMAIN_WIREGUARD
   end

   subgraph DDNS_PROVIDER[DYNAMIC DNS PROVIDER]
      SUBDOMAIN_MYAPP --->|CNAME| DDNS
      SUBDOMAIN_WIREGUARD --->|CNAME| DDNS
   end

   subgraph INTERNET_SERVICE_PROVIDER[INTERNET SERVICE PROVIDER]
      DDNS --->|DynDNS| ROUTER
      ROUTER --> ROUTER_PORT443
      ROUTER --> ROUTER_PORT80
      ROUTER --> ROUTER_PORT51820
      DNS_ISP
   end

   subgraph SERVER_DEVICE[MINI PC]

      subgraph CONTAINER_ENGINE[DOCKER]

         subgraph TRAEFIK_CONTAINER[TRAEFIK CONTAINER]

            subgraph TRAEFIK_ROUTER[TRAEFIK HTTP ROUTER]
            TRAEFIK_ROUTER_TRAEFIK
            TRAEFIK_ROUTER_MYAPP
            TRAEFIK_ROUTER_PIHOLE
            end

            subgraph TRAEFIK_MIDDLEWARE[TRAEFIK MIDDLEWARE]
               REDIRECT(HTTPS redirect)
               IP_WHITELISTING(IP whitelist)
               SABLIER(Sablier dynamic)
               AUTH(PocketID auth)
            end

            CROWDSEC_BOUNCER
            ACCESS_LOG
            DOCKER_TRAEFIK_PORT80
            DOCKER_TRAEFIK_PORT443
            DOCKER_TRAEFIK_PORT8080
         end

         subgraph SABLIER_CONTAINER[SABLIER CONTAINER]
            DOCKER_SABLIER_PORT10000
            WAITING_PAGE(Waiting page)
         end

         subgraph PIHOLE_CONTAINER[PIHOLE CONTAINER]

            subgraph PIHOLE_DNS_RECORDS[LOCAL DNS RECORDS]
               PIHOLE_DNS_TRAEFIK ~~~
               PIHOLE_DNS_PIHOLE ~~~
               PIHOLE_DNS_MYAPP
            end

            DOCKER_PIHOLE_PORT53
            DOCKER_PIHOLE_PORT80
            DOCKER_PIHOLE_DNS
         end

         subgraph WIREGUARD_HOST[WIREGUARD CONTAINER]
           DOCKER_WIREGUARD_PORT51820
         end

         subgraph MYAPP_CONTAINER[MYAPP CONTAINER]
           DOCKER_MYAPP_PORT5000
         end

         subgraph UNBOUND_CONTAINER[UNBOUND CONTAINER]
           DOCKER_UNBOUND_PORT53
         end

         subgraph CROWDSEC_CONTAINER[CROWDSEC CONTAINER]
           CROWDSEC_ENGINE
         end

      end

   end

   CLIENT((User )) -.-> VPN_CLIENT
   BROWSER((Browser)) --> HOSTING_PROVIDER
   CLIENT -.-> BROWSER
   VPN_CLIENT --> BROWSER
   WIREGUARD_CLIENT_ENDPOINT -.->|Server static IP\n192 . 168. 0 . 16|SERVER_DEVICE
   WIREGUARD_CLIENT_DNS -->|Server tunnel address\n10 . 0 . 0 . 1| SERVER_DEVICE
   ROUTER_PORT51820 -->|port forward|DOCKER_WIREGUARD_PORT51820
   ROUTER_PORT443 ------>|port forward|DOCKER_TRAEFIK_PORT443
   ROUTER_PORT80 -->|port forward|DOCKER_TRAEFIK_PORT80
   DNS_ISP ------>|Server static IP|DOCKER_PIHOLE_PORT53
   PIHOLE_DNS_MYAPP --->|Server internal IP|DOCKER_TRAEFIK_PORT443
   PIHOLE_DNS_PIHOLE --->|Server internal IP|DOCKER_TRAEFIK_PORT443
   PIHOLE_DNS_TRAEFIK --->|Server internal IP| DOCKER_TRAEFIK_PORT443
   DOCKER_TRAEFIK_PORT443 --> CROWDSEC_BOUNCER
   CROWDSEC_BOUNCER ----->|IP not banned|TRAEFIK_ROUTER
   DOCKER_TRAEFIK_PORT80 --> TRAEFIK_ROUTER
   CROWDSEC_BOUNCER -.->|every request logged|ACCESS_LOG
   ACCESS_LOG -.........->|reads, detects attacks|CROWDSEC_ENGINE
   CROWDSEC_ENGINE -.->|decisions|CROWDSEC_BOUNCER
   CROWDSEC_ENGINE <-...->|signals / community blocklist|CROWDSEC_COMMUNITY
   TRAEFIK_ROUTER_MYAPP --> REDIRECT
   TRAEFIK_ROUTER_PIHOLE --> REDIRECT
   TRAEFIK_ROUTER_TRAEFIK -->|Dashboard / API|REDIRECT
   IP_WHITELISTING --> AUTH
   IP_WHITELISTING --> DOCKER_PIHOLE_PORT80
   REDIRECT ----> SABLIER
   SABLIER <-..->|return status|DOCKER_SABLIER_PORT10000
   SABLIER --->|not ready|WAITING_PAGE
   SABLIER --->|ready|DOCKER_MYAPP_PORT5000
   REDIRECT --> IP_WHITELISTING
   DOCKER_SABLIER_PORT10000 <-.->|check status|DOCKER_MYAPP_PORT5000
   AUTH --> DOCKER_TRAEFIK_PORT8080
   DOCKER_PIHOLE_DNS ---> DOCKER_UNBOUND_PORT53
   UNBOUND_CONTAINER <----> ROOT_DNS_SERVERS
Basically all services will be accessible via dedicated subdomains which will point to our local network, either through dynamic DNS or through local DNS records, then a reverse proxy will be responsible for routing the requests to the right application running in Docker containers.
We make the ISP upstream DNS (from router configuration) point to the server IP address, so that we reroute the entire Internet traffic through Pi-hole and thus take advantage of its benefits.
In this example Traefik (traefik.example.com) and Pi-Hole (pihole.example.com) are only accessible through VPN and from the local network thanks to local DNS records and IP whitelisting, while Myapp (myapp.example.com) is also accessible from the internet publicly. In addition, Traefik dashboard is behind OIDC authentication through PocketID, see PocketID.
On top of that, CrowdSec watches the Traefik access log and its bouncer, plugged on the HTTPS entrypoint, rejects the IP addresses flagged as malicious (by our own scenarios or by the community blocklist) before they reach any service, see CrowdSec.
You will find more details on how all this has been implemented later in this guide.
Install and prepare system
By default, the Mni PC came with Windows 11, I simply installed Debian 12 instead (then followed version up to 13.4, which is the version I use at the time of writing this guide). Backup the Windows key before, just in case.
- Download latest Debian image for amd64 :
- debian-12.5.0-amd64-netinst.iso
- Download Rufus or equivalent software to be able to write the image to a USB key
- Simply select the image in Rufus and write it to the USB key with the default proposed options
- Insert the USB key into the mini PC and start it, you may need to access the bios to change the boot device priority, to boot on the USB key
- Then follow the Debian installation instructions, I personally installed the basic system without GUI (no desktop environment)
System user
When installing Debian, you should have been asked to create a regular user account. We will simply use that user for the whole guide.
For security reasons, do not use the root user directly.
If you run a program as root and a security flaw is exploited, the attacker has access to the whole system without
restriction.
Using a regular user, even with sudo enabled, will require running sudo and will still prompt for the account password
as an additional security step.
It is also safer in case you unintentionally issue a command that could hurt the system (like deleting system files,
etc.).
[!NOTE] We may also create specific users inside Docker containers for some applications, specially when creating our own Dockerfile, but we'll clarify then whether additional permissions need to be added in case they need access to the local filesystem through a bind mount.
sudo is not installed on Debian by default. You have to install it.
So, become root and install sudo :
su -
apt install sudo
Then add user in the sudoers :
/sbin/adduser username sudo
SSH access
Generally, you'll want to leave your machine in a cool, quiet corner, rather than letting it land around in your feet and having to connect a keyboard/mouse/screen every time you want to access it.
A solution is simply to access it as a remote computer via SSH, from your main computer.
In the normal Debian images, SSH is not enabled by default, so you need to install openssh server to allow SSH connections :
apt update
apt install openssh-server
Then simply use the ssh command from the client machine to establish a secure and authenticated SSH connection to the
mini PC (here named n100) :
ssh username@n100
Enter your password then you are ready to go !
You can also use your preferred SSH client.
Unless you want to be able to do some operations from outside your local network, there is no need to open the SSH port to the internet. If you do so consider using it behind a VPN (even if SSH itself is very secure).
Basic tools
We need to install some basic tools which will be useful for the next steps.
Install curl (for transferring data through URLs) :
sudo apt install curl
Install netstat (to check network connections) :
sudo apt install net-tools
Optionally install vim (improved vi) :
sudo apt install vim
Directory structure
We will place every application configuration into the /opt/apps directory, as follows :
/
|- opt
    |- apps
        |- traefik
        |- arcane
        |- phpmyadmin
        |- dashdot
        |- ...
Usually this directory (/opt) is reserved for any software and packages that are not part of the default installation, but feel free to choose another location.
You can already create the directory :
sudo mkdir /opt/apps
We will create the subdirectories associated with each application when we install them.
Docker & Docker Compose
|
|
|
We will use Docker to containerize and run our different applications.
Docker enables to separate applications from the infrastructure, it provides the ability to package and run an application in an isolated environment called a container. Containers contain everything needed to run the application, so you don't need to rely on what's installed on the host.
We will also install Docker Compose, so we can define and run multi-container Docker applications.
Docker provides an installation script, but in Debian 13, we can install the Docker engine through the package manager and a more modern version of Docker Compose is available as a plugin.
Complete Docker setup on Debian 13 :
# 1. Remove any conflicting packages
sudo dpkg --remove --force-depends docker-buildx-plugin docker-compose-plugin docker-compose
sudo apt --fix-broken install
sudo apt autoremove

# 2. Install Docker Engine + plugins
sudo apt update
sudo apt install docker.io docker-compose-plugin docker-buildx-plugin

# 3. Enable and start Docker
sudo systemctl enable --now docker
sudo systemctl status docker

# 4. Add user to docker group
sudo usermod -aG docker $USER
newgrp docker  # or log out/in

# 5. Check Docker installation
sudo docker info
[!NOTE] In this guide I systematically use latest images (
:latesttag), but usually you better want to avoid using:latesttags in production. Anyway if you uselatesttags and want to update an image in the future, simply pull it again and rerun your container / compose file, i.e. :sudo docker-compose pull sudo docker-compose up -dThen remove any old images.
Network configuration
Before installing our services, we need to configure the network, so we can reach our applications from different locations.
The idea is to have :
- A main domain name
- A subdomain name for each application that must be reachable from the internet
- A dynamic DNS name to avoid having to use a static public IP address
- A Traefik reverse proxy to handle HTTP request that will be port forwarded to the applications
For services that will not be accessible to the internet, we will use Pi-Hole’s ability to manage local DNS records (each record will point to server's internal IP address) so that they are also reachable using a subdomain name.
Here is an overview of the route for each case, when a client request myapp.example.com :
:small_blue_diamond: Internet access :
flowchart LR
    style HOSTING_PROVIDER fill: #4d683b
    style DDNS_PROVIDER fill: #69587b
    style INTERNET_SERVICE_PROVIDER fill: #205566
    style TRAEFIK_CONTAINER fill: #663535
    style APPLICATION fill: #663535
    style SERVER_DEVICE fill: #665151
    CLIENT((Client))
    SUBDOMAIN_MYAPP(myapp\n.example.com)
    DDNS(myddns\n.ddns.net)
    ROUTER[public IP]
    ROUTER_PORT{{port}}
    DOCKER_TRAEFIK_PORT{{port}}
    APPLICATION_PORT{{port}}

    subgraph HOSTING_PROVIDER[DOMAIN NAME REGISTRAR]
        SUBDOMAIN_MYAPP
    end

    subgraph DDNS_PROVIDER[DYNAMIC DNS PROVIDER]
        DDNS
    end

    subgraph INTERNET_SERVICE_PROVIDER[INTERNET SERVICE PROVIDER]
        ROUTER
        ROUTER_PORT
    end

    subgraph SERVER_DEVICE[MINI PC]
        subgraph TRAEFIK_CONTAINER[TRAEFIK]
            DOCKER_TRAEFIK_PORT
        end

        subgraph APPLICATION[APPLICATION]
            APPLICATION_PORT
        end
    end

    CLIENT --> SUBDOMAIN_MYAPP
    SUBDOMAIN_MYAPP -->|CNAME| DDNS
    DDNS -->|DynDNS| ROUTER
    ROUTER --> ROUTER_PORT
    ROUTER_PORT -->|port forward| DOCKER_TRAEFIK_PORT
    DOCKER_TRAEFIK_PORT -->|HTTP router| APPLICATION_PORT
:small_blue_diamond: VPN access :
flowchart LR
    style VPN fill: #4d683b
    style TRAEFIK_CONTAINER fill: #663535
    style PI_HOLE fill: #663535
    style APPLICATION fill: #663535
    style WIREGUARD fill: #663535
    style SERVER_DEVICE fill: #665151
    CLIENT((Client))
    VPN_CLIENT(DNS)
    VPN_ENDPOINT(Endpoint)
    PIHOLE_DNS_MYAPP(myapp\n.example.com)
    DOCKER_TRAEFIK_PORT{{port}}
    APPLICATION_PORT{{port}}
    WIREGUARD_PORT{{port}}
    PIHOLE_DNS{{port}}

    subgraph VPN[VPN]
        VPN_CLIENT
        VPN_ENDPOINT
    end

    subgraph SERVER_DEVICE[MINI PC]
        subgraph PI_HOLE[PI-HOLE]
            PIHOLE_DNS
            PIHOLE_DNS_MYAPP
        end

        subgraph TRAEFIK_CONTAINER[TRAEFIK]
            DOCKER_TRAEFIK_PORT
        end

        subgraph APPLICATION[APPLICATION]
            APPLICATION_PORT
        end

        subgraph WIREGUARD[WIREGUARD]
            WIREGUARD_PORT
        end
    end

    VPN_ENDPOINT --> WIREGUARD_PORT
    CLIENT --> VPN_CLIENT
    VPN_CLIENT --> PIHOLE_DNS
    PIHOLE_DNS_MYAPP --->|A| TRAEFIK_CONTAINER
    DOCKER_TRAEFIK_PORT -->|HTTP router| APPLICATION_PORT
:small_blue_diamond: Local network access :
flowchart LR
    style INTERNET_SERVICE_PROVIDER fill: #205566
    style TRAEFIK_CONTAINER fill: #663535
    style PI_HOLE fill: #663535
    style APPLICATION fill: #663535
    style SERVER_DEVICE fill: #665151
    CLIENT((Client))
    ISP_DNS(DNS)
    PIHOLE_DNS_MYAPP(myapp\n.example.com)
    DOCKER_TRAEFIK_PORT{{port}}
    APPLICATION_PORT{{port}}
    PIHOLE_DNS{{port}}

    subgraph INTERNET_SERVICE_PROVIDER[INTERNET SERVICE PROVIDER]
        ISP_DNS
    end

    subgraph SERVER_DEVICE[MINI PC]
        subgraph PI_HOLE[PI-HOLE]
            PIHOLE_DNS
            PIHOLE_DNS_MYAPP
        end

        subgraph TRAEFIK_CONTAINER[TRAEFIK]
            DOCKER_TRAEFIK_PORT
        end

        subgraph APPLICATION[APPLICATION]
            APPLICATION_PORT
        end

    end

    CLIENT ---> ISP_DNS
    ISP_DNS ---> PIHOLE_DNS
    PIHOLE_DNS_MYAPP --->|A| TRAEFIK_CONTAINER
    DOCKER_TRAEFIK_PORT -->|HTTP router| APPLICATION_PORT
[!NOTE] My router offers all the required features (DHCP server, DNS server, port forwarding, dynDNS, etc.) for the steps described below. Most of the routers also have those features (they rarely purely route packets), but if this is not your case, you may have to perform double NAT to allow more advanced configurations. I obviously cannot go through the configuration specific to each router.
IP settings
The following changes to the IP settings are required if you want the DNS requests of your whole local network to go through Pi-Hole and the custom DNS resolver (Unbound) (only the DNS requests : the ad blocking is done at DNS level, the traffic itself does not need to go through the mini PC) :
- Assign a static IP address to the mini PC, for example
192.168.0.16(I have local DHCP enabled) - Make the devices use the mini PC as DNS server (
192.168.0.16), either through the router (the DNS server it hands out with DHCP), or manually on each device
Of course Pi-Hole container have to expose port 53 to receive incoming DNS requests. Refer to Pi-hole setup for more details.
[!WARNING] Setting the mini PC as "DNS server" in the router configuration is not always enough : many ISP boxes keep answering the DNS queries of the LAN devices themselves with the ISP resolvers, and the devices silently bypass Pi-Hole. Always verify from a device which server actually answers :
nslookup doubleclick.netThe answering server must be the mini PC (
192.168.0.16), and a domain from the block lists must resolve to0.0.0.0. If the router does not hand out the mini PC address, set the DNS manually on each device (on Windows : Settings -> Network -> Ethernet -> DNS server assignment -> Manual). In that case :
- leave the alternate DNS empty : Windows does not strictly respect the primary/secondary order, a public secondary DNS ends up bypassing Pi-Hole
- leave "DNS over HTTPS" off : Pi-Hole only speaks plain DNS on port
53, and this leg never leaves your LAN anyway (the privacy part is Unbound resolving directly from the root servers)- disable "secure DNS" / DNS-over-HTTPS in the browsers too, else they use their own resolver and bypass Pi-Hole
If you don't want the whole network to use Pi-Hole, skip the second point, then only the VPN clients (and the devices you configure manually) will use it.
Dynamic DNS
When connecting from outside our network (from the internet), we need to know the public IP address of our router to connect to. But unless we have a static public IP (not necessarily the safest option), we are getting dynamically-assigned public IP addresses (via DHCP), so we would need to update the configuration everytime the IP changes, which is very uncomfortable.
Fortunately we can register a dynamic host record (DynDNS), and configure it in our router configuration so that when the public IP address changes, a call is made to the DynDNS service provider to update the record. That way our network will always be reachable from the internet via the DynDNS record no matter the IP address.
Well, simply register a dynamic DNS hostname from a provider (there are free ones), for example No-IP, DuckDNS, etc. :
- hostname :
myddns.ddns.net - IP / target : internet box external IP (public IP)
- type :
A
Then activate DynDNS on the router :
- Service provider :
No-IP(adapt to your provider) - Hostname :
myddns.ddns.net - Username : xxxxxxxx
- Password : xxxxxxxx
The IP will be updated automatically when a change will be detected.
[!NOTE] Your ISP may only support some dynamic DNS provider that can be configured in the router, so you may want to pick one that is supported natively, else you will have to set up an update client that will be responsible to regularly check for IP change.
Domain and subdomains
You will need to buy a domain from you preferred domain provider, for this guide I will use example.com.
[!IMPORTANT] I advise you to also subscribe to a domain privacy option in order to hide you personal data. Domain Privacy protects the contact information of the owner of a domain name in the WHOIS directory. Normally, this public database is used to verify the availability of a domain name and who it belongs to, but marketing companies and scammers can also exploit it for other purposes, like sending spam or identity theft.
You can check the information that are available publicly about your domain using the whois command :
whois example.com
Right, we will then use subdomains to locate each service as a separate website to avoid having to buy a new domain name for each. A subdomain is simply a prefix added to the original domain name, it functions as a separate website from its domain.
So, let's create subdomains from the domain name registrar settings, for every service to be exposed on the internet :
wireguard.example.com: To access the WireGuard serverquake.example.com: To access the Defrag-life websitelychee.example.com: To access the Lychee websiteccteam.example.com: To access the CCTeam APIsgoatcounter.example.com: So that GoatCounter can track the traffic on the exposed websites
Then add corresponding CNAME records to point to the dynamic DNS myddns.ddns.net :
CNAME wireguard myddns.ddns.netCNAME quake myddns.ddns.netCNAME lychee myddns.ddns.netCNAME ccteam myddns.ddns.netCNAME goatcounter myddns.ddns.net
A CNAME record is just a records which points a name to another name instead of pointing to an IP address (like A records).
[!NOTE] Services that will only be accessible from the local network or through VPN do not need to have a subdomain defined at this level. We will use Pi-Hole's local DNS records for that. See Pi-Hole configuration.
However, while the VPN stuff is fully functional and to be able to do the configuration easily from your client machine, you may want to temporarily create subdomains and add CNAME records for the following subdomains (also remove the IP whitelisting middleware in the corresponding service configuration), else you will be blocked by IP whitelisting :
arcane.example.com: To manage Docker containers (start/stop, check logs, etc.)pihole.example.com: To configure the local DNS records
Port forwarding
For our services to be reachable from the internet, we need to forward incoming requests to our mini PC so that they will be handled by our Traefik reverse proxy. This can be done through port forwarding.
Port forwarding directs the router to send any incoming data from the internet to a specified device on the network. It is safe to forward ports on your router as long as you have a reverse proxy or a firewall running in between.
Allow access without VPN
If you decide that at least one of the applications must be reachable from the outside directly through HTTP or HTTPS without requiring a VPN, then simply port forward the related TCP ports to the mini PC.
Go to your router configuration and add a port forward rule for the TCP port 80 :
- Name :
Traefik - Input port :
80 - Target port :
80 - Device :
n100 - Protocol :
TCP
and 443 :
- Name :
Traefik SSL - Input port :
443 - Target port :
443 - Device :
n100 - Protocol :
TCP
We will configure Traefik later to redirect HTTP requests to HTTPS. But if you prefer you can only open the HTTPS port (if you are going to use Let's encrypt' HTTP challenge, it's enough for the TLS certificates to be generated, see the warning box a little further below though).
Allow access through VPN
If you want some applications to be available from the outside through VPN, then open the VPN port :
Go to your router configuration and add a port forward rule for the UDP port 51820 :
- Name :
VPN - Input port :
51820 - Target port :
51820 - Device :
n100 - Protocol :
UDP
Of course if you want the applications to be available only through VPN, then only open the VPN port, remove any opened HTTP/HTTPS port.
[!WARNING] Note that if you use Let's Encrypt' HTTP challenge to issue and renew SSL/TLS certificates, target websites must be reachable from the internet. That mean you will have to open the HTTP (S) port at least when issuing/renewing certificates, you could also keep them open and restrict access to the necessary IP ranges, if your router supports that. If you really don't want to open HTTP (S) ports (better for security), then you will have to configure DNS challenge instead of HTTP challenge, if your DNS provider support it. See HTTP challenge and DNS challenge below when configuring Traefik.
Reverse proxy
Traefik is an open source HTTP reverse proxy and load balancer that can integrate easily with our Docker infrastructure. We will use it to intercept and route every incoming request to the corresponding backend services.
It will listen to our services and instantly generates the routes, so that they are connected to the outside world. We will also use it to automatically generate and renew SSL/TLS certificates through Let's Encrypt.
Here is an overview of the network flow on our setup :
flowchart LR
    style INCOMING_REQUEST fill: #205566
    style TRAEFIK_CONTAINER fill: #663535
    style MYAPP1_CONTAINER fill: #663535
    style MYAPP2_CONTAINER fill: #663535
    style TRAEFIK_ROUTER fill: #806030
    style TRAEFIK_MIDDLEWARE fill: #806030
    style SERVER_DEVICE fill: #665555
    style CONTAINER_ENGINE fill: #664545
    INCOMING_REQUEST((INCOMING\nREQUEST))
    DOCKER_TRAEFIK_PORT443{{443/tcp}}
    DOCKER_TRAEFIK_PORT80{{80/tcp}}
    DOCKER_TRAEFIK_PORT8080{{8080/tcp}}
    DOCKER_MYAPP1_PORT{{exposed port}}
    DOCKER_MYAPP2_PORT{{exposed port}}
    TRAEFIK_ROUTER_MYAPP1(myapp1.example.com)
    TRAEFIK_ROUTER_MYAPP2(myapp2.example.com)
    TRAEFIK_ROUTER_TRAEFIK(traefik.example.com)

    subgraph SERVER_DEVICE[MINI PC]
        subgraph CONTAINER_ENGINE[DOCKER]
            subgraph MYAPP1_CONTAINER[MYAPP1 CONTAINER]
                DOCKER_MYAPP1_PORT
            end
            subgraph MYAPP2_CONTAINER[MYAPP2 CONTAINER]
                DOCKER_MYAPP2_PORT
            end

            subgraph TRAEFIK_CONTAINER[TRAEFIK CONTAINER]
                subgraph TRAEFIK_ROUTER[TRAEFIK HTTP ROUTER]
                    TRAEFIK_ROUTER_TRAEFIK
                    TRAEFIK_ROUTER_MYAPP1
                    TRAEFIK_ROUTER_MYAPP2
                end
                subgraph TRAEFIK_MIDDLEWARE[TRAEFIK MIDDLEWARE]
                    REDIRECT(HTTPS redirect)
                    IP_WHITELISTING(IP whitelist)
                    AUTH(PocketID auth)
                end
                DOCKER_TRAEFIK_PORT80
                DOCKER_TRAEFIK_PORT443
                DOCKER_TRAEFIK_PORT8080
            end

        end
    end

    INCOMING_REQUEST --> DOCKER_TRAEFIK_PORT80
    INCOMING_REQUEST --> DOCKER_TRAEFIK_PORT443
    DOCKER_TRAEFIK_PORT80 --> TRAEFIK_ROUTER
    DOCKER_TRAEFIK_PORT443 --> TRAEFIK_ROUTER
    TRAEFIK_ROUTER_TRAEFIK --> REDIRECT
    TRAEFIK_ROUTER_MYAPP1 --> REDIRECT
    TRAEFIK_ROUTER_MYAPP2 --> REDIRECT
    REDIRECT -.-> DOCKER_TRAEFIK_PORT443
    IP_WHITELISTING --> AUTH
    IP_WHITELISTING ---> DOCKER_MYAPP2_PORT
    REDIRECT --> IP_WHITELISTING
    REDIRECT ---> DOCKER_MYAPP1_PORT
    AUTH --> DOCKER_TRAEFIK_PORT8080
It handles HTTP to HTTPS redirection, IP whitelisting and authentication (through PocketID, or basic authentication)
through custom middlewares.
In this example myapp1 is accessible from the internet, myapp2 is accessible only through VPN,
and Traefik (dashboard and APIs) is accessible only through VPN after OIDC authentication.
I've deliberately left out Sablier for the moment, to keep things simple, but basically this would simply add a middleware that checks the state of the application, in order to temporarily display a waiting page while not ready, refer to Scale to zero with Sablier for more information.
Installation
First, create a folder to hold data and configuration :
sudo mkdir /opt/apps/traefik
Then copy the files from this project's traefik directory into the /opt/apps/traefik directory :
- docker-compose.yml : The Traefik service definition
- traefik.yml : The Traefik static configuration
- .env : The secrets read by the service (DNS provider token, CrowdSec bouncer key), to fill in
- credentials.txt : A file that will hold users credentials to access the Traefik dashboard (if you want it restricted with basic authentication), see Generate basic authentication credentials
Files should be ready to use, simply replace the e-mail address (admin@example.com) in the traefik.yaml file with
your e-mail address.
You will also need to create the JSON file to hold the certificates, see TLS certificates.
Anyway you will find below more details about each file (see Configuration files details) and some further configuration.
Generate basic authentication credentials
If you want the Traefik dashboard to be protected with basic authentication rather than via PocketID, allowed users have to be added to the credentials.txt file.
You can generate a user/password using htpasswd :
-
Install the needed package if not present :
sudo apt install apache2-util -
Generate the credentials (we use bcrypt with a computing time of 10) :
htpasswd -nbBC 10 admin xxxxxxxx
Then copy the output to the credentials.txt file.
[!NOTE] Actually as Traefik will be accessible only from local network and through VPN, we don't really need to set up authentication, but it's more for demonstration, and it's always better to have 2 layers of security than one.
TLS certificates
To enable HTTPS on our websites, we need to get TLS certificates from a certificate authority. A TLS certificate certifies, in a way, the authenticity of a website (actually it proves that we have the ownership of the public key used for TLS encryption), preventing hackers from intercepting any data transmitted between a device and the site.
We will use Let's Encrypt, a nonprofit certificate authority which provide free TLS certificates.
Let's Encrypt can automatically generate certificates via Traefik, for that we need to create a acme.json file
that will hold the generated certificates (file is mapped to a volume in the Compose file), so that the certificates
are persisted between container restarts (not generated each time which could raise Let's Encrypt rate limits), we also
need to change the permissions so that Traefik can access and edit this file :
cd /opt/apps/traefik
touch /opt/apps/traefik/acme.json
chmod 600 /opt/apps/traefik/acme.json
HTTP challenge
If you use HTTP challenge, Let's Encrypt will validate that you control the domain names by trying to reach the web
server through HTTP or HTTPS.
So you must open and port forward ports 80 or 443 for the TLS certificate to be issued correctly.
The corresponding certificate resolver configuration would be :
tlsChallenge: { }
[!WARNING] Note that Let’s Encrypt will not let you use this challenge to issue wildcard certificates.
DNS challenge
When using DNS challenge, Let's Encrypt will validate that you control the domain names by querying the DNS system for a TXT record under the target domain name. So you don't need to open HTTP or HTTPS port on your router.
First, check that your DNS provider is supported by Traefik to automate the DNS verification, a list can be found here : https://doc.traefik.io/traefik/https/acme/.
Then :
- Create an access token / API key from your provider interface
- Add the necessary environment variables required by your provider to the .env file next to the Compose file
(loaded with
env_file), i.e. :MYPROVIDER_ACCESS_TOKEN=<access_token_here>
The corresponding certificate resolver configuration would be :
dnsChallenge:
  provider: <your_provider_here>
IP whitelisting
We will set up IP whitelisting so that we can allow only traffic from the local network or from the VPN for some of our services. Indeed, even if we do not have defined public subdomains for these services, they can still be reached via the IP address (actually in that case Traefik will not route the request, but it is still better to have this additional security).
Basically it involves creating a Traefik middleware for defining the IP whitelist and apply it to the needed services. It is declared once, in the dynamic configuration directory :
:page_facing_up: traefik/dynamic/vpn-whitelist.yml :
http:
  middlewares:
    vpn-whitelist:
      ipAllowList:
        sourceRange:
          - "192.168.0.0/24" # your LAN
          - "10.0.0.0/24" # Wireguard subnet
So we allow exactly 2 IP ranges :
- the local IP range : IPs assigned to the devices on your local network (computers, mobile devices, ...)
- the WireGuard subnet : the VPN peers keep their tunnel address when they reach Traefik, as WireGuard runs on the host and the peers' traffic is not NATed towards the containers
That way :
- Requests coming from the local network come with a local address assigned by the router DHCP, and are accepted.
- Requests coming from the internet through VPN come with a
10.0.0.xaddress, and are accepted. - Requests coming from the internet without VPN come with a public IP address and are rejected, as it does not match any whitelisted address.
[!NOTE] A request from your own network to a name that resolves to your public IP goes through the NAT loopback of the router and reaches Traefik with the public IP as source : rejected as well. So the private services must resolve to the LAN address of the mini PC for the devices that use them (Pi-Hole's local DNS records, see Pi-hole), and a container that has to call another one (the Traefik plugin fetching a token from PocketID for instance) must use the internal name (i.e.
http://pocketid:1411), or a public name that Traefik carries as a network alias on the private network (see PocketID), never a public URL resolving to the public IP.
[!WARNING] Never whitelist a Docker network range. A container is not a trusted client, and with the network segmentation below, a whitelisted Docker range would let a compromised public container walk straight into the private services.
Then it just needs to be referenced in the middlewares list of every router that must stay private
(vpn-whitelist@file), as you will see in the services definitions.
Keep in mind that it only protects the requests that go through Traefik : what a container can reach directly on the
Docker networks is the job of the network segmentation.
Network segmentation
Every service behind the reverse proxy must share a Docker network with Traefik to be reachable by name, but containers on the same network can also talk to each other directly, without going through Traefik and its middlewares. With a single shared network, a vulnerability in one of the applications exposed to the internet (an old PHP website, a photo gallery, an API) gives an attacker a foothold from which every other container is one HTTP request away : Pi-Hole's admin interface, Arcane (and through it the Docker socket, i.e. root on the host), the Traefik dashboard, ... The IP whitelist does not help there, it never sees this traffic.
So Traefik sits on two networks, and nothing else is allowed to be on both :
| Network | Who | Reachable from |
|---|---|---|
traefik-private-net | Traefik and the private services : Pi-Hole, Arcane, Dashdot, Homer, PhpMyAdmin, PocketID, Sablier, ... | local network and VPN only (vpn-whitelist) |
traefik-public-net | Traefik and the services exposed to the internet : Lychee, Defrag-life, ... | anyone |
A compromised public container can then only see Traefik and the other public applications, never the private ones. A few rules go with it :
- a public application never joins
traefik-private-net, a private one never joinstraefik-public-net, and no application joins both - the databases stay on the private network of their own stack (
lychee-net,defrag-life-net, ...), never on a Traefik network - containers holding the Docker socket (Arcane, Sablier) are private by construction
- PocketID stays private : a public application that would authenticate through it does so with the browser, through the public URL and Traefik, it does not need a shared network
- a public application monitored by Prometheus shares a dedicated network with Prometheus only
(
prometheus-<app>-net), neverprometheus-netnor its own database network, see Prometheus
Configuration files details
Static configuration file :
:page_facing_up: traefik.yaml :
api:
  dashboard: true

# Health check endpoint (/ping) for Gatus, served on the internal "traefik" entrypoint (8080), not published on the host
ping: {}

entryPoints:
  web:
    address: ':80'

  websecure:
    address: ':443'
    http:
      middlewares:
        # Every request on 443 is checked against the CrowdSec decisions first (see the CrowdSec section)
        - crowdsec@file

providers:
  docker:
    watch: true
    exposedByDefault: false
  file:
    directory: /etc/traefik/dynamic
    watch: true

certificatesResolvers:
  default:
    acme:
      email: admin@example.com
      storage: acme.json
      caServer: 'https://acme-v02.api.letsencrypt.org/directory'
      dnsChallenge:
        provider: <your_provider_here>

experimental:
  plugins:
    sablier:
      moduleName: "github.com/sablierapp/sablier-traefik-plugin"
      version: "v1.1.0"
    traefik-oidc-auth:
      moduleName: "github.com/sevensolutions/traefik-oidc-auth"
      version: "v0.18.0"
    crowdsec-bouncer-traefik-plugin:
      moduleName: "github.com/maxlerebourg/crowdsec-bouncer-traefik-plugin"
      version: "v1.7.1"
log:
  level: info

accessLog:
  # One JSON line per request, written to a file shared (read-only) with the CrowdSec container
  filePath: /var/log/traefik/access.log
  format: json
  fields:
    headers:
      names:
        # Request headers are dropped from the log by default, the User-Agent is needed by the CrowdSec scenarios
        User-Agent: keep
This config file :
- enables the Traefik dashboard (UI that provides a detailed overview of the current configuration)
- enables the ping endpoint (
/ping), used by Gatus to check that Traefik is alive. It is served on the internaltraefikentrypoint (port8080), created automatically and not published on the host - defines 2 entrypoints, named
web(for port80) andwebsecure(for port443) so that we can receive requests on these ports - defines a
dockerprovider so that we can use container labels for retrieving routing configuration. We have configured it to not expose containers by default, so that containers that do not have atraefik.enable=truelabel are ignored from the resulting routing configuration - defines a
defaultcertificate resolver for Let's Encrypt to automatically generate certificates - set log level to
info(you can set it todebugwhen you need more information on what's going on) - writes the access log as JSON lines in /var/log/traefik/access.log (a folder bound in the Compose file), one
line per request with the client IP, the router and the status code :
the fastest way to understand why a request is rejected, and the input of CrowdSec. Request headers are
dropped from the log by default, the
User-Agentis kept for the CrowdSec scenarios - declares the Traefik plugins used by the middlewares (Sablier, OIDC authentication, CrowdSec bouncer), downloaded when Traefik starts
- sets the
crowdsecmiddleware on thewebsecureentrypoint, so that every HTTPS request is checked against the CrowdSec decisions before reaching any router
Service definition :
:page_facing_up: docker-compose.yml :
services:

  traefik:
    image: traefik:latest
    container_name: traefik
    restart: unless-stopped
    ports:
      - "80:80"
      - "443:443"
    volumes:
      - /var/run/docker.sock:/var/run/docker.sock:ro    # So that Traefik can listen to the Docker events
      - ./traefik.yml:/etc/traefik/traefik.yml:ro       # Traefik static configuration
      - ./dynamic:/etc/traefik/dynamic:ro               # Traefik dynamic configuration
      - ./acme.json:/acme.json                          # For Let's Encrypt certificate storage
      - ./credentials.txt:/credentials.txt:ro           # For Traefik dashboard credentials
      - ./logs:/var/log/traefik                         # Access log, shared (read-only) with CrowdSec
    networks:
      # private : services reachable from the local network and the VPN only
      traefik-private-net:
        aliases:
          # Lets the containers of the private network resolve the public name of the OIDC provider to Traefik itself,
          # so that applications authenticating natively against PocketID can use its public issuer URL (see PocketID)
          - pocketid.example.com
          # Same for the public services, so that Gatus checks them through Traefik with their real name
          # (routing, TLS certificate, CrowdSec), without joining the public network nor depending on Pi-hole
          - lychee.example.com
          - quake.example.com
          - goatcounter.example.com
          - ccteam.example.com
      # public : services exposed to the internet
      traefik-public-net:
    env_file: .env    # DNS provider token for the DNS challenge, CrowdSec bouncer key
    labels:
      - "traefik.enable=true"

      # Redirect all HTTP requests to HTTPS
      - "traefik.http.middlewares.httpsonly.redirectscheme.scheme=https"
      - "traefik.http.middlewares.httpsonly.redirectscheme.permanent=true"
      - "traefik.http.routers.httpsonly.rule=HostRegexp(`{any:.*}`)"
      - "traefik.http.routers.httpsonly.middlewares=httpsonly"

      # Configure dashboard with HTTPS
      - "traefik.http.routers.dashboard.rule=Host(`traefik.example.com`)"
      - "traefik.http.routers.dashboard.entrypoints=websecure"
      - "traefik.http.routers.dashboard.service=dashboard@internal"
      - "traefik.http.routers.dashboard.tls=true"
      - "traefik.http.routers.dashboard.tls.certresolver=default"

      # Configure API with HTTPS
      - "traefik.http.routers.api.rule=Host(`traefik.example.com`) && PathPrefix(`/api`)"
      - "traefik.http.routers.api.entrypoints=websecure"
      - "traefik.http.routers.api.service=api@internal"
      - "traefik.http.routers.api.tls=true"
      - "traefik.http.routers.api.tls.certresolver=default"

      # Secure dashboard/API behind VPN and PocketID authentication (or basic authentication)
      - "traefik.http.routers.dashboard.middlewares=vpn-whitelist@file,traefik-auth@file"
      - "traefik.http.routers.api.middlewares=vpn-whitelist@file,traefik-auth@file"
      # - "traefik.http.middlewares.auth.basicauth.usersfile=/credentials.txt" # only if you use basic auth

networks:

  traefik-private-net:
    name: traefik-private-net

  traefik-public-net:
    name: traefik-public-net
This Compose file mainly :
- exposes ports
80and443to receive incoming HTTP/HTTPS requests - binds the logs folder where the access log is written, shared read-only with the CrowdSec container
- defines two networks :
traefik-private-netfor the services that must stay private (reachable from the local network and the VPN only) andtraefik-public-netfor the services exposed to the internet, see Network segmentation - gives Traefik network aliases on the private network : the containers of that network resolve these public names
to Traefik itself.
pocketid.example.comis used by the applications authenticating natively against PocketID (see PocketID), the public services by Gatus to check them through Traefik - loads its secrets from the .env file (see Environment variables) : the DNS provider access token used to issue Let's Encrypt certificates through DNS challenge, and the CrowdSec bouncer key
- defines an HTTP router that will match
traefik.example.comURL on ourwebsecureentrypoint to point to our service - defines
httpsonlyrouter and middleware responsible for automatically redirecting HTTP requests to HTTPS - configures
dashboardandapirouters to use secure HTTPS endpoint with our certificate resolver to generate related Let's Encrypt certificates - secures dashboard and API endpoints with the
vpn-whitelistmiddleware (requests from the local network and the VPN only) and thetraefik-authmiddleware (authentication through PocketID, basic authentication being the alternative)
[!CAUTION] The order in which the middlewares are defined in relation to a router is important, they will be applied in the same order as their declaration.
Environment variables :
:page_facing_up: .env :
# Access token / API key of your DNS provider, used by the Let's Encrypt DNS challenge (variable name depends on the provider, see Traefik documentation)
MYPROVIDER_ACCESS_TOKEN=<access_token_here>
# Key of the CrowdSec bouncer (same value as BOUNCER_KEY_traefik in crowdsec/.env), read by traefik/dynamic/crowdsec.yml
CROWDSEC_BOUNCER_KEY=<bouncer_key>
MYPROVIDER_ACCESS_TOKENis the token of your DNS provider, its name depends on the provider (see DNS challenge)CROWDSEC_BOUNCER_KEYis read by thecrowdsecmiddleware in dynamic/crowdsec.yml through a template (dynamic configuration files are Go templates,{{ env "..." }}reads a variable of the Traefik container), so that no secret sits in a configuration file. Same value asBOUNCER_KEY_traefikin crowdsec/.env (see CrowdSec)
Run
Finally, run the Compose file :
sudo docker-compose -f /opt/apps/traefik/docker-compose.yml up -d
# You may need to force recreate if you changed a config from an already running configuration
sudo docker-compose -f /opt/apps/traefik/docker-compose.yml up -d --force-recreate
You should end-up with a running traefik container.
It should also have generated the needed Let's Encrypt certificates in the acme.json file.
So you can reach the dashboard at https://traefik.example.com.
VPN and ad-blocking
|
|
|
|
We will install WireGuard, Pi-hole and Unbound to create a virtual private network (VPN) with ad-blocking and DNS privacy/caching capabilities.
WireGuard is a free and open-source modern VPN that utilizes state-of-the-art cryptography to securely encapsulates IP packets over UDP, in order to lower the environment attack surface. As a VPN it establishes a secure connection between a computer and the internet by making all the traffic going through an encrypted tunnel. The point of self-hosting our own VPN server is to ensure a private and secure connection to our services from the internet, without having to trust third-party VPN providers, and to keep complete freedom and control over the browsing data.
Pi-hole is a network-level ad blocking and internet tracker blocking application. It has the ability to block traditional website advertisements as well as advertisements in unconventional places such as mobile apps ads. It can also be used as a DNS server and has a built-in DHCP server.
Unbound is a validating, recursive, caching DNS resolver, that has the ability to contact DNS authority servers directly in order to validate and cache the queries on your network and serve them to you directly, so you don’t have to rely on your ISP or third-party DNS resolvers (like Cloudflare or Google).
So the idea is that every client in any network can use the VPN to reach our applications while taking advantage of Pi-Hole and Unbound :
flowchart TB
    style WINDOWS11 fill: #205566
    style LAPTOP fill: #205566
    style MOBILE fill: #205566
    style MACOS fill: #205566
    style WIREGUARD_SERVER fill: #764545
    style PIHOLE fill: #663535
    style UNBOUND fill: #562525
    style INTERNET fill: #4d683b
    style HOME_NETWORK fill: #263555
    style 5G_NETWORK fill: #263555
    style WORK_NETWORK fill: #263555
    style MINI_PC fill: #504255
    WINDOWS11(Peer 1 \n Home PC - Windows 11)
    LAPTOP(Peer 2 \n Home laptop - Ubuntu 22)
    MOBILE(Peer 3 \n Phone - Android 14)
    MACOS(Peer 4 \n Work PC - MacOS 13)
    WIREGUARD_SERVER(WireGuard server - Secure VPN)
    PIHOLE(Pi-Hole - Firewall & ad-blocking)
    UNBOUND(Unbound - Custom DNS resolver)
    INTERNET((Internet))

    subgraph HOME_NETWORK[Home network]
        WINDOWS11
        LAPTOP
    end

    subgraph 5G_NETWORK[Mobile network]
        MOBILE
    end

    subgraph WORK_NETWORK[Work network]
        MACOS
    end

    subgraph MINI_PC[Mini PC]
        WIREGUARD_SERVER
        PIHOLE
        UNBOUND
    end

    WINDOWS11 -- WireGuard tunnel --> WIREGUARD_SERVER
    LAPTOP -- WireGuard tunnel --> WIREGUARD_SERVER
    MOBILE -- WireGuard tunnel --> WIREGUARD_SERVER
    MACOS -- WireGuard tunnel --> WIREGUARD_SERVER
    WIREGUARD_SERVER -- DNS queries --> PIHOLE
    PIHOLE -- Filtered DNS queries --> UNBOUND
    UNBOUND -- DNS resolution --> INTERNET
WireGuard runs directly on the host (kernel module, managed by wg-quick), Pi-Hole and Unbound run as two
small Compose stacks.
Everything about performance is in VPN connection speed.
Installation
First, create the folders that will hold data and configuration :
sudo mkdir -p /opt/apps/pihole /opt/apps/unbound /opt/apps/wgdashboard/data
Then from this project's pihole, unbound and wgdashboard directories, copy the docker-compose.yml files into the matching /opt/apps folders. For more details about these files, see Configuration files details.
WireGuard itself is a Debian package :
sudo apt install wireguard
Now let's take a look at the configuration for each service.
Configuration
WireGuard
WireGuard runs directly on the host : the kernel module is part of Debian, wg-quick manages the interface, and the
peers are managed in the configuration file (or with the wg command). Compared to running it in a container, this
removes a few hops for every packet (Docker bridge, veth pair, a second NAT layer and the userland proxy)
and makes the network stack much easier to observe and tune.
Generate the keys (wg genkey | tee private.key | wg pubkey > public.key, on the server and on each peer) and create
the configuration :
sudo nano /etc/wireguard/wg0.conf
:page_facing_up: /etc/wireguard/wg0.conf (enp1s0 is the LAN interface of the mini PC, %i is replaced by the
interface name) :
[Interface]
Address = 10.0.0.1/24
ListenPort = 51820
MTU = 1420
PrivateKey = <server private key>
PostUp = iptables -N DOCKER-USER 2>/dev/null || true; iptables -C DOCKER-USER -i %i -j ACCEPT 2>/dev/null || iptables -I DOCKER-USER 1 -i %i -j ACCEPT; iptables -C DOCKER-USER -o %i -j ACCEPT 2>/dev/null || iptables -I DOCKER-USER 2 -o %i -j ACCEPT; iptables -A FORWARD -i %i -j ACCEPT; iptables -A FORWARD -o %i -j ACCEPT; iptables -t nat -C POSTROUTING -s 10.0.0.0/24 -o enp1s0 -j MASQUERADE 2>/dev/null || iptables -t nat -A POSTROUTING -s 10.0.0.0/24 -o enp1s0 -j MASQUERADE; iptables -t mangle -C FORWARD -p tcp --tcp-flags SYN,RST SYN -j TCPMSS --clamp-mss-to-pmtu 2>/dev/null || iptables -t mangle -A FORWARD -p tcp --tcp-flags SYN,RST SYN -j TCPMSS --clamp-mss-to-pmtu; iptables -t raw -C PREROUTING -i enp1s0 -p udp --dport 51820 -j NOTRACK 2>/dev/null || iptables -t raw -A PREROUTING -i enp1s0 -p udp --dport 51820 -j NOTRACK; iptables -t raw -C OUTPUT -o enp1s0 -p udp --sport 51820 -j NOTRACK 2>/dev/null || iptables -t raw -A OUTPUT -o enp1s0 -p udp --sport 51820 -j NOTRACK; tc qdisc replace dev %i root cake bandwidth 860mbit besteffort || true
PostDown = iptables -D DOCKER-USER -i %i -j ACCEPT || true; iptables -D DOCKER-USER -o %i -j ACCEPT || true; iptables -D FORWARD -i %i -j ACCEPT || true; iptables -D FORWARD -o %i -j ACCEPT || true; iptables -t nat -D POSTROUTING -s 10.0.0.0/24 -o enp1s0 -j MASQUERADE || true; iptables -t mangle -D FORWARD -p tcp --tcp-flags SYN,RST SYN -j TCPMSS --clamp-mss-to-pmtu || true; iptables -t raw -D PREROUTING -i enp1s0 -p udp --dport 51820 -j NOTRACK || true; iptables -t raw -D OUTPUT -o enp1s0 -p udp --sport 51820 -j NOTRACK || true

[Peer]
# desktop-home
PublicKey = <peer public key>
AllowedIPs = 10.0.0.2/32

[Peer]
# phone
PublicKey = <peer public key>
AllowedIPs = 10.0.0.3/32
Then protect and enable it :
sudo chmod 600 /etc/wireguard/wg0.conf
sudo systemctl enable --now wg-quick@wg0
The PostUp line looks scary, but each piece has a reason (and wg-quick runs the hooks with set -e, so anything
that may legitimately fail has to be guarded with || true or a -C check, else the interface is torn down) :
DOCKER-USERfast path : Docker sets theFORWARDpolicy toDROPand inserts about a hundred rules (four per bridge network) that every relayed packet walks through. TheDOCKER-USERchain is evaluated first and is never flushed by Docker, so accepting the tunnel traffic there short-circuits the whole chain. The plainFORWARDrules are a fallback in casewg0comes up before Docker at boot.- NAT : the peers' traffic leaves with the mini PC address (on my machine the rule was already set globally, keeping it here makes the file self-contained).
- TCPMSS clamp : TCP inside the tunnel can carry
1380bytes per segment at most, clamping the MSS on the SYN packets prevents fragmentation and black holes for the relayed connections. NOTRACK: connection tracking is useless for the encrypted UDP flow (WireGuard authenticates every packet itself), this saves a lookup per packet.cake: gives every flow inside the tunnel its own queue and keeps the latency low. Without it, thefq_codelqueue of the physical interface sees the whole tunnel as a single flow, so a big download can starve a video stream or a call.860mbitis what a gigabit link carries once the tunnel overhead is added, it costs nothing measurable.
The DNS pushed to the peers is the tunnel address of the server, 10.0.0.1 : Docker publishes Pi-Hole's port 53
on every address of the host, including this one, so the peers reach Pi-Hole (then Unbound) without any extra route,
and it also works in split tunnel mode since the address is inside the tunnel subnet.
Peers configuration
On each device, the client configuration looks like this :
[Interface]
PrivateKey = <peer private key>
Address = 10.0.0.2/32
DNS = 10.0.0.1
MTU = 1420

[Peer]
PublicKey = <server public key>
Endpoint = 192.168.0.16:51820
# full tunnel : 0.0.0.0/1, 128.0.0.0/1 — split tunnel : 10.0.0.0/24
AllowedIPs = 0.0.0.0/1, 128.0.0.0/1
PersistentKeepalive = 25
[!TIP] A few things I learned the hard way about the peers configuration :
- At home, use the LAN IP address of the server as endpoint (
192.168.0.16:51820), not the public hostname : going through the public IP from inside the LAN makes the router do NAT loopback (hairpin) in software, which cost me about half of the throughput (350/440 Mbit/s instead of 570/860). Easiest is to keep two tunnels on the device : a "home" one with the LAN endpoint and an "away" one with the public hostname.- At home, a full tunnel brings nothing : the traffic leaves through the same router anyway, it only adds encryption and relaying work for the server (and costs about 40 % of the download speed, see VPN connection speed). Use a split tunnel (
AllowedIPslimited to the VPN subnet, here10.0.0.0/24, which contains the DNS address so that the DNS still goes through the tunnel), or simply no tunnel at all with the device DNS pointing to the mini PC : the ad blocking is done at DNS level, it is identical in all cases.0.0.0.0/1, 128.0.0.0/1also disables the kill switch and the DNS leak protection of the Windows client (only a0.0.0.0/0route enables them), so Windows silently falls back to the router DNS if Pi-Hole does not answer within about a second.- Never point a client to an address the server holds on a secondary interface (Wi-Fi, USB adapter), see the warning below.
[!WARNING] Connect the server to the LAN through one interface only. I had the Wi-Fi of the mini PC connected to the same network "just in case", plus a USB Ethernet adapter left over from a test. Linux answers ARP requests for all its addresses on all its interfaces, so the router could deliver traffic for the main address through the Wi-Fi or the USB adapter, NetworkManager detected its own Wi-Fi as an address conflict and dropped the USB adapter address for hours at each DHCP renewal, and the client I had pointed to that address lost its tunnel at random and got a fraction of the throughput when it worked. Disable the Wi-Fi (
sudo nmcli radio wifi off) and unplug what you don't use.
WGDashboard
Managing the peers in wg0.conf with an editor works, but a web interface is more comfortable : WGDashboard shows the interfaces, the peers, their last handshake and their traffic, creates a peer with its keys and its QR code, and serves the configuration file to download. It is the replacement for WireGuard UI, which is no longer maintained and which could not be used with WireGuard running on the host.
[!IMPORTANT] The container must share the host's network namespace (
network_mode: host). WireGuard runs on the host, so thewg0interface lives in the host's namespace : a container with its own namespace can read wg0.conf through the bind mount, and will happily list your peers, but it cannot query the interface itself. The symptom is unmistakable : the peers are displayed but always as disconnected, with no handshake and no traffic, whatever their real state.
Two consequences follow from the host namespace, and they are the whole difficulty of this service :
- Traefik can no longer reach it by container name, since the container is on no Docker network. The service points at
the mini PC address instead,
http://192.168.0.16:10086 - the dashboard is reachable directly at that same address, hence bypassing Traefik, the IP whitelist and any authentication middleware. Its own login therefore remains the barrier that covers every path, and it is the reason we do not put PocketID in front of it : that would only protect the nice URL while leaving the direct one open
To close that direct path, app_ip in the [Server] section of wg-dashboard.ini can bind the dashboard to the
gateway address of the private Traefik network
(docker network inspect traefik-private-net --format '{{range .IPAM.Config}}{{.Gateway}}{{end}}') so that only Traefik
and the containers of that network can reach it.
Keep in mind that this address depends on the subnet Docker assigns, and would change if the network were recreated.
[!NOTE] OIDC is not available for the admin dashboard, only for the client side app. The
[OIDC] admin_enablesetting and the/api/oidc/toggleendpoint exist, and theAdminsection of wg-dashboard-oidc-providers.json can be filled, but nothing consumes them :dashboard.pynever instantiates theDashboardOIDCmodule, so no provider is registered, no request is made to the provider, nothing is logged, and no button appears. Don't spend an evening looking for a configuration mistake.The single sign-on documented by the project applies to the client side app (
/client), a self-service portal where people sign in to download the peers assigned to them : fill theClientsection instead, setclient_enable = true, and register the portal URL itself as the callback. The (empty) Clients tab of the admin dashboard lists those portal accounts, not your peers, an empty tab is normal when you are the only user.The
extra_hostsentry of the Compose file is there for that case : in the host namespace the container resolves names through the host resolver, which knows nothing of the private names, so the provider would not even be resolved. See PocketID for the general problem and its other solutions.
Setting up
Create the folder, then copy the docker-compose.yml file from this project's wgdashboard directory into /opt/apps/wgdashboard, and the wgdashboard.yml file from traefik/dynamic into /opt/apps/traefik/dynamic :
sudo mkdir -p /opt/apps/wgdashboard/data
Then add a local DNS record wgdashboard.example.com pointing to the mini PC (see Pi-hole), start the
container (see Run) and open https://wgdashboard.example.com. The default credentials are admin / admin,
change them immediately in the settings, where TOTP can also be enabled.
Your existing peers appear on their own : the dashboard reads the very wg0.conf the interface uses, so nothing has to be imported and nothing is duplicated.
[!WARNING] The dashboard can start and stop the interface, but
wg0is managed bywg-quick@wg0through systemd. Avoid switching it from both sides, otherwise systemd and the dashboard end up with diverging views of what is running.Peers created from the dashboard are written directly into wg0.conf. Keep a copy of that file with your backups : it holds the server's private key, and losing it means every client has to be reconfigured.
Pi-hole
The Compose file will run a Pi-Hole instance which need to be configured.
First, Pi-Hole must accept the queries coming from other interfaces than its own Docker network (the VPN peers, the
LAN) : by default it only answers "local" requests, and "local" for Pi-Hole is the Docker bridge network. The Compose
file sets this once and for all with theFTLCONF_dns_listeningMode: 'all' environment variable (the equivalent of
Settings -> DNS -> Interface settings -> "Permit all origins" in the web UI).
The web UI is reachable at https://pihole.example.com through Traefik : the Compose file does not carry Traefik labels anymore, the router is declared in a file of Traefik's dynamic configuration directory instead (see Traefik routing below), restricted to the local network and the VPN peers.
[!IMPORTANT] Chicken and egg : the private services have no public DNS record (see Domain and subdomains), so
pihole.example.comcan only be resolved by Pi-Hole itself through a local DNS record... which is created in the web UI you cannot reach yet. Until it exists the browser getsNXDOMAIN(or, if a public record for the name still exists, reaches Traefik through the NAT loopback of the router with the public IP as source and gets a403, see IP whitelisting). Create the first record from the command line, it is applied immediately :sudo docker exec pihole pihole-FTL --config dns.hosts '[ "192.168.0.16 pihole.example.com" ]' sudo docker exec pihole nslookup pihole.example.com 127.0.0.1Then make sure the device you use has Pi-Hole as DNS server (
192.168.0.16, see IP settings), flush its cache (ipconfig /flushdnson Windows) and restart the browser.--config dns.hostsreplaces the whole list : to add entries later from the command line, repeat the complete list, or simply use the web UI once it is reachable.
I don't set a Pi-Hole password : authentication is handled in front of it by the reverse proxy, with an OIDC middleware backed by PocketID (see PocketID), and the network segmentation keeps the container out of reach of the applications exposed to the internet. The image generates a random password at first start, remove it (or set yours) with :
sudo docker exec -it pihole pihole setpassword
In Settings -> DNS, untick every public upstream and add Unbound as custom upstream DNS server : 10.2.0.200#53
(its static address in the pihole-net Docker network, see Services definition).
Then we need to add local DNS records so that the domain names can be resolved from VPN or local network (remember the DNS requests of the VPN peers and of the configured devices go through Pi-Hole). We simply need to associate domain names with the internal IP address of the mini PC, so they can be handled by the reverse proxy.
Go to Settings -> Local DNS Records (or repeat the pihole-FTL --config dns.hosts command above with the complete
list) and add a DNS record entry for every subdomain that must only be reachable from the local network or through
VPN :
arcane.example.com                  192.168.0.16
ccteam.example.com                  192.168.0.16
crowdsec.example.com                192.168.0.16
dashboard.example.com               192.168.0.16
dashdot.example.com                 192.168.0.16
ghostfolio.example.com              192.168.0.16
goatcounter.example.com             192.168.0.16
homebox.example.com                 192.168.0.16
lychee.example.com                  192.168.0.16
omnitools.example.com               192.168.0.16
phpmyadmin.example.com              192.168.0.16
pihole.example.com                  192.168.0.16
pocketid.example.com                192.168.0.16
quake.example.com                   192.168.0.16
traefik.example.com                 192.168.0.16
wgdashboard.example.com             192.168.0.16
Add the public services as well (Lychee, Defrag-life, ...), even though they have a public DNS record. Without a local record, a device at home resolves them to the public IP and the traffic loops through the NAT loopback of the router : it costs about half of the throughput (measured in VPN connection speed), and Traefik sees the requests coming from your public IP address instead of the device's one, so they are treated like internet traffic by the IP whitelist and by CrowdSec (a misbehaving device at home could get your whole household banned from your own sites). With a local record, everything stays on the LAN.
[!NOTE] Consequence for the VPN peers away from home : they use Pi-Hole through the tunnel, so these names resolve to
192.168.0.16for them too, which is only reachable with a full tunnel or with192.168.0.0/24added toAllowedIPs. Do that on the away profile only : on the home profile, routing the LAN subnet through the tunnel would send the traffic to your printer or TV through the mini PC.
You can also configure rate limiting (default to 1000 queries per minute), domain whitelisting, DNS settings, etc. but I will not go through all Pi-Hole configuration, the default should work just fine.
If it is working you should be able to see activity in the dashboard.
Unbound
The first time you will run Unbound, it may fail because a few files included in the default configuration will be missing (at least in the image version I'm using), indeed the following files are included in the default unbound.conf file (which should have been created correctly in /etc/unbound/unbound.conf) :
- /opt/unbound/etc/unbound/a-records.conf
- /opt/unbound/etc/unbound/srv-records.conf
- /opt/unbound/etc/unbound/forward-records.conf
You could manually create these files (you can find default ones from the Unbound GitHub repository), and then mount them into the Unbound container, before running again the Compose file.
But that way it would run Unbound in forwarder mode, meaning that the DNS server will forward all the queries to Cloudflare. This was my first try and a DNS leak test confirmed that it uses Cloudflare, indeed the default forward-records.conf file includes the following forwarding rules :
forward-addr: 1.1.1.1@853#cloudflare-dns.com
forward-addr: 1.0.0.1@853#cloudflare-dns.com
So, if you want to run Unbound without forwarding, just remove or comment the lines that includes the above files from the unbound.conf file. Do not create any of these files at all and do not bind them in the container, just remove the includes from the unbound.conf file.
A DNS leak test should now show your IP address as DNS server.
[!IMPORTANT] If you use the default forward-records.conf file, Unbound will run in forwarder mode, meaning that it will forward all queries to Cloudflare. To remove the default forwarding to Cloudflare and make your unbound container a recursive-only server, edit the unbound.conf file and remove include of the forward-records.conf file.
Then there are a few settings in unbound.conf that are essential when Unbound runs in a container. I ran for
months with a resolver that returned SERVFAIL for most names that were not already in cache (login.live.com,
www.apple.com, the Twitch video servers, ...), cached names being served fine, which made streams randomly fail to
start and Windows painfully slow at boot when the tunnel was up :
server:
    # the container has no IPv6 connectivity : without this, Unbound keeps trying the IPv6 addresses of the authoritative
    # servers, burns its retry budget and ends up with SERVFAIL ("exceeded the maximum number of sends")
    do-ip6: no
    # 0x20 case randomization breaks with load balanced domains (Microsoft, Akamai, Twitch, ...) that answer differently
    # on each query, Unbound then cannot validate its fallback ("0x20 failed, then got different replies in fallback")
    use-caps-for-id: no
    # 1 is plenty, 5 (debug) formats a huge amount of text for every single query, even when it ends up in /dev/null
    verbosity: 1
    # log the reason of each SERVFAIL to the container output (sudo docker logs unbound)
    log-servfail: yes
    logfile: ""
    use-syslog: no
A quick way to validate such changes without touching the running resolver is to start a throwaway Unbound with the modified file on the same Docker network, and to compare both on names that are not cached :
sudo docker run -d --name unbound-test --network wireguard_net -v /tmp/unbound-test.conf:/opt/unbound/etc/unbound/unbound.conf:ro mvance/unbound:latest
dig @$(sudo docker inspect unbound-test --format '{{range .NetworkSettings.Networks}}{{.IPAddress}}{{end}}') login.live.com
sudo docker logs unbound-test | grep SERVFAIL
sudo docker rm -f unbound-test
With my original file 9 names out of 16 failed, with do-ip6: no alone all 16 succeeded, and use-caps-for-id: no on
top made them faster.
Do not enable log-queries for daily use, Unbound logs a lot.
Configuration files details
Services definition
:page_facing_up: pihole/docker-compose.yml :
services:

  pihole:
    container_name: pihole
    image: pihole/pihole:latest
    restart: unless-stopped
    ports:
      - "53:53/tcp"
      - "53:53/udp"
    environment:
      TZ: "Europe/Zurich"
      FTLCONF_dns_listeningMode: 'all'
    networks:
      pihole-net:
        ipv4_address: 10.2.0.100
      traefik-private-net:
    volumes:
      - "./etc-pihole/:/etc/pihole/"
    cap_add:
      - NET_ADMIN
      - SYS_TIME
      - SYS_NICE

networks:

  pihole-net:
    name: pihole-net
    ipam:
      driver: default
      config:
        - subnet: 10.2.0.0/24

  traefik-private-net:
    name: traefik-private-net
    external: true
:page_facing_up: traefik/dynamic/pihole.yml :
http:
  services:
    pihole:
      loadBalancer:
        servers:
          - url: http://pihole:80

  routers:
    pihole:
      rule: 'Host(`pihole.example.com`)'
      entryPoints:
        - websecure
      tls:
        certResolver: default
      service: pihole
      middlewares:
        - vpn-whitelist@file
        - pihole-auth@file
This Compose file :
- defines the
pihole-netnetwork with the subnet10.2.0.0/24(shared with Unbound) - references the
traefik-private-netTraefik network so that the web UI can be reached through the reverse proxy (the router itself is declared on the Traefik side, see below) - defines the
piholeservice :- publishes port
53(TCP and UDP) on every address of the host, which is what makes Pi-Hole reachable from the LAN (192.168.0.16) and from the VPN peers (10.0.0.1) without any extra rule - sets the timezone and
FTLCONF_dns_listeningMode: 'all'(see Pi-hole) - assigns the static IP address
10.2.0.100 - binds the /etc/pihole folder to keep the configuration and the databases
- adds the
NET_ADMIN,SYS_TIMEandSYS_NICEcapabilities recommended by the Pi-Hole image (DHCP server, time synchronisation, scheduling priority)
- publishes port
- it uses Traefik dynamic config file to :
- define the
piholeservice pointing to the container on port80(reachable by name thanks to the sharedtraefik-private-netnetwork) - define the router matching
pihole.example.comon thewebsecureentrypoint with a Let's Encrypt certificate - restrict the web UI to the local network and the VPN peers with the
vpn-whitelistmiddleware - add a forward-auth middleware
pihole-authin front of it (I use PocketID) to require authentication (see PocketID)
- define the
[!NOTE] Do not lower the MTU of the Docker networks "to fit the tunnel" (I had
com.docker.network.driver.mtu: "1280"on all of them for a long time) : the containers don't need it, MSS clamping and PMTU discovery take care of TCP through the tunnel and DNS answers fit anyway. A small bridge MTU only means more packets for the same data and a dependency on ICMP for the inbound traffic, and back when WireGuard itself ran in a container it forced the kernel to fragment every single encrypted packet.
:page_facing_up: unbound/docker-compose.yml :
services:

  unbound:
    image: "mvance/unbound:latest"
    container_name: unbound
    restart: unless-stopped
    hostname: "unbound"
    volumes:
      - "./unbound:/opt/unbound/etc/unbound/"
    networks:
      pihole-net:
        ipv4_address: 10.2.0.200

networks:

  pihole-net:
    name: pihole-net
    external: true
This Compose file only defines the unbound service, on the same (external) pihole-net network with the static
IP address 10.2.0.200, and binds the configuration folder so that unbound.conf can be edited
(see Unbound). Unbound is not exposed at all, only Pi-Hole talks to it.
:page_facing_up: wgdashboard/docker-compose.yml :
services:

  wgdashboard:
    image: ghcr.io/wgdashboard/wgdashboard:latest
    restart: unless-stopped
    container_name: wgdashboard
    volumes:
      - /etc/wireguard:/etc/wireguard
      - ./data:/data
    network_mode: host
    cap_add:
      - NET_ADMIN
    extra_hosts:
      - "pocketid.example.com:192.168.0.16"
This one is the odd one out : no network and no published port, because network_mode: host puts it in the host's
network namespace, the only way for it to see the live state of wg0 (see WGDashboard). NET_ADMIN
lets it act on the interface, /etc/wireguard is shared with the host so that it edits the very file wg-quick uses,
and data holds its own database and settings. extra_hosts is only useful if you enable the single sign-on of the
client side app.
Traefik routing
:page_facing_up: traefik/dynamic/pihole.yml (to copy into /opt/apps/traefik/dynamic/, the directory watched by the
file provider of traefik.yml) :
http:
  services:
    pihole:
      loadBalancer:
        servers:
          - url: http://pihole:80

  routers:
    pihole:
      rule: 'Host(`pihole.example.com`)'
      entryPoints:
        - websecure
      tls:
        certResolver: default
      service: pihole
      middlewares:
        - vpn-whitelist@docker
        - pihole-auth@file
It declares the pihole service pointing to the container on port 80 (reachable by name thanks to the shared
traefik-private-net network) and the router matching pihole.example.com on the websecure entrypoint with a
Let's Encrypt certificate, exactly what the Traefik labels used to do, but Traefik picks up the file without restarting
anything. The vpn-whitelist middleware keeps the web UI private (local network and VPN peers only).
The pihole-auth middleware is a forward-auth middleware (I use PocketID) to require authentication
(see PocketID).
:page_facing_up: traefik/dynamic/wgdashboard.yml :
http:
  services:
    wgdashboard:
      loadBalancer:
        servers:
          - url: http://192.168.0.16:10086

  routers:
    wgdashboard:
      rule: 'Host(`wgdashboard.example.com`)'
      entryPoints:
        - websecure
      tls:
        certResolver: default
      service: wgdashboard
      middlewares:
        - vpn-whitelist@file
The WGDashboard router is the same, with one difference : its service points at the mini PC address rather than at a container name, since the container has no Docker network of its own. Only the IP whitelist is applied, for the reason explained in WGDashboard.
Run
Once the tunnel is up (see WireGuard), run the three Compose files :
sudo docker-compose -f /opt/apps/pihole/docker-compose.yml up -d
sudo docker-compose -f /opt/apps/unbound/docker-compose.yml up -d
sudo docker-compose -f /opt/apps/wgdashboard/docker-compose.yml up -d
You should end up with the wg0 interface (sudo wg show) and 3 running containers, pihole, unbound and
wgdashboard.
Unbound is not exposed, Pi-Hole is reachable at https://pihole.example.com and WGDashboard
at https://wgdashboard.example.com.
Test the network
DNS resolution
Each service should be resolvable through its subdomain name.
When a user enters the URL in the browser, the browser need to know the IP address corresponding to the domain name, so it can send the queries to. For that it :
- Checks the browser cache (most browsers cache DNS data by default), and use the address corresponding to the provided name if found
- Checks the OS cache and return the address to the browser if found
- Checks the local host table file (usually /etc/hosts on Linux/Mac systems and C: \Windows\System32\Drivers\etc\hosts on Windows) to see if an entry matches the specified name, if so, it will directly return it to the browser
- Invokes the local resolver, on Windows, it is defined at the network adapter level, usually Control Panel > Network and Internet > Network Connections then in the advanced properties of the desired connection (Higher Priority Connection). On Linux/Mac it is usually /etc/resovl.conf. In my Windows system it is automatically configured to point to my router local IP Address. The resolver checks its cache to see if it already has the address for this name. If it does, it returns it immediately to the browser
- Checks the router cache and return the address to the browser if found
- Checks the ISP cache and return the address to the browser if found
- Checks the ISP resolving name server which will call the root DNS servers (root server <--> TLD server <--> Authoritative Name Server) to find the IP address from the DNS server responsible for the domain name
In our case the requests from the local network should reach Pi-hole (directly, or through the router if it really forwards them, see IP settings), so the IP resolving goes through Pi-Hole and Unbound. See Network flow later below for a more graphical representation of the network flow.
You can first test that each service is resolvable using nslookup command, i.e. :
C:\Users\Yann39>nslookup myapp.example.com
Server :   pi.hole
Address:  10.2.0.100

Name :     myapp.example.com
Address:  192.168.0.16
If the answering server is the router instead of Pi-Hole, the router does not forward the queries
(see IP settings).
If names resolve fine once cached but fail (SERVFAIL) or take a second the first time, the problem is on Unbound's
side, see the settings in Unbound.
Then you can look for DNS leak using any online checker, to determine which DNS servers the browser is using to resolve domain names, it should end up showing your public IP address, not Cloudflare or Google, etc. as we use Unbound (see Unbound for configuration).
You could also use tools like Wireshark to look closely at DNS resolution or to confirm that the traffic is
effectively going through the VPN when connected (in that case the "Protocol" column should be WireGuard for all
queries). I will not go through a Wireshark tutorial, but it is a very useful and interesting tool for viewing what
going on in your network.
Reachability
To verify that the network is set up correctly, we can simply try to access some services and see if we can reach them or not, from different device and connection type.
[!NOTE] I simply temporarily added a
CNAMErecord in my domain name registrar for the services to be checked, to point to my DDNS for testing the IP whitelisting, Traefik will not route request if you try to access a service via the public IP address.
For example if we try to access a service that must be accessible only through VPN (and local network), here are the results :
| Device | Connection | VPN status | Public IP | Remote address (request header) | Traefik | Response |
|---|---|---|---|---|---|---|
| PC | cable | :red_circle: off | 144.12.117.3 | 192.168.0.16 | 192.168.0.11 | :heavy_check_mark: 200 OK |
| PC | cable | :green_circle: on | 144.12.117.3 | 192.168.0.16 | 192.168.0.11 | :heavy_check_mark: 200 OK |
| Mobile | wifi | :red_circle: off | 144.12.117.3 | 192.168.0.16 | 192.168.0.12 | :heavy_check_mark: 200 OK |
| Mobile | wifi | :green_circle: on | 144.12.117.3 | 192.168.0.16 | 172.22.0.1 | :heavy_check_mark: 200 OK |
| Mobile | 4G | :red_circle: off | 81.165.84.189 | 144.12.117.3 | 81.165.84.189 | :x: 403 Forbidden |
| Mobile | 4G | :green_circle: on | 144.12.117.3 | 192.168.0.16 | 172.22.0.1 | :heavy_check_mark: 200 OK |
192.168.0.16is the mini PC's private IP address144.12.117.3is the router's public IP address192.168.0.11is the desktop PC's local IP address192.168.0.12is the mobile phone's local IP address172.22.0.1is the Traefik Bridge network IP address81.165.84.189is the public IP address on the mobile 4G network
These are expected results, we can see that the service is reachable from the local network and from anywhere when using the VPN, and it is not accessible outside the local network if we don't use the VPN.
We can also confirm this by looking at the Traefik logs (you have to set level to debug in traefik.yml file to
see the debug logs) which shows that the vpn-whitelist middleware blocks any IP address that is not whitelisted :
level=debug msg="Authentication succeeded" middlewareType=BasicAuth middlewareName=auth@docker
level=debug msg="Accepting IP 192.168.0.16" middlewareName=vpn-whitelist@docker middlewareType=IPWhiteLister
level=debug msg="Accepting IP 172.22.0.1" middlewareName=vpn-whitelist@docker middlewareType=IPWhiteLister
level=debug msg="Rejecting IP 81.165.84.189: \"81.165.84.189\" matched none of the trusted IPs" middlewareName=vpn-whitelist@docker middlewareType=IPWhiteLister
VPN connection speed
To verify that the VPN is not killing the connection speed, first run an online speed test with and without the tunnel, from a wired device (Wi-Fi adds its own variability). These are my results with a symmetric gigabit fiber line, from the home PC :
| Test (home PC, Ethernet) | Download / upload (Mbit/s) |
|---|---|
| No VPN | 920 / 920 |
| Split tunnel (only the VPN subnet routed) | 910 / 920 |
| Full tunnel, endpoint = LAN IP of the server | 570 / 860 |
| Full tunnel, endpoint = public hostname (router hairpin) | 350 / 440 |
The upload is fine, the hairpin case is explained in Peers configuration, and the download ceiling took me an evening of measurements to understand. Here is what I learned, so you don't have to.
Configure MTU
Most Ethernet connections have an MTU of 1500. You can confirm this on your network by running the ping command
with the right parameters :
ping www.google.com -f -l 1472
ping www.google.com -f -l 1473
1472 will work and 1473 will warn that the packet needs to be fragmented, because the IPv4 header is 20 bytes
and the ICMP header is 8 bytes (1472 + 20 + 8 = 1500).
WireGuard adds its own headers, 60 bytes on IPv4 and 80 bytes on IPv6, so the tunnel MTU must be 1500 - 80 = 1420
(the wg-quick default).
Beware of tools defaulting to 1450 (WireGuard UI did) : that produces 1510 bytes packets that get fragmented, and a
fragmented tunnel is dramatically slow (a few percent of the line rate).
Set 1420 on the server and on every peer, and don't go lower : a smaller MTU only means more packets for the same
data.
Measure where the limit is
Speed tests only give the end result. To know which part of the path limits, use iPerf 3 between the peer and
the server, in both directions, in UDP and in TCP.
Install iperf3 on the server (sudo apt install iperf3) and on the client (Windows builds are available on iperf.fr),
run iperf3 -s on the client (allow it in the Windows firewall), then from the server, with the tunnel up (10.0.0.2
being the tunnel address of the peer and 192.168.0.12 its LAN address) :
# reference : LAN, no tunnel, both directions
iperf3 -c 192.168.0.12 -t 10 -P 4
iperf3 -c 192.168.0.12 -t 10 -P 4 -R
# through the tunnel, UDP at a fixed rate : does the path carry the packets at all ?
iperf3 -c 10.0.0.2 -u -b 900M -l 1350 -t 10
# through the tunnel, TCP : what does a real transfer get ?
iperf3 -c 10.0.0.2 -t 10 -P 4
iperf3 -c 10.0.0.2 -t 10 -P 4 -R
And while a test runs, watch the receive drops of the network card and the state of the TCP connections on the server :
ethtool -S enp1s0 | grep rx_missed      # before / after : frames the card dropped because its receive ring was full
ss -ti dst 10.0.0.2                     # rtt, cwnd and retrans of the running connections
My results on the N100 :
- LAN without tunnel : 940 Mbit/s both ways, zero retransmission. Card, cable, router and PC are fine.
- Tunnel, UDP : 900+ Mbit/s both ways with 0.00 % loss at line rate. The whole path, encryption on the N100 and decryption on the PC included, carries the full gigabit.
- Tunnel, TCP, upload (peer to internet) : 860 to 930 Mbit/s.
- Tunnel, TCP, download (internet to peer) : 550 to 600 Mbit/s, whatever I tried, with
rx_missedclimbing on the server (50 to 1000 per second) while the CPU never went above 70 % on the busiest core.
So the limit is neither the CPU nor WireGuard, it is the network card. The Realtek RTL8168H of this mini PC (r8169
driver) has a single queue, a single interrupt handled by a single core, and a receive ring of 256 descriptors
(hardware maximum), which holds about 3 ms of gigabit traffic.
When the card receives and transmits at ~600 Mbit/s at the same time, which is exactly what relaying a download
through the tunnel does, the ring overflows during the small scheduling gaps of the receive path, and the dropped frames
make the TCP senders on the internet back off. "Polite" senders (speed test servers) settle around 560 Mbit/s,
aggressive ones (public iPerf servers with 10 Gbit/s uplinks) push ~850 Mbit/s through at the price of tens of thousands
of retransmissions.
The upload is not affected because the plaintext sent out benefits from segmentation offload (far fewer packets to
handle), and UDP is not affected because it does not react to drops.
For the record, here is what does not move that ceiling (I measured each one) : pinning the card interrupt to a
dedicated core and steering the rest with RPS, interrupt coalescing (receive coalescing even multiplied the drops by
30), threaded NAPI with real-time priority, real-time ksoftirqd, a bigger NAPI budget, disabling Ethernet flow
control, TSO/GSO, cake on the tunnel interface, an ingress shaper, a fast path in iptables. Some of them lower the CPU
usage, none of them changes the size of the receive ring.
What does help :
- Don't use a full tunnel at home, see Peers configuration : a split tunnel, or no tunnel at all with the DNS pointing to Pi-Hole, gives the same ad blocking at 920 Mbit/s. Away from home, the remote connection is the limit anyway.
- If you really want line rate through the tunnel, the fix is hardware : a multi-queue network card (for example an Intel i226 on an M.2 A+E adapter, in place of the unused Wi-Fi card, brings 4 queues and receive rings up to 4096 descriptors).
Network card settings
Two settings of the r8169 driver are worth changing anyway, they lower the CPU cost of the upload and of the LAN
traffic. Put them as post-up commands of the interface in /etc/network/interfaces so that they survive a reboot :
iface enp1s0 inet dhcp
    # the driver keeps scatter-gather and TCP segmentation offload off by default because of old reports of transmit timeouts, they work fine on the RTL8168H
    post-up ethtool -K enp1s0 sg on tso on gso on || true
    # one interrupt per transmitted packet by default : coalesce them (but do NOT coalesce the receive side, it makes the receive drops worse)
    post-up ethtool -C enp1s0 tx-usecs 120 tx-frames 16 || true
If dmesg ever shows NETDEV WATCHDOG for the interface, remove the first line.
Network flow
For the following examples, we will consider that the user enters http://myapp.example.com in the browser for the first time (no DNS record found in cache).
Without VPN
Here is what happen when you try to reach a service which is open to the internet, without using any VPN, from your local network holding your homelab (on the left), or from any other location (on the right) :
| From local network | From outside local network |
|---|---|
|
|
From the local network (left), Pi-Hole answers with its local DNS record (yellow dotted line), so the browser gets the mini PC's internal IP and reaches the reverse proxy directly on the LAN, without going through the public IP (no port forwarding, no NAT loopback). From any other location (right), the name is resolved publicly through the client's DNS resolver and the request reaches the mini PC on port 80 (HTTP) after being port forwarded by the ISP router. In both cases the reverse proxy redirects the request to port 443 (HTTPS) thanks to the HTTPS redirect middleware, which finally routes it to the target application (red line).
With VPN
If you try to reach the service through the WireGuard VPN, the flow will look like the following :
flowchart TB
    style HOSTING_PROVIDER fill: #4d683b
    style DDNS_PROVIDER fill: #69587b
    style INTERNET_SERVICE_PROVIDER fill: #205566
    style SERVER_DEVICE fill: #665151
    style CONTAINER_ENGINE fill: #664343
    style TRAEFIK_CONTAINER fill: #663535
    style PIHOLE_CONTAINER fill: #663535
    style UNBOUND_CONTAINER fill: #663535
    style WIREGUARD_HOST fill: #663535
    style MYAPP_CONTAINER fill: #663535
    style PIHOLE_DNS_RECORDS fill: #806030
    style TRAEFIK_ROUTER fill: #806030
    style TRAEFIK_MIDDLEWARE fill: #806030
    style VPN_CLIENT fill: #105040
    DOMAIN(example.com)
    SUBDOMAIN_MYAPP(myapp.example.com)
    SUBDOMAIN_WIREGUARD(wireguard.example.com)
    DDNS(myddns.ddns.net)
    ROUTER_PUBLIC_IP[public IP]
    ROUTER_PORT51820{{51820/udp}}
    WIREGUARD_PORT{{51820/udp}}
    ROUTER_DNS[DNS 1]
    DOCKER_PIHOLE_PORT53{{53/udp}}
    DOCKER_TRAEFIK_PORT443{{443/tcp}}
    DOCKER_TRAEFIK_PORT80{{80/tcp}}
    DOCKER_MYAPP_PORT{{port/tcp}}
    DOCKER_UNBOUND_PORT53{{53/udp}}
    TRAEFIK_ROUTER_MYAPP(myapp.example.com)
    TRAEFIK_MIDDLEWARE_REDIRECT(HTTPS redirect)
    TRAEFIK_MIDDLEWARE_WHITELIST(IP whitelist)
    ROOT_DNS_SERVERS[Root DNS servers]
    PIHOLE_DNS_MYAPP(myapp.example.com)

    subgraph VPN_CLIENT[VPN CLIENT]
        WIREGUARD_CLIENT_ENDPOINT[Endpoint]
        WIREGUARD_CLIENT_DNS[DNS]
    end

    subgraph HOSTING_PROVIDER[DOMAIN NAME REGISTRAR]
        DOMAIN
        SUBDOMAIN_MYAPP
        SUBDOMAIN_WIREGUARD
    end

    subgraph DDNS_PROVIDER[DYNAMIC DNS PROVIDER]
        DDNS
    end

    subgraph INTERNET_SERVICE_PROVIDER[INTERNET SERVICE PROVIDER]
        ROUTER_PUBLIC_IP
        ROUTER_PORT51820
        ROUTER_DNS
    end

    subgraph SERVER_DEVICE[MINI PC]
        subgraph CONTAINER_ENGINE[DOCKER]
            subgraph MYAPP_CONTAINER[MYAPP CONTAINER]
                DOCKER_MYAPP_PORT
            end

            subgraph UNBOUND_CONTAINER[UNBOUND CONTAINER]
                DOCKER_UNBOUND_PORT53
            end

            subgraph PIHOLE_CONTAINER[PIHOLE CONTAINER]
                DOCKER_PIHOLE_PORT53
                subgraph PIHOLE_DNS_RECORDS[LOCAL DNS RECORDS]
                    PIHOLE_DNS_MYAPP
                end
            end

            subgraph TRAEFIK_CONTAINER[TRAEFIK CONTAINER]
                DOCKER_TRAEFIK_PORT443
                DOCKER_TRAEFIK_PORT80

                subgraph TRAEFIK_ROUTER[TRAEFIK HTTP ROUTER]
                    TRAEFIK_ROUTER_MYAPP
                end

                subgraph TRAEFIK_MIDDLEWARE[TRAEFIK MIDDLEWARE]
                    TRAEFIK_MIDDLEWARE_REDIRECT
                    TRAEFIK_MIDDLEWARE_WHITELIST
                end
            end

        end

        subgraph WIREGUARD_HOST[WIREGUARD - on the host]
            WIREGUARD_PORT
        end

    end

    CLIENT((client)) --> VPN_CLIENT
    WIREGUARD_CLIENT_ENDPOINT --> SUBDOMAIN_WIREGUARD
    WIREGUARD_CLIENT_DNS -->|Server tunnel address| DOCKER_PIHOLE_PORT53
    VPN_CLIENT -->|" http://myapp.example.com "| BROWSER
    BROWSER((browser)) --> ROUTER_PUBLIC_IP
    DOMAIN -->|subdomain| SUBDOMAIN_MYAPP
    DOMAIN -->|subdomain| SUBDOMAIN_WIREGUARD
    SUBDOMAIN_MYAPP -->|CNAME| DDNS
    SUBDOMAIN_WIREGUARD -->|CNAME| DDNS
    DDNS -->|DynDNS| ROUTER_PUBLIC_IP
    ROUTER_PUBLIC_IP --> ROUTER_PORT51820
    ROUTER_PORT51820 ----->|port forward| WIREGUARD_PORT
    PIHOLE_DNS_MYAPP -->|mini PC internal IP| DOCKER_TRAEFIK_PORT80
    DOCKER_TRAEFIK_PORT443 --> TRAEFIK_ROUTER
    DOCKER_TRAEFIK_PORT80 --> TRAEFIK_ROUTER
    TRAEFIK_ROUTER_MYAPP --> TRAEFIK_MIDDLEWARE_REDIRECT
    TRAEFIK_MIDDLEWARE_REDIRECT --> DOCKER_TRAEFIK_PORT443
    TRAEFIK_MIDDLEWARE_REDIRECT --> TRAEFIK_MIDDLEWARE_WHITELIST
    TRAEFIK_MIDDLEWARE_WHITELIST --> DOCKER_MYAPP_PORT
    ROUTER_DNS <---->|mini PC static IP| DOCKER_PIHOLE_PORT53
    DOCKER_PIHOLE_PORT53 <-->|DNS| DOCKER_UNBOUND_PORT53
    UNBOUND_CONTAINER <------> ROOT_DNS_SERVERS
    linkStyle 0 stroke-width: 4px, stroke: red
    linkStyle 1 stroke-width: 4px, stroke: yellow, stroke-dasharray: 5
    linkStyle 2 stroke-width: 4px, stroke: yellow, stroke-dasharray: 5
    linkStyle 3 stroke-width: 4px, stroke: red
    linkStyle 4 stroke-width: 4px, stroke: red
    linkStyle 5 stroke-width: 4px, stroke: yellow, stroke-dasharray: 5
    linkStyle 6 stroke-width: 4px, stroke: yellow, stroke-dasharray: 5
    linkStyle 7 stroke-width: 4px, stroke: yellow, stroke-dasharray: 5
    linkStyle 8 stroke-width: 4px, stroke: yellow, stroke-dasharray: 5
    linkStyle 9 stroke-width: 4px, stroke: yellow, stroke-dasharray: 5
    linkStyle 10 stroke-width: 4px, stroke: red
    linkStyle 11 stroke-width: 4px, stroke: red
    linkStyle 12 stroke-width: 4px, stroke: red
    linkStyle 13 stroke-width: 4px, stroke: red
    linkStyle 14 stroke-width: 4px, stroke: red
    linkStyle 15 stroke-width: 4px, stroke: red
    linkStyle 16 stroke-width: 4px, stroke: red
    linkStyle 17 stroke-width: 4px, stroke: red
    linkStyle 18 stroke-width: 4px, stroke: red
    linkStyle 20 stroke-width: 4px, stroke: yellow, stroke-dasharray: 5
    linkStyle 21 stroke-width: 4px, stroke: yellow, stroke-dasharray: 5
Here, first the client needs to connect to the VPN server through his preferred VPN client. The request for VPN connection reaches the mini PC on UDP port 51820 (VPN port) after being routed by the CNAME record to our dynamic DNS and then port forwarded by our router.
The DNS resolving always go through Pi-Hole and Unbound (yellow dotted line), to resolve the VPN server and the application.
The request for the application is handled by Pi-Hole DNS local record which route it to the mini PC IP address, to be handled by the reverse proxy, and is then redirected to port 443 (HTTPS) thanks to the HTTPS redirect middleware, which finally route it to the target application (red line).
If in any way the request arrives to Traefik with an unauthorized IP address, it will be rejected thanks to the IP whitelist middleware.
Install services
PocketID
We will use PocketID to add a single sign-on in front of the services that don't have a proper authentication of their own (Pi-Hole, the Traefik dashboard), and as identity provider for the services that support OpenID Connect natively (Arcane, Grafana, ...).
PocketID is a small self-hosted OpenID Connect (OIDC) provider with a twist : users don't have passwords, they authenticate with passkeys only (a hardware key, or the passkey manager of the phone, the browser or a password manager). Nothing to remember, nothing to phish, and one login for every service.
There are two ways to plug a service on it :
- services that speak OIDC natively (Arcane, Grafana, ...) get their own OIDC client in PocketID and show a "login with PocketID" button
- services that don't (Pi-Hole, the Traefik dashboard) are put behind the traefik-oidc-auth Traefik plugin : a middleware that redirects the browser to PocketID, checks the token it comes back with and keeps a session cookie, so that the service behind never sees an unauthenticated request
Here is an overview of the network flow when a service is protected by the middleware :
flowchart LR
    style INCOMING_REQUEST fill: #205566
    style TRAEFIK_CONTAINER fill: #663535
    style APP_CONTAINER fill: #663535
    style POCKETID_CONTAINER fill: #663535
    style TRAEFIK_ROUTER fill: #806030
    style TRAEFIK_MIDDLEWARE fill: #806030
    style SERVER_DEVICE fill: #665555
    style CONTAINER_ENGINE fill: #664545
    DOCKER_TRAEFIK_PORT443{{443/tcp}}
    DOCKER_TRAEFIK_PORT80{{80/tcp}}
    DOCKER_APP_PORT{{80/tcp}}
    DOCKER_POCKETID_PORT{{1411/tcp}}
    TRAEFIK_ROUTER_APP(pihole.example.com)
    TRAEFIK_ROUTER_POCKETID(pocketid.example.com)
    TRAEFIK_MIDDLEWARE_REDIRECT(HTTPS redirect)
    TRAEFIK_MIDDLEWARE_IP_WHITELIST(IP whitelist)
    TRAEFIK_MIDDLEWARE_OIDC(OIDC auth\npihole-auth)
    INCOMING_REQUEST((INCOMING\nREQUEST))
    INCOMING_REQUEST --> DOCKER_TRAEFIK_PORT443
    INCOMING_REQUEST --> DOCKER_TRAEFIK_PORT80

    subgraph SERVER_DEVICE[MINI PC]
        subgraph CONTAINER_ENGINE[DOCKER]
            subgraph APP_CONTAINER[PI-HOLE CONTAINER]
                DOCKER_APP_PORT
            end

            subgraph POCKETID_CONTAINER[POCKETID CONTAINER]
                DOCKER_POCKETID_PORT
            end

            subgraph TRAEFIK_CONTAINER[TRAEFIK CONTAINER]
                DOCKER_TRAEFIK_PORT443 --> TRAEFIK_ROUTER
                DOCKER_TRAEFIK_PORT80 --> TRAEFIK_ROUTER

                subgraph TRAEFIK_ROUTER[TRAEFIK HTTP ROUTERS]
                    TRAEFIK_ROUTER_APP
                    TRAEFIK_ROUTER_POCKETID
                end

                subgraph TRAEFIK_MIDDLEWARE[TRAEFIK MIDDLEWARES]
                    TRAEFIK_MIDDLEWARE_REDIRECT
                    TRAEFIK_MIDDLEWARE_IP_WHITELIST
                    TRAEFIK_MIDDLEWARE_OIDC
                end

                TRAEFIK_ROUTER_APP --> TRAEFIK_MIDDLEWARE_REDIRECT
                TRAEFIK_MIDDLEWARE_REDIRECT --> TRAEFIK_MIDDLEWARE_IP_WHITELIST
                TRAEFIK_MIDDLEWARE_REDIRECT -.-> DOCKER_TRAEFIK_PORT443
                TRAEFIK_MIDDLEWARE_IP_WHITELIST --> TRAEFIK_MIDDLEWARE_OIDC
                TRAEFIK_MIDDLEWARE_OIDC -->|authenticated| DOCKER_APP_PORT
                TRAEFIK_MIDDLEWARE_OIDC -.->|not authenticated : browser redirected to the login page| TRAEFIK_ROUTER_POCKETID
                TRAEFIK_MIDDLEWARE_OIDC -.->|token validation through the Docker network| DOCKER_POCKETID_PORT
                TRAEFIK_ROUTER_POCKETID --> DOCKER_POCKETID_PORT
            end

        end
    end
Setting up
Create the folders and the encryption key (PocketID encrypts its secrets at rest with it : keep that file with your
backups, without it the database is unusable).
The container runs as user 1000:1001 (see the .env file), so give it the ownership of the data folder and of the
key :
sudo mkdir -p /opt/apps/pocketid/data
openssl rand -base64 32 | sudo tee /opt/apps/pocketid/encryption_key > /dev/null
sudo chown -R 1000:1001 /opt/apps/pocketid/data /opt/apps/pocketid/encryption_key
sudo chmod 600 /opt/apps/pocketid/encryption_key
Then :
- copy the .env and docker-compose.yml files from this project's pocketid directory into the /opt/apps/pocketid directory, and adapt the .env file to your domain
- copy the pocketid.yml file from this project's traefik/dynamic directory into the /opt/apps/traefik/dynamic directory
- declare the
traefik-oidc-authplugin in the traefik.yml static configuration (see below) and restart Traefik, plugins are downloaded when it starts
Run the Compose file (see Run), then open https://pocketid.example.com : on first start the setup page
(/setup) creates the administrator account and registers its first passkey.
Now create one OIDC client per service to protect (OIDC Clients -> Add) :
- for a service put behind the Traefik middleware, the callback URL is the service URL followed by
/oidc/callback(the defaultCallbackUriof the plugin), for examplehttps://pihole.example.com/oidc/callback, and PKCE enabled. Copy the generated client ID and secret into theClientId/ClientSecretfields of the corresponding middleware in pocketid.yml, and give the middleware a random 32 charactersSecret(openssl rand -base64 48 | tr -dc 'A-Za-z0-9' | head -c 32; echo) : this one is not a PocketID secret, it is the key the plugin uses to encrypt its own session cookie. The plugin expects exactly 32 characters, and each middleware must have its own. Traefik picks up the change without restart - for a service with native OIDC support, use the callback URL it documents, and disable PKCE on the PocketID side
if the application does not send a
code_challenge(a confidential client is protected by its secret anyway). Some applications ask for each endpoint separately instead of an issuer URL : the authorization URL is always the public one (https://pocketid.example.com/authorize, the browser follows it), while the token and user info URLs are called by the container itself. They can be the internal ones (http://pocketid:1411/api/oidc/tokenandhttp://pocketid:1411/api/oidc/userinfo), or the public ones thanks to the alias and thepocketid-whitelistmiddleware described below (this is what Grafana does) - most OIDC libraries, however, verify that the issuer announced by the provider matches the URL they queried
(Homebox and its
go-oidcfor instance), so they cannot use the internal URL at all : queryinghttp://pocketid:1411returnshttps://pocketid.example.comas issuer and they refuse. Those applications must use the public issuer URL, which means their container has to reach it. Two small additions make that work, and they serve every future application :- Traefik carries a network alias with the provider's public name on the private network (see Service definition), so that the containers resolve it to Traefik itself, without any hard coded IP address and without depending on Pi-Hole for the container DNS
- the PocketID router uses the
pocketid-whitelistmiddleware instead ofvpn-whitelist: same ranges plus the private Docker network, so that a container is allowed to fetch the discovery document and to exchange the token. The public Docker network is deliberately left out, an application exposed to the internet must not reach the provider this way
flowchart LR
    APP[application container] -->|1 . resolves pocketid.example.com| DNS[[Docker DNS : alias on Traefik]]
    APP -->|2 . HTTPS, source 172.21.x.x| TRAEFIK[Traefik]
    TRAEFIK -->|3 . pocketid-whitelist accepts the private network| POCKETID[PocketID]
Finally, to protect a service with the middleware, add it to the middlewares list of its router, after the IP
whitelist, as done for Pi-Hole :
      middlewares:
        - vpn-whitelist@file
        - pihole-auth@file
[!NOTE] The
pocketidrouter is itself behind thevpn-whitelistmiddleware because every service I protect with it is only reachable from the local network or the VPN. If one day a public service is put behind the middleware, the login page must be reachable from the internet too : remove the whitelist from thepocketidrouter only, the login page is designed to be public (passkeys cannot be brute-forced or phished). PocketID itself stays on the private network (see Network segmentation).
Details
Service definition
:page_facing_up: docker-compose.yml :
services:

  pocketid:
    image: ghcr.io/pocket-id/pocket-id:v2
    container_name: pocketid
    restart: unless-stopped
    env_file: .env
    volumes:
      - ./data:/app/data
      - /opt/apps/pocketid/encryption_key:/opt/pocket-id/encryption_key:ro
    networks:
      - pocketid-net
      - traefik-private-net

networks:

  pocketid-net:
    name: pocketid-net

  traefik-private-net:
    name: traefik-private-net
    external: true
:page_facing_up: pocketid.yml :
http:
  services:
    pocketid:
      loadBalancer:
        servers:
          - url: http://pocketid:1411

  routers:
    pocketid:
      rule: 'Host(`pocketid.example.com`)'
      entryPoints:
        - websecure
      tls:
        certResolver: default
      service: pocketid
      middlewares:
        - vpn-whitelist@file

  middlewares:
    traefik-auth:
      plugin:
        traefik-oidc-auth:
          Secret: "<secret>"
          Provider:
            Url: "http://pocketid:1411/"
            ClientId: "<oidc_client_id>"
            ClientSecret: "<oidc_client_secret>"
            UsePkce: true
          Scopes: [ "openid", "profile", "email" ]
    pihole-auth:
      plugin:
        traefik-oidc-auth:
          Secret: "<secret>"
          Provider:
            Url: "http://pocketid:1411/"
            ClientId: "<oidc_client_id>"
            ClientSecret: "<oidc_client_secret>"
            UsePkce: true
          Scopes: [ "openid", "profile", "email" ]
:page_facing_up: traefik.yml (plugin declaration, in the static configuration) :
experimental:
  plugins:
    traefik-oidc-auth:
      moduleName: "github.com/sevensolutions/traefik-oidc-auth"
      version: "v0.18.0"
Things to notice :
- PocketID's data (SQLite database, uploaded logos) lives in the data folder, and the encryption key is mounted read-only from the host
- the settings come from the .env file (see Environment variables)
- it runs in its own network (
pocketid-net) but must also share the same network as Traefik (traefik-private-net), both to be reachable by the reverse proxy and so that the plugin can talk to it directly by container name - the Traefik dynamic config file :
- creates a service which will point to our container application running on port
1411 - creates an HTTP router that will match
pocketid.example.comURL on ourwebsecureentrypoint to point to our service - assigns the
vpn-whitelistmiddleware so that the traffic will be restricted to allowed IPs only (application reachable only from local network or through VPN) - adds a TLS configuration that will use our
defaultcertificates resolver, so it can generate Let's encrypt certificates - defines one middleware per protected service (
traefik-authfor the Traefik dashboard,pihole-authfor Pi-Hole), each with its own OIDC client and session, all pointing to PocketID through the internal URLhttp://pocketid:1411/: the token exchange stays inside the Docker network instead of looping through the reverse proxy
- creates a service which will point to our container application running on port
- the plugin itself is declared once in the static configuration, Traefik downloads it from its plugin catalog at start
Environment variables
:page_facing_up: .env :
APP_URL=https://pocketid.example.com
ENCRYPTION_KEY_FILE=/opt/pocket-id/encryption_key
# These variables are optional but recommended to review:
TRUST_PROXY=true
MAXMIND_LICENSE_KEY=
PUID=1000
PGID=1001
APP_URLis the public URL, it is also the OIDC issuer written in every token, so it must match the router's host exactly- there is no
INTERNAL_APP_URLhere on purpose : it makes the discovery document advertise the token and userinfo endpoints ashttp://pocketid:1411/..., for every client and whatever URL the document was fetched from. Clients whose library refuses plain HTTP (CrowdSec Web UI) then break on the token exchange. With the network alias andpocketid-whitelist, the containers reach the public HTTPS endpoints directly, so it is no longer needed ENCRYPTION_KEY_FILEpoints to the key mounted read-only in the containerTRUST_PROXYmakes PocketID take the client IP addresses from the headers set by Traefik (audit log, rate limiting), which is required behind a reverse proxyMAXMIND_LICENSE_KEYis optional, with a free MaxMind license key the audit log shows where the logins come fromPUID/PGIDare the user and group the application runs as, hence the ownership of the data folder and of the key
Run
Finally, simply run the Compose file :
sudo docker-compose -f /opt/apps/pocketid/docker-compose.yml up -d
You should end-up with a running pocketid container.
It should also have generated the needed Let's Encrypt certificates in the acme.json file in the Traefik folder.
The application is available at https://pocketid.example.com, where the first visit creates the administrator account and its passkey (see Setting up).
CrowdSec
We will use CrowdSec to detect and block the attackers knocking on the reverse proxy : scanners looking for /.env
or /wp-login.php, brute force attempts, known exploits, bad bots.
CrowdSec is an open source, collaborative intrusion prevention system : a security engine reads logs, matches them against scenarios from a community hub and takes decisions (ban an IP address for a few hours), and a bouncer enforces them where the traffic enters. In return for the signals it shares, the engine also receives the community blocklist : IP addresses currently attacking other CrowdSec users are blocked before they even try anything here.
In our setup the only door open to the internet is Traefik, so everything happens there :
- the security engine runs in a container on the private Traefik network and reads the Traefik access log through a shared folder (no Docker socket involved)
- the bouncer is a Traefik plugin, declared as a middleware on the
websecureentrypoint : every HTTPS request is checked against the current decisions before reaching any router, private services included (harmless : the local network and the VPN peers are trusted and never blocked)
Here is an overview of the network flow :
flowchart LR
    style INCOMING_REQUEST fill: #205566
    style TRAEFIK_CONTAINER fill: #663535
    style APP_CONTAINER fill: #663535
    style CROWDSEC_CONTAINER fill: #663535
    style TRAEFIK_ROUTER fill: #806030
    style TRAEFIK_MIDDLEWARE fill: #806030
    style SERVER_DEVICE fill: #665555
    style CONTAINER_ENGINE fill: #664545
    style HUB fill: #4d683b
    DOCKER_TRAEFIK_PORT443{{443/tcp}}
    DOCKER_APP_PORT{{80/tcp}}
    DOCKER_CROWDSEC_PORT{{8080/tcp\nlocal API}}
    TRAEFIK_ROUTER_APP(lychee.example.com)
    TRAEFIK_MIDDLEWARE_CROWDSEC(CrowdSec bouncer\non the websecure entrypoint)
    TRAEFIK_MIDDLEWARE_OTHERS(router middlewares)
    INCOMING_REQUEST((INCOMING\nREQUEST))
    HUB((CrowdSec hub\nand community))
    INCOMING_REQUEST --> DOCKER_TRAEFIK_PORT443

    subgraph SERVER_DEVICE[MINI PC]
        subgraph CONTAINER_ENGINE[DOCKER]
            subgraph TRAEFIK_CONTAINER[TRAEFIK CONTAINER]
                DOCKER_TRAEFIK_PORT443 --> TRAEFIK_MIDDLEWARE_CROWDSEC

                subgraph TRAEFIK_MIDDLEWARE[TRAEFIK MIDDLEWARES]
                    TRAEFIK_MIDDLEWARE_CROWDSEC
                    TRAEFIK_MIDDLEWARE_OTHERS
                end

                subgraph TRAEFIK_ROUTER[TRAEFIK HTTP ROUTER]
                    TRAEFIK_ROUTER_APP
                end

                TRAEFIK_MIDDLEWARE_CROWDSEC -->|IP not banned| TRAEFIK_ROUTER_APP
                TRAEFIK_MIDDLEWARE_CROWDSEC -.->|IP banned : 403| INCOMING_REQUEST
                TRAEFIK_ROUTER_APP --> TRAEFIK_MIDDLEWARE_OTHERS
            end

            subgraph APP_CONTAINER[APP CONTAINER]
                DOCKER_APP_PORT
            end

            subgraph CROWDSEC_CONTAINER[CROWDSEC CONTAINER]
                DOCKER_CROWDSEC_PORT
            end

            ACCESS_LOG[(access.log)]
            TRAEFIK_MIDDLEWARE_OTHERS --> DOCKER_APP_PORT
            TRAEFIK_CONTAINER -->|writes| ACCESS_LOG
            ACCESS_LOG -->|reads| CROWDSEC_CONTAINER
            TRAEFIK_MIDDLEWARE_CROWDSEC <-.->|pulls the decisions every minute| DOCKER_CROWDSEC_PORT
        end
    end

    CROWDSEC_CONTAINER <-->|scenarios, signals, community blocklist| HUB
Setting up
Create the folders, and a random key that will be shared between the security engine and the bouncer :
sudo mkdir -p /opt/apps/crowdsec /opt/apps/traefik/logs
openssl rand -base64 48
Then :
- copy the .env, docker-compose.yml and acquis.yml files from this project's crowdsec directory into the
/opt/apps/crowdsec directory, and put the key in
BOUNCER_KEY_traefikof the .env file - put the same key in
CROWDSEC_BOUNCER_KEYof Traefik's .env file, and copy the crowdsec.yml file from this project's traefik/dynamic directory into the /opt/apps/traefik/dynamic directory - update Traefik : the access log now goes to a file with the
User-Agentheader kept, the plugin is declared and thecrowdsec@filemiddleware is set on thewebsecureentrypoint in traefik.yml (see Static configuration file), and the logs folder is bound in Traefik's docker-compose.yml (see Service definition) - copy the logrotate file from this project's traefik directory to /etc/logrotate.d/traefik : the access log is
rotated daily and kept 7 days, Traefik reopens it on the
USR1signal
Details
Service definition
:page_facing_up: crowdsec/docker-compose.yml :
services:

  crowdsec:
    image: crowdsecurity/crowdsec:latest
    container_name: crowdsec
    restart: unless-stopped
    # Holds BOUNCER_KEY_traefik : registers the Traefik bouncer with this key at start (same value in traefik/.env)
    env_file: .env
    environment:
      TZ: "Europe/Zurich"
      # Hub items installed at start : Traefik log parser + HTTP scenarios, known CVE exploits, private IP ranges whitelist
      COLLECTIONS: "crowdsecurity/traefik crowdsecurity/http-cve"
      PARSERS: "crowdsecurity/whitelists"
    volumes:
      - ./acquis.yml:/etc/crowdsec/acquis.yaml:ro   # acquis.yaml is the path expected by CrowdSec's config.yaml
      - ./config:/etc/crowdsec
      - ./data:/var/lib/crowdsec/data
      - /opt/apps/traefik/logs:/var/log/traefik:ro
    networks:
      - traefik-private-net

networks:

  traefik-private-net:
    name: traefik-private-net
    external: true
:page_facing_up: crowdsec/.env :
# Key shared with the Traefik bouncer (same value as CROWDSEC_BOUNCER_KEY in traefik/.env), generate it with : openssl rand -base64 48
BOUNCER_KEY_traefik=<bouncer_key>
:page_facing_up: crowdsec/acquis.yml :
# Log sources read by the CrowdSec agent : the Traefik access log (bind mount shared with the Traefik container).
# A glob pattern, so that the file is picked up when it appears (Traefik may start after CrowdSec) or is recreated by logrotate.
filenames:
  - /var/log/traefik/*.log
labels:
  type: traefik
:page_facing_up: traefik/dynamic/crowdsec.yml :
http:
  middlewares:
    crowdsec:
      plugin:
        crowdsec-bouncer-traefik-plugin:
          enabled: true
          logLevel: INFO
          # stream mode : the plugin pulls the decisions from the CrowdSec local API every updateIntervalSeconds
          # and answers from its cache, nothing is called on the request path
          crowdsecMode: stream
          updateIntervalSeconds: 60
          crowdsecLapiScheme: http
          crowdsecLapiHost: crowdsec:8080
          # Dynamic files are Go templates : the key is read from the CROWDSEC_BOUNCER_KEY variable of the Traefik container (traefik/.env),
          # same value as BOUNCER_KEY_traefik in crowdsec/.env
          crowdsecLapiKey: '{{ env "CROWDSEC_BOUNCER_KEY" }}'
          # never block the local network and the VPN peers, whatever the decisions say
          clientTrustedIPs:
            - 192.168.0.0/24
            - 10.0.0.0/24
:page_facing_up: traefik/logrotate (to copy to /etc/logrotate.d/traefik) :
# Rotation of the Traefik access log (copy this file to /etc/logrotate.d/traefik on the host).
# Traefik reopens its log files when it receives the USR1 signal, no restart needed.
/opt/apps/traefik/logs/access.log {
    daily
    rotate 7
    compress
    delaycompress
    missingok
    notifempty
    create 0644 root root
    postrotate
        /usr/bin/docker kill --signal=USR1 traefik >/dev/null 2>&1 || true
    endscript
}
Things to notice :
- the security engine only joins
traefik-private-net: the bouncer reaches its local API atcrowdsec:8080by name, nothing is published on the host COLLECTIONSandPARSERSare installed from the hub at the first start :crowdsecurity/traefik(the access log parser and the base HTTP scenarios),crowdsecurity/http-cve(known exploits) andcrowdsecurity/whitelists(private IP ranges are never banned, so a misbehaving device at home cannot lock you out)BOUNCER_KEY_traefik(from the .env file) registers thetraefikbouncer with the given key at start, no manualcscli bouncers addneeded, the middleware reads the same key from Traefik's own .env file through a template, so that the key never appears in a configuration file- the volumes hold the acquisition file (which log to read, and which parser applies to it — mounted as /etc/crowdsec/acquis.yaml, the path CrowdSec expects), the configuration (hub items, local API and community API credentials, all created automatically) and the data (SQLite database of alerts and decisions, downloaded blocklists), the Traefik logs folder is mounted read-only
- the middleware runs in stream mode : it pulls the decisions from the local API every
updateIntervalSecondsand answers from its cache, nothing is called on the request path. If the local API becomes unreachable, the plugin keeps serving with the decisions it already has and logs errors clientTrustedIPsmakes the bouncer skip the local network and the VPN peers entirely, in addition to the CrowdSec side whitelist- as the middleware sits on the entrypoint, it runs before the routers and their own middlewares (IP whitelist,
authentication) for every request on
443, present and future services alike
[!NOTE] Your own public IP is not a private range. If some of your traffic reached Traefik through the NAT loopback of the router (a name resolving to the public IP, see IP whitelisting), a noisy test could ban you from your own services :
cscli decisions delete --ip <your_public_ip>lifts it. With local DNS records for the private and the public services (see Pi-hole), the devices at home never take that path.The engine shares the alerts it raises (attacking IP address and scenario) with CrowdSec's central API, that is what feeds the community blocklist everybody benefits from. If you don't want that, remove the
api.server.online_clientsection from config.yaml.
Run
Start the security engine first, so that the bouncer finds its local API, then recreate Traefik (the static configuration changed, and the plugin is downloaded at that moment) :
sudo docker-compose -f /opt/apps/crowdsec/docker-compose.yml up -d
sudo docker-compose -f /opt/apps/traefik/docker-compose.yml up -d --force-recreate
You should end-up with a running crowdsec container. Check that everything talks to everything :
sudo docker exec crowdsec cscli bouncers list          # the "traefik" bouncer, with a recent "last pull"
sudo docker exec crowdsec cscli collections list       # crowdsecurity/traefik and http-cve installed
sudo docker exec crowdsec cscli metrics                # "Acquisition Metrics" : lines read and parsed from access.log (browse a site first)
sudo docker logs traefik 2>&1 | grep -i crowdsec       # plugin loaded, no error
To test the bouncer independently of the scenarios, ban an outside address (your phone on 4G for example) for a few minutes and try to reach a public service from it :
sudo docker exec crowdsec cscli decisions add --ip <phone_public_ip> --duration 5m --reason "bouncer test"
sudo docker exec crowdsec cscli decisions list
sudo docker exec crowdsec cscli decisions delete --ip <phone_public_ip>
The phone must get a 403 from Traefik while the decision is active. To test the scenarios, from the same phone request
a dozen pages a scanner would try (/.env, /wp-login.php, /phpmyadmin/, /.git/config, ...) on a public service :
after a few of them cscli alerts list shows a http-probing or http-sensitive-files alert and the phone is banned
for four hours (the default duration), lift it with cscli decisions delete.
CrowdSec Web UI
CrowdSec is driven from the command line with cscli, which is fine for a check now and then but tedious
to browse. CrowdSec Web UI is a small third-party dashboard that reads the same local API and shows the alerts,
the active decisions, the bouncers and the metrics, with the country and the AS of every attacker, filters, and the
ability to ban or unban an address in two clicks.
It is a plain HTTP application, it holds no Docker socket and no privilege : it only needs a machine account on the CrowdSec local API, so it sits on the private network like the other administration tools. It authenticates its users against PocketID with its own OIDC support.
Here is an overview of the network flow :
flowchart LR
    style INCOMING_REQUEST fill: #205566
    style TRAEFIK_CONTAINER fill: #663535
    style APP_CONTAINER fill: #663535
    style CROWDSEC_CONTAINER fill: #663535
    style POCKETID_CONTAINER fill: #663535
    style TRAEFIK_ROUTER fill: #806030
    style TRAEFIK_MIDDLEWARE fill: #806030
    style SERVER_DEVICE fill: #665555
    style CONTAINER_ENGINE fill: #664545
    DOCKER_TRAEFIK_PORT443{{443/tcp}}
    DOCKER_APP_PORT{{3000/tcp}}
    DOCKER_CROWDSEC_PORT{{8080/tcp\nlocal API}}
    DOCKER_POCKETID_PORT{{1411/tcp}}
    TRAEFIK_ROUTER_APP(crowdsec.example.com)
    TRAEFIK_MIDDLEWARE_IP_WHITELIST(IP whitelist)
    INCOMING_REQUEST((INCOMING\nREQUEST))
    INCOMING_REQUEST --> DOCKER_TRAEFIK_PORT443

    subgraph SERVER_DEVICE[MINI PC]
        subgraph CONTAINER_ENGINE[DOCKER]
            subgraph TRAEFIK_CONTAINER[TRAEFIK CONTAINER]
                DOCKER_TRAEFIK_PORT443 --> TRAEFIK_ROUTER

                subgraph TRAEFIK_ROUTER[TRAEFIK HTTP ROUTER]
                    TRAEFIK_ROUTER_APP
                end

                subgraph TRAEFIK_MIDDLEWARE[TRAEFIK MIDDLEWARES]
                    TRAEFIK_MIDDLEWARE_IP_WHITELIST
                end

                TRAEFIK_ROUTER_APP --> TRAEFIK_MIDDLEWARE_IP_WHITELIST
            end

            subgraph APP_CONTAINER[CROWDSEC WEB UI CONTAINER]
                DOCKER_APP_PORT
            end

            subgraph CROWDSEC_CONTAINER[CROWDSEC CONTAINER]
                DOCKER_CROWDSEC_PORT
            end

            subgraph POCKETID_CONTAINER[POCKETID CONTAINER]
                DOCKER_POCKETID_PORT
            end

            TRAEFIK_MIDDLEWARE_IP_WHITELIST --> DOCKER_APP_PORT
            DOCKER_APP_PORT -->|machine account : alerts, decisions, metrics| DOCKER_CROWDSEC_PORT
            DOCKER_APP_PORT -.->|OIDC single sign - on, through the Traefik alias| DOCKER_POCKETID_PORT
        end
    end
Setting up
Create the folders, then register the machine account the UI will use to read the local API :
sudo mkdir -p /opt/apps/crowdsec-web-ui/data
PW=$(openssl rand -base64 32); echo "machine password : $PW"
sudo docker exec crowdsec cscli machines add crowdsec-web-ui --password "$PW" -f /dev/null
Then :
- copy the .env and docker-compose.yml files from this project's crowdsec-web-ui directory into the
/opt/apps/crowdsec-web-ui directory, and put the generated password in
CONFIG_INSTANCE_LAPI_AUTH_PASSWORD - copy the crowdsec-web-ui.yml file from this project's traefik/dynamic directory into the /opt/apps/traefik/dynamic directory
- create an OIDC client in PocketID with the callback URL of the application :
https://crowdsec.example.com/api/auth/oidc/callback, and PKCE disabled, as the application does not send acode_challenge(it is a confidential client, the client secret is what protects the code exchange). Then put its client ID inCONFIG_AUTH_OIDC_CLIENT_IDand its secret inCONFIG_AUTH_OIDC_CLIENT_SECRET. No middleware on the router : the application talks to PocketID itself - add a local DNS record
crowdsec.example.compointing to the mini PC (see Pi-hole), the service is not published on the internet
[!TIP] If PocketID answers
access_denied, "you are not allowed to access this service" right after the login, the problem is not in the middleware : the OIDC client restricts access to some user groups and your account is not in them. Remove the restriction on the client, or add your group. The error comes from PocketID (look at the domain in the address bar), the application is not even reached.
[!NOTE] This service uses the native OIDC support of the application rather than the Traefik plugin used by Pi-Hole, so that the UI knows who is connected and can apply its admin / read-only roles. Its OIDC library only accepts HTTPS issuers (
only requests to HTTPS are allowed), so the internalhttp://pocketid:1411URL cannot be used : it goes through the public issuer, reachable from the container thanks to the Traefik network alias and thepocketid-whitelistmiddleware described in PocketID.
CONFIG_AUTH_ENABLEDstays onauto: the built-in account (password, TOTP, passkeys) created on the first visit remains available and is your way back in if the OIDC login ever breaks.Roles are decided by group mapping, and
CONFIG_AUTH_OIDC_UNMATCHED_ROLEdefaults todeny: without any group configured, a user who authenticates perfectly is still rejected with OIDC user is not authorized, and nothing is written in the logs since it is a decision, not an error. Either declare the groups as above, or setCONFIG_AUTH_OIDC_UNMATCHED_ROLEtoadminand let PocketID alone decide who may use the client.
Details
Service definition
:page_facing_up: docker-compose.yml :
services:

  crowdsec-web-ui:
    image: ghcr.io/theduffman85/crowdsec-web-ui:latest
    container_name: crowdsec-web-ui
    restart: unless-stopped
    # Holds the password of the CrowdSec machine account (see .env)
    env_file: .env
    environment:
      TZ: "Europe/Zurich"
      # Built-in authentication stays enabled : the local account (password, TOTP, passkeys) is the fallback
      # if the OIDC login ever fails, and it is what gives the UI a real identity and admin / read-only roles
      CONFIG_AUTH_ENABLED: "auto"
      # Single sign-on against PocketID, handled by the application itself (no middleware on the router).
      # The issuer is the PUBLIC URL, no trailing slash : the container reaches it through the Traefik network
      # alias and the pocketid-whitelist middleware, see the PocketID section
      CONFIG_AUTH_OIDC_ISSUER_URL: https://pocketid.example.com
      CONFIG_AUTH_OIDC_CLIENT_ID: <oidc_client_id>
      # CONFIG_AUTH_OIDC_CLIENT_SECRET comes from the .env file
      # Role given to a user matching no group. It defaults to "deny", which rejects every OIDC user with
      # "OIDC user is not authorized" as long as no group is mapped. With a single administrator, "admin" is
      # enough : PocketID already decides who may use the client, through the allowed groups of the client itself.
      # For real admin / read-only roles, set it back to "deny" and map the groups :
      #   CONFIG_AUTH_OIDC_SCOPE: "openid profile email groups"
      #   CONFIG_AUTH_OIDC_GROUPS_CLAIM: groups
      #   CONFIG_AUTH_OIDC_ADMIN_GROUPS_0: <admin_group>
      #   CONFIG_AUTH_OIDC_READ_ONLY_GROUPS_0: <read_only_group>
      CONFIG_AUTH_OIDC_UNMATCHED_ROLE: admin
      # CrowdSec local API, reached by container name on the private Traefik network
      CONFIG_INSTANCE_LAPI_URL: http://crowdsec:8080
      CONFIG_INSTANCE_LAPI_AUTH_TYPE: password
      CONFIG_INSTANCE_LAPI_AUTH_USERNAME: crowdsec-web-ui
      # CONFIG_INSTANCE_LAPI_AUTH_PASSWORD comes from the .env file
    volumes:
      # SQLite database of the UI (its own users, notification rules, GeoNames data)
      - ./data:/app/data
    networks:
      - traefik-private-net

networks:

  traefik-private-net:
    name: traefik-private-net
    external: true
:page_facing_up: .env :
# Password of the CrowdSec machine account the UI uses to read the local API.
# Generate it with `openssl rand -base64 32`, then register the machine in the CrowdSec container :
#   sudo docker exec crowdsec cscli machines add crowdsec-web-ui --password '<password>' -f /dev/null
CONFIG_INSTANCE_LAPI_AUTH_PASSWORD=<lapi_machine_password>

# Secret of the PocketID OIDC client used for the single sign-on
CONFIG_AUTH_OIDC_CLIENT_SECRET=<oidc_client_secret>
:page_facing_up: crowdsec-web-ui.yml :
http:
  services:
    crowdsec-web-ui:
      loadBalancer:
        servers:
          - url: http://crowdsec-web-ui:3000

  routers:
    crowdsec-web-ui:
      rule: 'Host(`crowdsec.example.com`)'
      entryPoints:
        - websecure
      tls:
        certResolver: default
      service: crowdsec-web-ui
      # Only the IP whitelist : the application handles the PocketID single sign-on itself (native OIDC),
      # so no authentication middleware here, otherwise you would log in twice
      middlewares:
        - vpn-whitelist@file
Things to notice :
- it only joins
traefik-private-net: it reaches the CrowdSec local API atcrowdsec:8080by container name, and nothing is published on the host CONFIG_INSTANCE_LAPI_AUTH_*are the credentials of the machine account registered withcscli machines add. A machine account is required : a bouncer API key like the one used by the Traefik plugin can only read the decisions, not the alerts- the data volume holds the UI's own SQLite database (its accounts, its notification rules, the GeoNames data used to locate the attackers), not CrowdSec data
- the router only carries the IP whitelist : the single sign-on is done by the application itself, adding an authentication middleware would mean logging in twice
- deleting alerts from the UI additionally requires its source IP to be trusted by CrowdSec, see the note below
[!WARNING] To allow alert deletion, the UI's IP must be listed in
api.server.trusted_ipsof CrowdSec's config.yaml (in /opt/apps/crowdsec/config/), then restart the container. Use the private network range only, never the172.16.0.0/12the project suggests : that range also coverstraefik-public-net, so the applications exposed to the internet would be trusted too, which is exactly what Network segmentation avoids.api: server: trusted_ips: - 127.0.0.1 - ::1 - 172.21.0.0/16 # traefik-private-net, check it with : docker network inspect traefik-private-netEverything else (reading the alerts, adding or lifting a ban) works without it.
Run
Simply run the Compose file :
sudo docker-compose -f /opt/apps/crowdsec-web-ui/docker-compose.yml up -d
You should end-up with a running crowdsec-web-ui container, and Traefik picks up the dynamic configuration file
without restarting.
The application is available at https://crowdsec.example.com. On the first visit it asks you to create the local administrator account, then the PocketID button appears on the login page.
[!NOTE] This is a third-party project, unrelated to the CrowdSec company, and it only publishes a
latesttag : keep an eye on it when you pull the images.
Arcane
We will use Arcane to easily manage our Docker containers.
Arcane is an open source web interface to start, stop, restart, update and inspect the containers, read their logs, open a shell in them, and manage the images, volumes, networks and Compose projects, with image update checks and vulnerability scanning.
It needs the Docker socket, which means full control over the Docker daemon, i.e. root on the host : it sits on the private network only, reachable from the local network and the VPN, see Network segmentation.
Here is an overview of the network flow :
flowchart LR
    style INCOMING_REQUEST fill: #205566
    style TRAEFIK_CONTAINER fill: #663535
    style APP_CONTAINER fill: #663535
    style POCKETID_CONTAINER fill: #663535
    style TRAEFIK_ROUTER fill: #806030
    style TRAEFIK_MIDDLEWARE fill: #806030
    style SERVER_DEVICE fill: #665555
    style CONTAINER_ENGINE fill: #664545
    DOCKER_TRAEFIK_PORT443{{443/tcp}}
    DOCKER_APP_PORT{{3552/tcp}}
    DOCKER_POCKETID_PORT{{1411/tcp}}
    DOCKER_SOCKET[(Docker socket)]
    TRAEFIK_ROUTER_APP(arcane.example.com)
    TRAEFIK_MIDDLEWARE_IP_WHITELIST(IP whitelist)
    INCOMING_REQUEST((INCOMING\nREQUEST))
    INCOMING_REQUEST --> DOCKER_TRAEFIK_PORT443

    subgraph SERVER_DEVICE[MINI PC]
        DOCKER_SOCKET

        subgraph CONTAINER_ENGINE[DOCKER]
            subgraph TRAEFIK_CONTAINER[TRAEFIK CONTAINER]
                DOCKER_TRAEFIK_PORT443 --> TRAEFIK_ROUTER

                subgraph TRAEFIK_ROUTER[TRAEFIK HTTP ROUTER]
                    TRAEFIK_ROUTER_APP
                end

                subgraph TRAEFIK_MIDDLEWARE[TRAEFIK MIDDLEWARES]
                    TRAEFIK_MIDDLEWARE_IP_WHITELIST
                end

                TRAEFIK_ROUTER_APP --> TRAEFIK_MIDDLEWARE_IP_WHITELIST
            end

            subgraph APP_CONTAINER[ARCANE CONTAINER]
                DOCKER_APP_PORT
            end

            subgraph POCKETID_CONTAINER[POCKETID CONTAINER]
                DOCKER_POCKETID_PORT
            end

            TRAEFIK_MIDDLEWARE_IP_WHITELIST --> DOCKER_APP_PORT
            DOCKER_APP_PORT -.->|OIDC single sign - on, through the Traefik alias| DOCKER_POCKETID_PORT
        end

        DOCKER_APP_PORT -->|containers, images, volumes, ...| DOCKER_SOCKET
    end
Setting up
Create a folder to hold the configuration :
sudo mkdir /opt/apps/arcane
Then :
- copy the .env and docker-compose.yml files from this project's arcane directory into the /opt/apps/arcane
directory, and generate the encryption key in the .env file (
openssl rand -hex 32). Keep it with your backups : it encrypts the secrets Arcane stores (registry credentials, ...) - copy the arcane.yml file from this project's traefik/dynamic directory into the /opt/apps/traefik/dynamic directory
- create an OIDC client in PocketID with the callback URL of the application :
https://arcane.example.com/auth/oidc/callback, and PKCE disabled (it is a confidential client, the client secret protects the code exchange). Restrict it to your administrators group (Allowed user groups), then put its client ID and secret inOIDC_CLIENT_IDandOIDC_CLIENT_SECRETof the .env file. No middleware on the router : the application talks to PocketID itself - add a local DNS record
arcane.example.compointing to the mini PC (see Pi-hole), the service is not published on the internet
Then start the service (see below) and finish the configuration in this order, the local admin account is needed until the OIDC login works :
- for the first start, set
OIDC_AUTO_REDIRECT_TO_PROVIDERto"false"in the docker-compose.yml file (the file of this project holds the final value,"true"), otherwise the login page redirects to PocketID before any role is mapped - log in with the default account,
arcane/arcane-admin, and change the password as requested - in Settings -> Authentication, map the PocketID group
super_adminsto the Admin role, Global scope - log out, log in through PocketID, and check that you are an admin
- disable the local login in Settings -> Authentication, set
OIDC_AUTO_REDIRECT_TO_PROVIDERback to"true"and recreate the container : the login page then redirects straight to PocketID
[!IMPORTANT] Configure the role mapping before relying on the OIDC login : Arcane creates the OIDC users automatically on their first login, but without a matching mapping they get no role, and therefore no permission at all. The groups are read again at every login, PocketID is the source of truth.
The mapping can also be declared in the docker-compose.yml file with
OIDC_ROLE_MAPPINGS, a JSON array such as[{"claimValue":"super_admins","roleId":"<admin_role_id>"}], but it references the role by its ID (see Settings -> Roles), not by its name.
[!NOTE] The default account is
arcane/arcane-admin, notadmin/adminas some pages of the documentation say. It is only created when the database holds no user : if the login fails on a fresh install, an earlier attempt already initialized thearcane-datavolume. As long as nothing is configured, delete it and start again :sudo docker-compose -f /opt/apps/arcane/docker-compose.yml down -v.
Details
Service definition
:page_facing_up: docker-compose.yml :
services:

  arcane:
    image: ghcr.io/getarcaneapp/manager:latest
    container_name: arcane
    restart: unless-stopped
    # Encryption key and OIDC client credentials (see .env)
    env_file: .env
    environment:
      TZ: "Europe/Zurich"
      APP_URL: https://arcane.example.com
      # X-Forwarded-* headers are only trusted from the private Traefik network. Never the 172.16.0.0/12 suggested by
      # the documentation : that range also covers traefik-public-net. Check it with : docker network inspect traefik-private-net
      TRUSTED_PROXIES: 172.21.0.0/16
      ANALYTICS_DISABLED: "true"

      # Native OIDC authentication against PocketID (callback URL : https://arcane.example.com/auth/oidc/callback)
      # The issuer is the PUBLIC URL, no trailing slash : the container resolves it to Traefik thanks to the alias on
      # traefik-private-net, and Traefik lets it through with the pocketid-whitelist middleware (see PocketID)
      OIDC_ENABLED: "true"
      OIDC_ISSUER_URL: https://pocketid.example.com
      OIDC_SCOPES: openid email profile groups
      OIDC_GROUPS_CLAIM: groups
      OIDC_PROVIDER_NAME: PocketID
      # Set it to "false" for the first start, until the role mapping is configured and the OIDC login validated
      # (the local admin is needed for that), then back to "true" once the local login is disabled in Settings -> Authentication
      OIDC_AUTO_REDIRECT_TO_PROVIDER: "true"
      # Roles can also be mapped declaratively (role referenced by its ID, see Settings -> Roles) :
      # OIDC_ROLE_MAPPINGS: '[{"claimValue":"super_admins","roleId":"<admin_role_id>"}]'
    volumes:
      # Full access to the Docker daemon, i.e. root on the host : private network only
      - /var/run/docker.sock:/var/run/docker.sock
      # SQLite database, projects, settings, session signing key
      - arcane-data:/app/data
    # Host cgroup namespace, so that Arcane reliably detects its own container
    cgroup: host
    healthcheck:
      test: [ "CMD", "./arcane", "health", "--timeout", "2s" ]
      interval: 30s
      timeout: 3s
      retries: 5
      start_period: 15s
    networks:
      - traefik-private-net

volumes:

  arcane-data:
    name: arcane-data

networks:

  traefik-private-net:
    name: traefik-private-net
    external: true
Environment variables
:page_facing_up: .env :
# Key encrypting the secrets stored by Arcane (registry credentials, ...), 32 bytes : openssl rand -hex 32
# Keep it with your backups, without it the encrypted data is lost
ENCRYPTION_KEY=<encryption_key>

# PocketID OIDC client (callback URL : https://arcane.example.com/auth/oidc/callback)
OIDC_CLIENT_ID=<oidc_client_id>
OIDC_CLIENT_SECRET=<oidc_client_secret>
Traefik routing
:page_facing_up: arcane.yml :
http:
  services:
    arcane:
      loadBalancer:
        servers:
          - url: http://arcane:3552

  routers:
    arcane:
      rule: 'Host(`arcane.example.com`)'
      entryPoints:
        - websecure
      tls:
        certResolver: default
      service: arcane
      # Only the IP whitelist : the application handles the PocketID single sign-on itself (native OIDC),
      # so no authentication middleware here, otherwise you would log in twice
      middlewares:
        - vpn-whitelist@file
Things to notice :
- it only joins
traefik-private-net, nothing is published on the host - the data (SQLite database, settings, the key Arcane generates to sign its sessions) lives in the
arcane-dataDocker volume, see Volumes to back it up TRUSTED_PROXIESis restricted to the private Traefik network, so that Arcane sees the real client IP in theX-Forwarded-Forheader set by Traefik. The documentation suggests172.16.0.0/12, which also coverstraefik-public-net- the stacks started with
docker-composefrom /opt/apps show up in Arcane as they are, through the labels Compose puts on the containers : nothing to import - the router only carries the IP whitelist : the single sign-on is done by the application itself, adding an authentication middleware would mean logging in twice
- the Traefik documentation of Arcane also describes a gRPC router and a
readtimeout=0son the entrypoint : they are only needed for the edge agents, used to manage remote Docker hosts. The WebSockets (logs, container shell) go through the regular router without any special configuration - the
arcane healthcommand of the health check calls/api/health, which Gatus uses too
Run
Simply run the Compose file :
sudo docker-compose -f /opt/apps/arcane/docker-compose.yml up -d
You should end-up with a running arcane container, and Traefik picks up the dynamic configuration file without
restarting.
The application is available at https://arcane.example.com, finish the configuration in the order described in Setting up above.
PhpMyAdmin
As our services will use some MySQL/MariaDB databases, we will use PhpMyAdmin to easily manage our databases.
PhpMyAdmin is a free software tool intended to handle the administration of MySQL over the Web, it supports a wide range of operations on MySQL and MariaDB (managing databases, tables, columns, relations, indexes, users, permissions, etc.).
Here is an overview of the network flow :
flowchart LR
    style INCOMING_REQUEST fill: #205566
    style TRAEFIK_CONTAINER fill: #663535
    style APP_CONTAINER fill: #663535
    style TRAEFIK_ROUTER fill: #806030
    style TRAEFIK_MIDDLEWARE fill: #806030
    style SERVER_DEVICE fill: #665555
    style CONTAINER_ENGINE fill: #664545
    DOCKER_TRAEFIK_PORT443{{443/tcp}}
    DOCKER_TRAEFIK_PORT80{{80/tcp}}
    DOCKER_APP_PORT{{80/tcp}}
    TRAEFIK_ROUTER_APP(phpmyadmin.example.com)
    TRAEFIK_MIDDLEWARE_REDIRECT(HTTPS redirect)
    TRAEFIK_MIDDLEWARE_IP_WHITELIST(IP whitelist)
    INCOMING_REQUEST((INCOMING\nREQUEST))
    INCOMING_REQUEST --> DOCKER_TRAEFIK_PORT443
    INCOMING_REQUEST --> DOCKER_TRAEFIK_PORT80

    subgraph SERVER_DEVICE[MINI PC]
        subgraph CONTAINER_ENGINE[DOCKER]
            subgraph APP_CONTAINER[PHPMYADMIN CONTAINER]
                DOCKER_APP_PORT
            end

            subgraph TRAEFIK_CONTAINER[TRAEFIK CONTAINER]
                DOCKER_TRAEFIK_PORT443 --> TRAEFIK_ROUTER
                DOCKER_TRAEFIK_PORT80 --> TRAEFIK_ROUTER

                subgraph TRAEFIK_ROUTER[TRAEFIK HTTP ROUTER]
                    TRAEFIK_ROUTER_APP
                end

                subgraph TRAEFIK_MIDDLEWARE[TRAEFIK MIDDLEWARES]
                    TRAEFIK_MIDDLEWARE_REDIRECT
                    TRAEFIK_MIDDLEWARE_IP_WHITELIST
                end

                TRAEFIK_MIDDLEWARE_REDIRECT --> TRAEFIK_MIDDLEWARE_IP_WHITELIST
                TRAEFIK_MIDDLEWARE_REDIRECT -.-> DOCKER_TRAEFIK_PORT443
                TRAEFIK_MIDDLEWARE_IP_WHITELIST --> DOCKER_APP_PORT
                TRAEFIK_ROUTER_APP --> TRAEFIK_MIDDLEWARE_REDIRECT
            end

        end
    end
Setting up
Create a folder to hold the configuration :
sudo mkdir /opt/apps/phpmyadmin
Then simply copy the docker-compose.yml file from this project's phpmyadmin directory into the /opt/apps/phpmyadmin directory.
Details
Service definition
:page_facing_up: docker-compose.yml :
services:

  phpmyadmin:
    image: phpmyadmin:latest
    container_name: phpmyadmin
    environment:
      - PMA_ARBITRARY=1
    restart: unless-stopped
    volumes:
      - ./darkwolf/:/var/www/html/themes/darkwolf/
    networks:
      - phpmyadmin-net
      - traefik-private-net

networks:

  phpmyadmin-net:
    name: phpmyadmin-net

  traefik-private-net:
    name: traefik-private-net
    external: true
:page_facing_up: phpmyadmin.yml :
http:
  services:
    phpmyadmin:
      loadBalancer:
        servers:
          - url: http://phpmyadmin:80

  routers:
    phpmyadmin:
      rule: 'Host(`phpmyadmin.example.com`)'
      entryPoints:
        - websecure
      tls:
        certResolver: default
      service: phpmyadmin
      middlewares:
        - vpn-whitelist@file
Things to notice :
- We mount a theme directory to use a custom theme (dark theme named
darkwolf), so just copy the theme data from official repository https://www.phpmyadmin.net/themes/ - It uses Traefik dynamic config file to :
- create a service which will point to our container application running on port
80 - create an HTTP router that will match
phpmyadmin.example.comURL on ourwebsecureentrypoint to point to our service - assign the
vpn-whitelistmiddleware so that the traffic will be restricted to allowed IPs only (application reachable only from local network or through VPN) - add a TLS configuration that will use our
defaultcertificates resolver, so it can generate Let's encrypt certificates
- create a service which will point to our container application running on port
- It runs in its own network (
phpmyadmin-net) but must also share the same network as Traefik (traefik-private-net) so it can be auto discovered - The
phpmyadminnetwork will have to be added to any MySQL/MariaDB database container that we want to make reachable from PhpMyAdmin - We set the environment variable
PMA_ARBITRARYto1to tell PhpMyAdmin to allow connection to any arbitrary database server (we will be able to specify the server on login screen)
Run
Finally, simply run the Compose file :
sudo docker-compose -f /opt/apps/phpmyadmin/docker-compose.yml up -d
You should end-up with a running phpmyadmin container.
It should also have generated the needed Let's Encrypt certificates in the acme.json file in the Traefik folder.
The application is available at https://phpmyadmin.example.com.
[!IMPORTANT] You will have to use the database service name as host to connect to a database
Homer
Homer is a simple application that allows to generate a static homepage from a simple yaml configuration file.
We will use it as a dashboard to list our services.
flowchart LR
    style INCOMING_REQUEST fill: #205566
    style TRAEFIK_CONTAINER fill: #663535
    style APP_CONTAINER fill: #663535
    style TRAEFIK_ROUTER fill: #806030
    style TRAEFIK_MIDDLEWARE fill: #806030
    style SERVER_DEVICE fill: #665555
    style CONTAINER_ENGINE fill: #664545
    DOCKER_TRAEFIK_PORT443{{443/tcp}}
    DOCKER_TRAEFIK_PORT80{{80/tcp}}
    DOCKER_APP_PORT{{8080/tcp}}
    TRAEFIK_ROUTER_APP(dashboard.example.com)
    TRAEFIK_MIDDLEWARE_REDIRECT(HTTPS redirect)
    TRAEFIK_MIDDLEWARE_IP_WHITELIST(IP whitelist)
    INCOMING_REQUEST((INCOMING\nREQUEST))
    INCOMING_REQUEST --> DOCKER_TRAEFIK_PORT443
    INCOMING_REQUEST --> DOCKER_TRAEFIK_PORT80

    subgraph SERVER_DEVICE[MINI_PC]
        subgraph CONTAINER_ENGINE[DOCKER]
            subgraph APP_CONTAINER[HOMER CONTAINER]
                DOCKER_APP_PORT
            end

            subgraph TRAEFIK_CONTAINER[TRAEFIK CONTAINER]
                DOCKER_TRAEFIK_PORT443 --> TRAEFIK_ROUTER
                DOCKER_TRAEFIK_PORT80 --> TRAEFIK_ROUTER

                subgraph TRAEFIK_ROUTER[TRAEFIK HTTP ROUTER]
                    TRAEFIK_ROUTER_APP
                end

                subgraph TRAEFIK_MIDDLEWARE[TRAEFIK MIDDLEWARES]
                    TRAEFIK_MIDDLEWARE_REDIRECT
                    TRAEFIK_MIDDLEWARE_IP_WHITELIST
                end

                TRAEFIK_MIDDLEWARE_REDIRECT --> TRAEFIK_MIDDLEWARE_IP_WHITELIST
                TRAEFIK_MIDDLEWARE_REDIRECT -.-> DOCKER_TRAEFIK_PORT443
                TRAEFIK_MIDDLEWARE_IP_WHITELIST --> DOCKER_APP_PORT
                TRAEFIK_ROUTER_APP --> TRAEFIK_MIDDLEWARE_REDIRECT
            end

        end
    end
Setting up
First, create a folder to hold the configuration :
sudo mkdir /opt/apps/homer
Also create an assets directory to hold the application assets and the main configuration file, it will be mounted in the container.
mkdir /opt/apps/homer/assets
By default, on first run, it installs in this directory some example configuration files and assets (favicons, ...), we
have disabled this by setting the environment variable INIT_ASSETS to 0 (default 1).
Note that this assets directory must have the same gid / uid that the container user have (default
1000:1000), so make sure to execute :
chown -R 1000:1000 /opt/apps/homer/assets/
Then copy :
- the docker-compose.yml file from this project's homer directory into the /opt/apps/homer directory
- the config.yml file from this project's homer directory into the /opt/apps/homer/assets directory
- the homer.yml file from this project's traefik/dynamic directory into the /opt/apps/traefik/dynamic directory
Details
Service definition
:page_facing_up: docker-compose.yml :
services:

  homer:
    image: b4bz/homer:latest
    container_name: homer
    volumes:
      - ./assets/:/www/assets
    user: 1000:1000
    restart: unless-stopped
    environment:
      - INIT_ASSETS=0
      - IPV6_DISABLE=1
    networks:
      - homer-net
      - traefik-private-net

networks:

  homer-net:
    name: homer-net

  traefik-private-net:
    name: traefik-private-net
    external: true
:page_facing_up: homer.yml :
http:
  services:
    homer:
      loadBalancer:
        servers:
          - url: http://homer:8080

  routers:
    homer:
      rule: 'Host(`dashboard.example.com`)'
      entryPoints:
        - websecure
      tls:
        certResolver: default
      service: homer
      middlewares:
        - vpn-whitelist@file
Things to notice :
- Homer's assets data is bound to a local directory named
assets - It sets the
INIT_ASSETSenvironment variable to0to avoid generating default example data - It sets the
IPV6_DISABLEenvironment variable to1to disable listening on IPv6 (we don't use IPv6) - It sets a user with uid and gid
1000to run the application in the container - It uses Traefik dynamic config file to :
- create a service which will point to our container application running on port
8080 - create an HTTP router that will match
dashboard.example.comURL on ourwebsecureentrypoint to point to our service - assign the
vpn-whitelistmiddleware so that the traffic will be restricted to allowed IPs only (application reachable only from local network or through VPN) - add TLS configuration that will use our
defaultcertificates resolver, so it can generate Let's encrypt certificates
- create a service which will point to our container application running on port
- It runs in its own network (
homer-net) but must also share the same network as Traefik (traefik-private-net) so it can be auto discovered
Configuration file
:page_facing_up: config.yml :
---
header: false
footer: '<p>Created with <span class="has-text-danger">❤️</span> with <a href="https://bulma.io/">bulma</a>, <a href="https://vuejs.org/">vuejs</a> & <a href="https://fontawesome.com/">font awesome</a> // Fork me on <a href="https://github.com/bastienwirtz/homer"><i class="fab fa-github-alt"></i></a></p>' # set false if you want to hide it.

columns: 3

# Optional theme customization
theme: default
colors:
  light:
    highlight-primary: "#3367d6"
    highlight-secondary: "#4285f4"
    highlight-hover: "#5a95f5"
    background: "#f5f5f5"
    card-background: "#ffffff"
    text: "#363636"
    text-header: "#ffffff"
    text-title: "#303030"
    text-subtitle: "#424242"
    card-shadow: rgba(0, 0, 0, 0.1)
    link: "#3273dc"
    link-hover: "#363636"
  dark:
    highlight-primary: "#3367d6"
    highlight-secondary: "#2b2b2b"
    highlight-hover: "#131313"
    background: "#131313"
    card-background: "#2b2b2b"
    text: "#eaeaea"
    text-header: "#ffffff"
    text-title: "#fafafa"
    text-subtitle: "#f5f5f5"
    card-shadow: rgba(0, 0, 0, 0.4)
    link: "#3273dc"
    link-hover: "#ffdd57"

links:
  - name: "GitHub"
    icon: "fab fa-github"
    url: "https://github.com/Yann39"
    target: "_blank"

services:
  - name: "Admin tools"
    icon: "fas fa-shield"
    items:
      - name: "Dashdot"
        logo: "assets/logos/logo-dashdot.png"
        subtitle: "Minimal server monitoring"
        tag: "monitoring"
        url: "https://dashdot.example.com"
      - name: "Traefik"
        logo: "assets/logos/logo-traefik.svg"
        subtitle: "HTTP reverse proxy"
        tag: "network"
        url: "https://traefik.example.com"
      - name: "Arcane"
        logo: "assets/logos/logo-arcane.svg"
        subtitle: "Container management platform"
        tag: "tool"
        url: "https://arcane.example.com"
      - name: "Backrest"
        logo: "assets/logos/logo-backrest.svg"
        subtitle: "Backup solution built on top of restic"
        tag: "tool"
        url: "https://backrest.example.com"
      - name: "Pi-Hole"
        logo: "assets/logos/logo-pihole.svg"
        subtitle: "Network-wide ad blocking"
        tag: "network"
        url: "https://pihole.example.com/admin"
      - name: "GoatCounter"
        logo: "assets/logos/logo-goatcounter.svg"
        subtitle: "Privacy-friendly web analytics"
        tag: "analytics"
        url: "https://goatcounter.example.com"
      - name: "PhpMyAdmin"
        logo: "assets/logos/logo-phpmyadmin.svg"
        subtitle: "MySQL database management"
        tag: "tool"
        url: "https://phpmyadmin.example.com"
  - name: "Applications"
    icon: "fas fa-globe"
    items:
      - name: "Motoclub GraphQL API"
        logo: "assets/logos/logo-ccteam.svg"
        subtitle: "GraphQL API for our motoclub mobile application"
        tag: "app"
        url: "https://ccteam.example.com/ccteam-gql/graphql"
      - name: "Defrag-life"
        logo: "https://cdn2.steamgriddb.com/file/sgdb-cdn/icon_thumb/946af3555203afdb63e571b873e419f6.png"
        subtitle: "Quake 3 arena Defrag website"
        tag: "app"
        url: "https://quake.example.com"
      - name: "Lychee"
        logo: "https://avatars.githubusercontent.com/u/37916028?s=200&v=4"
        subtitle: "Photo management tool"
        tag: "app"
        url: "https://lychee.example.com"
      - name: "Homebox"
        logo: "https://homebox.software/_astro/lilbox.CmeGTiwj_Z1HYzg2.svg"
        subtitle: "Home inventory management"
        tag: "app"
        url: "https://homebox.example.com"
      - name: "Omnitools"
        logo: "https://getumbrel.github.io/umbrel-apps-gallery/omnitools/icon.svg"
        subtitle: "Various user-friendly utilities"
        tag: "tool"
        url: "https://omnitools.example.com"
      - name: "Ghostfolio"
        logo: "assets/logos/logo-ghostfolio.svg"
        subtitle: "Wealth management and portfolio tracking"
        tag: "app"
        url: "https://ghostfolio.example.com"
  - name: "Internal"
    icon: "fas fa-microchip"
    items:
      - name: "Wireguard"
        logo: "assets/logos/logo-wireguard.svg"
        subtitle: "Simple yet fast and modern VPN"
        tag: "network"
      - name: "Sablier"
        logo: "https://avatars.githubusercontent.com/u/183561550?s=200&v=4"
        subtitle: "Workload scaling on demand"
        tag: "tool"
      - name: "Unbound"
        logo: "https://i.imgur.com/cnsNS1O.png"
        subtitle: "Validating, recursive, and caching DNS resolver"
        tag: "network"
      - name: "Pocket ID"
        logo: "assets/logos/logo-pocket-id.svg"
        subtitle: "Simple OIDC provider"
        tag: "authentication"
        url: "https://pocketid.example.com"
This is simply the configuration file that is used by the application to display the dashboard page.
Run
Finally, simply run the Compose file :
sudo docker-compose -f /opt/apps/homer/docker-compose.yml up -d
You should end-up with a running homer container.
It should also have generated the needed Let's Encrypt certificates in the acme.json file in the Traefik folder.
The application will be available at https://dashboard.example.com.
Dashdot
Dashdot is a modern application to monitor server resources through a basic UI.
flowchart LR
    style INCOMING_REQUEST fill: #205566
    style TRAEFIK_CONTAINER fill: #663535
    style APP_CONTAINER fill: #663535
    style TRAEFIK_ROUTER fill: #806030
    style TRAEFIK_MIDDLEWARE fill: #806030
    style SERVER_DEVICE fill: #665555
    style CONTAINER_ENGINE fill: #664545
    DOCKER_TRAEFIK_PORT443{{443/tcp}}
    DOCKER_TRAEFIK_PORT80{{80/tcp}}
    DOCKER_APP_PORT{{3001/tcp}}
    TRAEFIK_ROUTER_APP(dashdot.example.com)
    TRAEFIK_MIDDLEWARE_REDIRECT(HTTPS redirect)
    TRAEFIK_MIDDLEWARE_IP_WHITELIST(IP whitelist)
    INCOMING_REQUEST((INCOMING\nREQUEST))
    INCOMING_REQUEST --> DOCKER_TRAEFIK_PORT443
    INCOMING_REQUEST --> DOCKER_TRAEFIK_PORT80

    subgraph SERVER_DEVICE[MINI PC]
        subgraph CONTAINER_ENGINE[DOCKER]
            subgraph APP_CONTAINER[DASHDOT CONTAINER]
                DOCKER_APP_PORT
            end

            subgraph TRAEFIK_CONTAINER[TRAEFIK CONTAINER]
                DOCKER_TRAEFIK_PORT443 --> TRAEFIK_ROUTER
                DOCKER_TRAEFIK_PORT80 --> TRAEFIK_ROUTER

                subgraph TRAEFIK_ROUTER[TRAEFIK HTTP ROUTER]
                    TRAEFIK_ROUTER_APP
                end

                subgraph TRAEFIK_MIDDLEWARE[TRAEFIK MIDDLEWARES]
                    TRAEFIK_MIDDLEWARE_REDIRECT
                    TRAEFIK_MIDDLEWARE_IP_WHITELIST
                end

                TRAEFIK_MIDDLEWARE_REDIRECT --> TRAEFIK_MIDDLEWARE_IP_WHITELIST
                TRAEFIK_MIDDLEWARE_REDIRECT -.-> DOCKER_TRAEFIK_PORT443
                TRAEFIK_MIDDLEWARE_IP_WHITELIST --> DOCKER_APP_PORT
                TRAEFIK_ROUTER_APP --> TRAEFIK_MIDDLEWARE_REDIRECT
            end

        end
    end
Setting up
Create a folder to hold the configuration :
sudo mkdir /opt/apps/dashdot
Then :
- copy the docker-compose.yml file from this project's dashdot directory into the /opt/apps/dashdot directory
- copy the dashdot.yml file from this project's traefik/dynamic directory into the /opt/apps/traefik/dynamic directory
Details
Service definition
:page_facing_up: docker-compose.yml :
services:

  dashdot:
    image: mauricenino/dashdot:latest
    container_name: dashdot
    restart: unless-stopped
    volumes:
      - /:/mnt/host:ro
    networks:
      - dashdot-net
      - traefik-private-net

networks:

  dashdot-net:
    name: dashdot-net

  traefik-private-net:
    name: traefik-private-net
    external: true
:page_facing_up: dashdot.yml :
http:
  services:
    dashdot:
      loadBalancer:
        servers:
          - url: http://dashdot:3001

  routers:
    dashdot:
      rule: 'Host(`dashdot.example.com`)'
      entryPoints:
        - websecure
      tls:
        certResolver: default
      service: dashdot
      middlewares:
        - vpn-whitelist@file
        - sablier-dashdot@file
Things to notice :
- Dashdot's data is bound to the current directory (read-only)
- It uses Traefik dynamic config file to :
- create a service which will point to our container application running on port
3001 - create an HTTP router that will match
dashdot.example.comURL on ourwebsecureentrypoint to point to our service - add a TLS configuration that will use our
defaultcertificates resolver, so it can generate Let's encrypt certificates - assign the
vpn-whitelistmiddleware so that the traffic will be restricted to allowed IPs only (application reachable only from local network or through VPN) - assign the
sablier-dashdotmiddleware so that on-demand stop/start of the container can be done through Sablier
- create a service which will point to our container application running on port
- It runs in its own network (
dashdot-net) but must also share the same network as Traefik (traefik-private-net) so it can be auto discovered
Run
Finally, simply run the Compose file :
sudo docker-compose -f /opt/apps/dashdot/docker-compose.yml up -d
You should end-up with a running dashdot container.
It should also have generated the needed Let's Encrypt certificates in the acme.json file in the Traefik folder.
The application is available at https://dashdot.example.com.
Lychee
Lychee is a robust, locally hosted web-based photo management tool. It enables you to carry out various operations on photos, including uploading, organizing, sharing, and more.
flowchart LR
    style INCOMING_REQUEST fill: #205566
    style TRAEFIK_CONTAINER fill: #663535
    style APP_CONTAINER fill: #663535
    style TRAEFIK_ROUTER fill: #806030
    style TRAEFIK_MIDDLEWARE fill: #806030
    style SERVER_DEVICE fill: #665555
    style CONTAINER_ENGINE fill: #664545
    DOCKER_TRAEFIK_PORT443{{443/tcp}}
    DOCKER_TRAEFIK_PORT80{{80/tcp}}
    DOCKER_APP_PORT{{80/tcp}}
    TRAEFIK_ROUTER_APP(lychee.example.com)
    TRAEFIK_MIDDLEWARE_REDIRECT(HTTPS redirect)
    INCOMING_REQUEST((INCOMING\nREQUEST))
    INCOMING_REQUEST --> DOCKER_TRAEFIK_PORT443
    INCOMING_REQUEST --> DOCKER_TRAEFIK_PORT80

    subgraph SERVER_DEVICE[MINI_PC]
        subgraph CONTAINER_ENGINE[DOCKER]
            subgraph APP_CONTAINER[LYCHEE CONTAINER]
                DOCKER_APP_PORT
            end

            subgraph TRAEFIK_CONTAINER[TRAEFIK CONTAINER]
                DOCKER_TRAEFIK_PORT443 --> TRAEFIK_ROUTER
                DOCKER_TRAEFIK_PORT80 --> TRAEFIK_ROUTER

                subgraph TRAEFIK_ROUTER[TRAEFIK HTTP ROUTER]
                    TRAEFIK_ROUTER_APP
                end

                subgraph TRAEFIK_MIDDLEWARE[TRAEFIK MIDDLEWARES]
                    TRAEFIK_MIDDLEWARE_REDIRECT
                end

                TRAEFIK_MIDDLEWARE_REDIRECT -.-> DOCKER_TRAEFIK_PORT443
                TRAEFIK_MIDDLEWARE_IP_WHITELIST --> DOCKER_APP_PORT
                TRAEFIK_ROUTER_APP --> TRAEFIK_MIDDLEWARE_REDIRECT
            end

        end
    end
Setting up
First, create a folder to hold the configuration :
sudo mkdir /opt/apps/lychee
Then copy :
- the docker-compose.yml file from this project's lychee directory into the /opt/apps/lychee directory.
- the lychee.yml file from this project's traefik/dynamic directory into the /opt/apps/traefik/dynamic directory.
Details
Service definition
:page_facing_up: docker-compose.yml :
services:

  lychee:
    image: lycheeorg/lychee:latest
    container_name: lychee
    volumes:
      - ./lychee/conf:/conf
      - ./lychee/uploads:/uploads
      - ./lychee/sym:/sym
      - ./lychee/logs:/logs
    environment:
      - PHP_TZ=UTC
      - TIMEZONE=UTC
      - DB_CONNECTION=mysql
      - DB_HOST=lychee-db
      - DB_PORT=3306
      - DB_DATABASE=lychee
      - DB_USERNAME=$MYSQL_USERNAME
      - DB_PASSWORD=$MYSQL_PASSWORD
      - STARTUP_DELAY=30
      - ADMIN_USER=$ADMIN_USER
      - ADMIN_PASSWORD=$ADMIN_PASSWORD
      - APP_URL=https://lychee.example.com
      - TRUSTED_PROXIES=*
    depends_on:
      - lychee-db
    restart: unless-stopped
    networks:
      - lychee-net
      - traefik-public-net

  lychee-db:
    container_name: lychee-db
    image: mariadb:latest
    restart: unless-stopped
    environment:
      - MARIADB_AUTO_UPGRADE=1
      - MYSQL_ROOT_PASSWORD=$MYSQL_ROOT_PASSWORD
      - MYSQL_DATABASE=lychee
      - MYSQL_USER=$MYSQL_USERNAME
      - MYSQL_PASSWORD=$MYSQL_PASSWORD
    volumes:
      - lychee-db-vol:/var/lib/mysql
    networks:
      - lychee-net

volumes:

  lychee-db-vol:
    name: lychee-db-vol

networks:

  lychee-net:
    name: lychee-net

  traefik-public-net:
    name: traefik-public-net
    external: true
:page_facing_up: lychee.yml :
http:
  services:
    lychee:
      loadBalancer:
        servers:
          - url: http://lychee:80

  routers:
    lychee:
      rule: 'Host(`lychee.example.com`)'
      entryPoints:
        - websecure
      tls:
        certResolver: default
      service: lychee
Things to notice :
- It binds some volumes for configuration, uploads, symbolic links and logs
- It sets some environment variables for timezone, database connection, admin user and password, application URL and trusted proxies
- It uses Traefik dynamic config file to :
- create a service which will point to our container application running on port
80 - create an HTTP router that will match
lychee.example.comURL on ourwebsecureentrypoint to point to our service - add TLS configuration that will use our
defaultcertificates resolver, so it can generate Let's encrypt certificates
- create a service which will point to our container application running on port
- It runs in its own network (
lychee-net) but must also join the public network of Traefik (traefik-public-net) to be reachable by the reverse proxy, as it is exposed to the internet (see Network segmentation)
Run
Finally, simply run the Compose file :
sudo docker-compose -f /opt/apps/lychee/docker-compose.yml up -d
You should end-up with a running lychee container.
It should also have generated the needed Let's Encrypt certificates in the acme.json file in the Traefik folder.
The application will be available at https://lychee.example.com.
Homebox
Homebox is a simple inventory for the house : what you own, where it is stored, when it was bought, the warranty, the receipts and the manuals attached to it, with labels, a QR code per item and a full text search. Useful when the insurance asks for a list, or just to remember in which box something ended up.
It is a small Go application with an embedded database, it needs nothing else. It is reachable from the local network and the VPN only, and it is our example of an application doing OIDC natively against PocketID, with its public issuer URL.
Here is an overview of the network flow :
flowchart LR
    style INCOMING_REQUEST fill: #205566
    style TRAEFIK_CONTAINER fill: #663535
    style APP_CONTAINER fill: #663535
    style POCKETID_CONTAINER fill: #663535
    style TRAEFIK_ROUTER fill: #806030
    style TRAEFIK_MIDDLEWARE fill: #806030
    style SERVER_DEVICE fill: #665555
    style CONTAINER_ENGINE fill: #664545
    DOCKER_TRAEFIK_PORT443{{443/tcp}}
    DOCKER_APP_PORT{{7745/tcp}}
    DOCKER_POCKETID_PORT{{1411/tcp}}
    TRAEFIK_ROUTER_APP(homebox.example.com)
    TRAEFIK_MIDDLEWARE_IP_WHITELIST(IP whitelist)
    INCOMING_REQUEST((INCOMING\nREQUEST))
    INCOMING_REQUEST --> DOCKER_TRAEFIK_PORT443

    subgraph SERVER_DEVICE[MINI PC]
        subgraph CONTAINER_ENGINE[DOCKER]
            subgraph TRAEFIK_CONTAINER[TRAEFIK CONTAINER]
                DOCKER_TRAEFIK_PORT443 --> TRAEFIK_ROUTER

                subgraph TRAEFIK_ROUTER[TRAEFIK HTTP ROUTER]
                    TRAEFIK_ROUTER_APP
                end

                subgraph TRAEFIK_MIDDLEWARE[TRAEFIK MIDDLEWARES]
                    TRAEFIK_MIDDLEWARE_IP_WHITELIST
                end

                TRAEFIK_ROUTER_APP --> TRAEFIK_MIDDLEWARE_IP_WHITELIST
            end

            subgraph APP_CONTAINER[HOMEBOX CONTAINER]
                DOCKER_APP_PORT
            end

            subgraph POCKETID_CONTAINER[POCKETID CONTAINER]
                DOCKER_POCKETID_PORT
            end

            TRAEFIK_MIDDLEWARE_IP_WHITELIST --> DOCKER_APP_PORT
            DOCKER_APP_PORT -.->|OIDC single sign - on, through the Traefik alias| DOCKER_POCKETID_PORT
        end
    end
Setting up
Create a folder to hold the configuration :
sudo mkdir /opt/apps/homebox
Then :
- copy the .env and docker-compose.yml files from this project's homebox directory into the /opt/apps/homebox directory
- copy the homebox.yml file from this project's traefik/dynamic directory into the /opt/apps/traefik/dynamic directory
- create an OIDC client in PocketID with the callback URL Homebox documents, then fill
HBOX_OIDC_CLIENT_IDandHBOX_OIDC_CLIENT_SECRET - generate the pepper used to hash the API keys (
openssl rand -base64 32) and put it inHBOX_AUTH_API_KEY_PEPPER - add a local DNS record
homebox.example.compointing to the mini PC (see Pi-hole), the service is not published on the internet
[!IMPORTANT]
HBOX_OIDC_ISSUER_URLmust be the public URL, without a trailing slash (Homebox is sensitive to it), and it must match character for character theissuerreturned by the provider : its OIDC library refuses any difference. The internal URLhttp://pocketid:1411therefore cannot be used, it answers with the public issuer and Homebox rejects it withissuer URL provided to client ... did not match. That the container can nonetheless reach the public URL is exactly what the Traefik network alias and thepocketid-whitelistmiddleware are for, see PocketID. Without them the container does not even resolve the name, since the private services have no public DNS record.
Details
Service definition
:page_facing_up: docker-compose.yml :
services:

  homebox:
    image: ghcr.io/sysadminsmedia/homebox:latest
    container_name: homebox
    restart: always
    env_file: .env
    environment:
      - HBOX_LOG_LEVEL=debug
      - HBOX_LOG_FORMAT=text
      - HBOX_WEB_MAX_UPLOAD_SIZE=10
      - HBOX_OIDC_ENABLED=true
      - HBOX_OIDC_ISSUER_URL=https://pocketid.example.com
      - HBOX_OIDC_CLIENT_ID=f1644c44-4f50-458f-9043-2bad9224e09c
      #- HBOX_OIDC_AUTO_REDIRECT=true
      #- HBOX_OPTIONS_ALLOW_LOCAL_LOGIN=false
      - HBOX_OPTIONS_TRUST_PROXY=true
      # Please consider allowing analytics to help us improve Homebox (basic computer information, no personal data)
      - HBOX_OPTIONS_ALLOW_ANALYTICS=true
    volumes:
      - homebox-data:/data/
    networks:
      - homebox-net
      - traefik-private-net

volumes:

  homebox-data:
    name: homebox-data-vol

networks:

  homebox-net:
    name: homebox-net

  traefik-private-net:
    name: traefik-private-net
    external: true
:page_facing_up: homebox.yml :
http:
  services:
    homebox:
      loadBalancer:
        servers:
          - url: http://homebox:7745

  routers:
Truncated — view the full README on GitHub.
Similar repos
Contributors
48 commits
Languages
PowerShell
55.0%
Shell
33.3%
Dockerfile
11.7%