
CSI driver built on top of rclone bringing cloud storage mounts to your pods with ease.
See the codeREADME
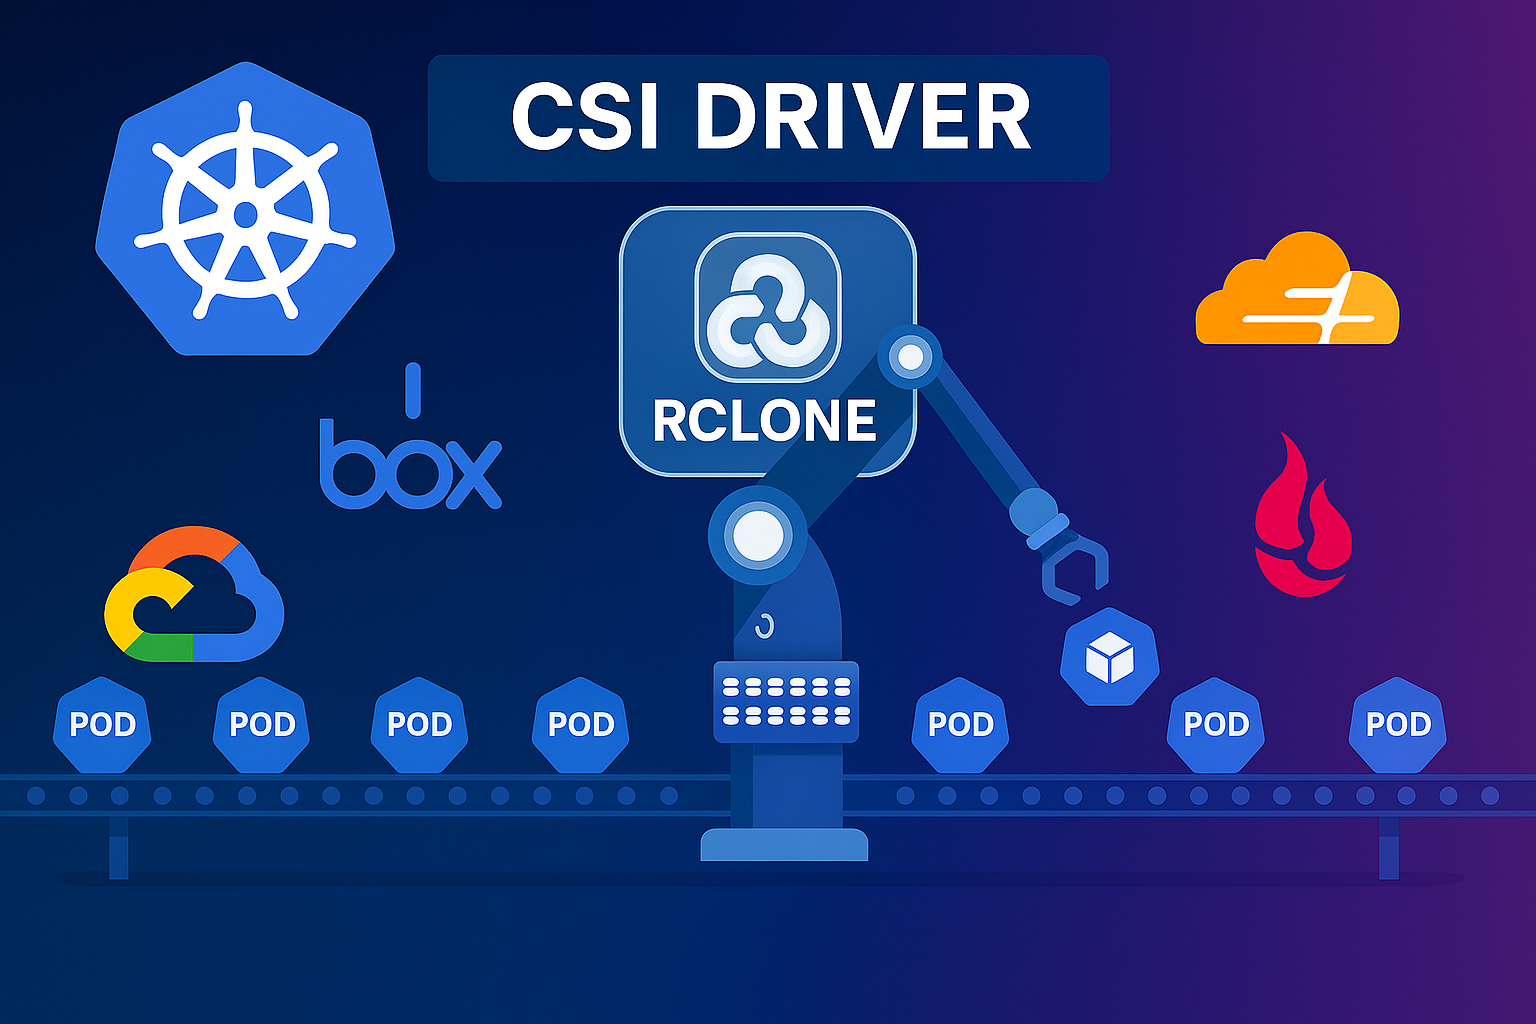
Rclone CSI Driver for Kubernetes



Quick Links: Features | Requirements | Installation | Quick Start | Examples | Development | Documentation
Overview
This is a repository for Rclone CSI driver, csi plugin name: rclone.csi.veloxpack.io. This driver enables Kubernetes pods to mount cloud storage backends as persistent volumes using rclone, supporting 50+ storage providers including S3, Google Cloud Storage, Azure Blob, Dropbox, and many more.
Container Images & Kubernetes Compatibility:
| driver version | supported k8s version | status |
|---|---|---|
| main branch | 1.20+ | GA |
| v0.2.0 | 1.20+ | GA |
Features
- 50+ Storage Providers: Supports Amazon S3, Google Cloud Storage, Azure Blob, Dropbox, SFTP, and many more
- No External Dependencies: Uses rclone as a Go library directly - no rclone binary installation required
- No Process Overhead: Direct library integration means no subprocess spawning or external process management
- Dynamic Volume Provisioning: Create persistent volumes via StorageClass
- Ephemeral/Inline Volumes: Define storage directly in Pod specs without separate PV/PVC resources
- Secret-based Configuration: Secure credential management using Kubernetes secrets
- Inline Configuration: Direct configuration in StorageClass parameters
- Template Variable Support: Dynamic path substitution using PVC/PV metadata
- VFS Caching: High-performance caching with configurable options
- Remote Control API: Expose rclone RC API for programmatic control (VFS cache refresh, stats, etc.)
- No Staging Required: Direct mount without volume staging
- Flexible Backend Support: Choose between minimal or full backend support for smaller images
Requirements
Production
- Kubernetes 1.20 or later
- CSI node driver registrar
- FUSE support on nodes (for mounting)
- No rclone installation required - the driver uses rclone as a Go library directly
Development/Testing
For local development and testing, we recommend using one of these lightweight Kubernetes distributions:
- minikube - Easy local Kubernetes cluster with good driver support
- kind (Kubernetes in Docker) - Lightweight and fast for CI/CD
- k3s - Minimal Kubernetes distribution, great for edge and IoT
See the Development section for using Skaffold with these tools for the fastest development workflow.
Install driver on a Kubernetes cluster
💡 For Development: Use Skaffold for the fastest development workflow with automatic rebuilds and live reload.
Option 1: Install via Helm (Recommended for Production)
Which installation method should I use?
- Production deployment? → Use Helm (this section)
- Development with live reload? → Use Skaffold (see Development section)
- Manual control needed? → Use kubectl
Basic Installation:
# Install with default configuration
helm install csi-rclone oci://ghcr.io/veloxpack/charts/csi-driver-rclone

# Install in a specific namespace
helm install csi-rclone oci://ghcr.io/veloxpack/charts/csi-driver-rclone \
  --namespace veloxpack --create-namespace
Selecting a specific driver image:
With Monitoring & Observability:
Choose the monitoring level that fits your needs:
# Option A: Basic metrics endpoint
# Use this for custom Prometheus configurations or basic monitoring
helm upgrade --install csi-rclone oci://ghcr.io/veloxpack/charts/csi-driver-rclone \
  --namespace veloxpack --create-namespace \
  --set node.metrics.enabled=true

# Option B: Metrics + Kubernetes Service
# Use this if you have Prometheus configured to discover services
helm upgrade --install csi-rclone oci://ghcr.io/veloxpack/charts/csi-driver-rclone \
  --namespace veloxpack --create-namespace \
  --set node.metrics.enabled=true \
  --set node.metrics.service.enabled=true

# Option C: Full monitoring stack (Recommended for production monitoring)
# Includes: metrics + ServiceMonitor (Prometheus Operator) + Grafana Dashboard
# Requires: Prometheus Operator installed (kube-prometheus-stack)
helm upgrade --install csi-rclone oci://ghcr.io/veloxpack/charts/csi-driver-rclone \
  --namespace veloxpack --create-namespace \
  --set node.metrics.enabled=true \
  --set node.metrics.service.enabled=true \
  --set node.metrics.serviceMonitor.enabled=true \
  --set node.metrics.dashboard.enabled=true \
  --set node.metrics.dashboard.namespace=monitoring
Advanced metrics configuration options
Customize metrics server settings:
helm upgrade --install csi-rclone oci://ghcr.io/veloxpack/charts/csi-driver-rclone \
  --namespace veloxpack --create-namespace \
  --set node.metrics.enabled=true \
  --set node.metrics.addr=:5572 \
  --set node.metrics.path=/metrics \
  --set node.metrics.readTimeout=10s \
  --set node.metrics.writeTimeout=10s \
  --set node.metrics.idleTimeout=60s
With Remote Control (RC) API:
Enable the rclone Remote Control API for programmatic control (e.g., VFS cache refresh, stats):
# Option A: RC API with basic auth (recommended for production)
# First, create a secret with credentials
kubectl create secret generic csi-rclone-rc-auth \
  --from-literal=username=admin \
  --from-literal=password=secure-password \
  -n veloxpack

# Install with RC API enabled
helm upgrade --install csi-rclone oci://ghcr.io/veloxpack/charts/csi-driver-rclone \
  --namespace veloxpack --create-namespace \
  --set node.rc.enabled=true \
  --set node.rc.basicAuth.existingSecret=csi-rclone-rc-auth \
  --set node.rc.service.enabled=true

# Option B: RC API without auth (development only - not recommended)
helm upgrade --install csi-rclone oci://ghcr.io/veloxpack/charts/csi-driver-rclone \
  --namespace veloxpack --create-namespace \
  --set node.rc.enabled=true \
  --set node.rc.noAuth=true \
  --set node.rc.service.enabled=true
Advanced RC API configuration options
Customize RC API server settings:
helm upgrade --install csi-rclone oci://ghcr.io/veloxpack/charts/csi-driver-rclone \
  --namespace veloxpack --create-namespace \
  --set node.rc.enabled=true \
  --set node.rc.addr=:5573 \
  --set node.rc.basicAuth.existingSecret=csi-rclone-rc-auth \
  --set node.rc.service.enabled=true \
  --set node.rc.service.type=ClusterIP
Using RC API:
Once enabled, you can call the RC API from within your cluster:
# Get RC API endpoint
RC_SERVICE=$(kubectl get svc -n veloxpack -l app.kubernetes.io/component=node-rc -o jsonpath='{.items[0].metadata.name}')

# Example: Refresh VFS cache for a mount
curl -X POST http://${RC_SERVICE}:5573/vfs/refresh \
  -H "Content-Type: application/json" \
  -d '{"recursive": true, "dir": "/path/to/mount"}'

# Example: Get mount stats
curl -X POST http://${RC_SERVICE}:5573/vfs/stats \
  -H "Content-Type: application/json" \
  -d '{}'
For more RC API endpoints, see the rclone RC documentation.
With Ephemeral/Inline Volumes:
Enable support for ephemeral volumes (inline volumes defined directly in Pod specs):
# Enable ephemeral volumes support
helm upgrade --install csi-rclone oci://ghcr.io/veloxpack/charts/csi-driver-rclone \
  --namespace veloxpack --create-namespace \
  --set feature.enableInlineVolume=true
Ephemeral volumes allow you to define storage configuration directly in Pod specifications without creating separate PV/PVC resources (see Kubernetes Ephemeral Volumes). This is useful for:
- Temporary storage that should be deleted with the pod
- Pod-specific configurations
- Simplified deployment manifests
With Custom Certificate Authority:
If your storage backend uses a private or self-signed CA:
# 1. Create a ConfigMap with your CA certificate
kubectl create configmap csi-rclone-custom-ca \
  --from-file=ca.crt=/path/to/ca.crt -n veloxpack

# 2. Install with CA mounted into the driver pods
helm upgrade --install csi-rclone oci://ghcr.io/veloxpack/charts/csi-driver-rclone \
  --namespace veloxpack --create-namespace \
  -f - <<EOF
node: &caMount
  extraVolumes:
    - name: custom-ca
      configMap:
        name: csi-rclone-custom-ca
  extraVolumeMounts:
    - name: custom-ca
      mountPath: /etc/rclone/ca
      readOnly: true
controller: *caMount
EOF
Then tell rclone to trust the CA using one of:
- StorageClass parameter:
ca_cert: /etc/rclone/ca/ca.crt(per-volume, rclone-native) - Environment variable: set
SSL_CERT_FILEviaextraEnv(process-wide, preserves system CAs)
See Custom Certificate Authority for full details and the custom CA example for a complete MinIO-with-TLS walkthrough.
Verify the installation:
# Check release status
helm list -n veloxpack

# Verify pods are running
kubectl get pods -n veloxpack -l app.kubernetes.io/name=csi-driver-rclone
Option 2: Install via kubectl (Manual)
For manual installation using kubectl and kustomize:
# Deploy the driver
kubectl apply -k deploy/overlays/default
This will install:
- CSI Controller (StatefulSet)
- CSI Node Driver (DaemonSet)
- RBAC permissions
- CSIDriver CRD
Enable RC API with kustomize:
# Create RC auth secret
kubectl create secret generic csi-rclone-rc-auth \
  --from-literal=username=admin \
  --from-literal=password=secure-password \
  -n veloxpack

# Deploy with RC API enabled
kubectl apply -k deploy/overlays/default
# Then apply RC components
kubectl apply -k deploy/components/rc-basic
kubectl apply -k deploy/components/rc-service
Custom Certificate Authority with kustomize:
If your storage backend uses a private or self-signed CA (e.g. internal Nextcloud, MinIO):
# Create a ConfigMap with your CA certificate
kubectl create configmap csi-rclone-custom-ca \
  --from-file=ca.crt=/path/to/ca.crt -n veloxpack

# Deploy with custom CA overlay
kubectl apply -k deploy/overlays/custom-ca
Then set ca_cert: /etc/rclone/ca/ca.crt in your StorageClass parameters so rclone trusts the CA. See the custom CA example for a full walkthrough.
For detailed manual installation options and overlays, see the manual installation guide.
Driver parameters
Please refer to rclone.csi.veloxpack.io driver parameters
Examples
- Basic usage
- Ephemeral/Inline Volumes
- Custom Certificate Authority
- S3 Storage
- Google Cloud Storage
- Azure Blob Storage
- MinIO
- Dropbox
- SFTP
Troubleshooting
Development
Quick Start with Skaffold (Recommended)
Skaffold provides the fastest development workflow with automatic rebuilds and deployments.
Install Skaffold:
# macOS
brew install skaffold

# Linux
curl -Lo skaffold https://storage.googleapis.com/skaffold/releases/latest/skaffold-linux-amd64 && \
sudo install skaffold /usr/local/bin/

# Windows
choco install skaffold
Start developing:
# Basic development (no metrics)
skaffold dev

# Full monitoring stack (Prometheus + Grafana)
skaffold dev -p metrics-full
Skaffold will:
- Build the Docker image on code changes
- Deploy to your local cluster (minikube/kind/k3s)
- Stream logs from all components
- Auto-reload on file changes
- Setup port-forwarding for metrics and dashboards
Available Skaffold Profiles
| Profile | Description | Port Forwards | Use Case |
|---|---|---|---|
default | Basic CSI driver | None | Development without metrics |
custom-ca | Custom CA for private backends | None | Private/self-signed CA testing |
metrics | Metrics endpoint only | None | Testing metrics collection |
metrics-service | Metrics + Service | :5572 | Service-based scraping |
metrics-prometheus | Full Prometheus integration | :5572, :9090 | Prometheus development |
metrics-dashboard | Grafana dashboard only | :3000 | Dashboard testing |
metrics-full | Complete monitoring | :5572, :9090, :3000 | Full stack development |
Examples:
# Development with full monitoring (recommended)
skaffold dev -p metrics-full
# Access: http://localhost:5572/metrics (metrics)
#         http://localhost:9090 (Prometheus)
#         http://localhost:3000 (Grafana - admin/prom-operator)

# Custom CA for private storage backends
skaffold dev -p custom-ca

# Just metrics endpoint
skaffold dev -p metrics

# Prometheus integration only
skaffold dev -p metrics-prometheus
Metrics Dashboard
The driver includes a comprehensive Grafana dashboard for monitoring and observability:
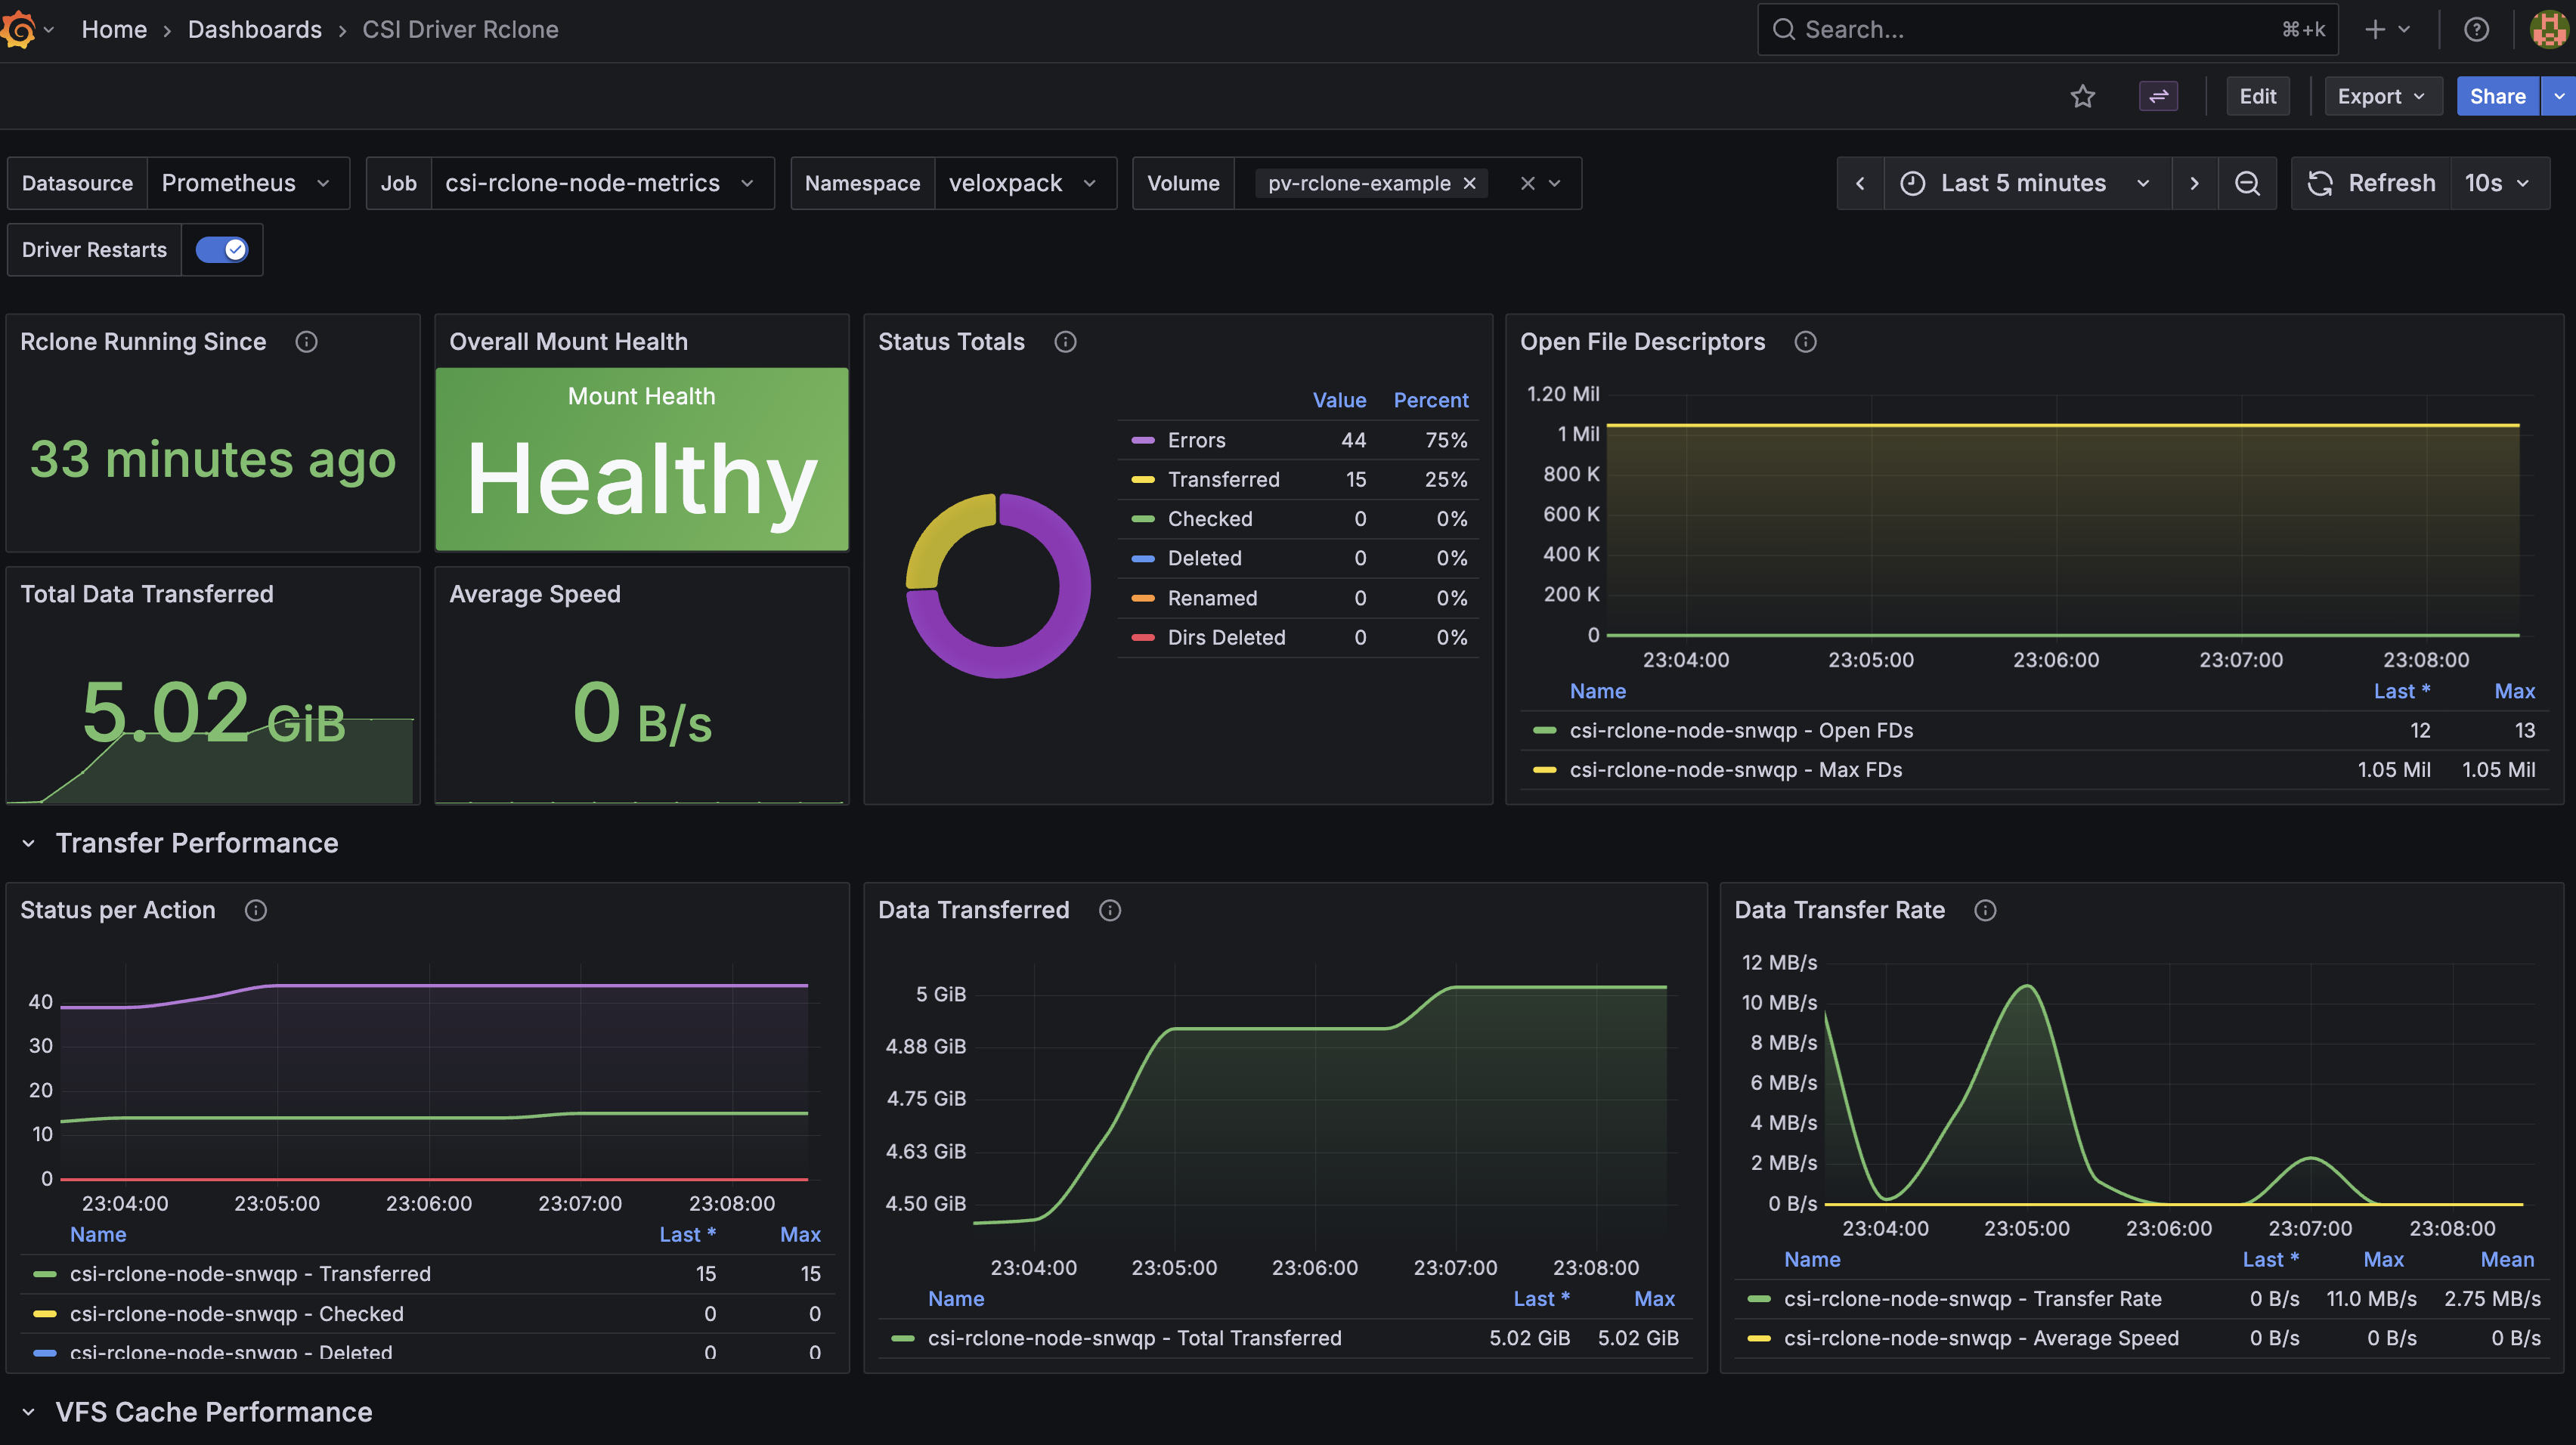
Dashboard Features:
- Overview & Rclone Statistics: Real-time health, uptime, file operations summary
- Transfer Performance: Data transfer rates, cumulative transfers, operation timelines
- VFS Cache Performance: File handles, disk cache usage, metadata cache, upload queues
- Mount Health & Details: Detailed mount information with health status
- System Resources: CPU, memory, and Go runtime metrics
Access the dashboard at http://localhost:3000 when using Skaffold profiles with monitoring enabled.
Prerequisites for Metrics Profiles
For metrics-prometheus and metrics-full profiles, install Prometheus Operator:
helm repo add prometheus-community https://prometheus-community.github.io/helm-charts
helm repo update
helm install kube-prometheus-stack prometheus-community/kube-prometheus-stack \
  --namespace monitoring --create-namespace
Testing & Code Quality
# Run tests
go test ./pkg/rclone/...

# Run linter
./bin/golangci-lint run --config .golangci.yml ./...
Local Binary Development
For testing the driver binary directly without Kubernetes:
# Build the binary
make build

# Run driver locally
./bin/rcloneplugin --endpoint unix:///tmp/csi.sock --nodeid CSINode -v=5
Alternative: Manual Development
For detailed manual setup and testing procedures, see the development guide.
Quick Start Guide
Once you've installed the driver, follow these steps to start using cloud storage in your pods:
1. Configure Storage Backend
Create a secret with your storage backend configuration:
apiVersion: v1
kind: Secret
metadata:
  name: rclone-secret
  namespace: default
type: Opaque
stringData:
  remote: "s3"
  remotePath: "my-bucket"
  configData: |
    [s3]
    type = s3
    provider = AWS
    access_key_id = YOUR_ACCESS_KEY_ID
    secret_access_key = YOUR_SECRET_ACCESS_KEY
    region = us-east-1
2. Create StorageClass
apiVersion: storage.k8s.io/v1
kind: StorageClass
metadata:
  name: rclone-csi
provisioner: rclone.csi.veloxpack.io
parameters:
  remote: "s3"
  remotePath: "my-bucket"
  csi.storage.k8s.io/node-publish-secret-name: "rclone-secret"
  csi.storage.k8s.io/node-publish-secret-namespace: "default"
reclaimPolicy: Delete
volumeBindingMode: Immediate
allowVolumeExpansion: true
3. Create PVC and Pod
apiVersion: v1
kind: PersistentVolumeClaim
metadata:
  name: pvc-rclone
spec:
  accessModes:
    - ReadWriteMany
  resources:
    requests:
      storage: 10Gi
  storageClassName: rclone-csi
---
apiVersion: v1
kind: Pod
metadata:
  name: nginx-rclone
spec:
  containers:
  - name: nginx
    image: nginx
    volumeMounts:
    - name: data
      mountPath: /data
  volumes:
  - name: data
    persistentVolumeClaim:
      claimName: pvc-rclone
Configuration Methods
Method 1: Kubernetes Secrets (Recommended)
Store sensitive credentials in Kubernetes secrets and reference them in StorageClass.
Method 2: Inline Configuration
Include configuration directly in StorageClass parameters.
Method 3: PersistentVolume Configuration
Configure directly in PersistentVolume volumeAttributes.
Priority: volumeAttributes > StorageClass parameters > Secrets
Dynamic Path Substitution
The driver supports template variables in the remotePath parameter:
| Variable | Description | Example |
|---|---|---|
${pvc.metadata.name} | PVC name | my-pvc-12345 |
${pvc.metadata.namespace} | PVC namespace | default |
${pv.metadata.name} | PV name | pv-rclone-abc123 |
Example:
parameters:
  remote: "s3"
  remotePath: "my-bucket/${pvc.metadata.namespace}/${pvc.metadata.name}"
VFS Cache Options
apiVersion: v1
kind: PersistentVolume
metadata:
  name: pv-rclone-performance
spec:
  mountOptions:
    - vfs-cache-mode=writes
    - vfs-cache-max-size=10G
    - dir-cache-time=30s
  csi:
    driver: rclone.csi.veloxpack.io
    volumeHandle: performance-volume
    volumeAttributes:
      remote: "s3"
      remotePath: "my-bucket"
      configData: |
        [s3]
        type = s3
        provider = AWS
        access_key_id = YOUR_ACCESS_KEY_ID
        secret_access_key = YOUR_SECRET_ACCESS_KEY
Separate Cache Directory Mount
For improved performance, you can mount a separate host path for the rclone cache directory. This is especially useful for:
- Using faster local storage for cache (e.g., SSD, NVMe)
- Mounting dedicated disks
helm upgrade --install csi-rclone oci://ghcr.io/veloxpack/charts/csi-driver-rclone \
  --namespace veloxpack --create-namespace \
  --set node.cache.enabled=true \
  --set node.cache.hostPath=/mnt/rclone-cache
Using the Cache Directory
Once the cache mount is enabled, specify the cache directory in your volume configuration:
apiVersion: v1
kind: PersistentVolume
metadata:
  name: pv-rclone-with-cache
spec:
  csi:
    driver: rclone.csi.veloxpack.io
    volumeHandle: cache-volume
    volumeAttributes:
      remote: "s3"
      remotePath: "my-bucket"
      cache_dir: /var/lib/rclone-cache/my-volume  # Use the mounted cache path
      configData: |
        [s3]
        type = s3
        provider = AWS
        access_key_id = YOUR_ACCESS_KEY_ID
        secret_access_key = YOUR_SECRET_ACCESS_KEY
Configuration Options:
| Parameter | Description | Default |
|---|---|---|
node.cache.enabled | Enable cache volume mount | false |
node.cache.hostPath | Host path (required when enabled) | "" |
node.cache.mountPath | Mount path in container | /var/lib/rclone-cache |
Remote Control (RC) API
The driver can expose rclone's Remote Control API, allowing programmatic control of mounts from within your cluster. This is useful for:
- VFS Cache Refresh: Trigger cache refresh for specific paths
- Statistics: Get real-time mount statistics
- Operations: Control rclone operations programmatically
Enable RC API via Helm:
# Create authentication secret
kubectl create secret generic csi-rclone-rc-auth \
  --from-literal=username=admin \
  --from-literal=password=secure-password \
  -n veloxpack

# Install with RC API
helm upgrade --install csi-rclone oci://ghcr.io/veloxpack/charts/csi-driver-rclone \
  --namespace veloxpack --create-namespace \
  --set node.rc.enabled=true \
  --set node.rc.basicAuth.existingSecret=csi-rclone-rc-auth \
  --set node.rc.service.enabled=true
Example: Refresh VFS Cache
# Get the RC service endpoint
RC_SERVICE=$(kubectl get svc -n veloxpack csi-rclone-node-rc -o jsonpath='{.metadata.name}')

# Refresh cache for a specific path
curl -X POST http://${RC_SERVICE}:5573/vfs/refresh \
  -u admin:secure-password \
  -H "Content-Type: application/json" \
  -d '{"recursive": true, "dir": "/path/to/mount"}'
Example: Get Mount Statistics
curl -X POST http://${RC_SERVICE}:5573/vfs/stats \
  -u admin:secure-password \
  -H "Content-Type: application/json" \
  -d '{}'
Configuration Options:
| Parameter | Description | Default |
|---|---|---|
node.rc.enabled | Enable RC API server | false |
node.rc.addr | RC API listening address | :5573 |
node.rc.noAuth | Disable authentication (not recommended) | false |
node.rc.basicAuth.existingSecret | Secret name for credentials | "" |
node.rc.service.enabled | Create Kubernetes Service for RC API | false |
Security Considerations:
- Always use authentication in production (
node.rc.noAuth=false) - Store credentials in Kubernetes secrets
- Use network policies to restrict access to the RC service
- The RC API has full control over mounts - restrict access appropriately
For more RC API endpoints and capabilities, see the rclone RC documentation.
Troubleshooting
Check Driver Status
# Check controller pods
kubectl get pods -n veloxpack -l app=csi-rclone-controller

# Check node pods
kubectl get pods -n veloxpack -l app=csi-rclone-node

# Check logs
kubectl logs -n veloxpack -l app=csi-rclone-controller
kubectl logs -n veloxpack -l app=csi-rclone-node
Verify Driver Functionality
# Check if the driver is working correctly
kubectl exec -n veloxpack -l app=csi-rclone-node -- /rcloneplugin --help

# Check driver version information (shows when driver starts)
kubectl logs -n veloxpack -l app=csi-rclone-node --tail=10 | grep "DRIVER INFORMATION" -A 10
Common Issues
- Authentication failures: Verify credentials in secrets or configData
- Network connectivity: Ensure nodes can reach the storage backend
- Permission errors: Check that credentials have proper access rights
- Configuration format: Ensure configData is valid INI format
- Resource constraints: Verify sufficient memory and disk space
For detailed troubleshooting, see the debug guide.
Building from Source
# Clone repository
git clone https://github.com/veloxpack/csi-driver-rclone.git
cd csi-driver-rclone

# Build binary
make build

# Build Docker image
make container

# Push to registry
make push
Docker Build Options
The driver supports two backend configurations for different use cases:
Full Backend Support (Default)
Includes all 50+ rclone backends for maximum compatibility:
# Build with all backends (default)
docker build -t csi-rclone:latest .

# Or explicitly specify
docker build --build-arg RCLONE_BACKEND_MODE=all -t csi-rclone:latest .
Minimal Backend Support
Includes only the most common backends for smaller image size:
# Build with minimal backends
docker build --build-arg RCLONE_BACKEND_MODE=minimal -t csi-rclone:minimal .
Minimal backends include:
- Amazon S3 and S3-compatible storage
- Google Cloud Storage
- Azure Blob Storage
- Dropbox
- Google Drive
- OneDrive
- Box
- Backblaze B2
- SFTP
- WebDAV
- FTP
- Local filesystem
Benefits of minimal build:
- Smaller Docker image size
- Faster container startup
- Reduced attack surface
- Lower memory footprint
Choose the build that fits your needs - full support for maximum compatibility or minimal for production efficiency.
Architecture
This driver is based on the csi-driver-nfs reference implementation, following CSI specification best practices. It also draws inspiration from the original csi-rclone implementation by WunderIO.
Components:
- Identity Server: Plugin metadata and health checks
- Controller Server: Volume lifecycle management (create/delete)
- Node Server: Volume mounting/unmounting on nodes
Key Design Decisions:
- No Staging: Rclone volumes don't require staging
- Direct Rclone Integration: Uses rclone's Go library directly
- Remote Creation: Creates temporary remotes for each mount
- VFS Caching: Leverages rclone's VFS for improved performance
- Template Variable Support: Dynamic path substitution using PVC/PV metadata
Security Considerations
- Use Secrets: Store sensitive credentials in Kubernetes secrets
- RBAC: Ensure proper RBAC permissions are configured
- Network Policies: Consider using network policies to restrict access
- Image Security: Use trusted container images
- Credential Rotation: Regularly rotate storage backend credentials
- RC API Security: When enabling Remote Control API, always use authentication and restrict access via network policies
Log Levels
Set log level for debugging:
args:
  - "--v=5"  # Verbose logging
  - "--logtostderr=true"
License
This project is licensed under the MIT License. See the LICENSE file for details.
Contributing
Contributions welcome! Please ensure:
- All code passes
golangci-lintchecks - Follow existing code patterns
- Add tests for new functionality
- Update documentation
Acknowledgments
This project builds upon the excellent work of several open source communities:
- WunderIO/csi-rclone - The original rclone CSI driver implementation that inspired this project
- Kubernetes CSI NFS Driver - Reference implementation and architectural patterns
- Rclone - The powerful cloud storage sync tool that makes this driver possible
- Kubernetes CSI Community - For the Container Storage Interface specification and ecosystem
Special thanks to the maintainers and contributors of these projects for their dedication to open source software.
Support
Contributors


Similar repos


Languages
Go
90.8%
Shell
3.3%
Makefile
2.9%
Dockerfile
1.6%
Mustache
1.5%
CSI driver built on top of rclone bringing cloud storage mounts to your pods with ease.
See the codeREADME
Rclone CSI Driver for Kubernetes
Quick Links: Features | Requirements | Installation | Quick Start | Examples | Development | Documentation
Overview
This is a repository for Rclone CSI driver, csi plugin name: rclone.csi.veloxpack.io. This driver enables Kubernetes pods to mount cloud storage backends as persistent volumes using rclone, supporting 50+ storage providers including S3, Google Cloud Storage, Azure Blob, Dropbox, and many more.
Container Images & Kubernetes Compatibility:
| driver version | supported k8s version | status |
|---|---|---|
| main branch | 1.20+ | GA |
| v0.2.0 | 1.20+ | GA |
Features
- 50+ Storage Providers: Supports Amazon S3, Google Cloud Storage, Azure Blob, Dropbox, SFTP, and many more
- No External Dependencies: Uses rclone as a Go library directly - no rclone binary installation required
- No Process Overhead: Direct library integration means no subprocess spawning or external process management
- Dynamic Volume Provisioning: Create persistent volumes via StorageClass
- Ephemeral/Inline Volumes: Define storage directly in Pod specs without separate PV/PVC resources
- Secret-based Configuration: Secure credential management using Kubernetes secrets
- Inline Configuration: Direct configuration in StorageClass parameters
- Template Variable Support: Dynamic path substitution using PVC/PV metadata
- VFS Caching: High-performance caching with configurable options
- Remote Control API: Expose rclone RC API for programmatic control (VFS cache refresh, stats, etc.)
- No Staging Required: Direct mount without volume staging
- Flexible Backend Support: Choose between minimal or full backend support for smaller images
Requirements
Production
- Kubernetes 1.20 or later
- CSI node driver registrar
- FUSE support on nodes (for mounting)
- No rclone installation required - the driver uses rclone as a Go library directly
Development/Testing
For local development and testing, we recommend using one of these lightweight Kubernetes distributions:
- minikube - Easy local Kubernetes cluster with good driver support
- kind (Kubernetes in Docker) - Lightweight and fast for CI/CD
- k3s - Minimal Kubernetes distribution, great for edge and IoT
See the Development section for using Skaffold with these tools for the fastest development workflow.
Install driver on a Kubernetes cluster
💡 For Development: Use Skaffold for the fastest development workflow with automatic rebuilds and live reload.
Option 1: Install via Helm (Recommended for Production)
Which installation method should I use?
- Production deployment? → Use Helm (this section)
- Development with live reload? → Use Skaffold (see Development section)
- Manual control needed? → Use kubectl
Basic Installation:
# Install with default configuration
helm install csi-rclone oci://ghcr.io/veloxpack/charts/csi-driver-rclone

# Install in a specific namespace
helm install csi-rclone oci://ghcr.io/veloxpack/charts/csi-driver-rclone \
  --namespace veloxpack --create-namespace
Selecting a specific driver image:
With Monitoring & Observability:
Choose the monitoring level that fits your needs:
# Option A: Basic metrics endpoint
# Use this for custom Prometheus configurations or basic monitoring
helm upgrade --install csi-rclone oci://ghcr.io/veloxpack/charts/csi-driver-rclone \
  --namespace veloxpack --create-namespace \
  --set node.metrics.enabled=true

# Option B: Metrics + Kubernetes Service
# Use this if you have Prometheus configured to discover services
helm upgrade --install csi-rclone oci://ghcr.io/veloxpack/charts/csi-driver-rclone \
  --namespace veloxpack --create-namespace \
  --set node.metrics.enabled=true \
  --set node.metrics.service.enabled=true

# Option C: Full monitoring stack (Recommended for production monitoring)
# Includes: metrics + ServiceMonitor (Prometheus Operator) + Grafana Dashboard
# Requires: Prometheus Operator installed (kube-prometheus-stack)
helm upgrade --install csi-rclone oci://ghcr.io/veloxpack/charts/csi-driver-rclone \
  --namespace veloxpack --create-namespace \
  --set node.metrics.enabled=true \
  --set node.metrics.service.enabled=true \
  --set node.metrics.serviceMonitor.enabled=true \
  --set node.metrics.dashboard.enabled=true \
  --set node.metrics.dashboard.namespace=monitoring
Advanced metrics configuration options
Customize metrics server settings:
helm upgrade --install csi-rclone oci://ghcr.io/veloxpack/charts/csi-driver-rclone \
  --namespace veloxpack --create-namespace \
  --set node.metrics.enabled=true \
  --set node.metrics.addr=:5572 \
  --set node.metrics.path=/metrics \
  --set node.metrics.readTimeout=10s \
  --set node.metrics.writeTimeout=10s \
  --set node.metrics.idleTimeout=60s
With Remote Control (RC) API:
Enable the rclone Remote Control API for programmatic control (e.g., VFS cache refresh, stats):
# Option A: RC API with basic auth (recommended for production)
# First, create a secret with credentials
kubectl create secret generic csi-rclone-rc-auth \
  --from-literal=username=admin \
  --from-literal=password=secure-password \
  -n veloxpack

# Install with RC API enabled
helm upgrade --install csi-rclone oci://ghcr.io/veloxpack/charts/csi-driver-rclone \
  --namespace veloxpack --create-namespace \
  --set node.rc.enabled=true \
  --set node.rc.basicAuth.existingSecret=csi-rclone-rc-auth \
  --set node.rc.service.enabled=true

# Option B: RC API without auth (development only - not recommended)
helm upgrade --install csi-rclone oci://ghcr.io/veloxpack/charts/csi-driver-rclone \
  --namespace veloxpack --create-namespace \
  --set node.rc.enabled=true \
  --set node.rc.noAuth=true \
  --set node.rc.service.enabled=true
Advanced RC API configuration options
Customize RC API server settings:
helm upgrade --install csi-rclone oci://ghcr.io/veloxpack/charts/csi-driver-rclone \
  --namespace veloxpack --create-namespace \
  --set node.rc.enabled=true \
  --set node.rc.addr=:5573 \
  --set node.rc.basicAuth.existingSecret=csi-rclone-rc-auth \
  --set node.rc.service.enabled=true \
  --set node.rc.service.type=ClusterIP
Using RC API:
Once enabled, you can call the RC API from within your cluster:
# Get RC API endpoint
RC_SERVICE=$(kubectl get svc -n veloxpack -l app.kubernetes.io/component=node-rc -o jsonpath='{.items[0].metadata.name}')

# Example: Refresh VFS cache for a mount
curl -X POST http://${RC_SERVICE}:5573/vfs/refresh \
  -H "Content-Type: application/json" \
  -d '{"recursive": true, "dir": "/path/to/mount"}'

# Example: Get mount stats
curl -X POST http://${RC_SERVICE}:5573/vfs/stats \
  -H "Content-Type: application/json" \
  -d '{}'
For more RC API endpoints, see the rclone RC documentation.
With Ephemeral/Inline Volumes:
Enable support for ephemeral volumes (inline volumes defined directly in Pod specs):
# Enable ephemeral volumes support
helm upgrade --install csi-rclone oci://ghcr.io/veloxpack/charts/csi-driver-rclone \
  --namespace veloxpack --create-namespace \
  --set feature.enableInlineVolume=true
Ephemeral volumes allow you to define storage configuration directly in Pod specifications without creating separate PV/PVC resources (see Kubernetes Ephemeral Volumes). This is useful for:
- Temporary storage that should be deleted with the pod
- Pod-specific configurations
- Simplified deployment manifests
With Custom Certificate Authority:
If your storage backend uses a private or self-signed CA:
# 1. Create a ConfigMap with your CA certificate
kubectl create configmap csi-rclone-custom-ca \
  --from-file=ca.crt=/path/to/ca.crt -n veloxpack

# 2. Install with CA mounted into the driver pods
helm upgrade --install csi-rclone oci://ghcr.io/veloxpack/charts/csi-driver-rclone \
  --namespace veloxpack --create-namespace \
  -f - <<EOF
node: &caMount
  extraVolumes:
    - name: custom-ca
      configMap:
        name: csi-rclone-custom-ca
  extraVolumeMounts:
    - name: custom-ca
      mountPath: /etc/rclone/ca
      readOnly: true
controller: *caMount
EOF
Then tell rclone to trust the CA using one of:
- StorageClass parameter:
ca_cert: /etc/rclone/ca/ca.crt(per-volume, rclone-native) - Environment variable: set
SSL_CERT_FILEviaextraEnv(process-wide, preserves system CAs)
See Custom Certificate Authority for full details and the custom CA example for a complete MinIO-with-TLS walkthrough.
Verify the installation:
# Check release status
helm list -n veloxpack

# Verify pods are running
kubectl get pods -n veloxpack -l app.kubernetes.io/name=csi-driver-rclone
Option 2: Install via kubectl (Manual)
For manual installation using kubectl and kustomize:
# Deploy the driver
kubectl apply -k deploy/overlays/default
This will install:
- CSI Controller (StatefulSet)
- CSI Node Driver (DaemonSet)
- RBAC permissions
- CSIDriver CRD
Enable RC API with kustomize:
# Create RC auth secret
kubectl create secret generic csi-rclone-rc-auth \
  --from-literal=username=admin \
  --from-literal=password=secure-password \
  -n veloxpack

# Deploy with RC API enabled
kubectl apply -k deploy/overlays/default
# Then apply RC components
kubectl apply -k deploy/components/rc-basic
kubectl apply -k deploy/components/rc-service
Custom Certificate Authority with kustomize:
If your storage backend uses a private or self-signed CA (e.g. internal Nextcloud, MinIO):
# Create a ConfigMap with your CA certificate
kubectl create configmap csi-rclone-custom-ca \
  --from-file=ca.crt=/path/to/ca.crt -n veloxpack

# Deploy with custom CA overlay
kubectl apply -k deploy/overlays/custom-ca
Then set ca_cert: /etc/rclone/ca/ca.crt in your StorageClass parameters so rclone trusts the CA. See the custom CA example for a full walkthrough.
For detailed manual installation options and overlays, see the manual installation guide.
Driver parameters
Please refer to rclone.csi.veloxpack.io driver parameters
Examples
- Basic usage
- Ephemeral/Inline Volumes
- Custom Certificate Authority
- S3 Storage
- Google Cloud Storage
- Azure Blob Storage
- MinIO
- Dropbox
- SFTP
Troubleshooting
Development
Quick Start with Skaffold (Recommended)
Skaffold provides the fastest development workflow with automatic rebuilds and deployments.
Install Skaffold:
# macOS
brew install skaffold

# Linux
curl -Lo skaffold https://storage.googleapis.com/skaffold/releases/latest/skaffold-linux-amd64 && \
sudo install skaffold /usr/local/bin/

# Windows
choco install skaffold
Start developing:
# Basic development (no metrics)
skaffold dev

# Full monitoring stack (Prometheus + Grafana)
skaffold dev -p metrics-full
Skaffold will:
- Build the Docker image on code changes
- Deploy to your local cluster (minikube/kind/k3s)
- Stream logs from all components
- Auto-reload on file changes
- Setup port-forwarding for metrics and dashboards
Available Skaffold Profiles
| Profile | Description | Port Forwards | Use Case |
|---|---|---|---|
default | Basic CSI driver | None | Development without metrics |
custom-ca | Custom CA for private backends | None | Private/self-signed CA testing |
metrics | Metrics endpoint only | None | Testing metrics collection |
metrics-service | Metrics + Service | :5572 | Service-based scraping |
metrics-prometheus | Full Prometheus integration | :5572, :9090 | Prometheus development |
metrics-dashboard | Grafana dashboard only | :3000 | Dashboard testing |
metrics-full | Complete monitoring | :5572, :9090, :3000 | Full stack development |
Examples:
# Development with full monitoring (recommended)
skaffold dev -p metrics-full
# Access: http://localhost:5572/metrics (metrics)
#         http://localhost:9090 (Prometheus)
#         http://localhost:3000 (Grafana - admin/prom-operator)

# Custom CA for private storage backends
skaffold dev -p custom-ca

# Just metrics endpoint
skaffold dev -p metrics

# Prometheus integration only
skaffold dev -p metrics-prometheus
Metrics Dashboard
The driver includes a comprehensive Grafana dashboard for monitoring and observability:
Dashboard Features:
- Overview & Rclone Statistics: Real-time health, uptime, file operations summary
- Transfer Performance: Data transfer rates, cumulative transfers, operation timelines
- VFS Cache Performance: File handles, disk cache usage, metadata cache, upload queues
- Mount Health & Details: Detailed mount information with health status
- System Resources: CPU, memory, and Go runtime metrics
Access the dashboard at http://localhost:3000 when using Skaffold profiles with monitoring enabled.
Prerequisites for Metrics Profiles
For metrics-prometheus and metrics-full profiles, install Prometheus Operator:
helm repo add prometheus-community https://prometheus-community.github.io/helm-charts
helm repo update
helm install kube-prometheus-stack prometheus-community/kube-prometheus-stack \
  --namespace monitoring --create-namespace
Testing & Code Quality
# Run tests
go test ./pkg/rclone/...

# Run linter
./bin/golangci-lint run --config .golangci.yml ./...
Local Binary Development
For testing the driver binary directly without Kubernetes:
# Build the binary
make build

# Run driver locally
./bin/rcloneplugin --endpoint unix:///tmp/csi.sock --nodeid CSINode -v=5
Alternative: Manual Development
For detailed manual setup and testing procedures, see the development guide.
Quick Start Guide
Once you've installed the driver, follow these steps to start using cloud storage in your pods:
1. Configure Storage Backend
Create a secret with your storage backend configuration:
apiVersion: v1
kind: Secret
metadata:
  name: rclone-secret
  namespace: default
type: Opaque
stringData:
  remote: "s3"
  remotePath: "my-bucket"
  configData: |
    [s3]
    type = s3
    provider = AWS
    access_key_id = YOUR_ACCESS_KEY_ID
    secret_access_key = YOUR_SECRET_ACCESS_KEY
    region = us-east-1
2. Create StorageClass
apiVersion: storage.k8s.io/v1
kind: StorageClass
metadata:
  name: rclone-csi
provisioner: rclone.csi.veloxpack.io
parameters:
  remote: "s3"
  remotePath: "my-bucket"
  csi.storage.k8s.io/node-publish-secret-name: "rclone-secret"
  csi.storage.k8s.io/node-publish-secret-namespace: "default"
reclaimPolicy: Delete
volumeBindingMode: Immediate
allowVolumeExpansion: true
3. Create PVC and Pod
apiVersion: v1
kind: PersistentVolumeClaim
metadata:
  name: pvc-rclone
spec:
  accessModes:
    - ReadWriteMany
  resources:
    requests:
      storage: 10Gi
  storageClassName: rclone-csi
---
apiVersion: v1
kind: Pod
metadata:
  name: nginx-rclone
spec:
  containers:
  - name: nginx
    image: nginx
    volumeMounts:
    - name: data
      mountPath: /data
  volumes:
  - name: data
    persistentVolumeClaim:
      claimName: pvc-rclone
Configuration Methods
Method 1: Kubernetes Secrets (Recommended)
Store sensitive credentials in Kubernetes secrets and reference them in StorageClass.
Method 2: Inline Configuration
Include configuration directly in StorageClass parameters.
Method 3: PersistentVolume Configuration
Configure directly in PersistentVolume volumeAttributes.
Priority: volumeAttributes > StorageClass parameters > Secrets
Dynamic Path Substitution
The driver supports template variables in the remotePath parameter:
| Variable | Description | Example |
|---|---|---|
${pvc.metadata.name} | PVC name | my-pvc-12345 |
${pvc.metadata.namespace} | PVC namespace | default |
${pv.metadata.name} | PV name | pv-rclone-abc123 |
Example:
parameters:
  remote: "s3"
  remotePath: "my-bucket/${pvc.metadata.namespace}/${pvc.metadata.name}"
VFS Cache Options
apiVersion: v1
kind: PersistentVolume
metadata:
  name: pv-rclone-performance
spec:
  mountOptions:
    - vfs-cache-mode=writes
    - vfs-cache-max-size=10G
    - dir-cache-time=30s
  csi:
    driver: rclone.csi.veloxpack.io
    volumeHandle: performance-volume
    volumeAttributes:
      remote: "s3"
      remotePath: "my-bucket"
      configData: |
        [s3]
        type = s3
        provider = AWS
        access_key_id = YOUR_ACCESS_KEY_ID
        secret_access_key = YOUR_SECRET_ACCESS_KEY
Separate Cache Directory Mount
For improved performance, you can mount a separate host path for the rclone cache directory. This is especially useful for:
- Using faster local storage for cache (e.g., SSD, NVMe)
- Mounting dedicated disks
helm upgrade --install csi-rclone oci://ghcr.io/veloxpack/charts/csi-driver-rclone \
  --namespace veloxpack --create-namespace \
  --set node.cache.enabled=true \
  --set node.cache.hostPath=/mnt/rclone-cache
Using the Cache Directory
Once the cache mount is enabled, specify the cache directory in your volume configuration:
apiVersion: v1
kind: PersistentVolume
metadata:
  name: pv-rclone-with-cache
spec:
  csi:
    driver: rclone.csi.veloxpack.io
    volumeHandle: cache-volume
    volumeAttributes:
      remote: "s3"
      remotePath: "my-bucket"
      cache_dir: /var/lib/rclone-cache/my-volume  # Use the mounted cache path
      configData: |
        [s3]
        type = s3
        provider = AWS
        access_key_id = YOUR_ACCESS_KEY_ID
        secret_access_key = YOUR_SECRET_ACCESS_KEY
Configuration Options:
| Parameter | Description | Default |
|---|---|---|
node.cache.enabled | Enable cache volume mount | false |
node.cache.hostPath | Host path (required when enabled) | "" |
node.cache.mountPath | Mount path in container | /var/lib/rclone-cache |
Remote Control (RC) API
The driver can expose rclone's Remote Control API, allowing programmatic control of mounts from within your cluster. This is useful for:
- VFS Cache Refresh: Trigger cache refresh for specific paths
- Statistics: Get real-time mount statistics
- Operations: Control rclone operations programmatically
Enable RC API via Helm:
# Create authentication secret
kubectl create secret generic csi-rclone-rc-auth \
  --from-literal=username=admin \
  --from-literal=password=secure-password \
  -n veloxpack

# Install with RC API
helm upgrade --install csi-rclone oci://ghcr.io/veloxpack/charts/csi-driver-rclone \
  --namespace veloxpack --create-namespace \
  --set node.rc.enabled=true \
  --set node.rc.basicAuth.existingSecret=csi-rclone-rc-auth \
  --set node.rc.service.enabled=true
Example: Refresh VFS Cache
# Get the RC service endpoint
RC_SERVICE=$(kubectl get svc -n veloxpack csi-rclone-node-rc -o jsonpath='{.metadata.name}')

# Refresh cache for a specific path
curl -X POST http://${RC_SERVICE}:5573/vfs/refresh \
  -u admin:secure-password \
  -H "Content-Type: application/json" \
  -d '{"recursive": true, "dir": "/path/to/mount"}'
Example: Get Mount Statistics
curl -X POST http://${RC_SERVICE}:5573/vfs/stats \
  -u admin:secure-password \
  -H "Content-Type: application/json" \
  -d '{}'
Configuration Options:
| Parameter | Description | Default |
|---|---|---|
node.rc.enabled | Enable RC API server | false |
node.rc.addr | RC API listening address | :5573 |
node.rc.noAuth | Disable authentication (not recommended) | false |
node.rc.basicAuth.existingSecret | Secret name for credentials | "" |
node.rc.service.enabled | Create Kubernetes Service for RC API | false |
Security Considerations:
- Always use authentication in production (
node.rc.noAuth=false) - Store credentials in Kubernetes secrets
- Use network policies to restrict access to the RC service
- The RC API has full control over mounts - restrict access appropriately
For more RC API endpoints and capabilities, see the rclone RC documentation.
Troubleshooting
Check Driver Status
# Check controller pods
kubectl get pods -n veloxpack -l app=csi-rclone-controller

# Check node pods
kubectl get pods -n veloxpack -l app=csi-rclone-node

# Check logs
kubectl logs -n veloxpack -l app=csi-rclone-controller
kubectl logs -n veloxpack -l app=csi-rclone-node
Verify Driver Functionality
# Check if the driver is working correctly
kubectl exec -n veloxpack -l app=csi-rclone-node -- /rcloneplugin --help

# Check driver version information (shows when driver starts)
kubectl logs -n veloxpack -l app=csi-rclone-node --tail=10 | grep "DRIVER INFORMATION" -A 10
Common Issues
- Authentication failures: Verify credentials in secrets or configData
- Network connectivity: Ensure nodes can reach the storage backend
- Permission errors: Check that credentials have proper access rights
- Configuration format: Ensure configData is valid INI format
- Resource constraints: Verify sufficient memory and disk space
For detailed troubleshooting, see the debug guide.
Building from Source
# Clone repository
git clone https://github.com/veloxpack/csi-driver-rclone.git
cd csi-driver-rclone

# Build binary
make build

# Build Docker image
make container

# Push to registry
make push
Docker Build Options
The driver supports two backend configurations for different use cases:
Full Backend Support (Default)
Includes all 50+ rclone backends for maximum compatibility:
# Build with all backends (default)
docker build -t csi-rclone:latest .

# Or explicitly specify
docker build --build-arg RCLONE_BACKEND_MODE=all -t csi-rclone:latest .
Minimal Backend Support
Includes only the most common backends for smaller image size:
# Build with minimal backends
docker build --build-arg RCLONE_BACKEND_MODE=minimal -t csi-rclone:minimal .
Minimal backends include:
- Amazon S3 and S3-compatible storage
- Google Cloud Storage
- Azure Blob Storage
- Dropbox
- Google Drive
- OneDrive
- Box
- Backblaze B2
- SFTP
- WebDAV
- FTP
- Local filesystem
Benefits of minimal build:
- Smaller Docker image size
- Faster container startup
- Reduced attack surface
- Lower memory footprint
Choose the build that fits your needs - full support for maximum compatibility or minimal for production efficiency.
Architecture
This driver is based on the csi-driver-nfs reference implementation, following CSI specification best practices. It also draws inspiration from the original csi-rclone implementation by WunderIO.
Components:
- Identity Server: Plugin metadata and health checks
- Controller Server: Volume lifecycle management (create/delete)
- Node Server: Volume mounting/unmounting on nodes
Key Design Decisions:
- No Staging: Rclone volumes don't require staging
- Direct Rclone Integration: Uses rclone's Go library directly
- Remote Creation: Creates temporary remotes for each mount
- VFS Caching: Leverages rclone's VFS for improved performance
- Template Variable Support: Dynamic path substitution using PVC/PV metadata
Security Considerations
- Use Secrets: Store sensitive credentials in Kubernetes secrets
- RBAC: Ensure proper RBAC permissions are configured
- Network Policies: Consider using network policies to restrict access
- Image Security: Use trusted container images
- Credential Rotation: Regularly rotate storage backend credentials
- RC API Security: When enabling Remote Control API, always use authentication and restrict access via network policies
Log Levels
Set log level for debugging:
args:
  - "--v=5"  # Verbose logging
  - "--logtostderr=true"
License
This project is licensed under the MIT License. See the LICENSE file for details.
Contributing
Contributions welcome! Please ensure:
- All code passes
golangci-lintchecks - Follow existing code patterns
- Add tests for new functionality
- Update documentation
Acknowledgments
This project builds upon the excellent work of several open source communities:
- WunderIO/csi-rclone - The original rclone CSI driver implementation that inspired this project
- Kubernetes CSI NFS Driver - Reference implementation and architectural patterns
- Rclone - The powerful cloud storage sync tool that makes this driver possible
- Kubernetes CSI Community - For the Container Storage Interface specification and ecosystem
Special thanks to the maintainers and contributors of these projects for their dedication to open source software.
Support
Similar repos
Contributors
Languages
Go
90.8%
Shell
3.3%
Makefile
2.9%
Dockerfile
1.6%
Mustache
1.5%