🍯 T-Pot - The All In One Multi Honeypot Platform 🐝
Shell
9,574
2,234 commits
updated Oct 9, 2026

T-Pot is the all in one, optionally distributed, multiarch (amd64, arm64) honeypot plattform, supporting 20+ honeypots and countless visualization options using the Elastic Stack, animated live attack maps and lots of security tools to further improve the deception experience.
ssh required)curl: $ sudo [apt, dnf, zypper] install curl if not installed already$HOME:env bash -c "$(curl -sL https://github.com/telekom-security/tpotce/raw/master/install.sh)"
~/tpotce/docker-compose.yml) by removing the ewsposter section. But in this case sharing really is caring!
T-Pot's main components have been moved into the tpotinit Docker image allowing T-Pot to now support multiple Linux distributions, even macOS and Windows (although both limited to the feature set of Docker Desktop). T-Pot uses docker and docker compose to reach its goal of running as many honeypots and tools as possible simultaneously and thus utilizing the host's hardware to its maximum.
Alongside the following tools:
... to give you the best out-of-the-box experience possible and an easy-to-use multi-honeypot system.
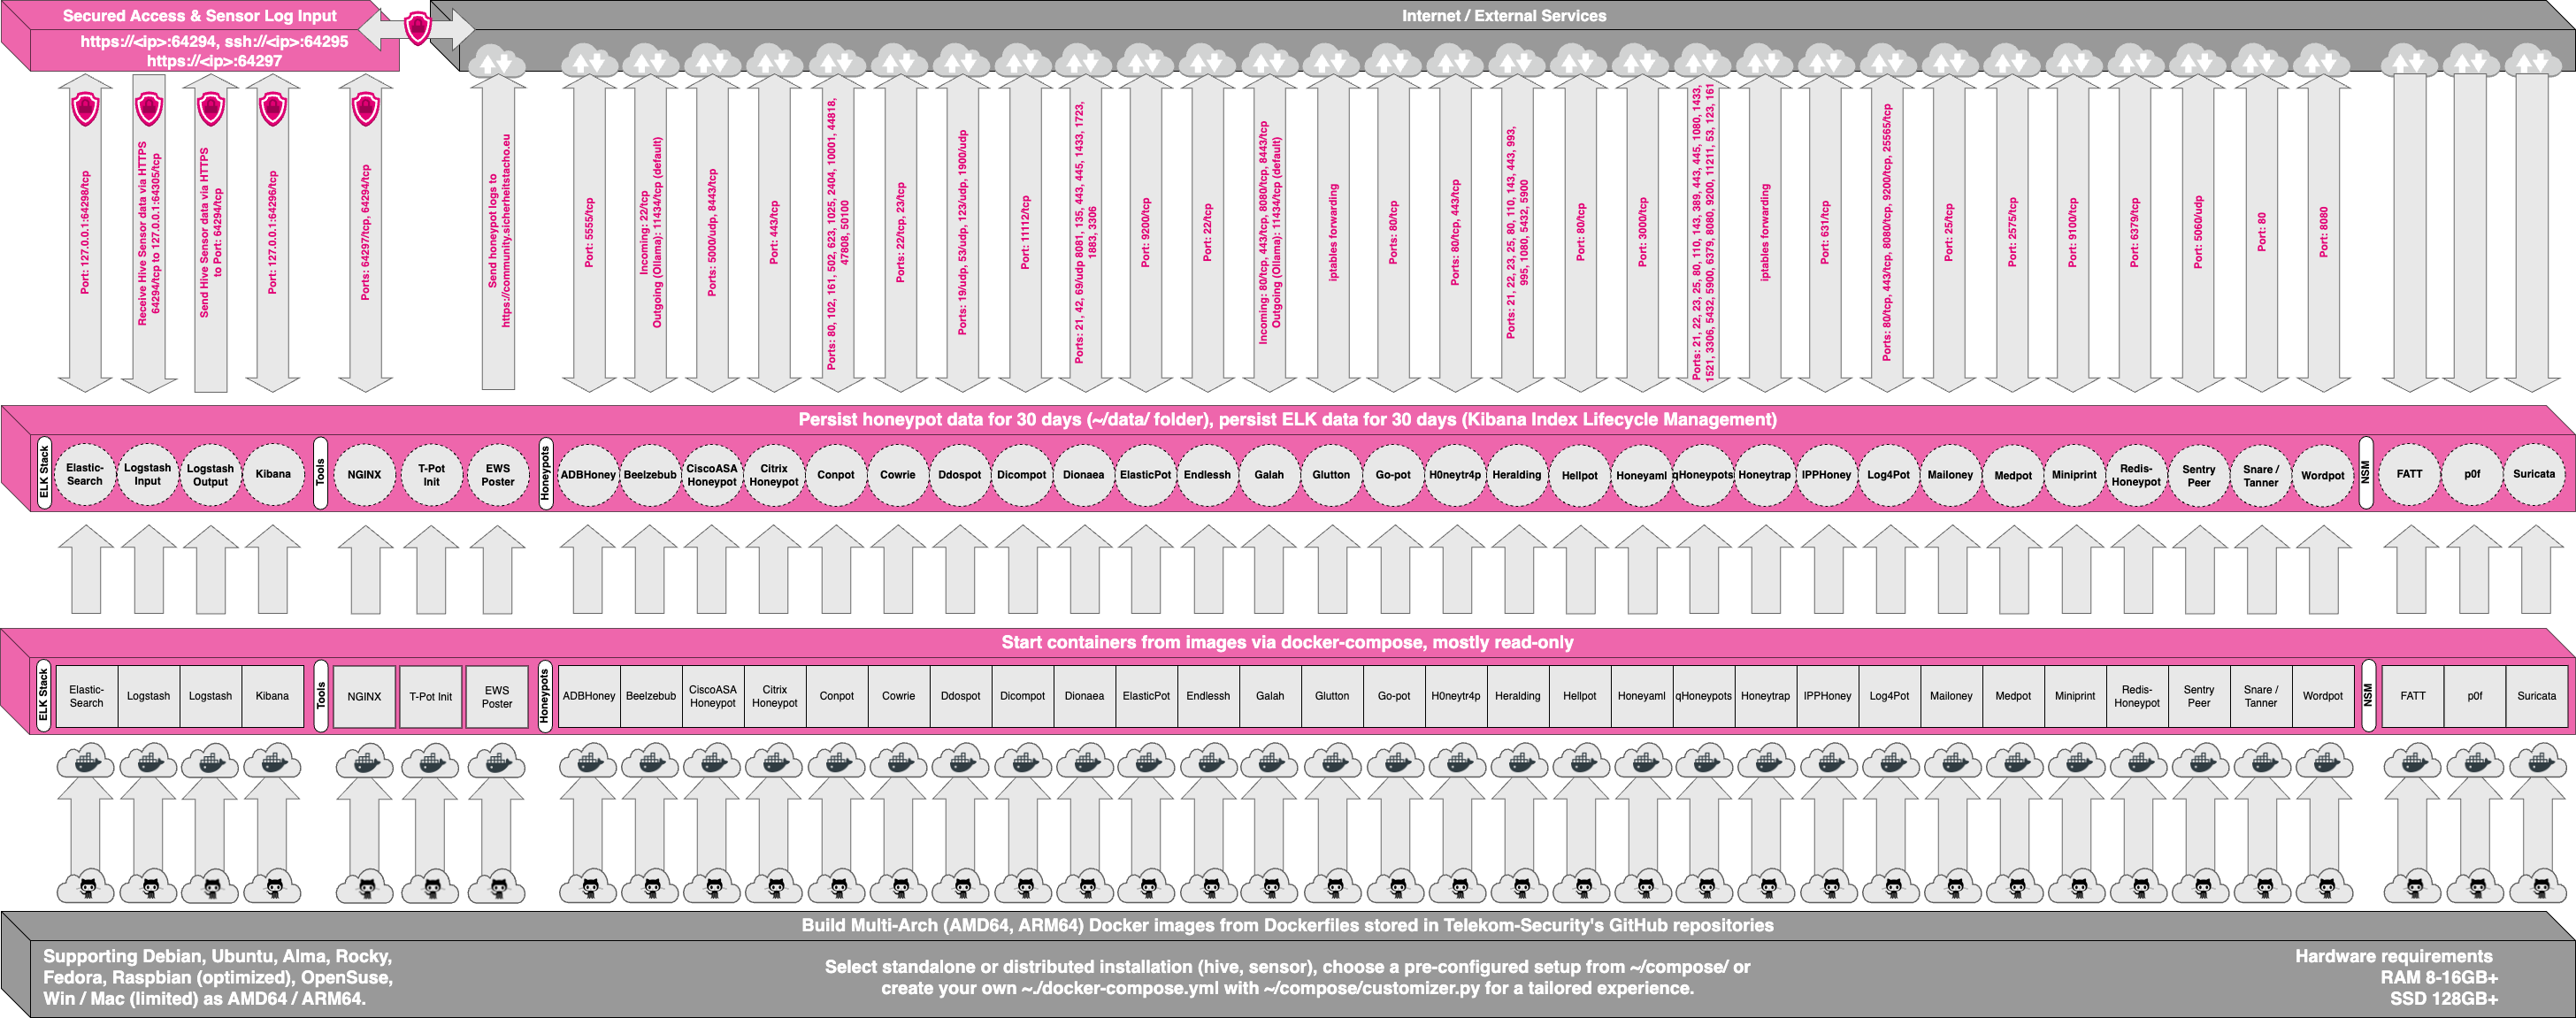
The source code and configuration files are fully stored in the T-Pot GitHub repository. The docker images are built and preconfigured for the T-Pot environment.
The individual Dockerfiles and configurations are located in the docker folder.
T-Pot offers a number of services which are basically divided into five groups:
docker-compose.yml.During the installation and during the usage of T-Pot there are two different types of accounts you will be working with. Make sure you know the differences of the different account types, since it is by far the most common reason for authentication errors.
| Service | Account Type | Username / Group | Description |
|---|---|---|---|
| SSH | OS | <OS_USERNAME> | The user you chose during the installation of the OS. |
| Nginx | BasicAuth | <WEB_USER> | <web_user> you chose during the installation of T-Pot. |
| CyberChef | BasicAuth | <WEB_USER> | <web_user> you chose during the installation of T-Pot. |
| Elasticvue | BasicAuth | <WEB_USER> | <web_user> you chose during the installation of T-Pot. |
| Geoip Attack Map | BasicAuth | <WEB_USER> | <web_user> you chose during the installation of T-Pot. |
| Spiderfoot | BasicAuth | <WEB_USER> | <web_user> you chose during the installation of T-Pot. |
| T-Pot | OS | tpot | tpot this user / group is always reserved by the T-Pot services. |
| T-Pot Logs | BasicAuth | <LS_WEB_USER> | LS_WEB_USER are automatically managed. |
Depending on the supported Linux distro images, hive / sensor, installing on real hardware, in a virtual machine or other environments there are different kind of requirements to be met regarding OS, RAM, storage and network for a successful installation of T-Pot (you can always adjust ~/tpotce/docker-compose.yml and ~/tpotce/.envto your needs to overcome these requirements).
| T-Pot Type | RAM | Storage | Description |
|---|---|---|---|
| Hive | 16GB | 256GB SSD | As a rule of thumb, the more honeypots, sensors & data, the more RAM and storage is needed. |
| Sensor | 8GB | 128GB SSD | Since honeypot logs are persisted (~/tpotce/data) for 30 days, storage depends on attack volume. |
T-Pot does require ...
All of the supported Linux distro images will run in a VM which means T-Pot will just run fine. The following were tested / reported to work:
Some configuration / setup hints:
Display to Console Only during initial installation of the OS and afterwards back to Full Graphics.T-Pot is only limited by the hardware support of the supported Linux distro images. It is recommended to check the HCL (hardware compatibility list) and test the supported distros with T-Pot before investing in dedicated hardware.
T-Pot is tested on and known to run on ...
Some users report working installations on other clouds and hosters, i.e. Azure and GCP. Hardware requirements may be different. If you are unsure you should research issues and discussions and run some functional tests. With T-Pot 24.04.0 and forward we made sure to remove settings that were known to interfere with cloud based installations.
Besides the ports generally needed by the OS, i.e. obtaining a DHCP lease, DNS, etc. T-Pot will require the following ports for incoming / outgoing connections. Review the T-Pot Architecture for a visual representation. Also some ports will show up as duplicates, which is fine since used in different editions.
| Port | Protocol | Direction | Description |
|---|---|---|---|
| 80, 443 | tcp | outgoing | T-Pot Management: Install, Updates, Logs (i.e. OS, GitHub, DockerHub, Sicherheitstacho, etc. |
| 11434 | tcp | outgoing | LLM based honeypots: Access your Ollama installation |
| 64294 | tcp | incoming | T-Pot Management: Sensor data transmission to hive (through NGINX reverse proxy) to 127.0.0.1:64305 |
| 64295 | tcp | incoming | T-Pot Management: Access to SSH |
| 64297 | tcp | incoming | T-Pot Management Access to NGINX reverse proxy |
| 5555 | tcp | incoming | Honeypot: ADBHoney |
| 22 | tcp | incoming | Honeypot: Beelzebub (LLM required) |
| 5000 | udp | incoming | Honeypot: CiscoASA |
| 8443 | tcp | incoming | Honeypot: CiscoASA |
| 443 | tcp | incoming | Honeypot: CitrixHoneypot |
| 80, 102, 502, 1025, 2404, 10001, 44818, 47808, 50100 | tcp | incoming | Honeypot: Conpot |
| 161, 623 | udp | incoming | Honeypot: Conpot |
| 22, 23 | tcp | incoming | Honeypot: Cowrie |
| 19, 53, 123, 1900 | udp | incoming | Honeypot: Ddospot |
| 11112 | tcp | incoming | Honeypot: Dicompot |
| 21, 42, 135, 443, 445, 1433, 1723, 1883, 3306, 8081 | tcp | incoming | Honeypot: Dionaea |
| 69 | udp | incoming | Honeypot: Dionaea |
| 9200 | tcp | incoming | Honeypot: Elasticpot |
| 22 | tcp | incoming | Honeypot: Endlessh |
| 80, 443, 8080, 8443 | tcp | incoming | Honeypot: Galah (LLM required) |
| 8080 | tcp | incoming | Honeypot: Go-pot |
| 80, 443 | tcp | incoming | Honeypot: H0neytr4p |
| 21, 22, 23, 25, 80, 110, 143, 443, 993, 995, 1080, 5432, 5900 | tcp | incoming | Honeypot: Heralding |
| 3000 | tcp | incoming | Honeypot: Honeyaml |
| 21, 22, 23, 25, 80, 110, 143, 389, 443, 445, 631, 1080, 1433, 1521, 3306, 3389, 5060, 5432, 5900, 6379, 6667, 8080, 9100, 9200, 11211 | tcp | incoming | Honeypot: qHoneypots |
| 53, 123, 161, 5060 | udp | incoming | Honeypot: qHoneypots |
| 631 | tcp | incoming | Honeypot: IPPHoney |
| 80, 443, 8080, 9200, 25565 | tcp | incoming | Honeypot: Log4Pot |
| 25 | tcp | incoming | Honeypot: Mailoney |
| 2575 | tcp | incoming | Honeypot: Medpot |
| 9100 | tcp | incoming | Honeypot: Miniprint |
| 6379 | tcp | incoming | Honeypot: Redishoneypot |
| 3389 | tcp | incoming | Honeypot: RDPHoneypot |
| 5060 | tcp/udp | incoming | Honeypot: SentryPeer |
| 80 | tcp | incoming | Honeypot: Snare (Tanner) |
| 8090 | tcp | incoming | Honeypot: Wordpot |
Ports and availability of SaaS services may vary based on your geographical location.
For some honeypots to reach full functionality (i.e. Cowrie or Log4Pot) outgoing connections are necessary as well, in order for them to download the attacker's malware. Please see the individual honeypot's documentation to learn more by following the links to their repositories.
We think LLM-Based Honeypots mark the beginning of a game change for the deception / honeypot field. Consequently, starting with the release of T-Pot 24.04.1, two LLM-based honeypots, Beelzebub and Galah, have been introduced. These honeypots require an installation of Ollama, which needs to be configured in the T-Pot configuration file. You can also adjust the settings in this file for ChatGPT support, but note that changes will also be required in the docker compose file (~/tpotce/compose/llm.yml) to accommodate these adjustments.
Follow the links in the Honeypots and Tools section to find out more about Beelzebub and Galah.
🚨 CPU-based usage is not recommended, not even for testing.
To set up and run Ollama, refer to the Ollama GitHub repository for instructions. For entry-level or testing purposes, results can be achieved using a Nvidia RTX 4060 Ti 16GB or equivalent (AMD's ROCm is also supported by Ollama), with models like openchat and Llama3. As a general rule with LLM-based systems, the better and more hardware you use, the faster and more accurate the results will be, especially when tasks are offloaded to multiple GPUs and larger models.
ChatGPT support for these honeypots will remain untested in relation to T-Pot.
It is recommended to get yourself familiar with how T-Pot and the honeypots work before you start exposing towards the internet. For a quickstart run a T-Pot installation in a virtual machine.
Once you are familiar with how things work you should choose a network you suspect intruders in or from (i.e. the internet). Otherwise T-Pot will most likely not capture any attacks (unless you want to prove a point)! For starters it is recommended to put T-Pot in an unfiltered zone, where all TCP and UDP traffic is forwarded to T-Pot's network interface. To avoid probing for T-Pot's management ports you should put T-Pot behind a firewall and forward all TCP / UDP traffic in the port range of 1-64000 to T-Pot while allowing access to ports > 64000 only from trusted IPs and / or only expose the ports relevant to your use-case. If you wish to catch malware traffic on unknown ports you should not limit the ports you forward since glutton and honeytrap dynamically bind any TCP port that is not occupied by other honeypot daemons and thus give you a better representation of the risks your setup is exposed to.
Download one of the supported Linux distro images, follow the TL;DR instructions or git clone the T-Pot repository and run the installer ~/tpotce/install.sh. Running T-Pot on top of a running and supported Linux system is possible, but a clean installation is recommended to avoid port conflicts with running services. The T-Pot installer will require direct access to the internet as described here.
Steps to Follow:
| Distribution Name | arm64 |
|---|---|
| Raspberry Pi OS (64Bit, Lite) | download |
$ git clone https://github.com/telekom-security/tpotce or follow the TL;DR and skip this section.$ cd tpotce$ ./install.sh:
tcp/64295sudo)dps, dpsw and dim aliases for formatted container and image overviewsla, ll and ls aliases (for exa, a improved ls command)mi (for micro, a great alternative to vi and / or nano)tpot.service to /etc/systemd/system so T-Pot can automatically start and stopsudo or root) password at least once$ sudo rebootOn Ubuntu 26.04 sudo is sudo-rs, which formats its password prompt differently. Ansible does not recognise that prompt and privilege escalation times out, a fix exists upstream but is not released yet. The installer detects this and runs Ansible against the traditional sudo that Ubuntu still ships as /usr/bin/sudo.ws - nothing to do, it says so when it happens. If you would rather have it system wide, switch the alternative: $ sudo update-alternatives --set sudo /usr/bin/sudo.ws.
The installer can run without any interaction, i.e. for automated tests or cloud provisioning:
./install.sh -s -t <type> [-u <webuser>] [-p <password>]
| Option | Description |
|---|---|
-s | Skip the confirmation prompt and every following question |
-t | Installation type: h hive, s sensor, l llm, i mini, m mobile, t tarpit |
-u | Web user name, required for h, l, i and t |
-p | Web user password, required for h, l, i and t |
⚠️ -s requires passwordless sudo for the user running the installer. Ansible would otherwise ask for the BECOME password and the run would stall, so the installer stops right away and tells you so. Grant it before you start:
echo "$(whoami) ALL=(ALL) NOPASSWD:ALL" | sudo tee /etc/sudoers.d/$(whoami)
sudo chmod 440 /etc/sudoers.d/$(whoami)
Remove /etc/sudoers.d/<user> after the installation if you do not want to keep it. On Debian without sudo installed the installer creates this rule itself, because it has to add sudo anyway - it says so when it does.
By default T-Pot installs from master. To test changes to the installer itself, the installer, the Ansible playbook and the T-Pot repository can be taken from any branch, tag or commit - and from a fork:
# from a local clone, the checked out branch is used automatically
git clone -b my-feature https://github.com/telekom-security/tpotce ~/tpotce
~/tpotce/install.sh

# explicitly, works the same for an unattended run
./install.sh -b my-feature -r https://github.com/someuser/tpotce -s -t h -u user -p pass

# as environment variables, i.e. for the one-liner or cloud provisioning
TPOT_BRANCH=my-feature env bash -c "$(curl -sL https://github.com/telekom-security/tpotce/raw/my-feature/install.sh)"
| Option | Environment | Description |
|---|---|---|
-b | TPOT_BRANCH | Branch, tag or commit to install from |
-r | TPOT_REPO_URL | Repository to install from, https URL |
The installer takes the first of these it finds: the options, the environment variables, the branch and origin of the local clone it runs from, and finally master of https://github.com/telekom-security/tpotce. It prints what it settled on before it changes anything. Two things to keep in mind:
install.sh from and in TPOT_BRANCH - they have to match, the script cannot tell where it was downloaded from.~/tpotce is always used as it is, so the installer stops if it is on a different repository or branch than the one requested. Remove it (sudo rm -rf ~/tpotce) and run the installer again.update.sh takes the same two options, so an existing installation can be moved to another branch or fork to test the update procedure itself:
# update an existing installation from a branch, -y is still required
~/tpotce/update.sh -y -b my-feature

# the same from a fork, this replaces the URL of 'origin' in ~/tpotce
~/tpotce/update.sh -y -b my-feature -r https://github.com/someuser/tpotce

# back to the released version
~/tpotce/update.sh -y -b master
The branch is checked out for good, so every following update.sh -y keeps updating from it. Here -b names a branch, not a tag or commit, and there are two more differences to the installer:
-b and -r nothing changes, the branch and origin of ~/tpotce are kept - a plain update.sh -y behaves as it always has.update.sh only warns about it as long as -b or -r is given. On such an installation keep passing the option, a plain update.sh -y refuses to update a version it does not know.
Sometimes it is just nice if you can spin up a T-Pot instance on macOS or Windows, i.e. for development, testing or just the fun of it. As Docker Desktop is rather limited not all honeypot types or T-Pot features are supported. Also remember, by default the macOS and Windows firewall are blocking access from remote, so testing is limited to the host. For production it is recommended to run T-Pot on Linux.
To get things up and running just follow these steps:
git clone https://github.com/telekom-security/tpotce (in Windows make sure the code is checked out with LF instead of CRLF!)cd ~/tpotcecp compose/mac_win.yml ./docker-compose.ymlWEB_USER by running ~/tpotce/genuser.sh (macOS) or ~/tpotce/genuserwin.ps1 (Windows).env file by changing TPOT_OSTYPE=linux to either mac or win:
# OSType (linux, mac, win)
#  Most docker features are available on linux
TPOT_OSTYPE=mac
docker compose up or docker compose up -d if you want T-Pot to run in the background.CTRL-C (it if was running in the foreground) and / or docker compose down -v to stop T-Pot entirely.Red Hat Enterprise Linux (RHEL) is a somewhat unique case in that:
grc is not available for RHEL and is omitted from the RHEL installation of T-Pot.With T-Pot Standard / Hive all services, tools, honeypots, etc. will be installed on to a single host which also serves as a Hive endpoint. Make sure to meet the system requirements. You can adjust ~/tpotce/docker-compose.yml to your personal use-case or create your very own configuration using ~/tpotce/compose/customizer.py for a tailored T-Pot experience to your needs.
Once the installation is finished you can proceed to First Start.
The distributed version of T-Pot requires at least two hosts
Uninstallation of T-Pot is only available on the supported Linux distros.
To uninstall T-Pot run ~/tpotce/uninstall.sh and follow the uninstaller instructions, you will have to enter your password at least once.
Once the uninstall is finished reboot the machine sudo reboot
Once the T-Pot Installer successfully finishes, the system needs to be rebooted (sudo reboot). Once rebooted you can log into the system using the user you setup during the installation of the system. Logins are according to the User Types:
<OS_USERNAME>]You can login via SSH to access the command line: ssh -l <OS_USERNAME> -p 64295 <your.ip>:
<OS_USERNAME>]You can also login from your browser and access the T-Pot WebUI and tools: https://<your.ip>:64297
<WEB_USER>]There is not much to do except to login and check via dps if all services and honeypots are starting up correctly. You can use dim to review the installed Docker images including their CREATED age, then login to Kibana and / or Geoip Attack Map to monitor the attacks.
The distributed deployment involves planning as T-Pot Init will only create a self-signed certificate for the IP of the Hive host which usually is suitable for simple setups. Since logstash will check for a valid certificate upon connection, a distributed setup involving Hive to be reachable on multiple IPs (i.e. RFC 1918 and public NAT IP) and maybe even a domain name will result in a connection error where the certificate cannot be validated as such a setup needs a certificate with a common name and SANs (Subject Alternative Name).
Before deploying any sensors make sure you have planned out domain names and IPs properly to avoid issues with the certificate. For more details see issue #1543.
Adjust the example to your IP / domain setup and follow the commands to change the certificate of Hive:
sudo systemctl stop tpot

sudo openssl req \
    -nodes \
    -x509 \
    -sha512 \
    -newkey rsa:8192 \
    -keyout "$HOME/tpotce/data/nginx/cert/nginx.key" \
    -out "$HOME/tpotce/data/nginx/cert/nginx.crt" \
    -days 3650 \
    -subj '/C=AU/ST=Some-State/O=Internet Widgits Pty Ltd' \
    -addext "subjectAltName = IP:192.168.1.200, IP:1.2.3.4, DNS:my.primary.domain, DNS:my.secondary.domain"

sudo chmod 774 $HOME/tpotce/data/nginx/cert/*
sudo chown tpot:tpot $HOME/tpotce/data/nginx/cert/*

sudo systemctl start tpot
The T-Pot configuration file (.env) does allow to disable the SSL verification for logstash connections from Sensor to the Hive by setting LS_SSL_VERIFICATION=none. For security reasons this is only recommended for lab or test environments.
If you choose to use a valid certificate for the Hive signed by a CA (i.e. Let's Encrypt), logstash, and therefore the Sensor, should have no problems to connect and transmit its logs to the Hive.
Once you have rebooted the Sensor as instructed by the installer you can continue with the distributed deployment by logging into Hive and go to cd ~/tpotce folder. Make sure you understood the Planning and Certificates before continuing with the actual deployment.
If you have not done already generate a SSH key to securely login to the Sensor and to allow Ansible to run a playbook on the sensor:
ssh-keygen, follow the instructions and leave the passphrase empty:
Generating public/private rsa key pair.
Enter file in which to save the key (/home/<your_user>/.ssh/id_rsa):
Enter passphrase (empty for no passphrase):
Enter same passphrase again:
Your identification has been saved in /home/<your_user>/.ssh/id_rsa
Your public key has been saved in /home/<your_user>/.ssh/id_rsa.pub
ssh-copy-id -p 64295 <Sensor_SSH_USER>@<Sensor_IP>):
/usr/bin/ssh-copy-id: INFO: Source of key(s) to be installed: "/home/<your_user>/.ssh/id_rsa.pub"
The authenticity of host '[<Sensor_IP>]:64295 ([<Sensor_IP>]:64295)' can't be stablished.
ED25519 key fingerprint is SHA256:naIDxFiw/skPJadTcgmWZQtgt+CdfRbUCoZn5RmkOnQ.
This key is not known by any other names.
Are you sure you want to continue connecting (yes/no/[fingerprint])? yes
/usr/bin/ssh-copy-id: INFO: attempting to log in with the new key(s), to filter out any that are already installed
/usr/bin/ssh-copy-id: INFO: 1 key(s) remain to be installed -- if you are prompted now it is to install the new keys
<your_user>@172.20.254.124's password:

Number of key(s) added: 1

Now try logging into the machine, with:   "ssh -p '64295' '<your_user>@<Sensor_IP>'"
and check to make sure that only the key(s) you wanted were added.
ssh -p '64295' '<your_user>@<Sensor_IP>'../deploy.sh and follow the instructions.
Identify the TPOT_HIVE_USER ENV on the Sensor in the $HOME/tpotce/.env config (it is a base64 encoded string). Now identify the same string in the LS_WEB_USER ENV on the Hive in the $HOME/tpotce/.env config. Remove the string and restart T-Pot.
Now you can safely delete the Sensor machine.
T-Pot is provided in order to make it accessible to everyone interested in honeypots. By default, the captured data is submitted to a community backend. This community backend uses the data to feed Sicherheitstacho.
You may opt out of the submission by removing the # Ewsposter service from ~/tpotce/docker-compose.yml by following these steps:
systemctl stop tpot~/tpotce/docker-compose.yml: micro ~/tpotce/docker-compose.ymlCTRL+Q):# Ewsposter service
ewsposter:
container_name: ewsposter
restart: always
depends_on:
tpotinit:
condition: service_healthy
networks:
- ewsposter_local
environment:
- EWS_HPFEEDS_ENABLE=false
- EWS_HPFEEDS_HOST=host
- EWS_HPFEEDS_PORT=port
- EWS_HPFEEDS_CHANNELS=channels
- EWS_HPFEEDS_IDENT=user
- EWS_HPFEEDS_SECRET=secret
- EWS_HPFEEDS_TLSCERT=false
- EWS_HPFEEDS_FORMAT=json
image: ${TPOT_REPO}/ewsposter:${TPOT_VERSION}
pull_policy: ${TPOT_PULL_POLICY}
volumes:
- ${TPOT_DATA_PATH}:/data
- ${TPOT_DATA_PATH}/ews/conf/ews.ip:/opt/ewsposter/ews.ip
systemctl start tpotIt is encouraged not to disable the data submission as it is the main purpose of the community approach - as you all know sharing is caring 😍
As an Opt-In it is possible to share T-Pot data with 3rd party HPFEEDS brokers.
~/tpotce/docker-compose.yml.ewsposter section and adjust the HPFEEDS settings to your needs.~/tpotce/data/ews/conf and set EWS_HPFEEDS_TLSCERT=/data/ews/conf/<your_ca.crt>.systemctl start tpot.
Remote access to your host / T-Pot is possible with SSH (on tcp/64295) and some services and tools come with T-Pot to make some of your research tasks a lot easier.
According to the User Types you can login via SSH to access the command line: ssh -l <OS_USERNAME> -p 64295 <your.ip>:
<OS_USERNAME>]According to the User Types you can open the T-Pot Landing Page from your browser via https://<your.ip>:64297:
<WEB_USER>]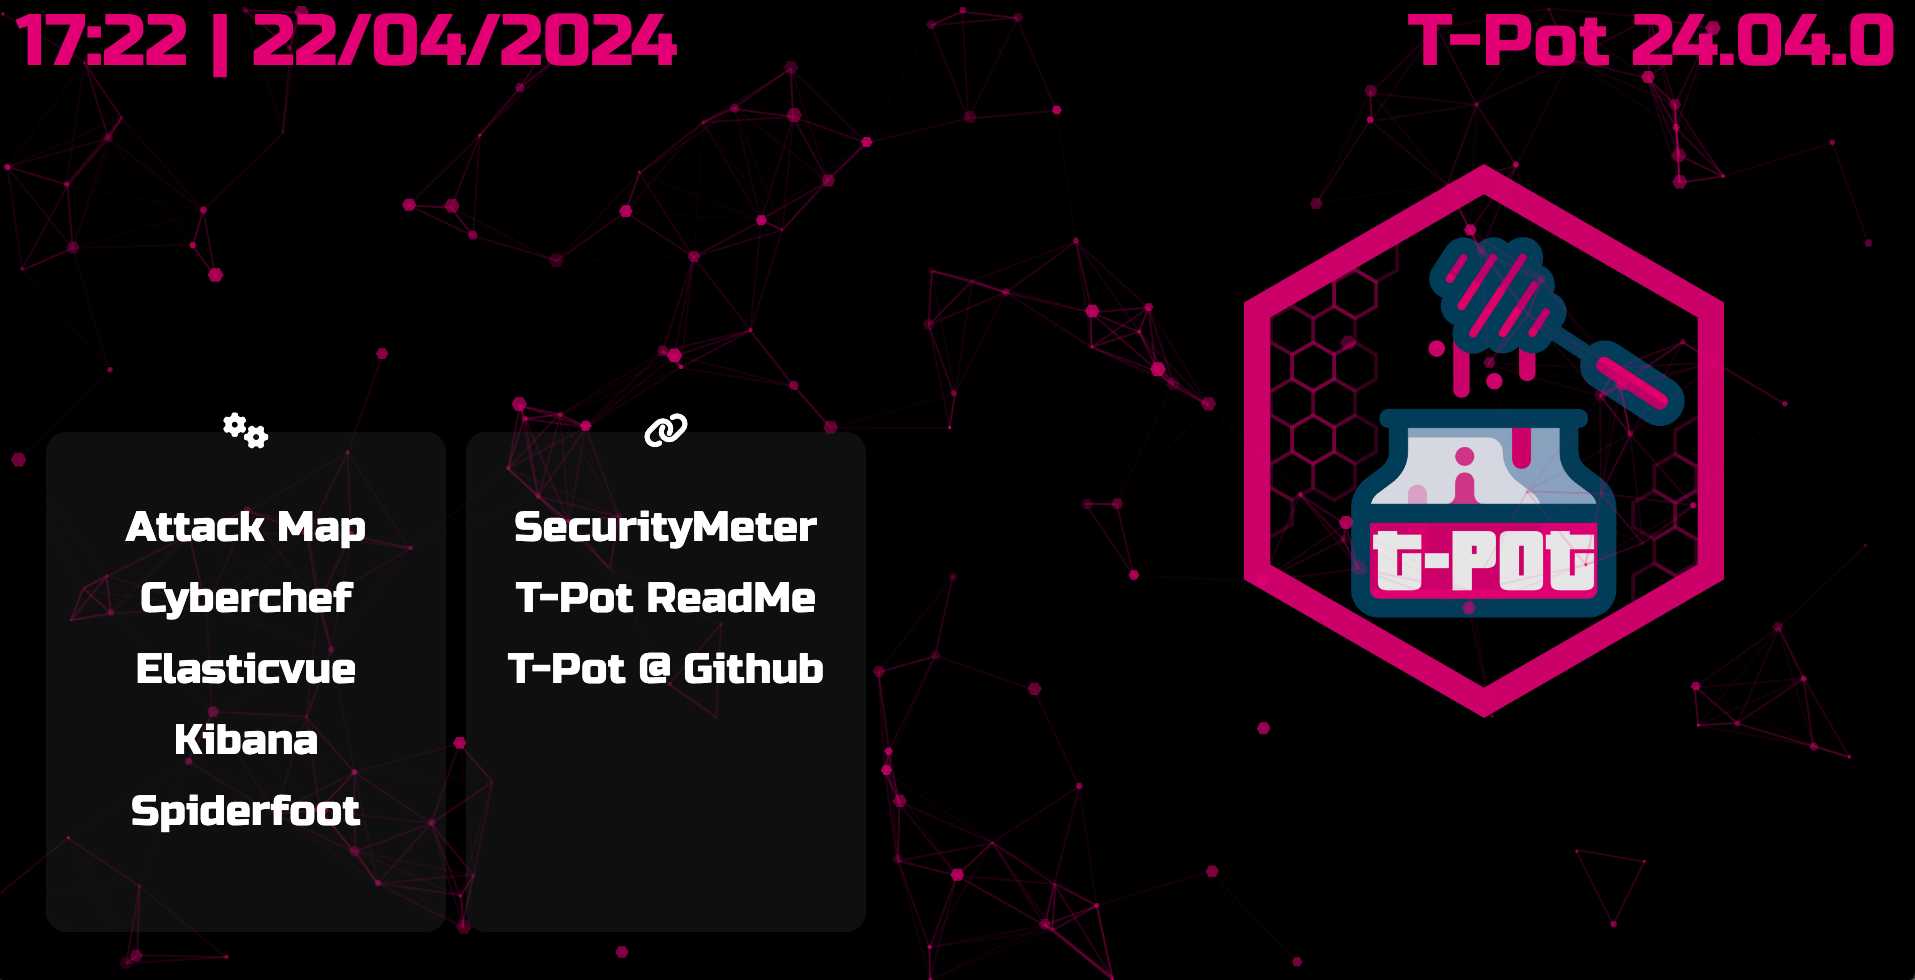
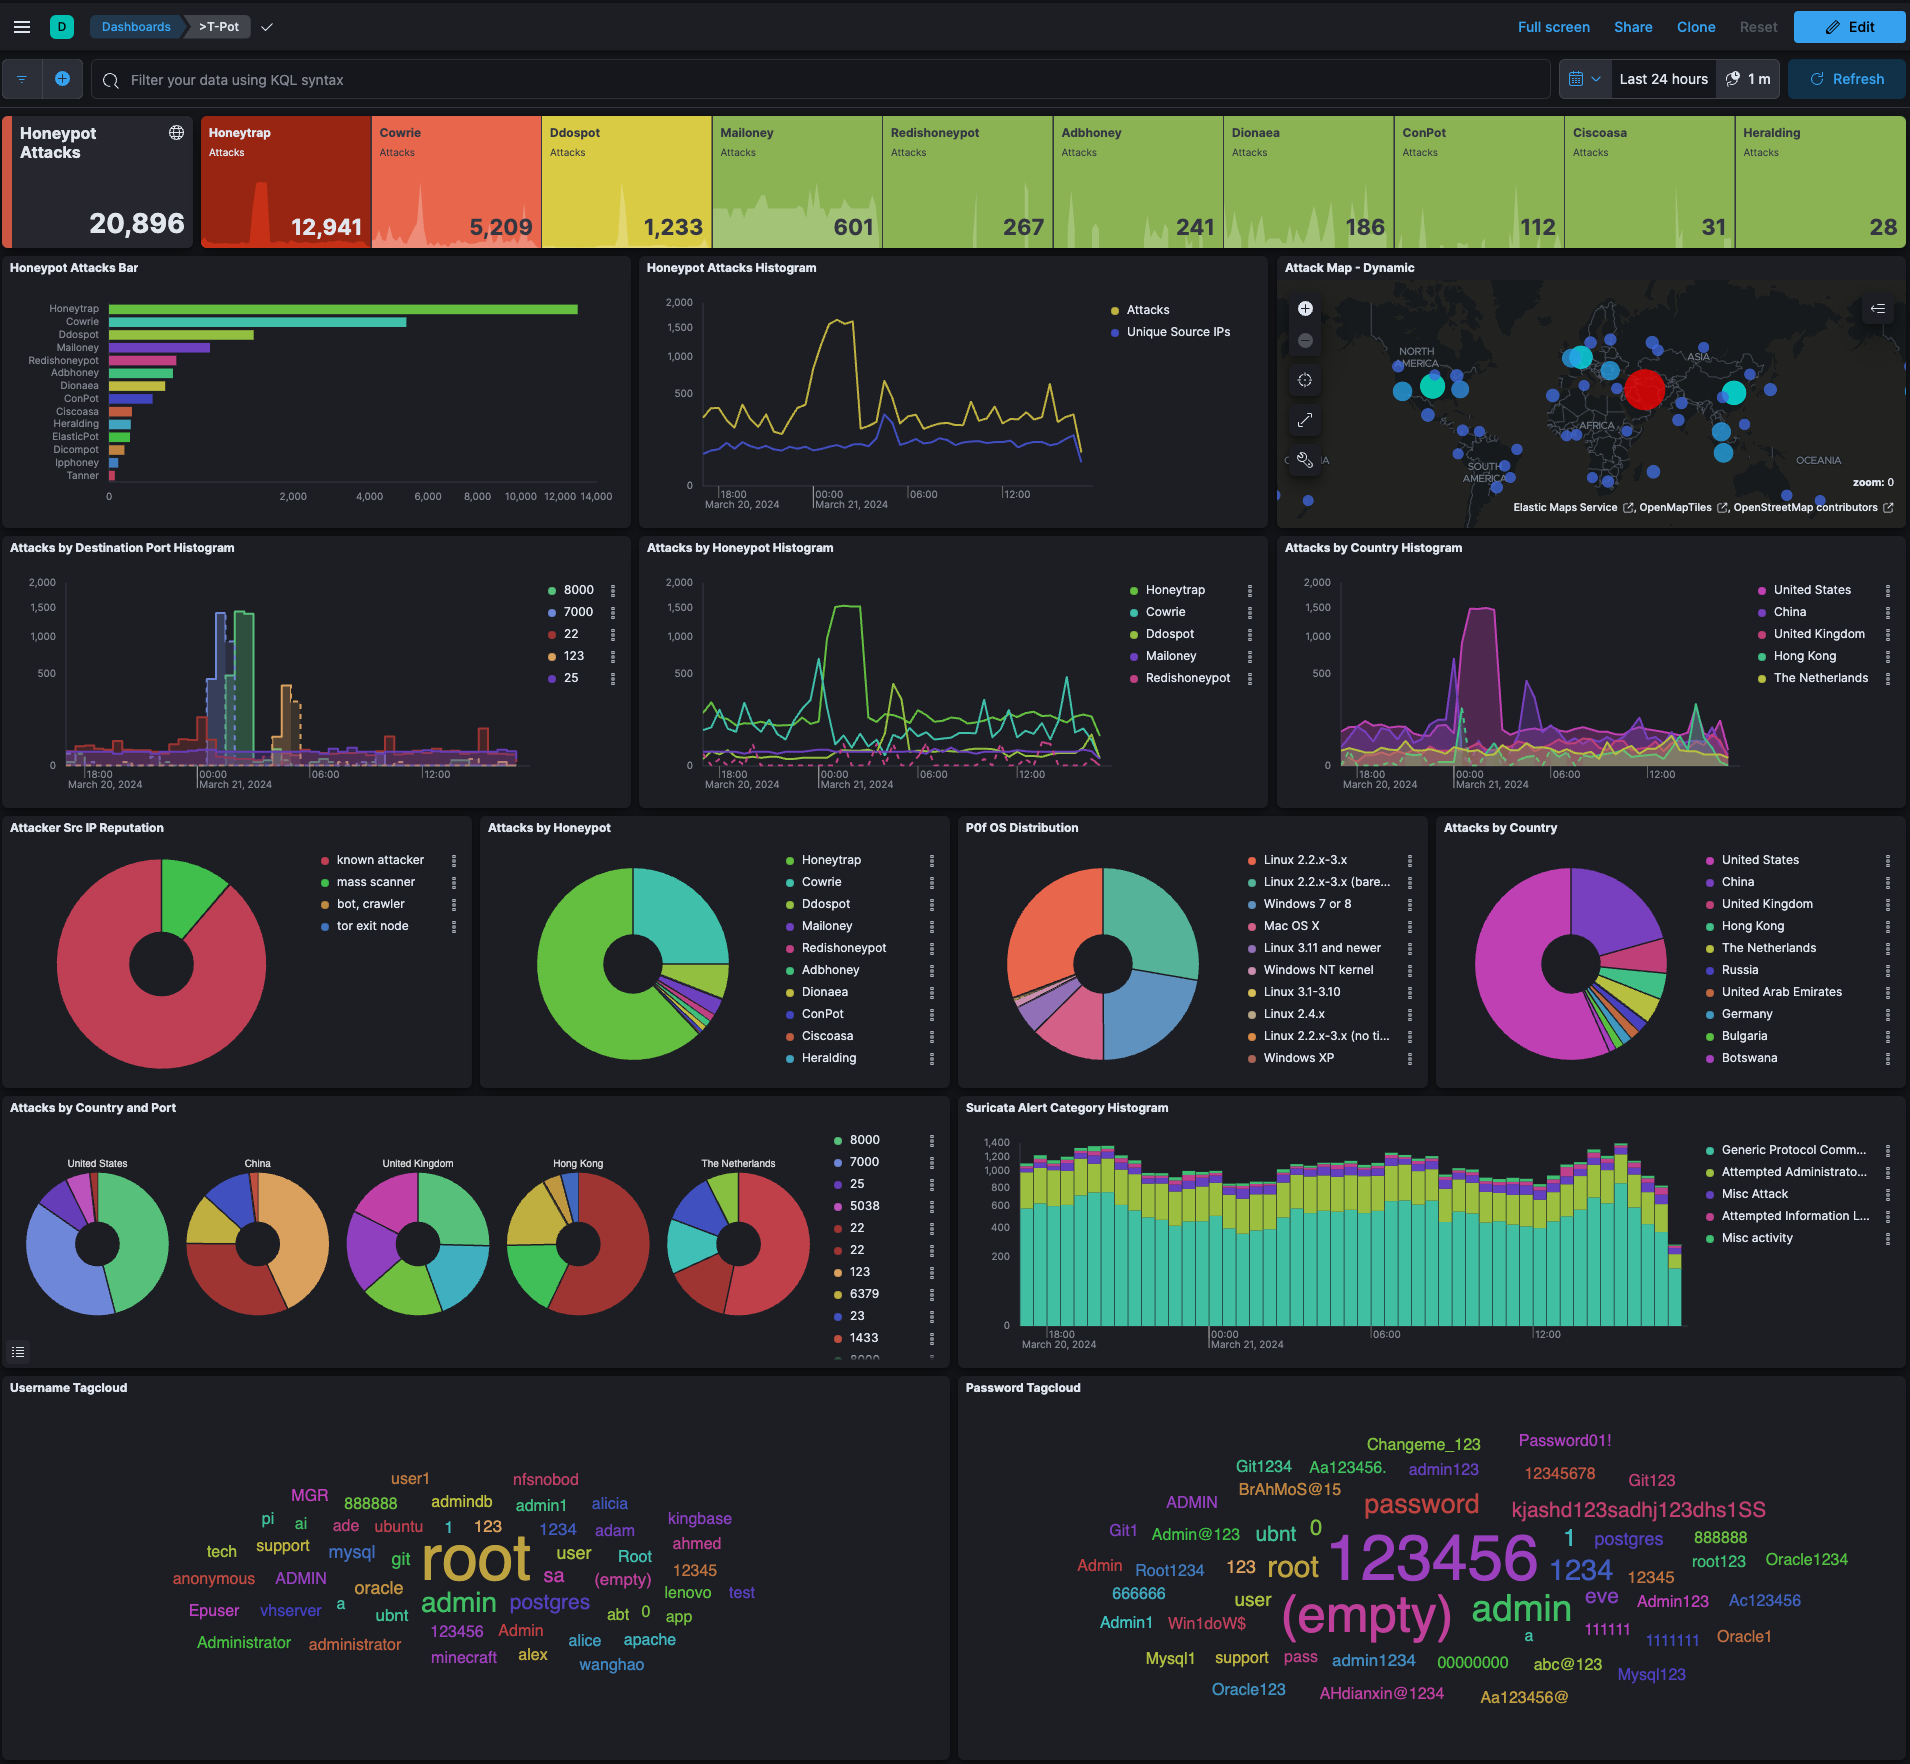
On the T-Pot Landing Page just click on Kibana and you will be forwarded to Kibana. You can select from a large variety of dashboards and visualizations all tailored to the T-Pot supported honeypots.
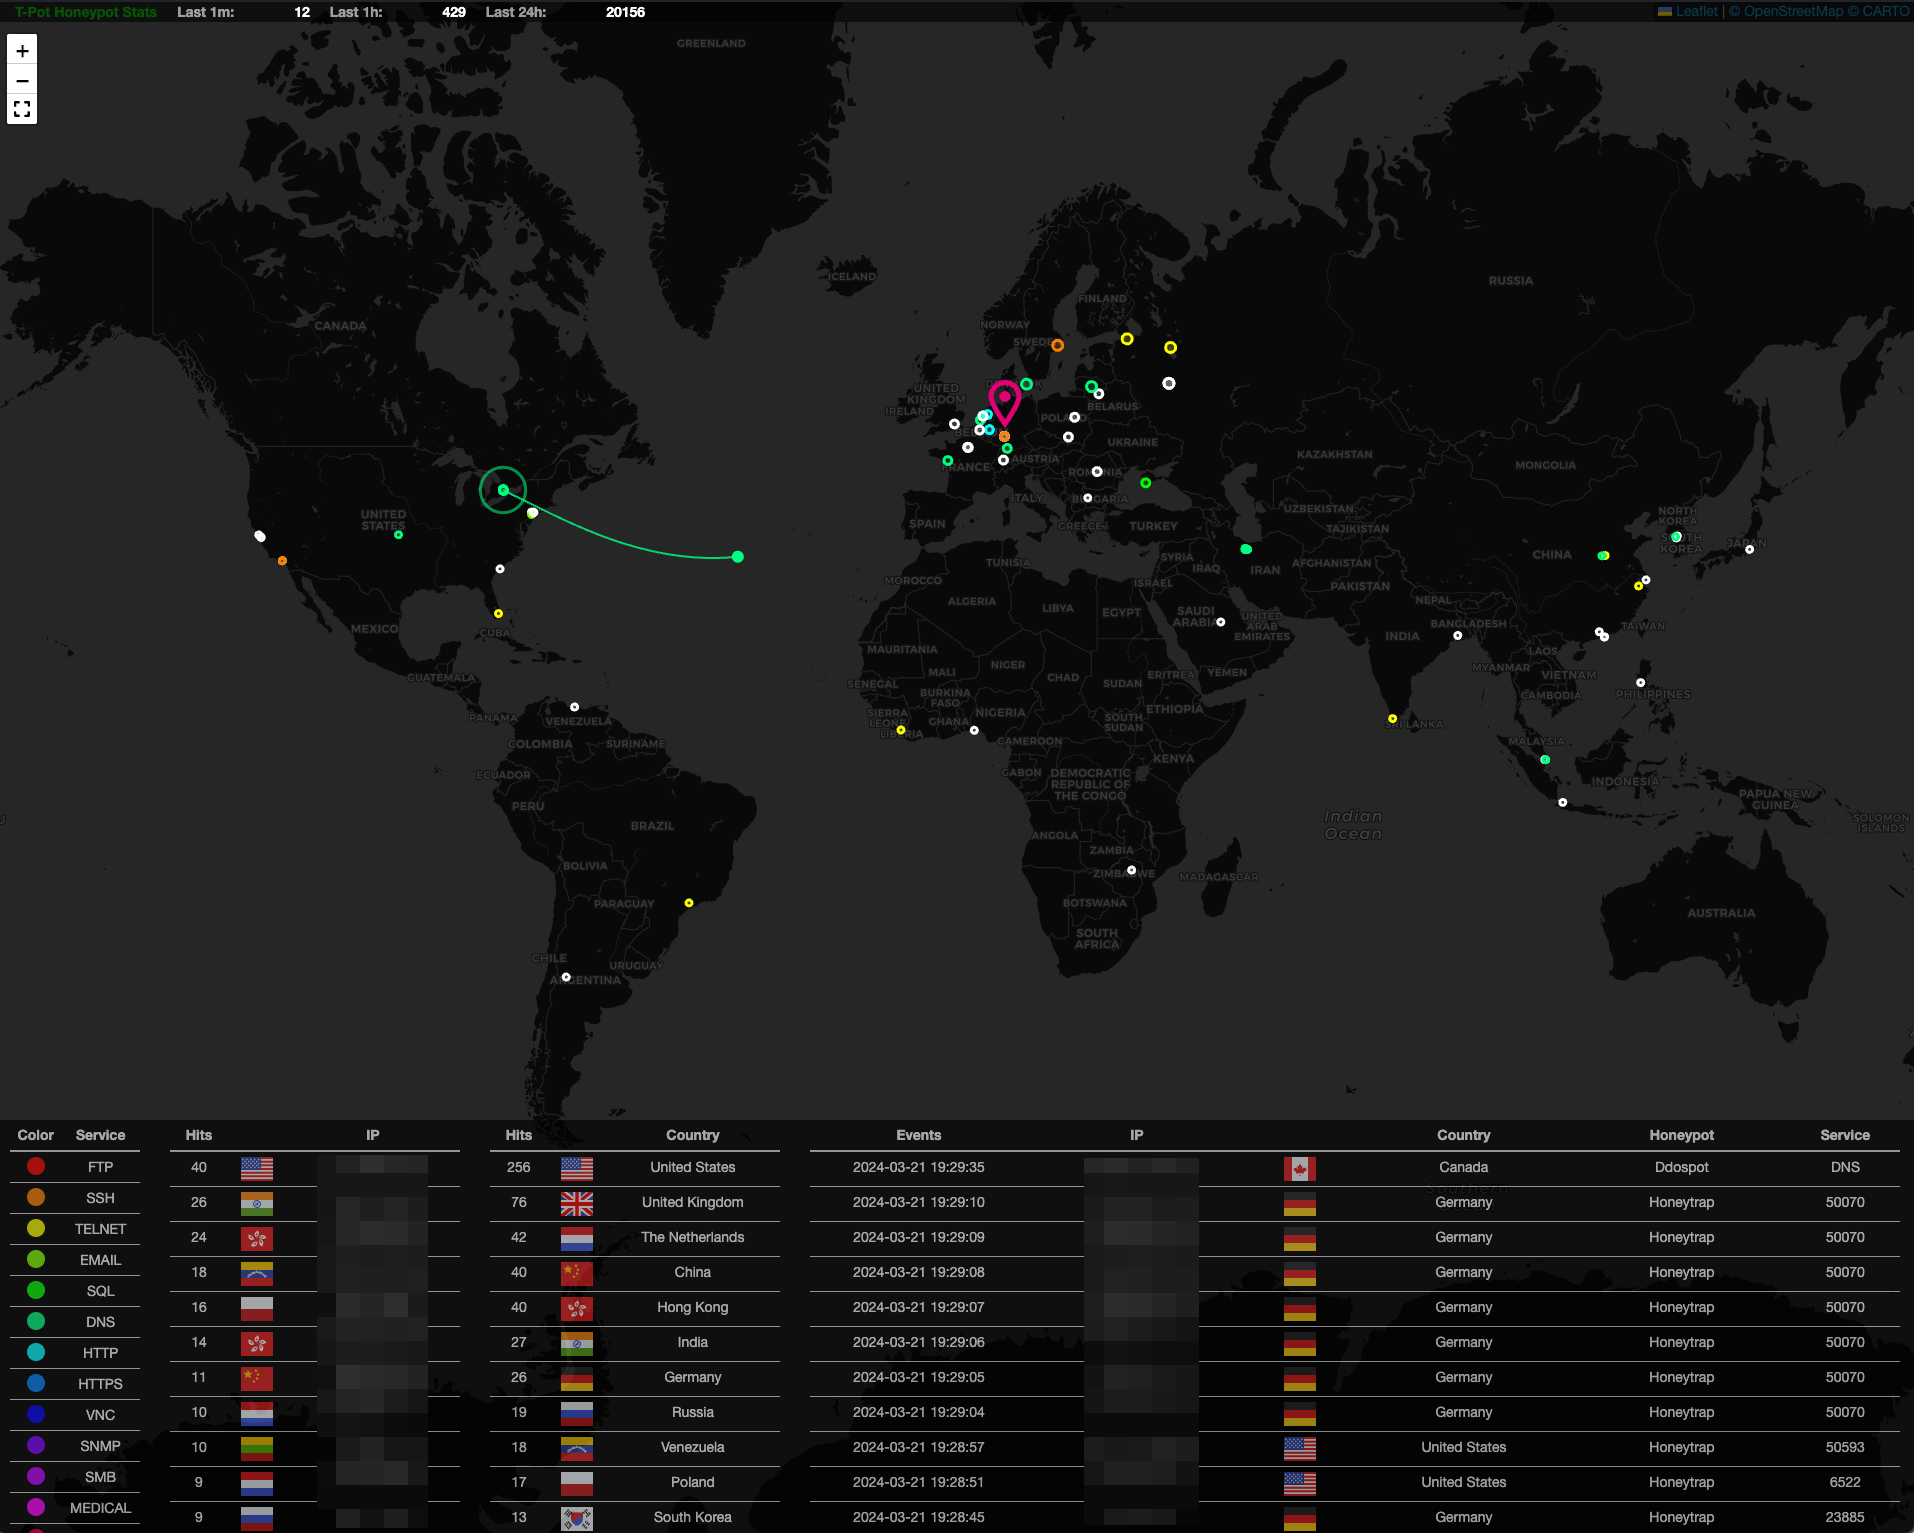
On the T-Pot Landing Page just click on Attack Map and you will be forwarded to the Attack Map. Since the Attack Map utilizes web sockets you may need to re-enter the <WEB_USER> credentials.
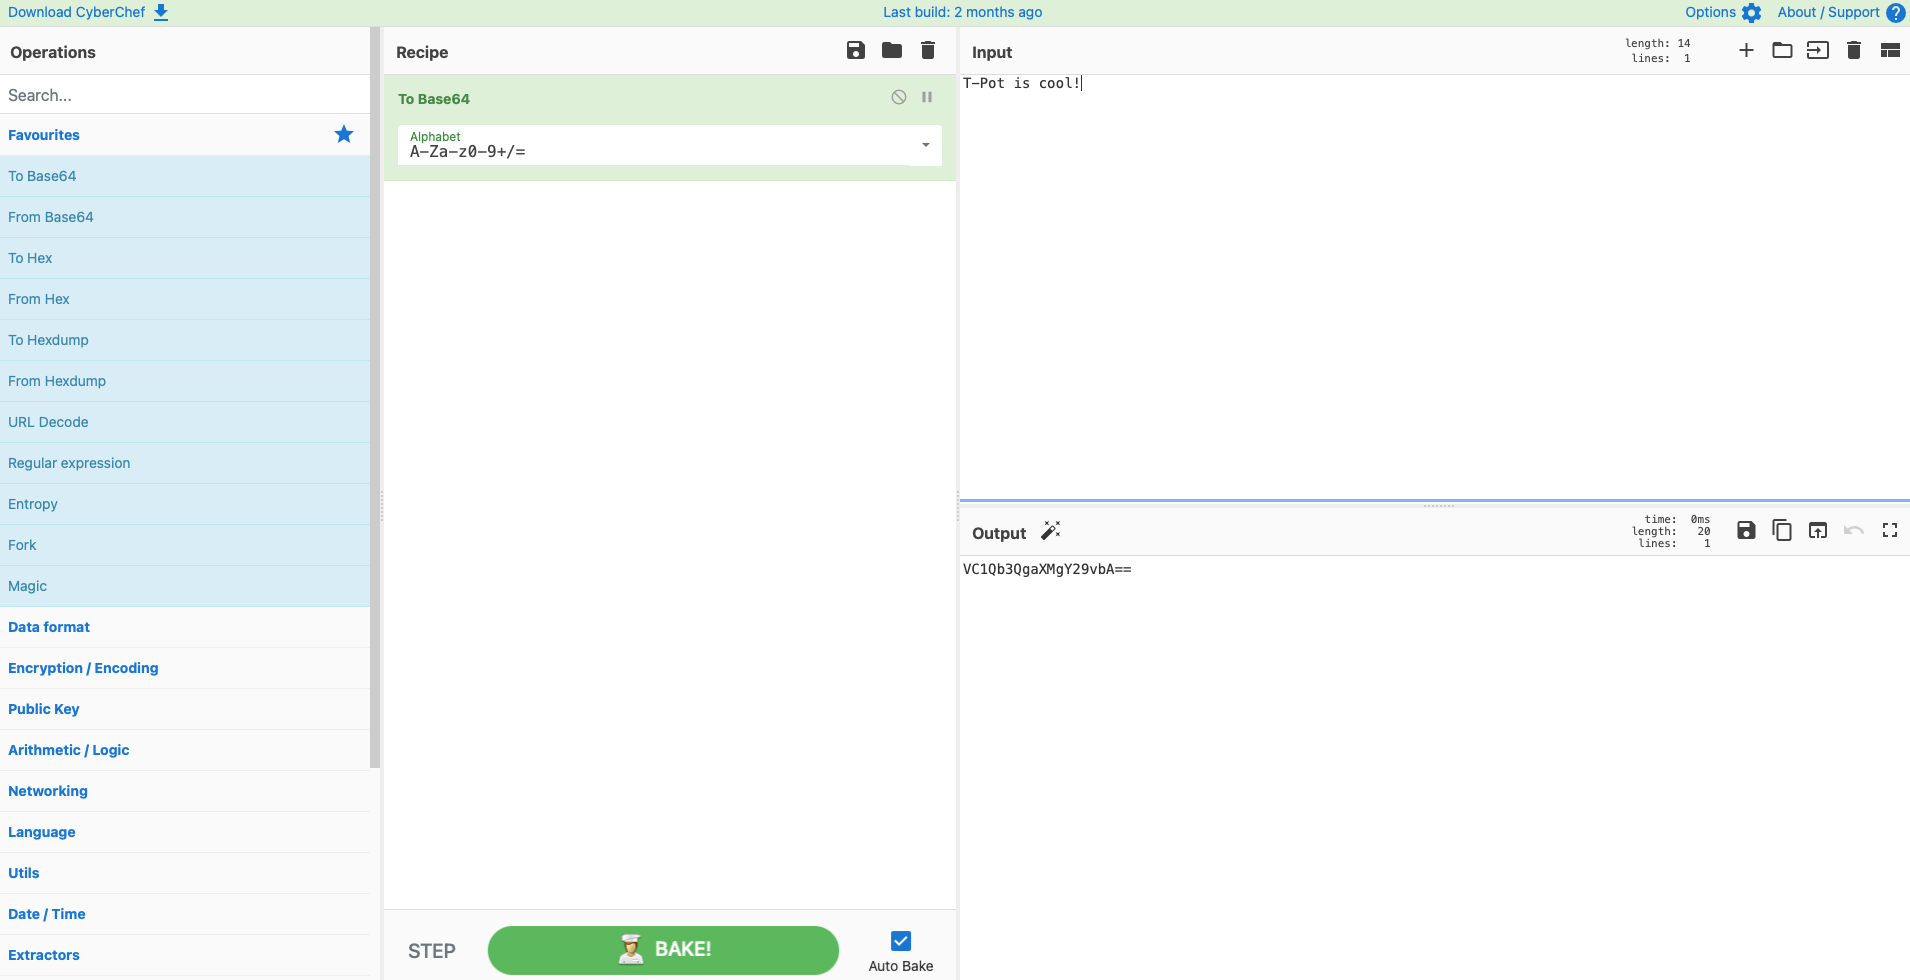
On the T-Pot Landing Page just click on Cyberchef and you will be forwarded to Cyberchef.
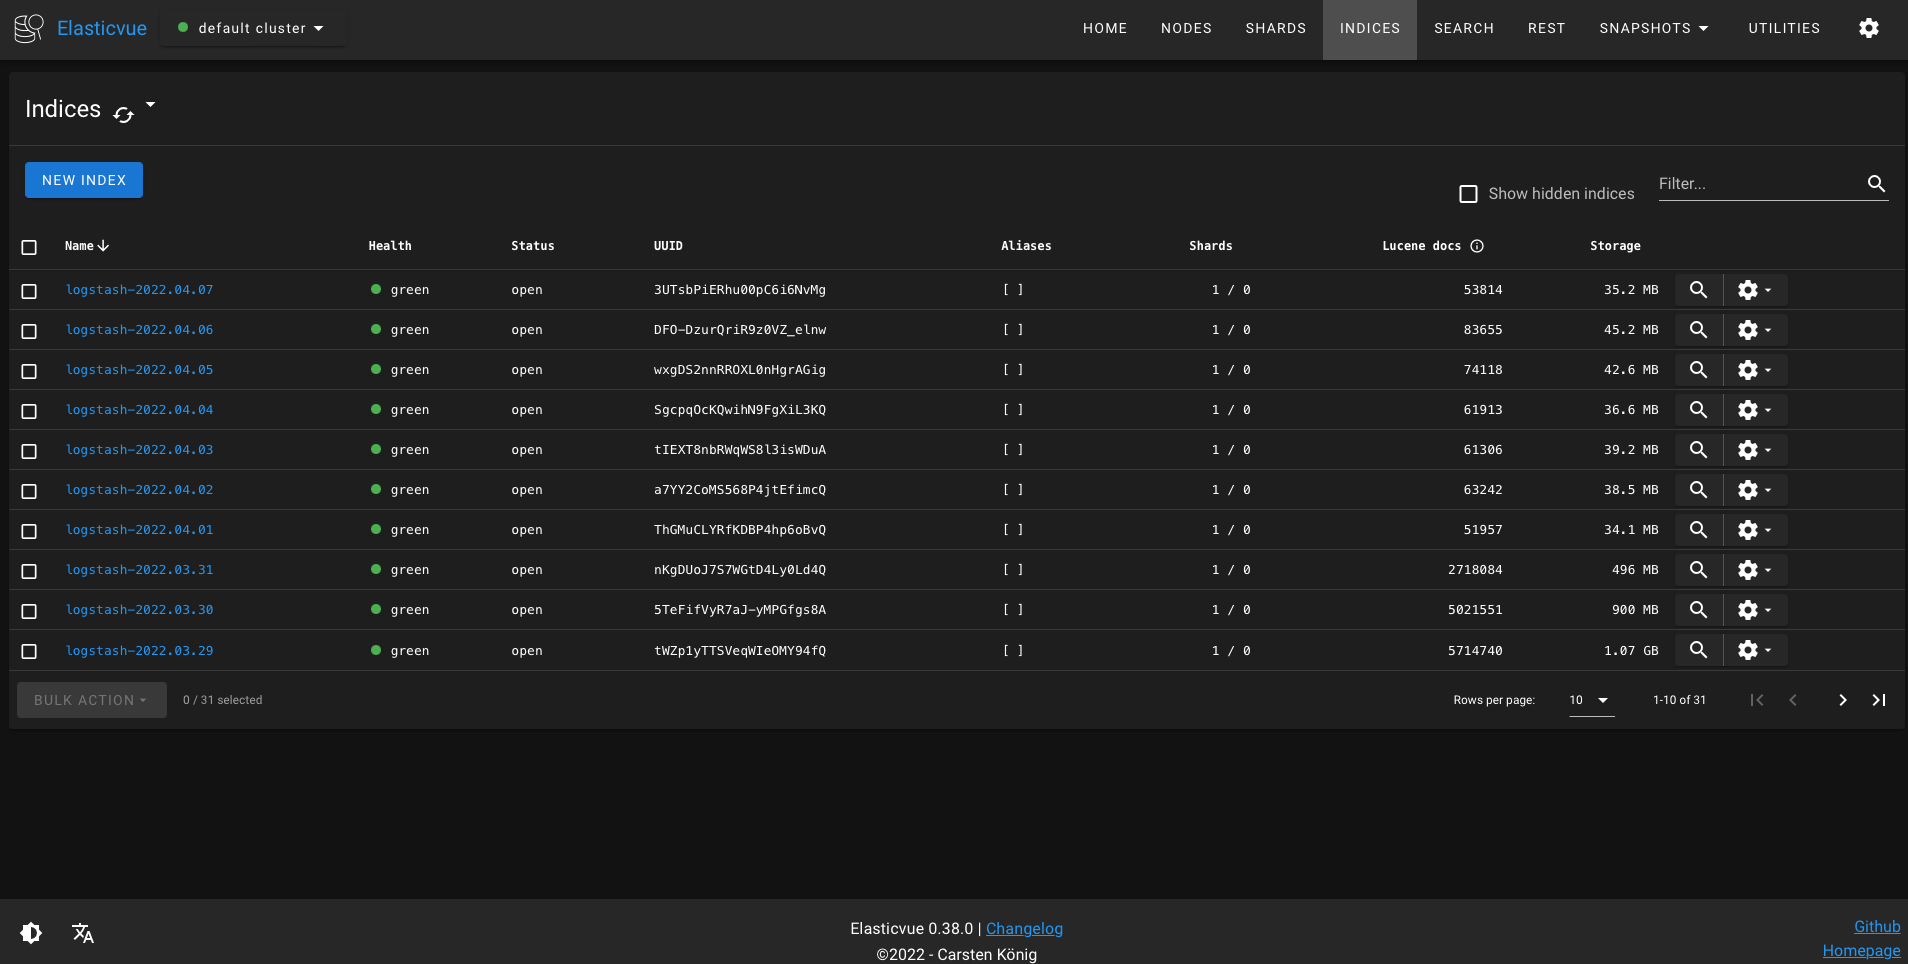
On the T-Pot Landing Page just click on Elasticvue and you will be forwarded to Elasticvue.
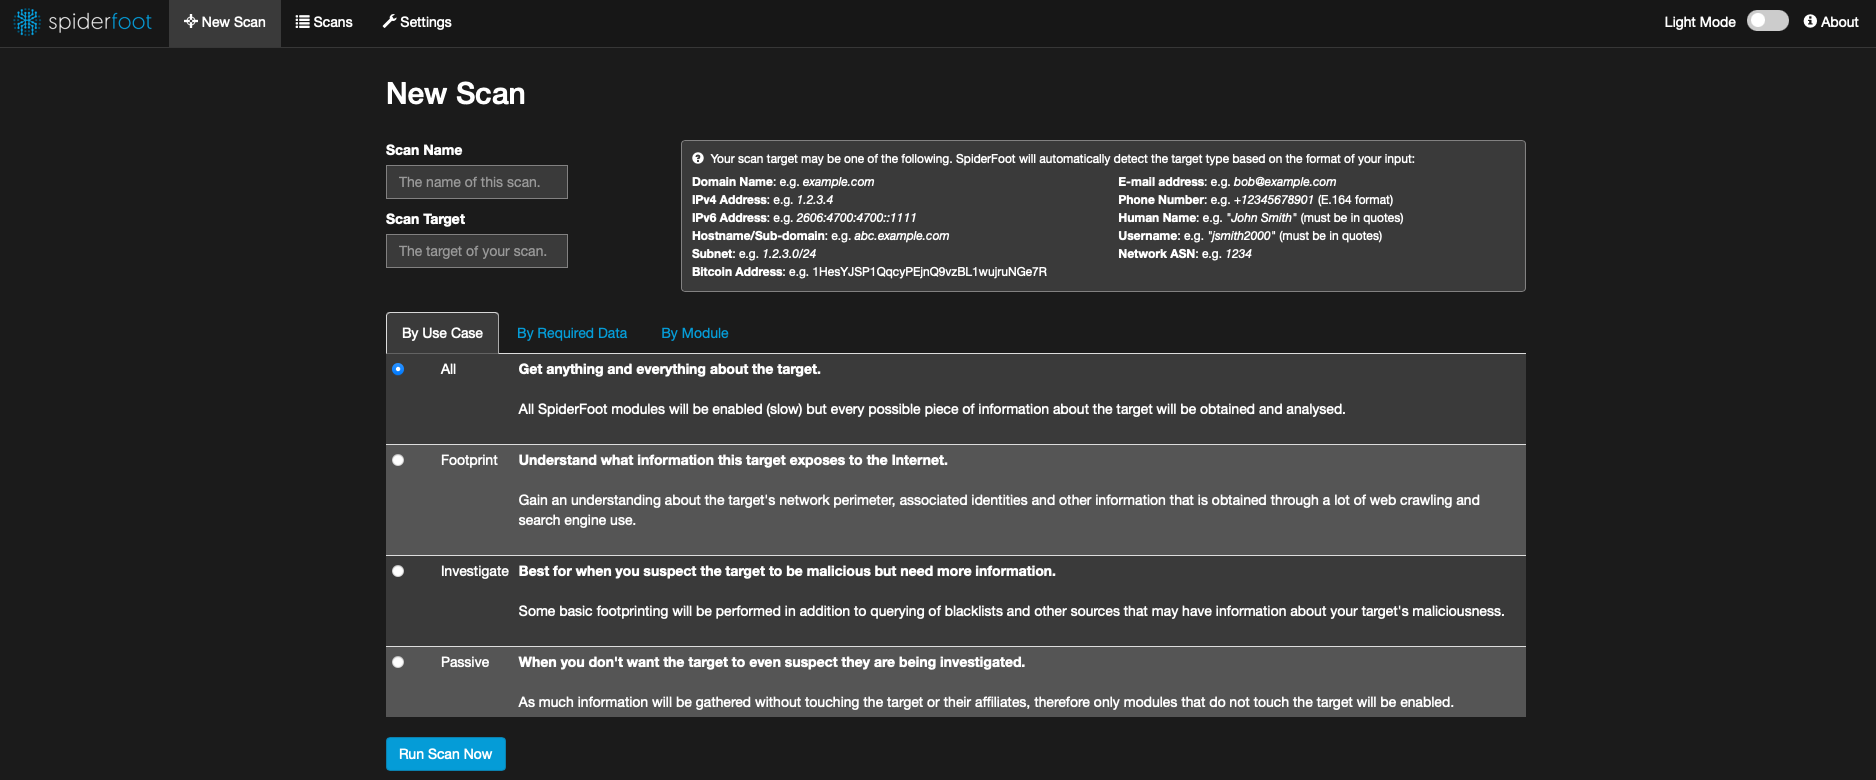
On the T-Pot Landing Page just click on Spiderfoot and you will be forwarded to Spiderfoot.
T-Pot offers a configuration file providing variables not only for the docker services (i.e. honeypots and tools) but also for the docker compose environment. The configuration file is hidden in ~/tpoce/.env. There is also an example file (env.example) which holds the default configuration.
Before the first start run ~/tpotce/genuser.sh or setup the WEB_USER manually as described here.
In ~/tpotce/compose you will find everything you need to adjust the T-Pot Standard / Hive installation:
customizer.py
llm.yml
mac_win.yml
mini.yml
mobile.yml
sensor.yml
standard.yml
tarpit.yml
tpot_services.yml
The .yml files are docker compose files, each representing a different set of honeypots and tools with tpot_services.yml being a template for customizer.py to create a customized docker compose file.
To activate a compose file follow these steps:
systemctl stop tpot.cp ~/tpotce/compose/<dockercompose.yml> ~/tpotce/docker-compose.yml.systemctl start tpot.To create your customized docker compose file:
cd ~/tpotce/compose.python3 customizer.py.docker-compose.yml. As some honeypots and services occupy the same ports it will check if any port conflicts are present and notify regarding the conflicting services. You then can resolve them manually by adjusting docker-compose-custom.yml or re-run the script.systemctl stop tpot.cp docker-compose-custom.yml ~/tpotce and cd ~/tpotce.docker-compose -f docker-compose-custom.yml up. In case of errors follow the Docker Compose Specification for mitigation. Most likely it is just a port conflict you can adjust by editing the docker compose file.CTRL-C to stop the containers and run docker-compose -f docker-compose-custom.yml down -v.mv ~/tpotce/docker-compose-custom.yml ~/tpotce/docker-compose.yml.systemctl start tpot.
T-Pot is designed to be low maintenance. Since almost everything is provided through docker images there is basically nothing you have to do but let it run. We will upgrade the docker images regularly to reduce the risks of compromise; however you should read this section closely.
Should an update fail, opening an issue or a discussion will help to improve things in the future, but the offered solution will always be to perform a fresh install as we simply cannot provide any support for lost data!
T-Pot security depends on the updates provided for the supported Linux distro images. Make sure to review the OS documentation and ensure updates are installed regularly by the OS. By default (~/tpotce/.env) TPOT_PULL_POLICY=always will ensure that at every T-Pot start docker will check for new docker images and download them before creating the containers.
T-Pot releases are offered through GitHub and can be pulled using ~/tpotce/update.sh.
If you made any relevant changes to the T-Pot config files make sure to create a backup first!
Updates may have unforeseen consequences. Create a backup of the machine or the files most valuable to your work!
The update script will ...
master by default~/tpot_backups/<date>_tpot_backup.tar before it touches anything~/tpotce to be in sync with that branch~/tpotce/.env) from that backup and carry its image tag
(TPOT_VERSION) forward to the one this release ships, so the new compose file does not ask for
images of the old version. A tag you pinned yourself - dev, a branch name - is left alone.TPOT_REPO from dtagdevsec to ghcr.io/telekom-security if it is still on that old
default, which avoids the Docker Hub rate limits. A registry
you set yourself is left alone..env now namesSENSOR, MINI, LLM, TARPIT, MOBILE) and restore it, using this release's ~/tpotce/compose/<edition>.yml so that new honeypots and changes of the release are included.docker-compose.yml in the backup archive. If you made changes to it (i.e.
removing the ewsposter section or a docker-compose.yml built with
~/tpotce/compose/customizer.py) you need to add them again - the run tells you how to compare
the two.The backup holds what git cannot bring back: ~/tpotce/.env, your docker-compose.yml, a patch of
your changes to tracked files, your untracked files, the commit to roll back to, and the files under
~/tpotce/data that exist nowhere else - the installation uuid, the nginx certificate your sensors
depend on, hive.crt, the ews configuration and the honeypot host keys. Everything else in
~/tpotce is tracked and comes back from git, and the honeypot data under ~/tpotce/data is never
touched by an update. That keeps the archive at roughly a megabyte, which is why it is not
compressed - on a Raspberry Pi compression would cost time for nothing. Add --full if you want
~/tpotce/data in there as well; be aware that on a busy hive this turns a megabyte into tens of
gigabytes.
Your own Kibana objects and the ILM policy live in Elasticsearch rather than in a file, so they are exported into the same archive before T-Pot is stopped. You no longer need to export them by hand ahead of an update.
Backups rotate: the last ten regular and the last two --full archives are kept, counted
separately, and the newest is never removed. Before writing, the script checks that the archive
still leaves 10% of the partition free - ~/tpot_backups usually sits on the same filesystem as
your honeypot data. If that does not work out it drops the oldest archives and degrades --full to
a regular backup; if even that does not fit it stops before touching anything, leaving T-Pot up and
running rather than filling the disk.
When update.sh finds a newer version of itself it pulls, restarts, and the new script finishes the
job. Scripts older than this release do not hand anything over when they restart, so the new script
starts from a checkout that has already been reset - your .env and your edition are gone by then,
and it will happily restore the upstream defaults instead. Fetch the current update.sh first and
run it with -b master, then the backup is taken before anything is reset and everything survives.
cd ~/tpotce
curl -fsSL -o update.sh https://raw.githubusercontent.com/telekom-security/tpotce/master/update.sh
chmod +x update.sh
./update.sh -y -b master
-b master is what makes this work, and switching the branch by hand beforehand is not an
alternative: .env is tracked, so git refuses to leave a branch while your configuration differs
from it. The script does the switch itself, after the backup has been written, and puts your
configuration back afterwards. It is also what keeps the update.sh you just fetched in place -
that file is tracked as well, so resetting the checkout discards it, and only a switch to master
brings the very same file back.
Without -b master the run stops after restoring your configuration and says so. It has to: your
checkout would still be on the older release, and finishing there would pull that release's images
and remove the ones your installation is running on.
This is only needed once, coming from a release that predates this behaviour. Afterwards a plain
./update.sh -y carries everything across on its own.
To update from a different branch or fork, i.e. to test changes before they are merged, see Testing a Branch.
~/tpotce/restore.sh puts a backup back.
restore.sh -l                     # list the backups and what they hold
restore.sh                        # restore from the newest one, asking per group
restore.sh -f <archive> -y        # restore everything from this archive, no questions
Without -y every group is offered separately, so you can bring back just the configuration
without touching anything else. The groups are the rollback of the git checkout, your changes to
tracked files, the configuration, your untracked files, the files under data/, and the Kibana
objects with the ILM policy.
T-Pot is stopped for the file part and started again for the Kibana import, because that one needs
a running instance. The files under data/ are restored with the owner and mode from the archive
(tpot:tpot, uid/gid 2000) - without those the containers will not start.
If you would rather do it by hand, the archive is a plain tar: tar tvf <archive> lists it,
MANIFEST says which edition and commit it came from, and rollback.txt holds the commit to go
back to with cd ~/tpotce && git reset --hard $(cat rollback.txt).
By default T-Pot will add a daily reboot including some cleaning up. You can adjust this line with sudo crontab -e
#Ansible: T-Pot Daily Reboot
42 2 * * * bash -c 'systemctl stop tpot.service && docker container prune -f; docker image prune -f; docker volume prune -f; /usr/sbin/shutdown -r +1 "T-Pot Daily Reboot"'
The following issues are known, simply follow the described steps to solve them.
Some time ago Docker introduced download rate limits. If you are frequently downloading Docker images via a single or shared IP, the IP address might have exhausted the Docker download rate limit. Login to your Docker account to extend the rate limit.
sudo su -
docker login
T-Pot is designed to only run on machines with a single NIC. T-Pot will try to grab the interface with the default route, however it is not guaranteed that this will always succeed. At best use T-Pot on machines with only a single NIC.
The update.sh shipped with 24.04.0 decides whether to restart itself by comparing its own file
against origin/master. That comparison only ever clears on master: on any other branch, and on a
detached HEAD after a git checkout <tag>, its update.sh differs from the one on master no
matter how often it pulls, so it keeps restarting itself and writes a backup on every pass. Current
versions restart on a checksum of their own file instead, stop on a detached HEAD before anything is
touched, and never restart into an older script.
Interrupt the loop with CTRL-C. Every pass resets the checkout before it restarts, so your .env
is back at the branch default by now, and the pass that still had your configuration is the
first one. Recover it before doing anything else:
ls -ltr ~/*_tpot_backup.tgz
tar xOf ~/<the oldest archive of this run>_tpot_backup.tgz .env > ~/tpotce/.env
grep -E "^(WEB_USER|TPOT_TYPE)=" ~/tpotce/.env
Those archive names carry the time down to the minute only, so a loop that stayed within one minute
wrote every pass to the same file and the last one won - if WEB_USER comes back empty, the login
has to be created again with ~/tpotce/genuser.sh. Then update with the current script, which stops
rather than loops:
curl -fsSL -o update.sh https://raw.githubusercontent.com/telekom-security/tpotce/master/update.sh
chmod +x update.sh
./update.sh -y -b master
The T-Pot service automatically starts and stops on each reboot (which occurs once on a daily basis as setup in sudo crontab -l during installation).
If you want to manually start the T-Pot service you can do so via systemctl start tpot and observe via dpsw the startup of the containers.
The T-Pot service automatically starts and stops on each reboot (which occurs once on a daily basis as setup in sudo crontab -l during installation).
If you want to manually stop the T-Pot service you can do so via systemctl stop tpot and observe via dpsw the shutdown of the containers.
All persistent log files from the honeypots, tools and T-Pot related services are stored in ~/tpotce/data. This includes collected artifacts which are not transmitted to the Elastic Stack.
All log data is stored in the T-Pot Data Folder and will be persisted for the number of cycles set for TPOT_PERSISTENCE_CYCLES=<1-999> in the T-Pot configuration file ~/tpotce/.env. It defaults to 30.
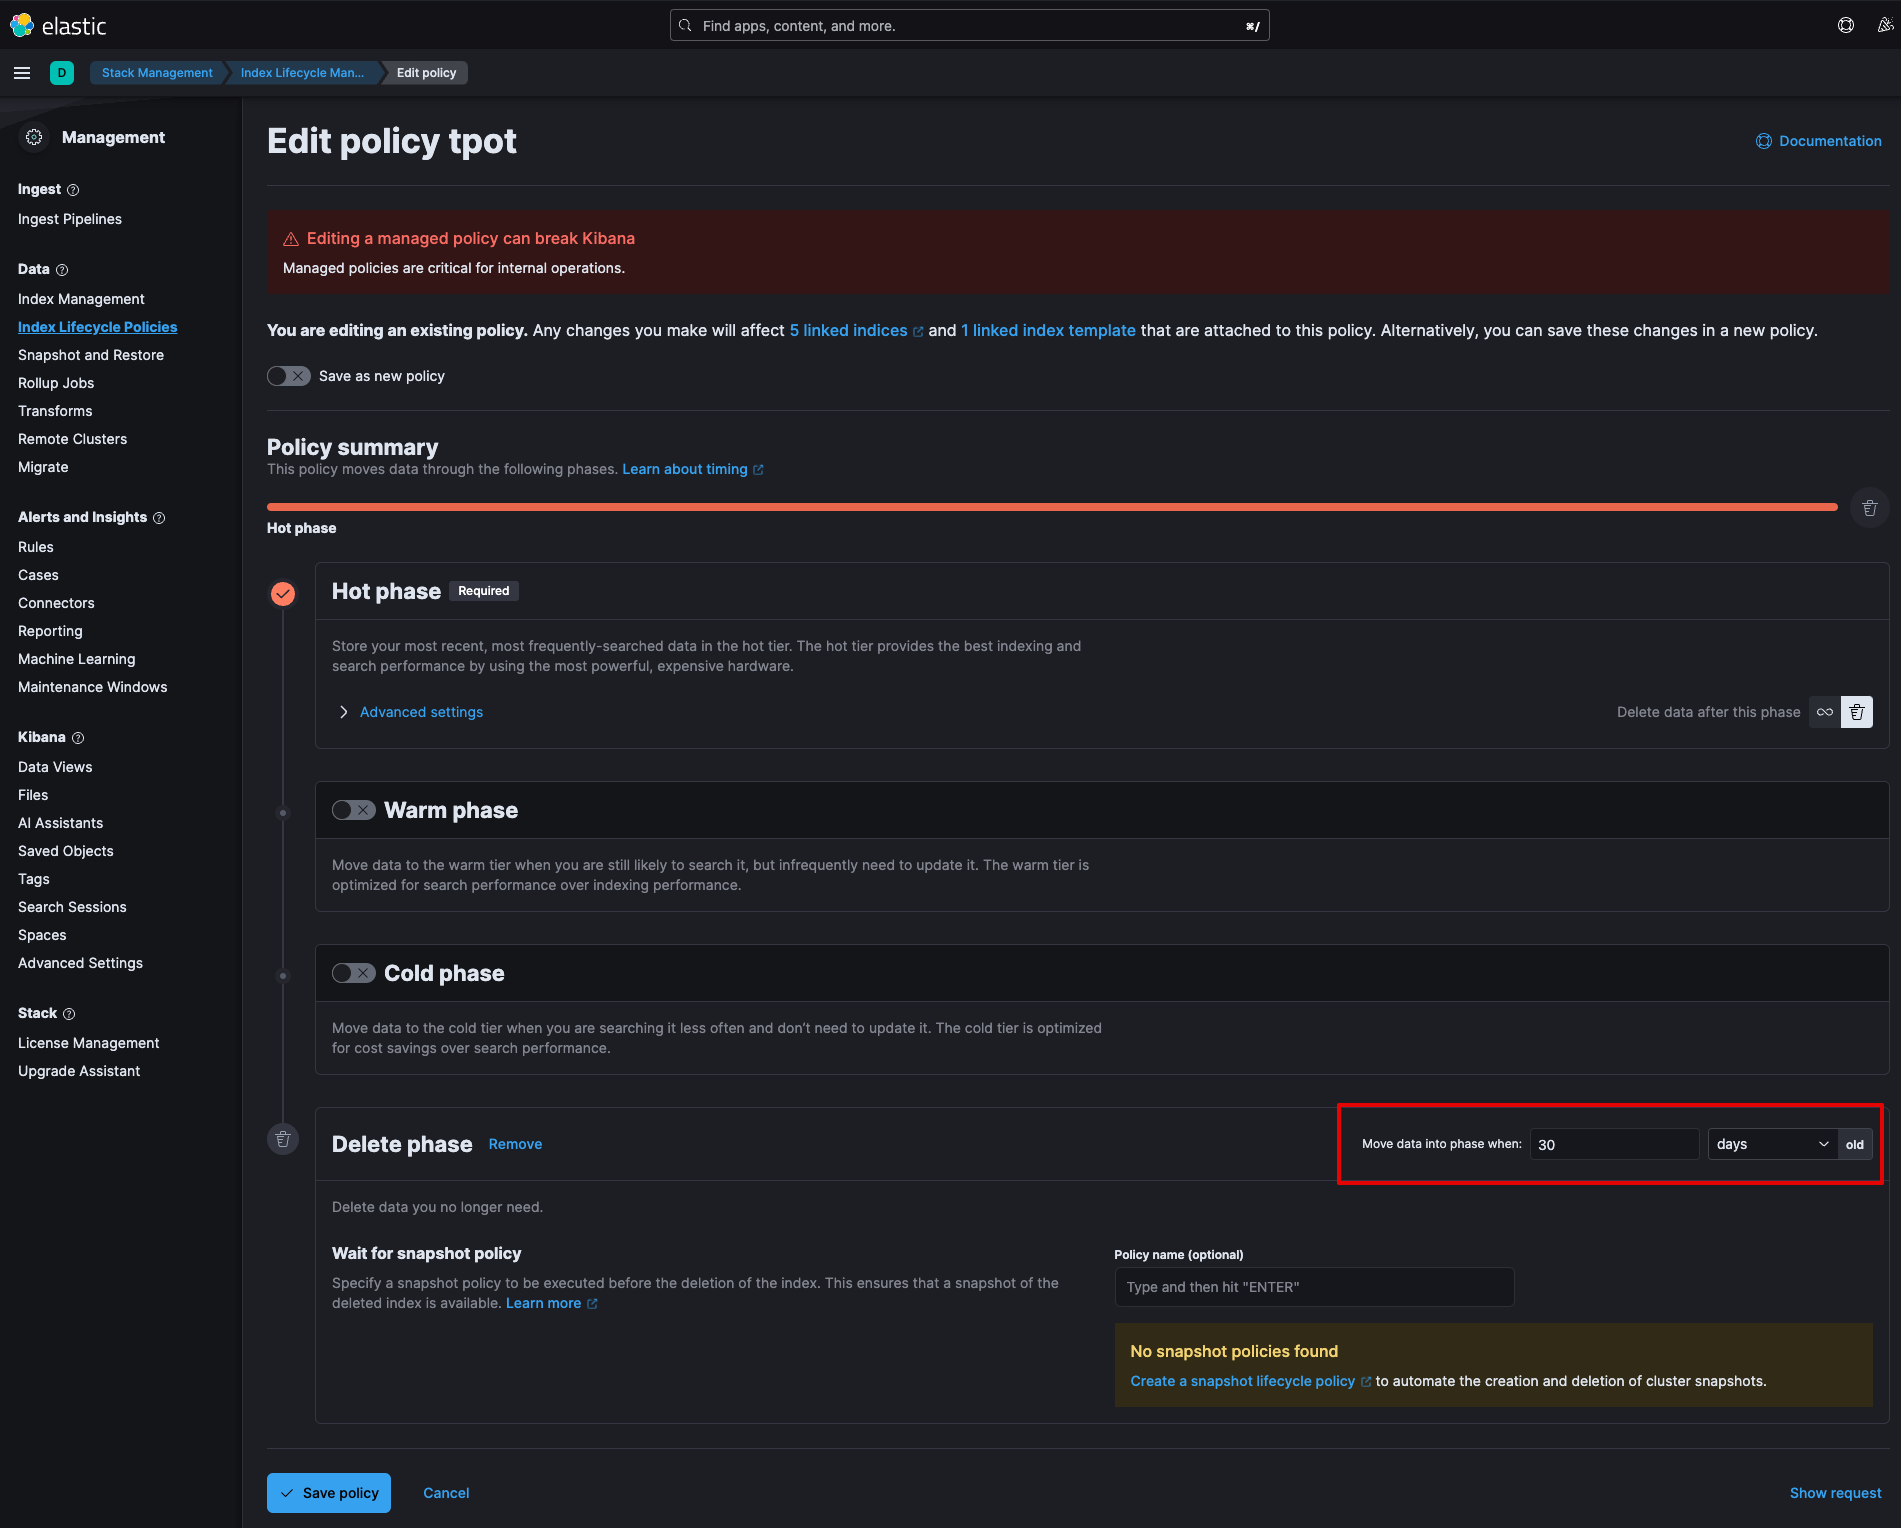
Elasticsearch indices are handled by the tpot Index Lifecycle Policy which can be adjusted directly in Kibana (make sure to "Include managed system policies").
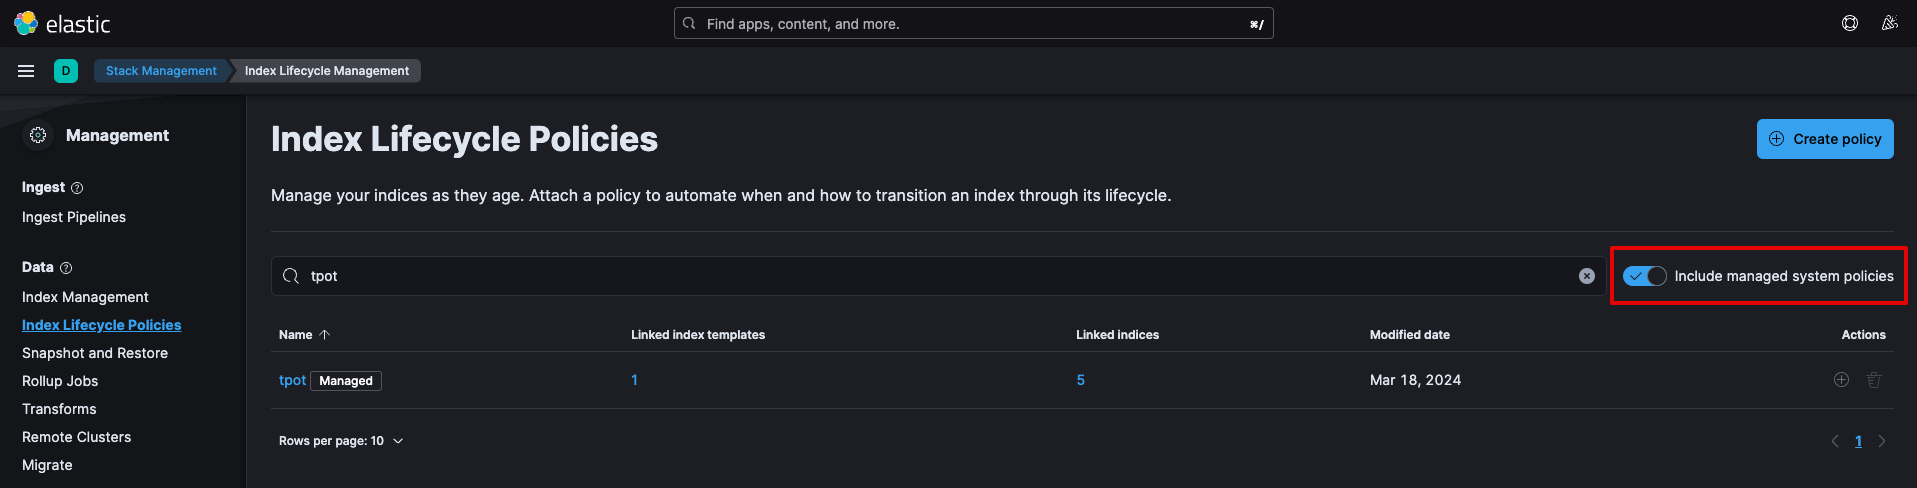
By default the tpot Index Lifecycle Policy keeps the indices for 30 days. This offers a good balance between storage and speed. However you may adjust the policy to your needs.
All log data stored in the T-Pot Data Folder (except for Elasticsearch indices, of course) can be erased by running clean.sh.
Sometimes things might break beyond repair and it has never been easier to reset a T-Pot to factory defaults (make sure to enter cd ~/tpotce).
systemctl stop tpot.~/tpotce/data folder to a safe place (this is optional, just in case).~/tpotce/data folder using sudo rm -rf ~/tpotce/data.cd ~/tpotce/
git reset --hard
~/tpotce/install.sh.
You can show all T-Pot relevant containers by running dps or dpsw [interval]. The interval (s) will re-run dps periodically. Use dim to show locally available Docker images including the CREATED column.
Blackhole will run T-Pot in kind of a stealth mode manner without permanent visits of publicly known scanners and thus reducing the possibility of being exposed. While this is of course always a cat and mouse game, the blackhole feature null routes all requests from known mass scanners while still catching the events through Suricata.
The feature is activated by setting TPOT_BLACKHOLE=ENABLED in ~/tpotce/.env, then run systemctl stop tpot and systemctl start tpot or sudo reboot.
Enabling this feature will drastically reduce attackers visibility and consequently result in less activity. However as already mentioned it is neither a guarantee for being completely stealth nor will it prevent fingerprinting of some honeypot services.
Nginx (T-Pot WebUI) allows you to add as many <WEB_USER> accounts as you want (according to the User Types).
To add a new user run ~/tpotce/genuser.sh.
To remove users open ~/tpotce/.env, locate WEB_USER and remove the corresponding base64 string (to decode: echo <base64_string> | base64 -d, or open CyberChef and load "From Base64" recipe).
For the changes to take effect you need to restart T-Pot using systemctl stop tpot and systemctl start tpot or sudo reboot.
Some T-Pot updates will require you to update the Kibana objects. Either to support new honeypots or to improve existing dashboards or visualizations. Make sure to export first so you do not loose any of your adjustments.
Generally T-Pot is offered as is without any commitment regarding support. Issues and discussions can be opened, but be prepared to include basic necessary info, so the community is able to help.
dpsdimhtop, docker statssystemctl stop tpot
grc netstat -tulpen
mi ~/tpotce/docker-compose.yml
docker-compose -f ~/tpotce/docker-compose.yml up
CTRL+C
docker-compose -f ~/tpotce/docker-compose.yml down -v
docker logs -f <container_name>tpotinit log: cat ~/tpotce/data/tpotinit.log
The Elastic Stack is hungry for RAM, specifically logstash and elasticsearch. If the Elastic Stack is unavailable, does not receive any logs or simply keeps crashing it is most likely a RAM or storage issue.
While T-Pot keeps trying to restart the services / containers run docker logs -f <container_name> (either logstash or elasticsearch) and check if there are any warnings or failures involving RAM.
Storage failures can be identified easier via htop.
T-Pot is provided as is open source without any commitment regarding support (see the disclaimer).
If you are a security researcher and want to responsibly report an issue please get in touch with our CERT.
Please report issues (errors) on our GitHub Issues, but troubleshoot first. Issues not providing information to address the error will be closed or converted into discussions.
Use the search function first, it is possible a similar issue has been addressed or discussed already, with the solution just a search away.
General questions, ideas, show & tell, etc. can be addressed on our GitHub Discussions.
Use the search function, it is possible a similar discussion has been opened already, with an answer just a search away.
The software that T-Pot is built on uses the following licenses.
GPLv2:
conpot,
galah,
dionaea,
honeytrap,
suricata
GPLv3:
adbhoney,
elasticpot,
ewsposter,
log4pot,
fatt,
heralding,
ipphoney,
miniprint,
redishoneypot,
rdphoneypot,
sentrypeer,
snare,
tanner
Apache 2 License:
cyberchef,
dicompot,
elasticsearch,
go-pot,
h0neytr4p,
logstash,
kibana,
docker
MIT license:
autoheal,
beelzebub,
ciscoasa,
ddospot,
elasticvue,
glutton,
hellpot,
honeyaml,
maltrail
Unlicense:
endlessh
Other:
citrixhoneypot,
cowrie,
mailoney,
Elastic License,
Wordpot
AGPL-3.0:
honeypots
Public Domain (CC):
Harvard Dataverse
Without open source and the development community we are proud to be a part of, T-Pot would not have been possible! Our thanks are extended but not limited to the following people and organizations:
One of the greatest feedback we have gotten so far is by one of the Conpot developers:
"[...] I highly recommend T-Pot which is ... it's not exactly a swiss army knife .. it's more like a swiss army soldier, equipped with a swiss army knife. Inside a tank. A swiss tank. [...]"
And from @robcowart (creator of ElastiFlow):
"#TPot is one of the most well put together turnkey honeypot solutions. It is a must-have for anyone wanting to analyze and understand the behavior of malicious actors and the threat they pose to your organization."
(top 24 of 33)
3,475 followers · starred Feb 2026
727 followers · starred Dec 2023
158 followers · starred Mar 2022
308 followers · starred Oct 2024
🍯 T-Pot - The All In One Multi Honeypot Platform 🐝
Shell
9,574
2,234 commits
updated Oct 9, 2026
T-Pot is the all in one, optionally distributed, multiarch (amd64, arm64) honeypot plattform, supporting 20+ honeypots and countless visualization options using the Elastic Stack, animated live attack maps and lots of security tools to further improve the deception experience.
ssh required)curl: $ sudo [apt, dnf, zypper] install curl if not installed already$HOME:env bash -c "$(curl -sL https://github.com/telekom-security/tpotce/raw/master/install.sh)"
~/tpotce/docker-compose.yml) by removing the ewsposter section. But in this case sharing really is caring!
T-Pot's main components have been moved into the tpotinit Docker image allowing T-Pot to now support multiple Linux distributions, even macOS and Windows (although both limited to the feature set of Docker Desktop). T-Pot uses docker and docker compose to reach its goal of running as many honeypots and tools as possible simultaneously and thus utilizing the host's hardware to its maximum.
Alongside the following tools:
... to give you the best out-of-the-box experience possible and an easy-to-use multi-honeypot system.
The source code and configuration files are fully stored in the T-Pot GitHub repository. The docker images are built and preconfigured for the T-Pot environment.
The individual Dockerfiles and configurations are located in the docker folder.
T-Pot offers a number of services which are basically divided into five groups:
docker-compose.yml.During the installation and during the usage of T-Pot there are two different types of accounts you will be working with. Make sure you know the differences of the different account types, since it is by far the most common reason for authentication errors.
| Service | Account Type | Username / Group | Description |
|---|---|---|---|
| SSH | OS | <OS_USERNAME> | The user you chose during the installation of the OS. |
| Nginx | BasicAuth | <WEB_USER> | <web_user> you chose during the installation of T-Pot. |
| CyberChef | BasicAuth | <WEB_USER> | <web_user> you chose during the installation of T-Pot. |
| Elasticvue | BasicAuth | <WEB_USER> | <web_user> you chose during the installation of T-Pot. |
| Geoip Attack Map | BasicAuth | <WEB_USER> | <web_user> you chose during the installation of T-Pot. |
| Spiderfoot | BasicAuth | <WEB_USER> | <web_user> you chose during the installation of T-Pot. |
| T-Pot | OS | tpot | tpot this user / group is always reserved by the T-Pot services. |
| T-Pot Logs | BasicAuth | <LS_WEB_USER> | LS_WEB_USER are automatically managed. |
Depending on the supported Linux distro images, hive / sensor, installing on real hardware, in a virtual machine or other environments there are different kind of requirements to be met regarding OS, RAM, storage and network for a successful installation of T-Pot (you can always adjust ~/tpotce/docker-compose.yml and ~/tpotce/.envto your needs to overcome these requirements).
| T-Pot Type | RAM | Storage | Description |
|---|---|---|---|
| Hive | 16GB | 256GB SSD | As a rule of thumb, the more honeypots, sensors & data, the more RAM and storage is needed. |
| Sensor | 8GB | 128GB SSD | Since honeypot logs are persisted (~/tpotce/data) for 30 days, storage depends on attack volume. |
T-Pot does require ...
All of the supported Linux distro images will run in a VM which means T-Pot will just run fine. The following were tested / reported to work:
Some configuration / setup hints:
Display to Console Only during initial installation of the OS and afterwards back to Full Graphics.T-Pot is only limited by the hardware support of the supported Linux distro images. It is recommended to check the HCL (hardware compatibility list) and test the supported distros with T-Pot before investing in dedicated hardware.
T-Pot is tested on and known to run on ...
Some users report working installations on other clouds and hosters, i.e. Azure and GCP. Hardware requirements may be different. If you are unsure you should research issues and discussions and run some functional tests. With T-Pot 24.04.0 and forward we made sure to remove settings that were known to interfere with cloud based installations.
Besides the ports generally needed by the OS, i.e. obtaining a DHCP lease, DNS, etc. T-Pot will require the following ports for incoming / outgoing connections. Review the T-Pot Architecture for a visual representation. Also some ports will show up as duplicates, which is fine since used in different editions.
| Port | Protocol | Direction | Description |
|---|---|---|---|
| 80, 443 | tcp | outgoing | T-Pot Management: Install, Updates, Logs (i.e. OS, GitHub, DockerHub, Sicherheitstacho, etc. |
| 11434 | tcp | outgoing | LLM based honeypots: Access your Ollama installation |
| 64294 | tcp | incoming | T-Pot Management: Sensor data transmission to hive (through NGINX reverse proxy) to 127.0.0.1:64305 |
| 64295 | tcp | incoming | T-Pot Management: Access to SSH |
| 64297 | tcp | incoming | T-Pot Management Access to NGINX reverse proxy |
| 5555 | tcp | incoming | Honeypot: ADBHoney |
| 22 | tcp | incoming | Honeypot: Beelzebub (LLM required) |
| 5000 | udp | incoming | Honeypot: CiscoASA |
| 8443 | tcp | incoming | Honeypot: CiscoASA |
| 443 | tcp | incoming | Honeypot: CitrixHoneypot |
| 80, 102, 502, 1025, 2404, 10001, 44818, 47808, 50100 | tcp | incoming | Honeypot: Conpot |
| 161, 623 | udp | incoming | Honeypot: Conpot |
| 22, 23 | tcp | incoming | Honeypot: Cowrie |
| 19, 53, 123, 1900 | udp | incoming | Honeypot: Ddospot |
| 11112 | tcp | incoming | Honeypot: Dicompot |
| 21, 42, 135, 443, 445, 1433, 1723, 1883, 3306, 8081 | tcp | incoming | Honeypot: Dionaea |
| 69 | udp | incoming | Honeypot: Dionaea |
| 9200 | tcp | incoming | Honeypot: Elasticpot |
| 22 | tcp | incoming | Honeypot: Endlessh |
| 80, 443, 8080, 8443 | tcp | incoming | Honeypot: Galah (LLM required) |
| 8080 | tcp | incoming | Honeypot: Go-pot |
| 80, 443 | tcp | incoming | Honeypot: H0neytr4p |
| 21, 22, 23, 25, 80, 110, 143, 443, 993, 995, 1080, 5432, 5900 | tcp | incoming | Honeypot: Heralding |
| 3000 | tcp | incoming | Honeypot: Honeyaml |
| 21, 22, 23, 25, 80, 110, 143, 389, 443, 445, 631, 1080, 1433, 1521, 3306, 3389, 5060, 5432, 5900, 6379, 6667, 8080, 9100, 9200, 11211 | tcp | incoming | Honeypot: qHoneypots |
| 53, 123, 161, 5060 | udp | incoming | Honeypot: qHoneypots |
| 631 | tcp | incoming | Honeypot: IPPHoney |
| 80, 443, 8080, 9200, 25565 | tcp | incoming | Honeypot: Log4Pot |
| 25 | tcp | incoming | Honeypot: Mailoney |
| 2575 | tcp | incoming | Honeypot: Medpot |
| 9100 | tcp | incoming | Honeypot: Miniprint |
| 6379 | tcp | incoming | Honeypot: Redishoneypot |
| 3389 | tcp | incoming | Honeypot: RDPHoneypot |
| 5060 | tcp/udp | incoming | Honeypot: SentryPeer |
| 80 | tcp | incoming | Honeypot: Snare (Tanner) |
| 8090 | tcp | incoming | Honeypot: Wordpot |
Ports and availability of SaaS services may vary based on your geographical location.
For some honeypots to reach full functionality (i.e. Cowrie or Log4Pot) outgoing connections are necessary as well, in order for them to download the attacker's malware. Please see the individual honeypot's documentation to learn more by following the links to their repositories.
We think LLM-Based Honeypots mark the beginning of a game change for the deception / honeypot field. Consequently, starting with the release of T-Pot 24.04.1, two LLM-based honeypots, Beelzebub and Galah, have been introduced. These honeypots require an installation of Ollama, which needs to be configured in the T-Pot configuration file. You can also adjust the settings in this file for ChatGPT support, but note that changes will also be required in the docker compose file (~/tpotce/compose/llm.yml) to accommodate these adjustments.
Follow the links in the Honeypots and Tools section to find out more about Beelzebub and Galah.
🚨 CPU-based usage is not recommended, not even for testing.
To set up and run Ollama, refer to the Ollama GitHub repository for instructions. For entry-level or testing purposes, results can be achieved using a Nvidia RTX 4060 Ti 16GB or equivalent (AMD's ROCm is also supported by Ollama), with models like openchat and Llama3. As a general rule with LLM-based systems, the better and more hardware you use, the faster and more accurate the results will be, especially when tasks are offloaded to multiple GPUs and larger models.
ChatGPT support for these honeypots will remain untested in relation to T-Pot.
It is recommended to get yourself familiar with how T-Pot and the honeypots work before you start exposing towards the internet. For a quickstart run a T-Pot installation in a virtual machine.
Once you are familiar with how things work you should choose a network you suspect intruders in or from (i.e. the internet). Otherwise T-Pot will most likely not capture any attacks (unless you want to prove a point)! For starters it is recommended to put T-Pot in an unfiltered zone, where all TCP and UDP traffic is forwarded to T-Pot's network interface. To avoid probing for T-Pot's management ports you should put T-Pot behind a firewall and forward all TCP / UDP traffic in the port range of 1-64000 to T-Pot while allowing access to ports > 64000 only from trusted IPs and / or only expose the ports relevant to your use-case. If you wish to catch malware traffic on unknown ports you should not limit the ports you forward since glutton and honeytrap dynamically bind any TCP port that is not occupied by other honeypot daemons and thus give you a better representation of the risks your setup is exposed to.
Download one of the supported Linux distro images, follow the TL;DR instructions or git clone the T-Pot repository and run the installer ~/tpotce/install.sh. Running T-Pot on top of a running and supported Linux system is possible, but a clean installation is recommended to avoid port conflicts with running services. The T-Pot installer will require direct access to the internet as described here.
Steps to Follow:
| Distribution Name | arm64 |
|---|---|
| Raspberry Pi OS (64Bit, Lite) | download |
$ git clone https://github.com/telekom-security/tpotce or follow the TL;DR and skip this section.$ cd tpotce$ ./install.sh:
tcp/64295sudo)dps, dpsw and dim aliases for formatted container and image overviewsla, ll and ls aliases (for exa, a improved ls command)mi (for micro, a great alternative to vi and / or nano)tpot.service to /etc/systemd/system so T-Pot can automatically start and stopsudo or root) password at least once$ sudo rebootOn Ubuntu 26.04 sudo is sudo-rs, which formats its password prompt differently. Ansible does not recognise that prompt and privilege escalation times out, a fix exists upstream but is not released yet. The installer detects this and runs Ansible against the traditional sudo that Ubuntu still ships as /usr/bin/sudo.ws - nothing to do, it says so when it happens. If you would rather have it system wide, switch the alternative: $ sudo update-alternatives --set sudo /usr/bin/sudo.ws.
The installer can run without any interaction, i.e. for automated tests or cloud provisioning:
./install.sh -s -t <type> [-u <webuser>] [-p <password>]
| Option | Description |
|---|---|
-s | Skip the confirmation prompt and every following question |
-t | Installation type: h hive, s sensor, l llm, i mini, m mobile, t tarpit |
-u | Web user name, required for h, l, i and t |
-p | Web user password, required for h, l, i and t |
⚠️ -s requires passwordless sudo for the user running the installer. Ansible would otherwise ask for the BECOME password and the run would stall, so the installer stops right away and tells you so. Grant it before you start:
echo "$(whoami) ALL=(ALL) NOPASSWD:ALL" | sudo tee /etc/sudoers.d/$(whoami)
sudo chmod 440 /etc/sudoers.d/$(whoami)
Remove /etc/sudoers.d/<user> after the installation if you do not want to keep it. On Debian without sudo installed the installer creates this rule itself, because it has to add sudo anyway - it says so when it does.
By default T-Pot installs from master. To test changes to the installer itself, the installer, the Ansible playbook and the T-Pot repository can be taken from any branch, tag or commit - and from a fork:
# from a local clone, the checked out branch is used automatically
git clone -b my-feature https://github.com/telekom-security/tpotce ~/tpotce
~/tpotce/install.sh

# explicitly, works the same for an unattended run
./install.sh -b my-feature -r https://github.com/someuser/tpotce -s -t h -u user -p pass

# as environment variables, i.e. for the one-liner or cloud provisioning
TPOT_BRANCH=my-feature env bash -c "$(curl -sL https://github.com/telekom-security/tpotce/raw/my-feature/install.sh)"
| Option | Environment | Description |
|---|---|---|
-b | TPOT_BRANCH | Branch, tag or commit to install from |
-r | TPOT_REPO_URL | Repository to install from, https URL |
The installer takes the first of these it finds: the options, the environment variables, the branch and origin of the local clone it runs from, and finally master of https://github.com/telekom-security/tpotce. It prints what it settled on before it changes anything. Two things to keep in mind:
install.sh from and in TPOT_BRANCH - they have to match, the script cannot tell where it was downloaded from.~/tpotce is always used as it is, so the installer stops if it is on a different repository or branch than the one requested. Remove it (sudo rm -rf ~/tpotce) and run the installer again.update.sh takes the same two options, so an existing installation can be moved to another branch or fork to test the update procedure itself:
# update an existing installation from a branch, -y is still required
~/tpotce/update.sh -y -b my-feature

# the same from a fork, this replaces the URL of 'origin' in ~/tpotce
~/tpotce/update.sh -y -b my-feature -r https://github.com/someuser/tpotce

# back to the released version
~/tpotce/update.sh -y -b master
The branch is checked out for good, so every following update.sh -y keeps updating from it. Here -b names a branch, not a tag or commit, and there are two more differences to the installer:
-b and -r nothing changes, the branch and origin of ~/tpotce are kept - a plain update.sh -y behaves as it always has.update.sh only warns about it as long as -b or -r is given. On such an installation keep passing the option, a plain update.sh -y refuses to update a version it does not know.
Sometimes it is just nice if you can spin up a T-Pot instance on macOS or Windows, i.e. for development, testing or just the fun of it. As Docker Desktop is rather limited not all honeypot types or T-Pot features are supported. Also remember, by default the macOS and Windows firewall are blocking access from remote, so testing is limited to the host. For production it is recommended to run T-Pot on Linux.
To get things up and running just follow these steps:
git clone https://github.com/telekom-security/tpotce (in Windows make sure the code is checked out with LF instead of CRLF!)cd ~/tpotcecp compose/mac_win.yml ./docker-compose.ymlWEB_USER by running ~/tpotce/genuser.sh (macOS) or ~/tpotce/genuserwin.ps1 (Windows).env file by changing TPOT_OSTYPE=linux to either mac or win:
# OSType (linux, mac, win)
#  Most docker features are available on linux
TPOT_OSTYPE=mac
docker compose up or docker compose up -d if you want T-Pot to run in the background.CTRL-C (it if was running in the foreground) and / or docker compose down -v to stop T-Pot entirely.Red Hat Enterprise Linux (RHEL) is a somewhat unique case in that:
grc is not available for RHEL and is omitted from the RHEL installation of T-Pot.With T-Pot Standard / Hive all services, tools, honeypots, etc. will be installed on to a single host which also serves as a Hive endpoint. Make sure to meet the system requirements. You can adjust ~/tpotce/docker-compose.yml to your personal use-case or create your very own configuration using ~/tpotce/compose/customizer.py for a tailored T-Pot experience to your needs.
Once the installation is finished you can proceed to First Start.
The distributed version of T-Pot requires at least two hosts
Uninstallation of T-Pot is only available on the supported Linux distros.
To uninstall T-Pot run ~/tpotce/uninstall.sh and follow the uninstaller instructions, you will have to enter your password at least once.
Once the uninstall is finished reboot the machine sudo reboot
Once the T-Pot Installer successfully finishes, the system needs to be rebooted (sudo reboot). Once rebooted you can log into the system using the user you setup during the installation of the system. Logins are according to the User Types:
<OS_USERNAME>]You can login via SSH to access the command line: ssh -l <OS_USERNAME> -p 64295 <your.ip>:
<OS_USERNAME>]You can also login from your browser and access the T-Pot WebUI and tools: https://<your.ip>:64297
<WEB_USER>]There is not much to do except to login and check via dps if all services and honeypots are starting up correctly. You can use dim to review the installed Docker images including their CREATED age, then login to Kibana and / or Geoip Attack Map to monitor the attacks.
The distributed deployment involves planning as T-Pot Init will only create a self-signed certificate for the IP of the Hive host which usually is suitable for simple setups. Since logstash will check for a valid certificate upon connection, a distributed setup involving Hive to be reachable on multiple IPs (i.e. RFC 1918 and public NAT IP) and maybe even a domain name will result in a connection error where the certificate cannot be validated as such a setup needs a certificate with a common name and SANs (Subject Alternative Name).
Before deploying any sensors make sure you have planned out domain names and IPs properly to avoid issues with the certificate. For more details see issue #1543.
Adjust the example to your IP / domain setup and follow the commands to change the certificate of Hive:
sudo systemctl stop tpot

sudo openssl req \
    -nodes \
    -x509 \
    -sha512 \
    -newkey rsa:8192 \
    -keyout "$HOME/tpotce/data/nginx/cert/nginx.key" \
    -out "$HOME/tpotce/data/nginx/cert/nginx.crt" \
    -days 3650 \
    -subj '/C=AU/ST=Some-State/O=Internet Widgits Pty Ltd' \
    -addext "subjectAltName = IP:192.168.1.200, IP:1.2.3.4, DNS:my.primary.domain, DNS:my.secondary.domain"

sudo chmod 774 $HOME/tpotce/data/nginx/cert/*
sudo chown tpot:tpot $HOME/tpotce/data/nginx/cert/*

sudo systemctl start tpot
The T-Pot configuration file (.env) does allow to disable the SSL verification for logstash connections from Sensor to the Hive by setting LS_SSL_VERIFICATION=none. For security reasons this is only recommended for lab or test environments.
If you choose to use a valid certificate for the Hive signed by a CA (i.e. Let's Encrypt), logstash, and therefore the Sensor, should have no problems to connect and transmit its logs to the Hive.
Once you have rebooted the Sensor as instructed by the installer you can continue with the distributed deployment by logging into Hive and go to cd ~/tpotce folder. Make sure you understood the Planning and Certificates before continuing with the actual deployment.
If you have not done already generate a SSH key to securely login to the Sensor and to allow Ansible to run a playbook on the sensor:
ssh-keygen, follow the instructions and leave the passphrase empty:
Generating public/private rsa key pair.
Enter file in which to save the key (/home/<your_user>/.ssh/id_rsa):
Enter passphrase (empty for no passphrase):
Enter same passphrase again:
Your identification has been saved in /home/<your_user>/.ssh/id_rsa
Your public key has been saved in /home/<your_user>/.ssh/id_rsa.pub
ssh-copy-id -p 64295 <Sensor_SSH_USER>@<Sensor_IP>):
/usr/bin/ssh-copy-id: INFO: Source of key(s) to be installed: "/home/<your_user>/.ssh/id_rsa.pub"
The authenticity of host '[<Sensor_IP>]:64295 ([<Sensor_IP>]:64295)' can't be stablished.
ED25519 key fingerprint is SHA256:naIDxFiw/skPJadTcgmWZQtgt+CdfRbUCoZn5RmkOnQ.
This key is not known by any other names.
Are you sure you want to continue connecting (yes/no/[fingerprint])? yes
/usr/bin/ssh-copy-id: INFO: attempting to log in with the new key(s), to filter out any that are already installed
/usr/bin/ssh-copy-id: INFO: 1 key(s) remain to be installed -- if you are prompted now it is to install the new keys
<your_user>@172.20.254.124's password:

Number of key(s) added: 1

Now try logging into the machine, with:   "ssh -p '64295' '<your_user>@<Sensor_IP>'"
and check to make sure that only the key(s) you wanted were added.
ssh -p '64295' '<your_user>@<Sensor_IP>'../deploy.sh and follow the instructions.
Identify the TPOT_HIVE_USER ENV on the Sensor in the $HOME/tpotce/.env config (it is a base64 encoded string). Now identify the same string in the LS_WEB_USER ENV on the Hive in the $HOME/tpotce/.env config. Remove the string and restart T-Pot.
Now you can safely delete the Sensor machine.
T-Pot is provided in order to make it accessible to everyone interested in honeypots. By default, the captured data is submitted to a community backend. This community backend uses the data to feed Sicherheitstacho.
You may opt out of the submission by removing the # Ewsposter service from ~/tpotce/docker-compose.yml by following these steps:
systemctl stop tpot~/tpotce/docker-compose.yml: micro ~/tpotce/docker-compose.ymlCTRL+Q):# Ewsposter service
ewsposter:
container_name: ewsposter
restart: always
depends_on:
tpotinit:
condition: service_healthy
networks:
- ewsposter_local
environment:
- EWS_HPFEEDS_ENABLE=false
- EWS_HPFEEDS_HOST=host
- EWS_HPFEEDS_PORT=port
- EWS_HPFEEDS_CHANNELS=channels
- EWS_HPFEEDS_IDENT=user
- EWS_HPFEEDS_SECRET=secret
- EWS_HPFEEDS_TLSCERT=false
- EWS_HPFEEDS_FORMAT=json
image: ${TPOT_REPO}/ewsposter:${TPOT_VERSION}
pull_policy: ${TPOT_PULL_POLICY}
volumes:
- ${TPOT_DATA_PATH}:/data
- ${TPOT_DATA_PATH}/ews/conf/ews.ip:/opt/ewsposter/ews.ip
systemctl start tpotIt is encouraged not to disable the data submission as it is the main purpose of the community approach - as you all know sharing is caring 😍
As an Opt-In it is possible to share T-Pot data with 3rd party HPFEEDS brokers.
~/tpotce/docker-compose.yml.ewsposter section and adjust the HPFEEDS settings to your needs.~/tpotce/data/ews/conf and set EWS_HPFEEDS_TLSCERT=/data/ews/conf/<your_ca.crt>.systemctl start tpot.
Remote access to your host / T-Pot is possible with SSH (on tcp/64295) and some services and tools come with T-Pot to make some of your research tasks a lot easier.
According to the User Types you can login via SSH to access the command line: ssh -l <OS_USERNAME> -p 64295 <your.ip>:
<OS_USERNAME>]According to the User Types you can open the T-Pot Landing Page from your browser via https://<your.ip>:64297:
<WEB_USER>]
On the T-Pot Landing Page just click on Kibana and you will be forwarded to Kibana. You can select from a large variety of dashboards and visualizations all tailored to the T-Pot supported honeypots.
On the T-Pot Landing Page just click on Attack Map and you will be forwarded to the Attack Map. Since the Attack Map utilizes web sockets you may need to re-enter the <WEB_USER> credentials.
On the T-Pot Landing Page just click on Cyberchef and you will be forwarded to Cyberchef.
On the T-Pot Landing Page just click on Elasticvue and you will be forwarded to Elasticvue.
On the T-Pot Landing Page just click on Spiderfoot and you will be forwarded to Spiderfoot.
T-Pot offers a configuration file providing variables not only for the docker services (i.e. honeypots and tools) but also for the docker compose environment. The configuration file is hidden in ~/tpoce/.env. There is also an example file (env.example) which holds the default configuration.
Before the first start run ~/tpotce/genuser.sh or setup the WEB_USER manually as described here.
In ~/tpotce/compose you will find everything you need to adjust the T-Pot Standard / Hive installation:
customizer.py
llm.yml
mac_win.yml
mini.yml
mobile.yml
sensor.yml
standard.yml
tarpit.yml
tpot_services.yml
The .yml files are docker compose files, each representing a different set of honeypots and tools with tpot_services.yml being a template for customizer.py to create a customized docker compose file.
To activate a compose file follow these steps:
systemctl stop tpot.cp ~/tpotce/compose/<dockercompose.yml> ~/tpotce/docker-compose.yml.systemctl start tpot.To create your customized docker compose file:
cd ~/tpotce/compose.python3 customizer.py.docker-compose.yml. As some honeypots and services occupy the same ports it will check if any port conflicts are present and notify regarding the conflicting services. You then can resolve them manually by adjusting docker-compose-custom.yml or re-run the script.systemctl stop tpot.cp docker-compose-custom.yml ~/tpotce and cd ~/tpotce.docker-compose -f docker-compose-custom.yml up. In case of errors follow the Docker Compose Specification for mitigation. Most likely it is just a port conflict you can adjust by editing the docker compose file.CTRL-C to stop the containers and run docker-compose -f docker-compose-custom.yml down -v.mv ~/tpotce/docker-compose-custom.yml ~/tpotce/docker-compose.yml.systemctl start tpot.
T-Pot is designed to be low maintenance. Since almost everything is provided through docker images there is basically nothing you have to do but let it run. We will upgrade the docker images regularly to reduce the risks of compromise; however you should read this section closely.
Should an update fail, opening an issue or a discussion will help to improve things in the future, but the offered solution will always be to perform a fresh install as we simply cannot provide any support for lost data!
T-Pot security depends on the updates provided for the supported Linux distro images. Make sure to review the OS documentation and ensure updates are installed regularly by the OS. By default (~/tpotce/.env) TPOT_PULL_POLICY=always will ensure that at every T-Pot start docker will check for new docker images and download them before creating the containers.
T-Pot releases are offered through GitHub and can be pulled using ~/tpotce/update.sh.
If you made any relevant changes to the T-Pot config files make sure to create a backup first!
Updates may have unforeseen consequences. Create a backup of the machine or the files most valuable to your work!
The update script will ...
master by default~/tpot_backups/<date>_tpot_backup.tar before it touches anything~/tpotce to be in sync with that branch~/tpotce/.env) from that backup and carry its image tag
(TPOT_VERSION) forward to the one this release ships, so the new compose file does not ask for
images of the old version. A tag you pinned yourself - dev, a branch name - is left alone.TPOT_REPO from dtagdevsec to ghcr.io/telekom-security if it is still on that old
default, which avoids the Docker Hub rate limits. A registry
you set yourself is left alone..env now namesSENSOR, MINI, LLM, TARPIT, MOBILE) and restore it, using this release's ~/tpotce/compose/<edition>.yml so that new honeypots and changes of the release are included.docker-compose.yml in the backup archive. If you made changes to it (i.e.
removing the ewsposter section or a docker-compose.yml built with
~/tpotce/compose/customizer.py) you need to add them again - the run tells you how to compare
the two.The backup holds what git cannot bring back: ~/tpotce/.env, your docker-compose.yml, a patch of
your changes to tracked files, your untracked files, the commit to roll back to, and the files under
~/tpotce/data that exist nowhere else - the installation uuid, the nginx certificate your sensors
depend on, hive.crt, the ews configuration and the honeypot host keys. Everything else in
~/tpotce is tracked and comes back from git, and the honeypot data under ~/tpotce/data is never
touched by an update. That keeps the archive at roughly a megabyte, which is why it is not
compressed - on a Raspberry Pi compression would cost time for nothing. Add --full if you want
~/tpotce/data in there as well; be aware that on a busy hive this turns a megabyte into tens of
gigabytes.
Your own Kibana objects and the ILM policy live in Elasticsearch rather than in a file, so they are exported into the same archive before T-Pot is stopped. You no longer need to export them by hand ahead of an update.
Backups rotate: the last ten regular and the last two --full archives are kept, counted
separately, and the newest is never removed. Before writing, the script checks that the archive
still leaves 10% of the partition free - ~/tpot_backups usually sits on the same filesystem as
your honeypot data. If that does not work out it drops the oldest archives and degrades --full to
a regular backup; if even that does not fit it stops before touching anything, leaving T-Pot up and
running rather than filling the disk.
When update.sh finds a newer version of itself it pulls, restarts, and the new script finishes the
job. Scripts older than this release do not hand anything over when they restart, so the new script
starts from a checkout that has already been reset - your .env and your edition are gone by then,
and it will happily restore the upstream defaults instead. Fetch the current update.sh first and
run it with -b master, then the backup is taken before anything is reset and everything survives.
cd ~/tpotce
curl -fsSL -o update.sh https://raw.githubusercontent.com/telekom-security/tpotce/master/update.sh
chmod +x update.sh
./update.sh -y -b master
-b master is what makes this work, and switching the branch by hand beforehand is not an
alternative: .env is tracked, so git refuses to leave a branch while your configuration differs
from it. The script does the switch itself, after the backup has been written, and puts your
configuration back afterwards. It is also what keeps the update.sh you just fetched in place -
that file is tracked as well, so resetting the checkout discards it, and only a switch to master
brings the very same file back.
Without -b master the run stops after restoring your configuration and says so. It has to: your
checkout would still be on the older release, and finishing there would pull that release's images
and remove the ones your installation is running on.
This is only needed once, coming from a release that predates this behaviour. Afterwards a plain
./update.sh -y carries everything across on its own.
To update from a different branch or fork, i.e. to test changes before they are merged, see Testing a Branch.
~/tpotce/restore.sh puts a backup back.
restore.sh -l                     # list the backups and what they hold
restore.sh                        # restore from the newest one, asking per group
restore.sh -f <archive> -y        # restore everything from this archive, no questions
Without -y every group is offered separately, so you can bring back just the configuration
without touching anything else. The groups are the rollback of the git checkout, your changes to
tracked files, the configuration, your untracked files, the files under data/, and the Kibana
objects with the ILM policy.
T-Pot is stopped for the file part and started again for the Kibana import, because that one needs
a running instance. The files under data/ are restored with the owner and mode from the archive
(tpot:tpot, uid/gid 2000) - without those the containers will not start.
If you would rather do it by hand, the archive is a plain tar: tar tvf <archive> lists it,
MANIFEST says which edition and commit it came from, and rollback.txt holds the commit to go
back to with cd ~/tpotce && git reset --hard $(cat rollback.txt).
By default T-Pot will add a daily reboot including some cleaning up. You can adjust this line with sudo crontab -e
#Ansible: T-Pot Daily Reboot
42 2 * * * bash -c 'systemctl stop tpot.service && docker container prune -f; docker image prune -f; docker volume prune -f; /usr/sbin/shutdown -r +1 "T-Pot Daily Reboot"'
The following issues are known, simply follow the described steps to solve them.
Some time ago Docker introduced download rate limits. If you are frequently downloading Docker images via a single or shared IP, the IP address might have exhausted the Docker download rate limit. Login to your Docker account to extend the rate limit.
sudo su -
docker login
T-Pot is designed to only run on machines with a single NIC. T-Pot will try to grab the interface with the default route, however it is not guaranteed that this will always succeed. At best use T-Pot on machines with only a single NIC.
The update.sh shipped with 24.04.0 decides whether to restart itself by comparing its own file
against origin/master. That comparison only ever clears on master: on any other branch, and on a
detached HEAD after a git checkout <tag>, its update.sh differs from the one on master no
matter how often it pulls, so it keeps restarting itself and writes a backup on every pass. Current
versions restart on a checksum of their own file instead, stop on a detached HEAD before anything is
touched, and never restart into an older script.
Interrupt the loop with CTRL-C. Every pass resets the checkout before it restarts, so your .env
is back at the branch default by now, and the pass that still had your configuration is the
first one. Recover it before doing anything else:
ls -ltr ~/*_tpot_backup.tgz
tar xOf ~/<the oldest archive of this run>_tpot_backup.tgz .env > ~/tpotce/.env
grep -E "^(WEB_USER|TPOT_TYPE)=" ~/tpotce/.env
Those archive names carry the time down to the minute only, so a loop that stayed within one minute
wrote every pass to the same file and the last one won - if WEB_USER comes back empty, the login
has to be created again with ~/tpotce/genuser.sh. Then update with the current script, which stops
rather than loops:
curl -fsSL -o update.sh https://raw.githubusercontent.com/telekom-security/tpotce/master/update.sh
chmod +x update.sh
./update.sh -y -b master
The T-Pot service automatically starts and stops on each reboot (which occurs once on a daily basis as setup in sudo crontab -l during installation).
If you want to manually start the T-Pot service you can do so via systemctl start tpot and observe via dpsw the startup of the containers.
The T-Pot service automatically starts and stops on each reboot (which occurs once on a daily basis as setup in sudo crontab -l during installation).
If you want to manually stop the T-Pot service you can do so via systemctl stop tpot and observe via dpsw the shutdown of the containers.
All persistent log files from the honeypots, tools and T-Pot related services are stored in ~/tpotce/data. This includes collected artifacts which are not transmitted to the Elastic Stack.
All log data is stored in the T-Pot Data Folder and will be persisted for the number of cycles set for TPOT_PERSISTENCE_CYCLES=<1-999> in the T-Pot configuration file ~/tpotce/.env. It defaults to 30.
Elasticsearch indices are handled by the tpot Index Lifecycle Policy which can be adjusted directly in Kibana (make sure to "Include managed system policies").
By default the tpot Index Lifecycle Policy keeps the indices for 30 days. This offers a good balance between storage and speed. However you may adjust the policy to your needs.
All log data stored in the T-Pot Data Folder (except for Elasticsearch indices, of course) can be erased by running clean.sh.
Sometimes things might break beyond repair and it has never been easier to reset a T-Pot to factory defaults (make sure to enter cd ~/tpotce).
systemctl stop tpot.~/tpotce/data folder to a safe place (this is optional, just in case).~/tpotce/data folder using sudo rm -rf ~/tpotce/data.cd ~/tpotce/
git reset --hard
~/tpotce/install.sh.
You can show all T-Pot relevant containers by running dps or dpsw [interval]. The interval (s) will re-run dps periodically. Use dim to show locally available Docker images including the CREATED column.
Blackhole will run T-Pot in kind of a stealth mode manner without permanent visits of publicly known scanners and thus reducing the possibility of being exposed. While this is of course always a cat and mouse game, the blackhole feature null routes all requests from known mass scanners while still catching the events through Suricata.
The feature is activated by setting TPOT_BLACKHOLE=ENABLED in ~/tpotce/.env, then run systemctl stop tpot and systemctl start tpot or sudo reboot.
Enabling this feature will drastically reduce attackers visibility and consequently result in less activity. However as already mentioned it is neither a guarantee for being completely stealth nor will it prevent fingerprinting of some honeypot services.
Nginx (T-Pot WebUI) allows you to add as many <WEB_USER> accounts as you want (according to the User Types).
To add a new user run ~/tpotce/genuser.sh.
To remove users open ~/tpotce/.env, locate WEB_USER and remove the corresponding base64 string (to decode: echo <base64_string> | base64 -d, or open CyberChef and load "From Base64" recipe).
For the changes to take effect you need to restart T-Pot using systemctl stop tpot and systemctl start tpot or sudo reboot.
Some T-Pot updates will require you to update the Kibana objects. Either to support new honeypots or to improve existing dashboards or visualizations. Make sure to export first so you do not loose any of your adjustments.
Generally T-Pot is offered as is without any commitment regarding support. Issues and discussions can be opened, but be prepared to include basic necessary info, so the community is able to help.
dpsdimhtop, docker statssystemctl stop tpot
grc netstat -tulpen
mi ~/tpotce/docker-compose.yml
docker-compose -f ~/tpotce/docker-compose.yml up
CTRL+C
docker-compose -f ~/tpotce/docker-compose.yml down -v
docker logs -f <container_name>tpotinit log: cat ~/tpotce/data/tpotinit.log
The Elastic Stack is hungry for RAM, specifically logstash and elasticsearch. If the Elastic Stack is unavailable, does not receive any logs or simply keeps crashing it is most likely a RAM or storage issue.
While T-Pot keeps trying to restart the services / containers run docker logs -f <container_name> (either logstash or elasticsearch) and check if there are any warnings or failures involving RAM.
Storage failures can be identified easier via htop.
T-Pot is provided as is open source without any commitment regarding support (see the disclaimer).
If you are a security researcher and want to responsibly report an issue please get in touch with our CERT.
Please report issues (errors) on our GitHub Issues, but troubleshoot first. Issues not providing information to address the error will be closed or converted into discussions.
Use the search function first, it is possible a similar issue has been addressed or discussed already, with the solution just a search away.
General questions, ideas, show & tell, etc. can be addressed on our GitHub Discussions.
Use the search function, it is possible a similar discussion has been opened already, with an answer just a search away.
The software that T-Pot is built on uses the following licenses.
GPLv2:
conpot,
galah,
dionaea,
honeytrap,
suricata
GPLv3:
adbhoney,
elasticpot,
ewsposter,
log4pot,
fatt,
heralding,
ipphoney,
miniprint,
redishoneypot,
rdphoneypot,
sentrypeer,
snare,
tanner
Apache 2 License:
cyberchef,
dicompot,
elasticsearch,
go-pot,
h0neytr4p,
logstash,
kibana,
docker
MIT license:
autoheal,
beelzebub,
ciscoasa,
ddospot,
elasticvue,
glutton,
hellpot,
honeyaml,
maltrail
Unlicense:
endlessh
Other:
citrixhoneypot,
cowrie,
mailoney,
Elastic License,
Wordpot
AGPL-3.0:
honeypots
Public Domain (CC):
Harvard Dataverse
Without open source and the development community we are proud to be a part of, T-Pot would not have been possible! Our thanks are extended but not limited to the following people and organizations:
One of the greatest feedback we have gotten so far is by one of the Conpot developers:
"[...] I highly recommend T-Pot which is ... it's not exactly a swiss army knife .. it's more like a swiss army soldier, equipped with a swiss army knife. Inside a tank. A swiss tank. [...]"
And from @robcowart (creator of ElastiFlow):
"#TPot is one of the most well put together turnkey honeypot solutions. It is a must-have for anyone wanting to analyze and understand the behavior of malicious actors and the threat they pose to your organization."
(top 24 of 33)
3,475 followers · starred Feb 2026
727 followers · starred Dec 2023
158 followers · starred Mar 2022
308 followers · starred Oct 2024