An open-source coding helper. Very friendly!
TypeScript
1,014
791 commits
updated Oct 10, 2026
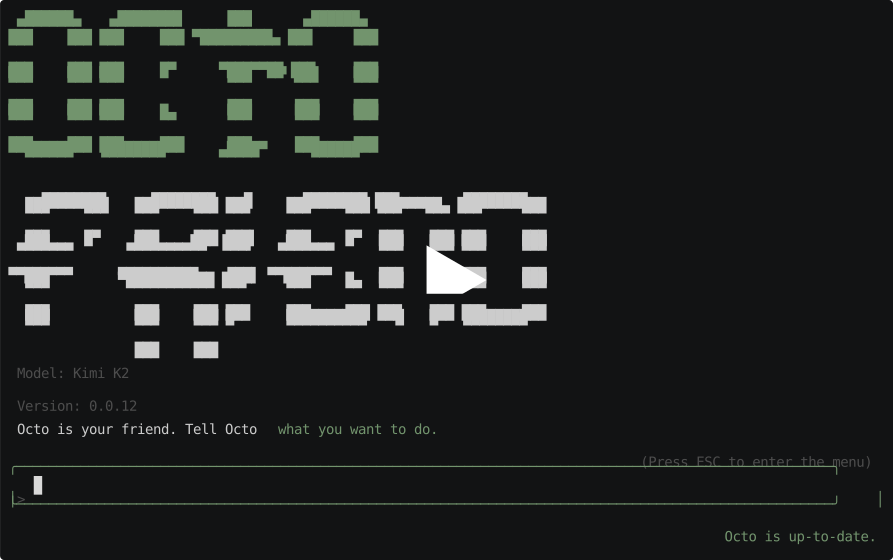
Octo is a small, helpful, zero-telemetry, cephalopod-flavored coding assistant. Octo is your friend.
npm install --global octofriend
And then:
octofriend
# or, for short:
octo

Octo is a small, helpful, cephalopod-flavored coding assistant that works with any OpenAI-compatible or Anthropic-compatible LLM API, and allows you to switch models at will mid-conversation when a particular model gets stuck. Octo can optionally use (and we recommend using) ML models we custom-trained and open-sourced (1, 2) to automatically handle tool call and code edit failures from the main coding models you're working with: the autofix models work with any coding LLM. Octo works great with Kimi K2.7-Code, GLM-5.2, GPT-5.6, and Claude 5 (although pretty much any agentic coding model will work). Octo wants to help you because Octo is your friend.
Octo has zero telemetry. Using Octo with a privacy-focused LLM provider (may we selfishly recommend Synthetic?) means your code stays yours. But you can also use it with any OpenAI-compatible API provider, with Anthropic, or with local LLMs you run on your own machine.
By default, Octo will look for Synthetic API keys to use Synthetic's private, zero-data-retention search API to power Octo's web search tool. If you have any Synthetic models configured anywhere in Octo, Octo's search tool will Just Work: even non-Synthetic-hosted models, like Claude, will be able to use Octo's web search tool.
If you don't want to use Synthetic's search API, but you still want to use the
web search tool, you can configure the search config in
~/.config/octofriend/octofriend.json5:
{
  // ...the rest of your config,
  search: {
    url: "some_search_api_url",
    apiEnvVar: "SOME_ENV_VAR_FOR_AUTH"
  },
}
The search tool will make POST requests against the configured URL with the following format, which is compatible with both Synthetic and Exa:
{
  query: "some search query",
}
If you don't configure the search config, and you don't configure any
Synthetic API keys, Octo's harness will automatically hide the web search tool
so Octo doesn't try to call it.
Octo automatically saves your conversations per-directory. When you exit a session with conversation history, Octo prints out the command you'll need to pick up right where you left off:
octo --resume <session-id>
To see all of your saved sessions for the current directory along with their session IDs, run:
octo session list
You can also switch sessions without leaving the app: press Ctrl+p to open
the menu and select "Load previous session". You'll see a list of previous
sessions for the current directory: pick one to switch over to it. Your
current session isn't lost: you can always switch back to it later, since it
was saved too.
If you started a session inside a Docker container with octo docker run,
you can resume it the same way and optionally replace the original docker run arguments:
octo --resume <session-id> [new docker run args...]
If your currently-selected model has image input enabled, you can attach pictures to your messages: just paste an image from your clipboard into the input box. Each attached image will show up as a badge alongside the input, and will be sent along with your message when you hit Enter. You can attach multiple images to a single message.
Press Backspace with your cursor after the image to delete it, or press Ctrl+c to clear all attached images.
If you want to enable image input for a custom model, add a modalities
entry for it in ~/.config/octofriend/octofriend.json5:
{
  nickname: "My vision model",
  baseUrl: "http://localhost:SOME_PORT",
  apiEnvVar: "SOME_ENV_VAR_FOR_AUTH",
  model: "some-model-string",
  modalities: {
    image: {
      enabled: true,
      maxSizeMB: 10,
      acceptedMimeTypes: ["image/png", "image/jpeg", "image/webp", "image/gif"],
    },
  },
}
Octo has built-in Docker support, and can attach to any Docker container
without needing special configuration or editing the image or container. To
make Octo run inside an existing container you have running — for example, if
you already have a Docker Compose setup — run octo docker connect your-container-name.
To have Octo launch a Docker image and shut it down when Octo quits, you can run:
# Make sure to add the -- before the docker run args!
octo docker run -- ordinary-docker-run-args
For example, to launch Octo inside an Alpine Linux container:
octo docker run -- -d -i -t alpine /bin/sh
All of Octo shell commands and filesystem edits and reads will happen inside
the container. However, Octo will continue to use any MCP servers you have
defined in your config via your host machine (since the MCP servers are
presumably running on your machine, not inside the container), and will make
HTTP requests from your machine as well if it uses the built-in fetch tool,
so that you can use arbitrary containers that may not have wget or curl
installed.
Octo will look for instruction files named like so:
OCTO.mdCLAUDE.mdAGENTS.mdOcto uses the first one of those it finds: so if you want to have different
instructions for Octo than for Claude, just have an OCTO.md and a
CLAUDE.md, and Octo will ignore your CLAUDE.md.
Octo will search the current directory for rules, and every parent directory,
up until (inclusive of) your home directory. All rule files will be merged: so
if you want project-specific rules as well as general rules to apply
everywhere, you can add an OCTO.md to your project, as well as a global
OCTO.md in your home directory.
If you don't want to clutter your home directory, you can also add a global
rules file in ~/.config/octofriend/OCTO.md.
Octo supports the Agent Skills spec for giving reusable context-dependent instructions. If you want to give special instructions for Octo to do code reviews, for example, you might write a code review skill file, and Octo will intelligently load the skill when it needs to do code reviews. You can find the full skill spec on the Agent Skills website, but they're essentially just tagged Markdown with optional scripts. Here's a very simple code review skill you might use:
---
name: "pr-review"
description: "Review Github pull requests"
---

To load a Github pull request, run the fetch tool twice:

## First fetch

First, load the URL for the PR to understand the author's intent.

Your fetch tool does not execute JavaScript. Note that parts of the Github UI
may fail without JS; for example, loading comments might say:

    UH OH!
    There was an error while loading"

This is okay and expected. Don't worry about that.

## Second fetch: load the diff

To load the diff for the PR, fetch the PR URL with a `.diff`
attached to the end. For example, to review
`https://github.com/synthetic-lab/octofriend/pull/66`, you should fetch:

`https://github.com/synthetic-lab/octofriend/pull/66.diff`

The diff is the most important part. The author may be incorrect, or have the
right idea but the wrong implementation. Focus on whether there are any bugs or
unexpected behavior.
We automatically detect skills in the following places:
~/.config/agents/skills, for global skill definitions.agents/skills, for skills relative to the current directory Octo is
working in. For example, if your company has special guidelines for agents,
you can distribute them with your company's repo in an .agents/skills
directory.If there are more directories you want Octo to discover skills from, you can
add them to your ~/.config/octofriend/octofriend.json5 config file like so:
skills: {
  paths: [
    // a list of directory paths containing skills
  ],
},
Octo can do a lot out of the box — pretty much anything is possible with enough
Bash — but if you want access to rich data from an MCP server, it'll help Octo
out a lot to just provide the MCP server directly instead of trying to contort
its tentacles into crafting the right Bash-isms. After you run octofriend for
the first time, you'll end up with a config file in
~/.config/octofriend/octofriend.json5. To hook Octo up to your favorite MCP
server, add the following to the config file:
mcpServers: {
  serverName: {
    command: "command-string",
    args: [
      "arguments",
      "to",
      "pass",
    ],
  },
},
For example, to plug Octo into your Linear workspace:
mcpServers: {
  linear: {
    command: "npx",
    args: [ "-y", "mcp-remote", "https://mcp.linear.app/sse" ],
  },
},
Octo can use language servers to give your coding model IDE-grade navigation tools: jumping to definitions, finding references, listing symbols in a file, hovering for type info, and more. If an LSP server for a file's extension is installed on your machine, Octo will automatically detect it and expose the corresponding tools to the model: there's no configuration required.
Octo knows how to detect a bunch of popular language servers out of the box,
including typescript-language-server, gopls, rust-analyzer,
bash-language-server, lua-language-server, ruby-lsp, jdtls, hls,
clojure-lsp, yaml-language-server, and several others: just install the
one you want via your usual package manager and Octo will pick it up.
To add support for a language server Octo doesn't know about (or to override
the command Octo uses for one of the built-in servers), add an entry to the
lsp block in ~/.config/octofriend/octofriend.json5:
lsp: {
  pyright: {
    // The command to start the language server (must speak stdio LSP)
    command: ["pyright-langserver", "--stdio"],
    // File extensions this server should handle
    extensions: [".py"],
    // Files used to find the project root, searching upwards from the file
    // being edited. Can be an empty list if the server doesn't need one.
    rootCandidates: ["pyproject.toml", "setup.py", ".git"],
  },
},
Custom servers take precedence over Octo's built-in ones when both claim the same file extension.
You can also disable language servers entirely, or disable individual servers:
// Disable all LSP tools:
lsp: false,

// Or, disable a single server:
lsp: {
  "typescript-language-server": { disabled: true },
},
If you're a relatively advanced user, you might want to use Octo with local
LLMs. Assuming you already have a local LLM API server set up like ollama or
llama.cpp, using Octo with it is super easy. When adding a model, make sure to
select Add a custom model.... Then it'll prompt you for your API base URL,
which is probably something like: http://localhost:3000, or whatever port
you're running your local LLM server on. After that it'll prompt you for an
environment variable to use as a credential; just use any non-empty environment
variable and it should work (since most local LLM server ignore credentials
anyway).
You can also edit the Octofriend config directly in
~/.config/octofriend/octofriend.json5. Just add the following to your list of
models:
{
  nickname: "The string to show in the UI for your model name",
  baseUrl: "http://localhost:SOME_PORT",
  apiEnvVar: "any non-empty env var",
  model: "The model string used by the API server, e.g. openai/gpt-oss-20b",
}
By default, Octo tries to present a pretty clean UI. If you want to see
underlying error messages from APIs or tool calls, run Octo with the
OCTO_VERBOSE environment variable set to any truthy string; for example:
OCTO_VERBOSE=1 octofriend
There's a hidden "Notifications" menu that only appears if you've configured
desktop notifications. To configure desktop notifications, add a block like
this to your octofriend.json5:
notifications: {
  notifyCommand: "notify-send Octo 'Finished responding!'",
},
Or for macOS:
notifications: {
  notifyCommand: 'osascript -e \'display notification "Octo finished!"\'',
},
This enables the Notifications submenu in the main ctrl-p menu. You can set
it to the following three settings:
The last option will be persisted to your config file, if you set it.
By default, for the session-level and persistent notifications, Octo will wait 10 seconds before notifying you, and if it receives input during that time it'll skip the notification (so as to not spam you with notifications when you're actively attending to it and chatting). To change the wait time, set:
notifications: {
  notifyCommand: "some command",
  notifyTimeoutMs: 20000, // Or however many milliseconds you want to wait
},
If you want to use unreleased versions of Octo, clone this repo and read the
instructions in canary.sh to install canary-octo in your shell.
(top 24 of 25)
6,375 followers · starred Aug 2025
625 followers · starred Jan 2026
193 followers · starred Nov 2025
128 followers · starred Feb 2026
An open-source coding helper. Very friendly!
TypeScript
1,014
791 commits
updated Oct 10, 2026
Octo is a small, helpful, zero-telemetry, cephalopod-flavored coding assistant. Octo is your friend.
npm install --global octofriend
And then:
octofriend
# or, for short:
octo
Octo is a small, helpful, cephalopod-flavored coding assistant that works with any OpenAI-compatible or Anthropic-compatible LLM API, and allows you to switch models at will mid-conversation when a particular model gets stuck. Octo can optionally use (and we recommend using) ML models we custom-trained and open-sourced (1, 2) to automatically handle tool call and code edit failures from the main coding models you're working with: the autofix models work with any coding LLM. Octo works great with Kimi K2.7-Code, GLM-5.2, GPT-5.6, and Claude 5 (although pretty much any agentic coding model will work). Octo wants to help you because Octo is your friend.
Octo has zero telemetry. Using Octo with a privacy-focused LLM provider (may we selfishly recommend Synthetic?) means your code stays yours. But you can also use it with any OpenAI-compatible API provider, with Anthropic, or with local LLMs you run on your own machine.
By default, Octo will look for Synthetic API keys to use Synthetic's private, zero-data-retention search API to power Octo's web search tool. If you have any Synthetic models configured anywhere in Octo, Octo's search tool will Just Work: even non-Synthetic-hosted models, like Claude, will be able to use Octo's web search tool.
If you don't want to use Synthetic's search API, but you still want to use the
web search tool, you can configure the search config in
~/.config/octofriend/octofriend.json5:
{
  // ...the rest of your config,
  search: {
    url: "some_search_api_url",
    apiEnvVar: "SOME_ENV_VAR_FOR_AUTH"
  },
}
The search tool will make POST requests against the configured URL with the following format, which is compatible with both Synthetic and Exa:
{
  query: "some search query",
}
If you don't configure the search config, and you don't configure any
Synthetic API keys, Octo's harness will automatically hide the web search tool
so Octo doesn't try to call it.
Octo automatically saves your conversations per-directory. When you exit a session with conversation history, Octo prints out the command you'll need to pick up right where you left off:
octo --resume <session-id>
To see all of your saved sessions for the current directory along with their session IDs, run:
octo session list
You can also switch sessions without leaving the app: press Ctrl+p to open
the menu and select "Load previous session". You'll see a list of previous
sessions for the current directory: pick one to switch over to it. Your
current session isn't lost: you can always switch back to it later, since it
was saved too.
If you started a session inside a Docker container with octo docker run,
you can resume it the same way and optionally replace the original docker run arguments:
octo --resume <session-id> [new docker run args...]
If your currently-selected model has image input enabled, you can attach pictures to your messages: just paste an image from your clipboard into the input box. Each attached image will show up as a badge alongside the input, and will be sent along with your message when you hit Enter. You can attach multiple images to a single message.
Press Backspace with your cursor after the image to delete it, or press Ctrl+c to clear all attached images.
If you want to enable image input for a custom model, add a modalities
entry for it in ~/.config/octofriend/octofriend.json5:
{
  nickname: "My vision model",
  baseUrl: "http://localhost:SOME_PORT",
  apiEnvVar: "SOME_ENV_VAR_FOR_AUTH",
  model: "some-model-string",
  modalities: {
    image: {
      enabled: true,
      maxSizeMB: 10,
      acceptedMimeTypes: ["image/png", "image/jpeg", "image/webp", "image/gif"],
    },
  },
}
Octo has built-in Docker support, and can attach to any Docker container
without needing special configuration or editing the image or container. To
make Octo run inside an existing container you have running — for example, if
you already have a Docker Compose setup — run octo docker connect your-container-name.
To have Octo launch a Docker image and shut it down when Octo quits, you can run:
# Make sure to add the -- before the docker run args!
octo docker run -- ordinary-docker-run-args
For example, to launch Octo inside an Alpine Linux container:
octo docker run -- -d -i -t alpine /bin/sh
All of Octo shell commands and filesystem edits and reads will happen inside
the container. However, Octo will continue to use any MCP servers you have
defined in your config via your host machine (since the MCP servers are
presumably running on your machine, not inside the container), and will make
HTTP requests from your machine as well if it uses the built-in fetch tool,
so that you can use arbitrary containers that may not have wget or curl
installed.
Octo will look for instruction files named like so:
OCTO.mdCLAUDE.mdAGENTS.mdOcto uses the first one of those it finds: so if you want to have different
instructions for Octo than for Claude, just have an OCTO.md and a
CLAUDE.md, and Octo will ignore your CLAUDE.md.
Octo will search the current directory for rules, and every parent directory,
up until (inclusive of) your home directory. All rule files will be merged: so
if you want project-specific rules as well as general rules to apply
everywhere, you can add an OCTO.md to your project, as well as a global
OCTO.md in your home directory.
If you don't want to clutter your home directory, you can also add a global
rules file in ~/.config/octofriend/OCTO.md.
Octo supports the Agent Skills spec for giving reusable context-dependent instructions. If you want to give special instructions for Octo to do code reviews, for example, you might write a code review skill file, and Octo will intelligently load the skill when it needs to do code reviews. You can find the full skill spec on the Agent Skills website, but they're essentially just tagged Markdown with optional scripts. Here's a very simple code review skill you might use:
---
name: "pr-review"
description: "Review Github pull requests"
---

To load a Github pull request, run the fetch tool twice:

## First fetch

First, load the URL for the PR to understand the author's intent.

Your fetch tool does not execute JavaScript. Note that parts of the Github UI
may fail without JS; for example, loading comments might say:

    UH OH!
    There was an error while loading"

This is okay and expected. Don't worry about that.

## Second fetch: load the diff

To load the diff for the PR, fetch the PR URL with a `.diff`
attached to the end. For example, to review
`https://github.com/synthetic-lab/octofriend/pull/66`, you should fetch:

`https://github.com/synthetic-lab/octofriend/pull/66.diff`

The diff is the most important part. The author may be incorrect, or have the
right idea but the wrong implementation. Focus on whether there are any bugs or
unexpected behavior.
We automatically detect skills in the following places:
~/.config/agents/skills, for global skill definitions.agents/skills, for skills relative to the current directory Octo is
working in. For example, if your company has special guidelines for agents,
you can distribute them with your company's repo in an .agents/skills
directory.If there are more directories you want Octo to discover skills from, you can
add them to your ~/.config/octofriend/octofriend.json5 config file like so:
skills: {
  paths: [
    // a list of directory paths containing skills
  ],
},
Octo can do a lot out of the box — pretty much anything is possible with enough
Bash — but if you want access to rich data from an MCP server, it'll help Octo
out a lot to just provide the MCP server directly instead of trying to contort
its tentacles into crafting the right Bash-isms. After you run octofriend for
the first time, you'll end up with a config file in
~/.config/octofriend/octofriend.json5. To hook Octo up to your favorite MCP
server, add the following to the config file:
mcpServers: {
  serverName: {
    command: "command-string",
    args: [
      "arguments",
      "to",
      "pass",
    ],
  },
},
For example, to plug Octo into your Linear workspace:
mcpServers: {
  linear: {
    command: "npx",
    args: [ "-y", "mcp-remote", "https://mcp.linear.app/sse" ],
  },
},
Octo can use language servers to give your coding model IDE-grade navigation tools: jumping to definitions, finding references, listing symbols in a file, hovering for type info, and more. If an LSP server for a file's extension is installed on your machine, Octo will automatically detect it and expose the corresponding tools to the model: there's no configuration required.
Octo knows how to detect a bunch of popular language servers out of the box,
including typescript-language-server, gopls, rust-analyzer,
bash-language-server, lua-language-server, ruby-lsp, jdtls, hls,
clojure-lsp, yaml-language-server, and several others: just install the
one you want via your usual package manager and Octo will pick it up.
To add support for a language server Octo doesn't know about (or to override
the command Octo uses for one of the built-in servers), add an entry to the
lsp block in ~/.config/octofriend/octofriend.json5:
lsp: {
  pyright: {
    // The command to start the language server (must speak stdio LSP)
    command: ["pyright-langserver", "--stdio"],
    // File extensions this server should handle
    extensions: [".py"],
    // Files used to find the project root, searching upwards from the file
    // being edited. Can be an empty list if the server doesn't need one.
    rootCandidates: ["pyproject.toml", "setup.py", ".git"],
  },
},
Custom servers take precedence over Octo's built-in ones when both claim the same file extension.
You can also disable language servers entirely, or disable individual servers:
// Disable all LSP tools:
lsp: false,

// Or, disable a single server:
lsp: {
  "typescript-language-server": { disabled: true },
},
If you're a relatively advanced user, you might want to use Octo with local
LLMs. Assuming you already have a local LLM API server set up like ollama or
llama.cpp, using Octo with it is super easy. When adding a model, make sure to
select Add a custom model.... Then it'll prompt you for your API base URL,
which is probably something like: http://localhost:3000, or whatever port
you're running your local LLM server on. After that it'll prompt you for an
environment variable to use as a credential; just use any non-empty environment
variable and it should work (since most local LLM server ignore credentials
anyway).
You can also edit the Octofriend config directly in
~/.config/octofriend/octofriend.json5. Just add the following to your list of
models:
{
  nickname: "The string to show in the UI for your model name",
  baseUrl: "http://localhost:SOME_PORT",
  apiEnvVar: "any non-empty env var",
  model: "The model string used by the API server, e.g. openai/gpt-oss-20b",
}
By default, Octo tries to present a pretty clean UI. If you want to see
underlying error messages from APIs or tool calls, run Octo with the
OCTO_VERBOSE environment variable set to any truthy string; for example:
OCTO_VERBOSE=1 octofriend
There's a hidden "Notifications" menu that only appears if you've configured
desktop notifications. To configure desktop notifications, add a block like
this to your octofriend.json5:
notifications: {
  notifyCommand: "notify-send Octo 'Finished responding!'",
},
Or for macOS:
notifications: {
  notifyCommand: 'osascript -e \'display notification "Octo finished!"\'',
},
This enables the Notifications submenu in the main ctrl-p menu. You can set
it to the following three settings:
The last option will be persisted to your config file, if you set it.
By default, for the session-level and persistent notifications, Octo will wait 10 seconds before notifying you, and if it receives input during that time it'll skip the notification (so as to not spam you with notifications when you're actively attending to it and chatting). To change the wait time, set:
notifications: {
  notifyCommand: "some command",
  notifyTimeoutMs: 20000, // Or however many milliseconds you want to wait
},
If you want to use unreleased versions of Octo, clone this repo and read the
instructions in canary.sh to install canary-octo in your shell.
(top 24 of 25)
6,375 followers · starred Aug 2025
625 followers · starred Jan 2026
193 followers · starred Nov 2025
128 followers · starred Feb 2026



