
Skylicht Engine is C++ Game Engine based on Irrlicht 3D. And my goal is to create a high-performance and lightweight Game Framework that can seamlessly function on both web and mobile platforms. This framework will be available to everyone for free.
771
stars
2,520
commits
C++
primary language
Sep 15, 2026
updated
README
Skylicht Engine
Skylicht Engine is an evolution of the Irrlicht Project. We have upgraded many features, including Sound Engine, Physics Engine, Particle Engine...
-
Core functionality: Direct3D11, OpenGL 4+, OpenGLES 3+, Google Angle GLES video driver backends.
-
Cross-Platform Framework: Android, IOS, Win32/Win64, UWP, Linux, MacOS, HTML5.
-
Render pipeline: Forwarder & Deferred.
Skylicht Engine is a super lightweight Game Engine that targets mobile platforms (Android, IOS). And, it's completely free.
How to build the project
| Platform | Build Status |
|---|---|
 Cygwin64 Cygwin64 | |
 Windows Windows |  |
 MacOS, IOS MacOS, IOS | |
 Linux Linux | |
 Emscripten Emscripten | |
 Android Android |  |
Prerequisites
- CMake 3.12 or higher
- Python 3.x
- Visual Studio (2017 or higher if you want to build on Windows OS)
Build source code
- Clone this repo
- Skylicht project have used the Large Files like .tga, .fbx... for demo samples, so you must install Git LFS
# call 'git lfs pull' after checkout
git lfs pull
- Build assets bundle
C:\skylicht-engine>cd Assets
C:\skylicht-engine\Assets>python BuildAssetBundles.py
C:\skylicht-engine\Assets>cd ..
- Run CMake from the current directory to generate visual studio project or xcode project
# Visual Studio 2019
C:\skylicht-engine>cmake -S . -B ./PrjVisualStudio -G "Visual Studio 16 2019" -A x64

# Visual Studio 2022
C:\skylicht-engine>cmake -S . -B ./PrjVisualStudio -G "Visual Studio 17 2022" -A x64

# Xcode
/User/Skylicht/Documents/skylicht-engine$cmake -S . -B ./PrjMac -G Xcode

# Linux
$ skylicht-engine$ cmake -S . -B ./PrjLinux -G "Unix Makefiles"
-
Open the generated solution
PrjVisualStudio/SKYLICHT_ENGINE.sln -
Once the solution opens, right click the SampleXXX project, click "Set as StartUp Project" and click the play button at the top to run the Demo App.
-
More details: please preview command in BuildCommand folder.
Build data assets
Compress Texture
- Optional, You can skip this step if you don't modify any resource texture.
- This python tool will convert texture .TGA to compressed texture (.DDS, .ETC2, .PVRTC) to optimize gpu memory on runtime.
# Install Tinydb
# https://pypi.org/project/tinydb
C:\skylicht-engine>C:\Python37\Scripts\pip install tinydb

# Install Pillow (Image processing)
# https://pillow.readthedocs.io/en/4.1.x/index.html
C:\skylicht-engine>C:\Python37\Scripts\pip install Pillow

# Compress TGA to DDS, ETC2 texture
C:\skylicht-engine>cd Assets
C:\skylicht-engine\Assets>python BuildTextureCompressDDS.py
C:\skylicht-engine\Assets>python BuildTextureCompressETC.py
C:\skylicht-engine\Assets>cd ..
Build Shader
- Optional, You can skip this step if you don't modify any shader.
- This python tool use C Preprocessor to inline shader (GLSL, HLSL) script.
# Install pcpp (C Preprocessor tool)
# https://pypi.org/project/pcpp
C:\skylicht-engine>C:\Python37\Scripts\pip install pcpp

# Build shader script
C:\skylicht-engine>cd Assets
C:\skylicht-engine\Assets>python BuildShader.py
C:\skylicht-engine\Assets>cd ..
- You can optimize shader for rendering on IOS, Android by recompiling the shader with HARD_SHADOW.
// Assets\BuiltIn\Shader\Shadow\GLSL\LibShadow.glsl

#define HARD_SHADOW
// #define PCF_NOISE
And re-build the shaders
# Build shader script
C:\skylicht-engine>cd Assets
C:\skylicht-engine\Assets>python BuildShader.py
C:\skylicht-engine\Assets>cd ..
Add your code to Project
Add source code
- Add new source files or subfolders on
Projects/{ProjectName}/Sourceand regenerate project
C:\skylicht-engine>cmake -S . -B ./PrjVisualStudio -G "Visual Studio 17 2022" -A x64
Create application project
- Run Scripts/create_project.py. Example: Create application NewApplication at folder Samples\NewApplication
C:\skylicht-engine>python Scripts\create_project.py NewApplication Samples\NewApplication
- Edit CMakeProjects.cmake, add new line:"subdirs (Samples/NewApplication)" and regenerate projects
- Open Visual Studio Solution and click NewApplication - "Set as StartUp Project".
Android
Prerequisites
- Install Android Studio and SDK
- Install mingw-w64 for Windows
- Install Android NDK
How to build
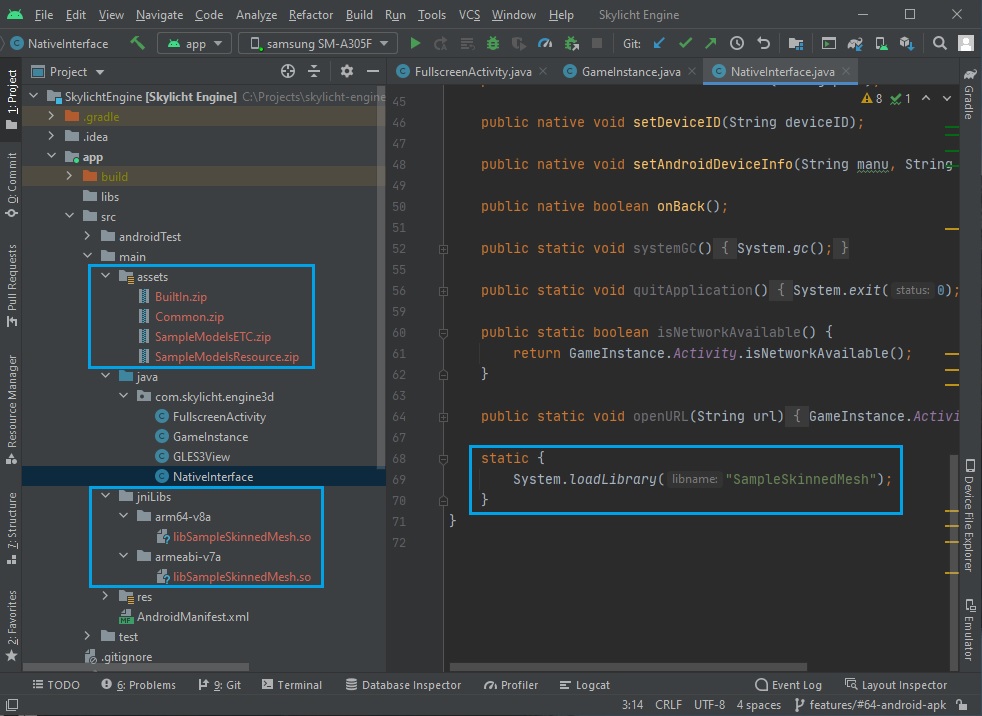
Step 1: Build native library
- Edit the file BuildCommand/BuildAndroidNDK.cmd by text editor and update your path MINGW and NDK
# BuildAndroidNDK.cmd
# Set your pc folder, example
set MINGW=C:\MinGW\bin
set NDK=C:\Android\android-ndk-r26d
...
- Run BuildCommand/BuildAndroidNDK.cmd to build android native library
Step 2: Copy native library to Gradle Project
# Make folder jniLibs on Android Project
C:\skylicht-engine>mkdir Projects\Android\app\src\main\jniLibs
C:\skylicht-engine>mkdir Projects\Android\app\src\main\jniLibs\armeabi-v7a
C:\skylicht-engine>mkdir Projects\Android\app\src\main\jniLibs\arm64-v8a

# Copy result native ndk (from step 1) to jniLibs
# Project SampleSkinnedMesh
C:\skylicht-engine>copy Bin\Android\Libs\arm64-v8a\libSampleSkinnedMesh.so Projects\Android\app\src\main\jniLibs\arm64-v8a
C:\skylicht-engine>copy Bin\Android\Libs\armeabi-v7a\libSampleSkinnedMesh.so Projects\Android\app\src\main\jniLibs\armeabi-v7a
Step 3: Copy asset resource to Gradle Project
C:\skylicht-engine\Assets>python BuildTextureCompressETC.py
C:\skylicht-engine\Assets>python BuildAssetBundles.py
C:\skylicht-engine\Assets>cd..
Android APK:
C:\skylicht-engine>SET ASSET_PATH=Projects\Android\app\src\main\assets
Android AAB: Assets will be copied to assetPack: appdata
C:\skylicht-engine>SET ASSET_PATH=Projects\Android\appdata\src\main\assets
And copy command
# Copy built-in asset
C:\skylicht-engine>copy Bin\BuiltIn.zip %ASSET_PATH%

# Copy project asset
# Project SampleSkinnedMesh
C:\skylicht-engine>copy Bin\Common.zip %ASSET_PATH%
C:\skylicht-engine>copy Bin\SampleModelsResource.zip %ASSET_PATH%

# Dont forget copy ETC texture
C:\skylicht-engine>copy Bin\SampleModelsETC.zip %ASSET_PATH%
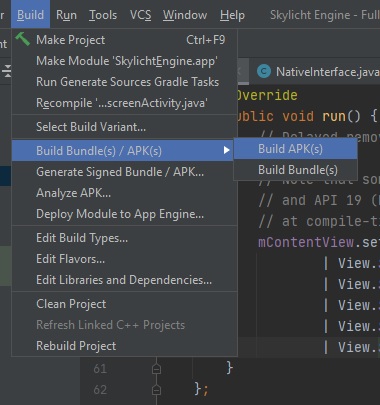
Step 4: Build APK by Android Studio or Gradle
Open Android Studio and import project Projects\Android
Run command build from Android Studio:
Android development
- You can rename your package name at build.gradle (Projects\Android\app)
- You can rename your application name at string.xml (Projects\Android\app\src\main\res\values)
iOS
Prerequisites
- Apple arm64 device
- Install XCode
How to build
Step 1: Build compress texture ETC and Build Asset Bundles
# Grant permission executive for PVRTexTool
skylicht-engine/Tools/PVRTexTool/darwin$ chmod +x PVRTexToolCLI

# Build compress texture ETC
skylicht-engine/Assets$ python3 BuildTextureCompressETC.py

# Build asset bundles
skylicht-engine/Assets$ python3 BuildAssetBundles.py
Step 2: Generate iOS xCode Project
If you want build samples for iOS device, you should replace the bundleIdentifier in Samples/{ProjectName}/CMakeLists.txt.
elseif (BUILD_IOS)
    # replace your application name
    set(MACOSX_BUNDLE_EXECUTABLE_NAME SampleHelloWorld)
    set(APP_NAME "SampleHelloWorld")

    # replace your bundleIdentifier
    set(APP_BUNDLE_IDENTIFIER "com.skylicht.helloword")
    set(CODE_SIGN_IDENTITY "iPhone Developer")

else()
And generate iOS xCode Project by this script.
# generate project for iOS device
skylicht-engine/BuildCommand$ ./GenerateXCodeIOS.sh

# or generate for iOS simulator
skylicht-engine/BuildCommand$ ./GenerateXCodeIOSSimulator.sh
Open iOS XCode Project on folder skylicht-engine/PrjIOS/SKYLICHT_ENGINE.xcodeproj
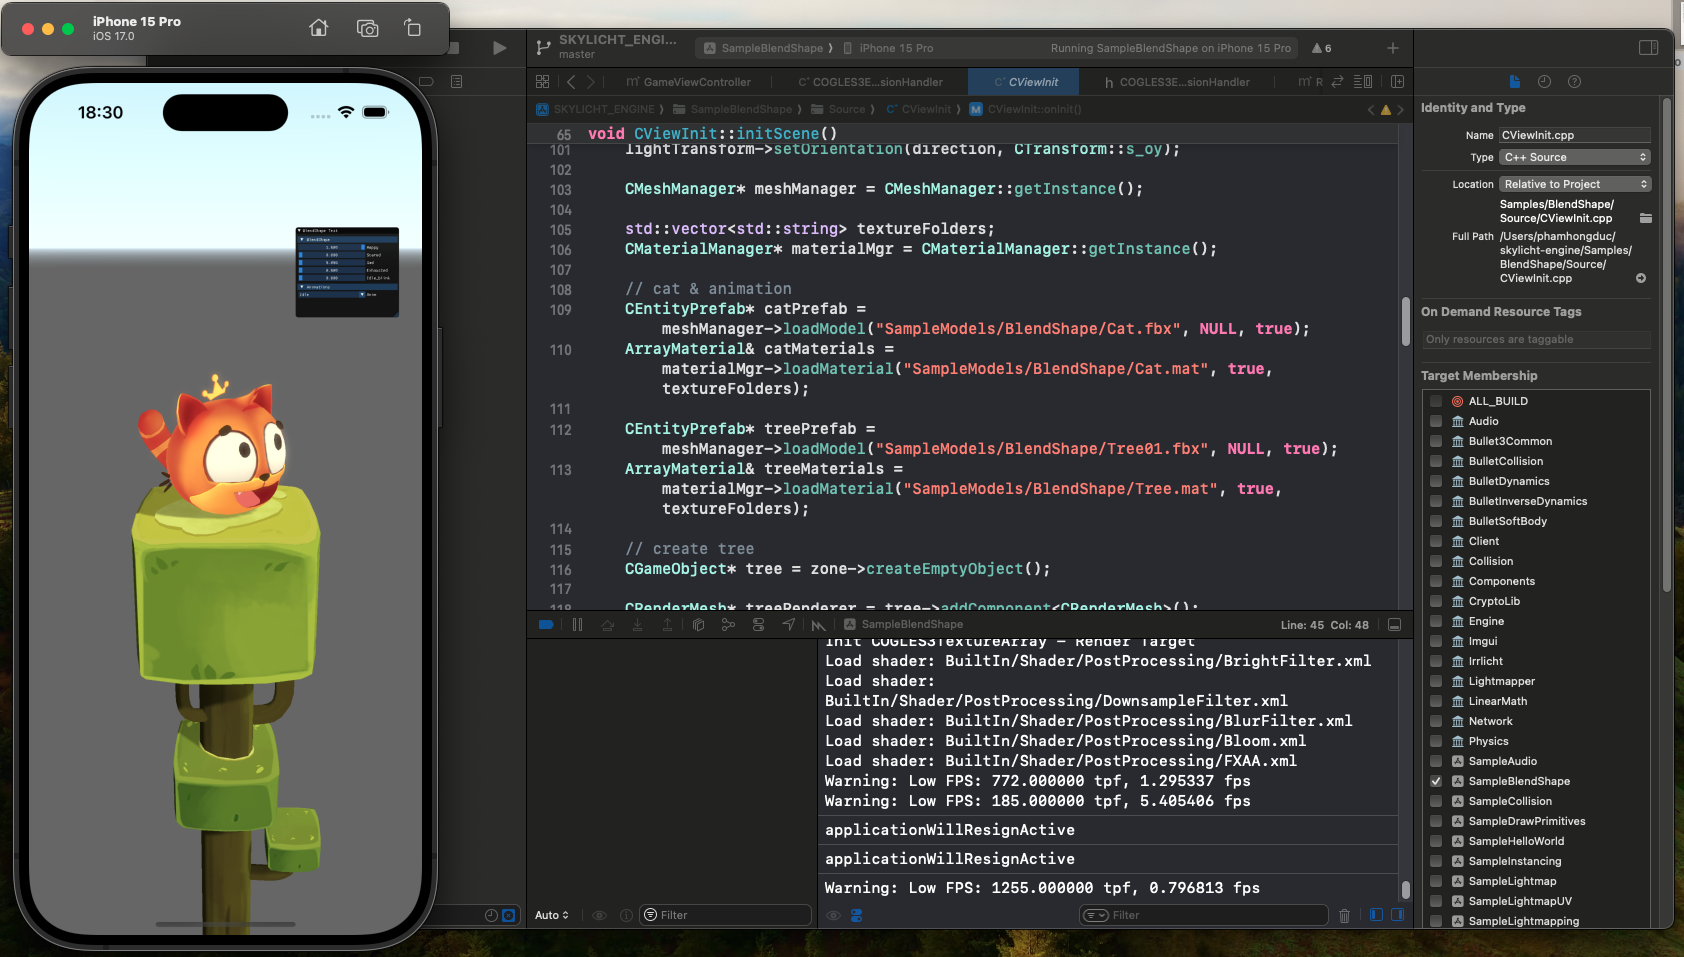
Note: iOS Simulator is not yet support compressed texture and hardware skinning.
Build static or shared library
Skylicht Engine can be compiled into a standalone library to simplify integration into other projects.
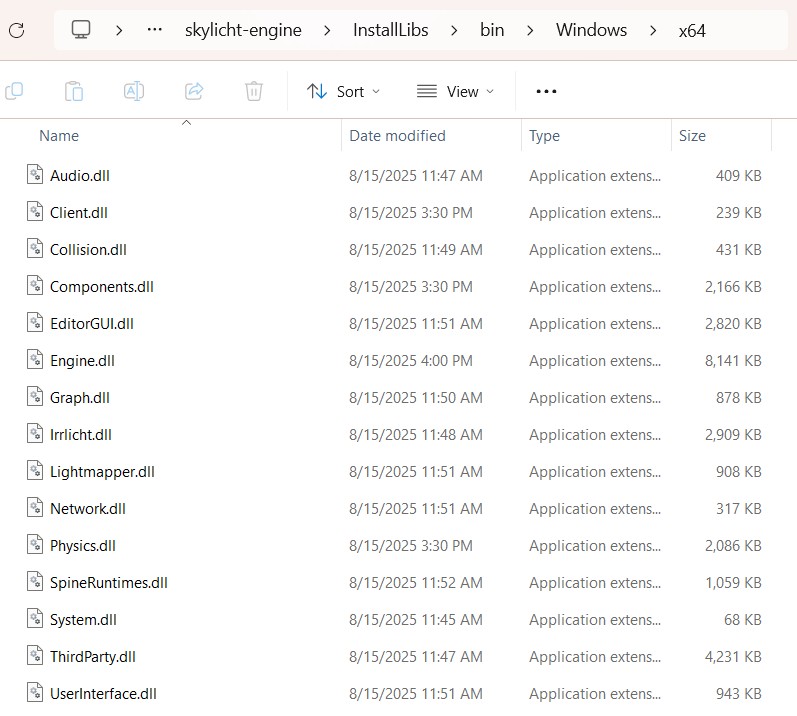
Shared library
C:\skylicht-engine>cmake -S . -B ./PrjVisualStudio -G "Visual Studio 17 2022" -A x64 -DINSTALL_LIBS=ON -DBUILD_SHARED_LIBS=ON
C:\skylicht-engine>cmake --build ./PrjVisualStudio --target install --config Debug
Note: Use the parameters "-DINSTALL_LIBS=ON -DBUILD_SHARED_LIBS=ON" with cmake command
Static library
C:\skylicht-engine>cmake -S . -B ./PrjVisualStudio -G "Visual Studio 17 2022" -A x64 -DINSTALL_LIBS=ON
C:\skylicht-engine>cmake --build ./PrjVisualStudio --target install --config Debug
How to integrate
And then copy the resulting InstallLibs folder to another project. See the project example: https://github.com/skylicht-lab/hello-skylicht See the API Reference
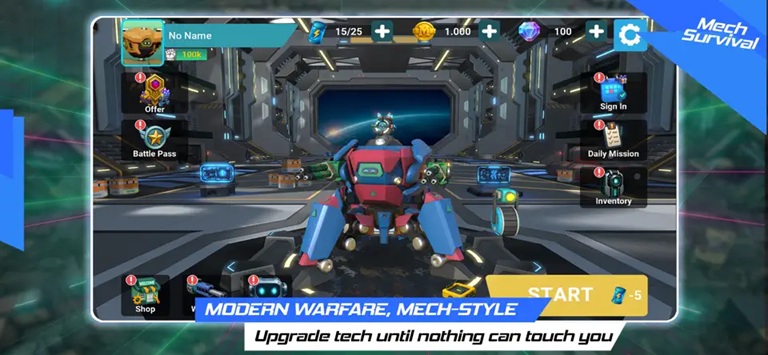
Game Built with Skylicht
Mech Survival


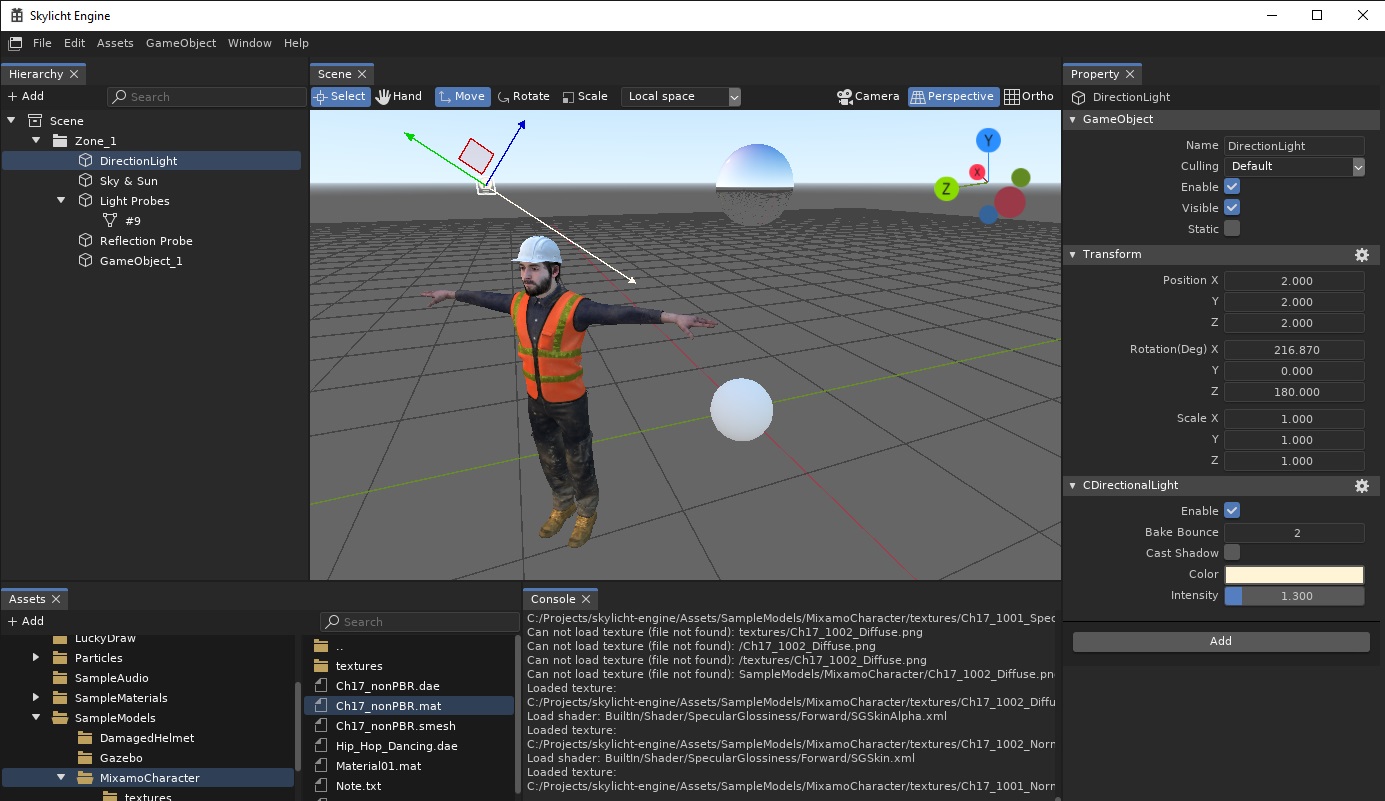
Roadmap
Code example
// INIT SCENE FUNCTION
// init scene/zone
CScene* scene = new CScene();
CZone* zone = scene->createZone();

// camera
CGameObject *camObj = zone->createEmptyObject();
CCamera* camera = camObj->addComponent<CCamera>();
camera->setPosition(core::vector3df(0.0f, 1.5f, 4.0f));
camera->lookAt(
   core::vector3df(0.0f, 0.0f, 0.0f),  // look at target position
   core::vector3df(0.0f, 1.0f, 0.0f)   // head up vector
);

// load model
CMeshManager* meshManager = CMeshManager::getInstance();
CEntityPrefab* meshPrefab = meshManager->loadModel("SampleModels/BlendShape/Cat.fbx", NULL, true);

// load material
CMaterialManager* materialMgr = CMaterialManager::getInstance();

// search textures folder
std::vector<std::string> textureFolders;

// use Skylicht Editor to edit .mat file
ArrayMaterial& catMaterials = materialMgr->loadMaterial("SampleModels/BlendShape/Cat.mat", true, textureFolders);

// create 3d object
CGameObject* cat = zone->createEmptyObject();
cat->setName("Cat");
cat->getTransformEuler()->setPosition(core::vector3df(0.0f, 1.0f, 0.0f));

// add render mesh component & init material
CRenderMesh* meshRenderer = cat->addComponent<CRenderMesh>();
meshRenderer->initFromPrefab(meshPrefab);
meshRenderer->initMaterial(catMaterials);

// update scene (1 frame)
scene->update();

// render scene to screen
CForwardRP* renderPipeline = new CForwardRP();

CBaseApp* app = getApplication();
u32 w = app->getWidth();
u32 h = app->getHeight();
renderPipeline->initRender(w, h);

// RENDER TO SCREEN FUNCTION
renderPipeline->render(
    NULL, // render target is screen
    camera, // the camera
    scene->getEntityManager(), // all entities in scene
    core::recti() // the viewport is fullscreen
);
Sample Projects
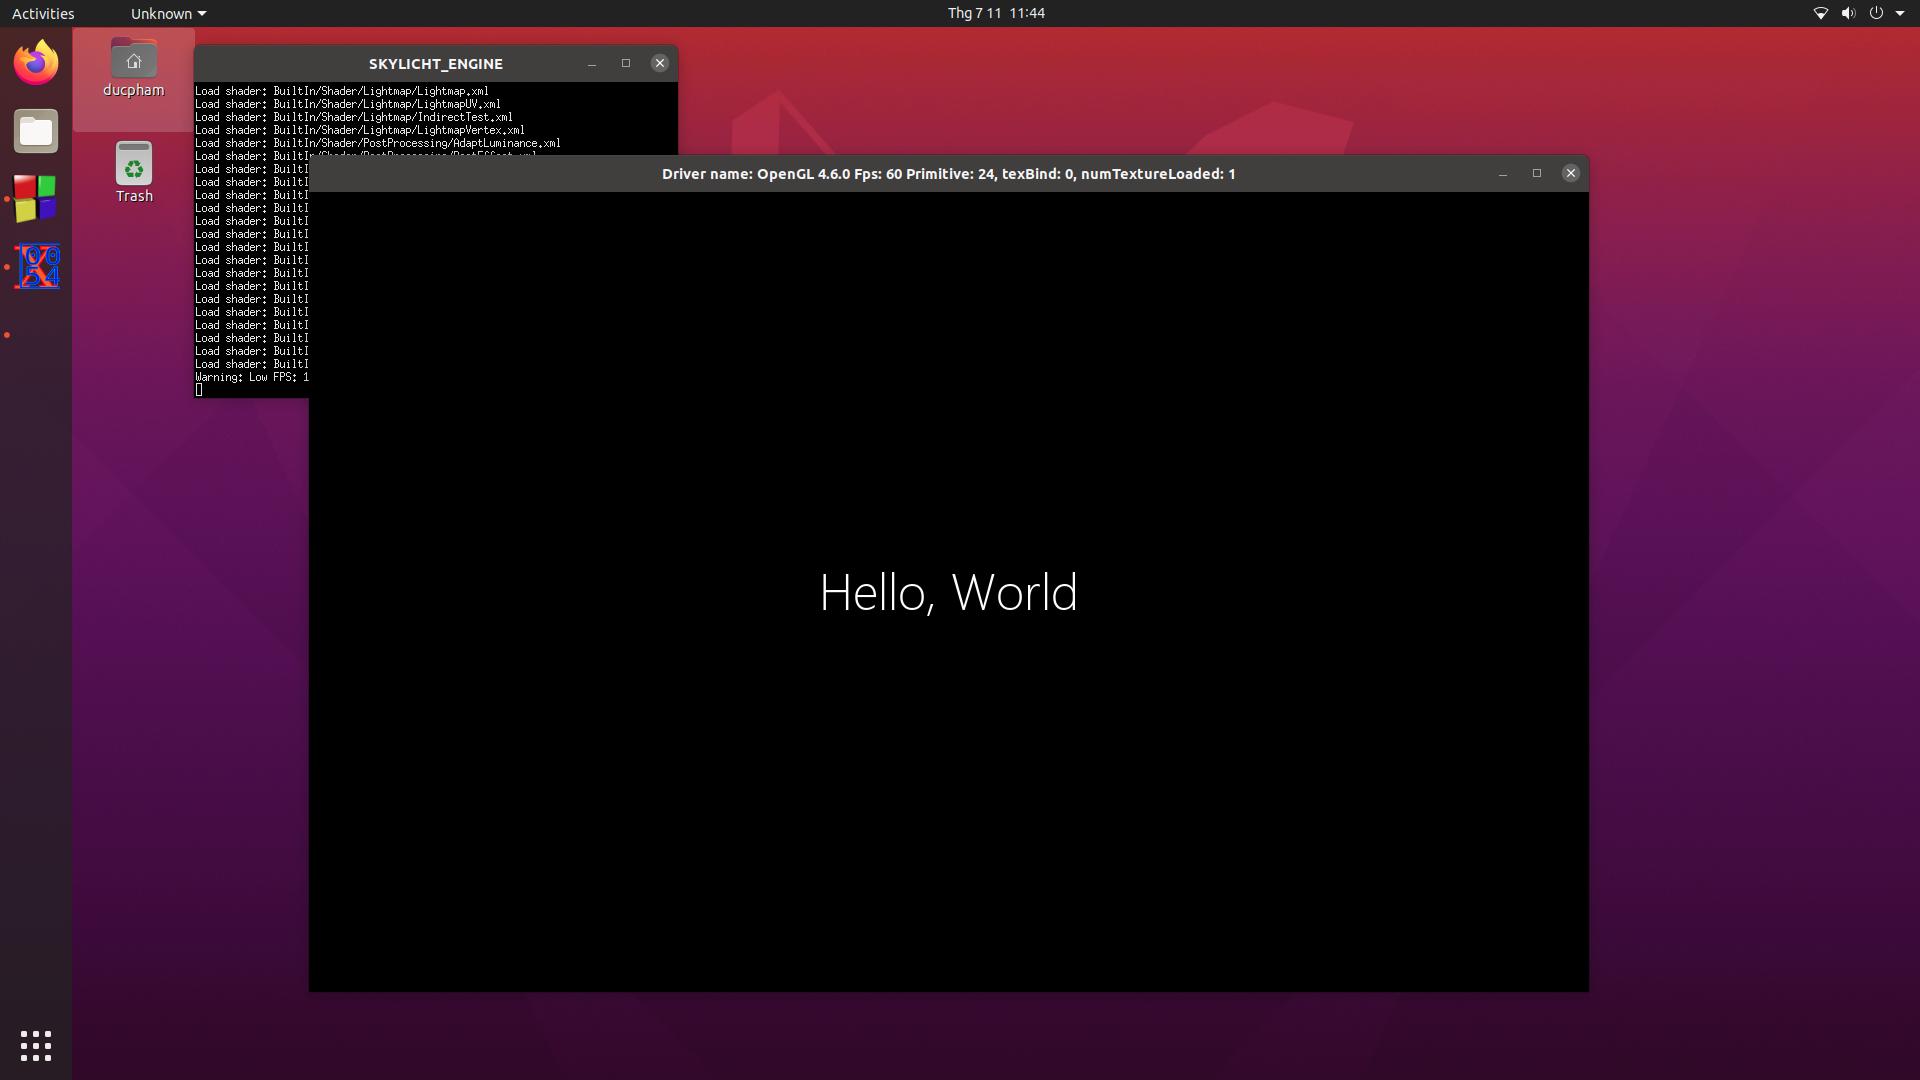
Samples\HelloWorld
Engine Components are used:
- FreeType Font
- Glyph Font
- Canvas Component
- Graphics2D
- GUI Text
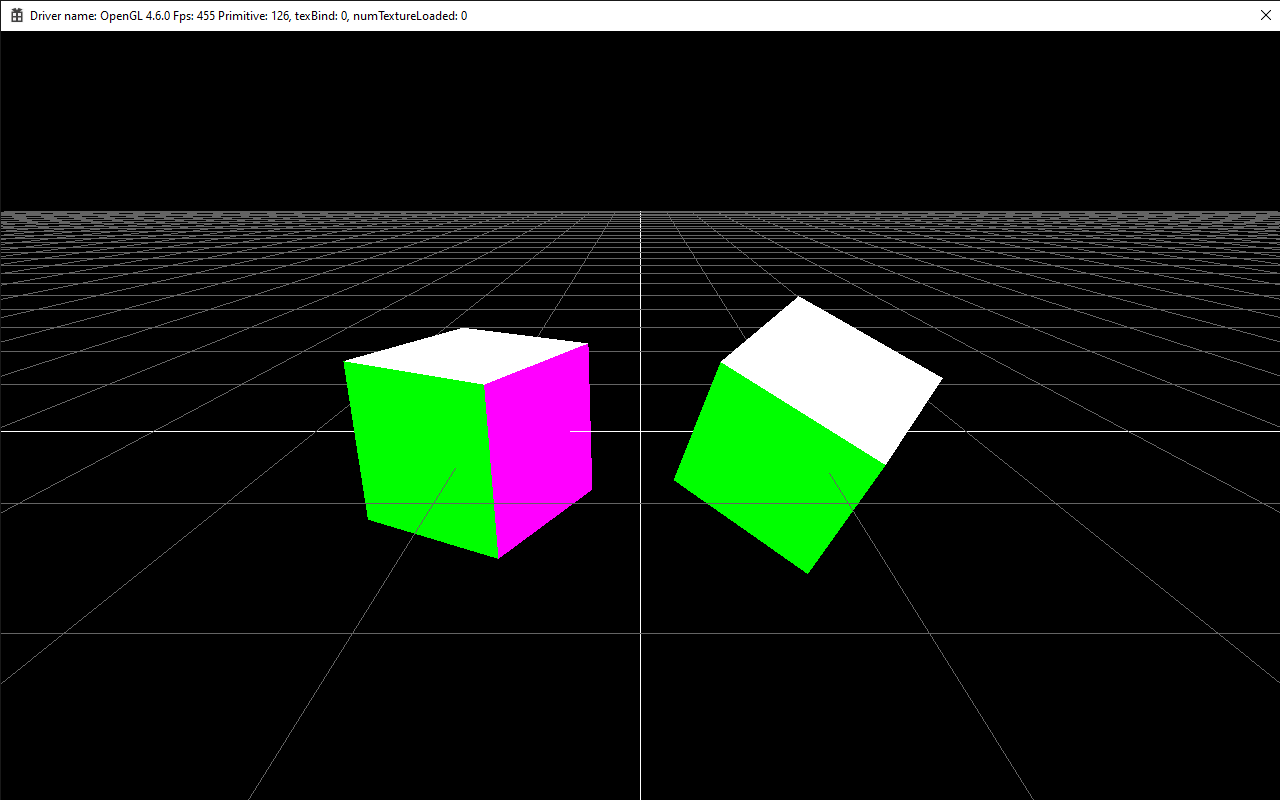
Samples\DrawPrimitives
This demo is to draw Cube 3D, set up, transform and use components.
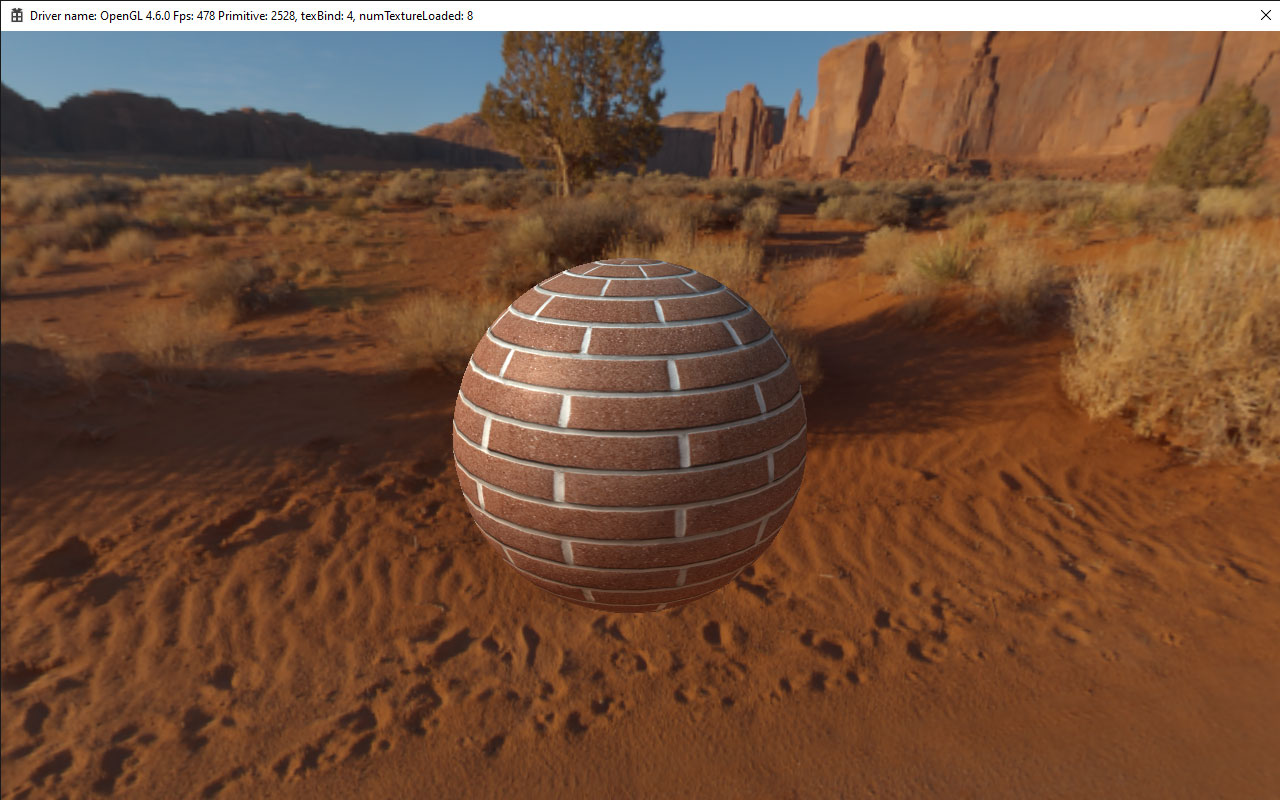
Samples\Materials
This demo code renders a 3D sphere, loads textures (Diffuse, Normal, Specular), and binds a SpecGloss shader to the material.
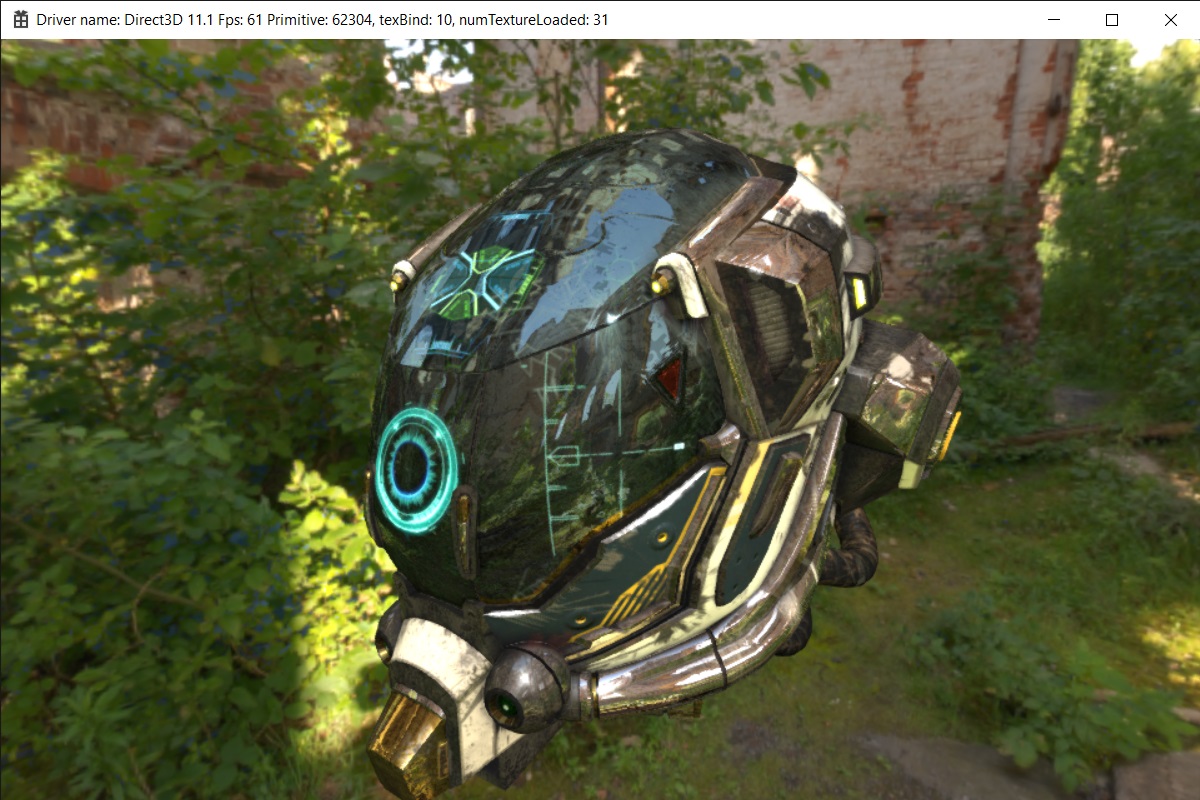
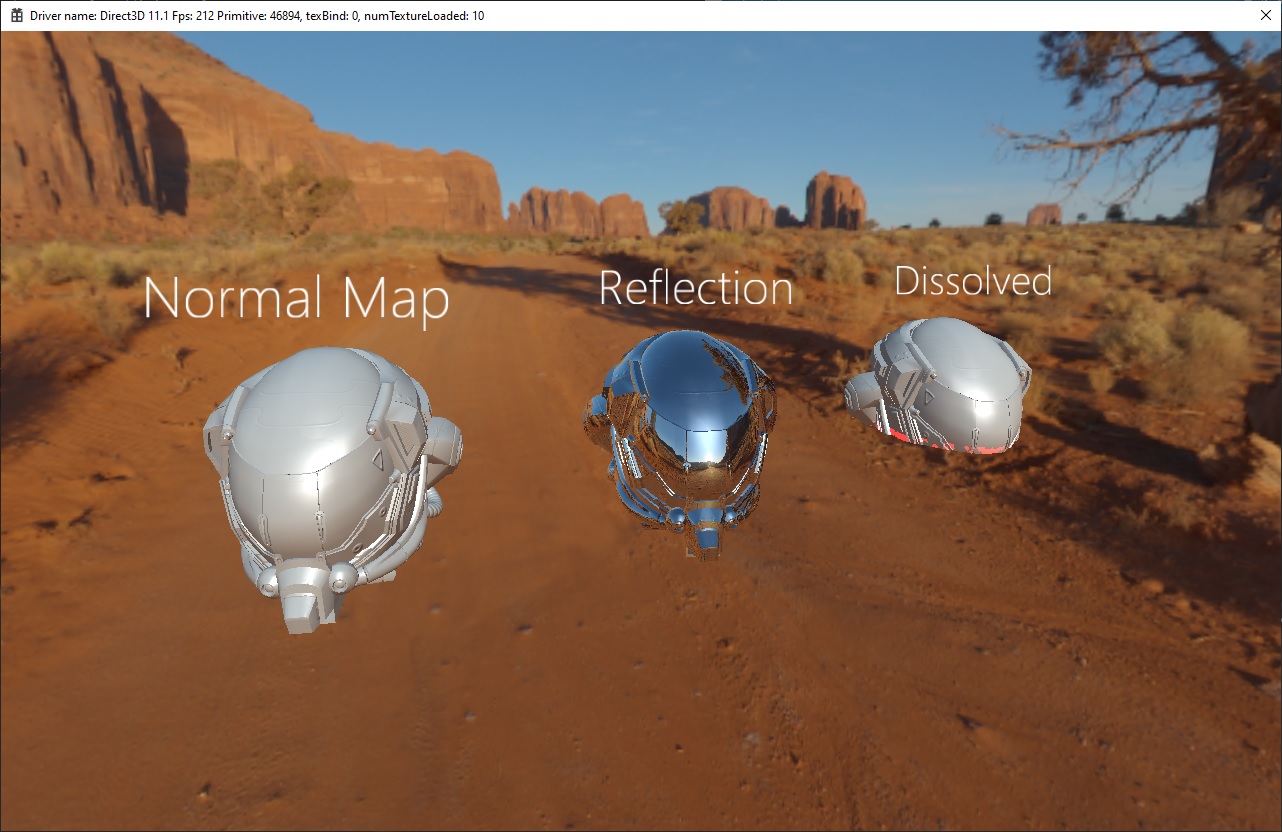
Samples\PBR
This demo code renders a Sci-fi Helmet, loads textures (Albedo, Roughness, Metal, AO, Emissive), and binds a Physically Based Rendering (PBR) shader to the material.
Samples\SampleShader
This demo code shows how to bind a shader to a material.
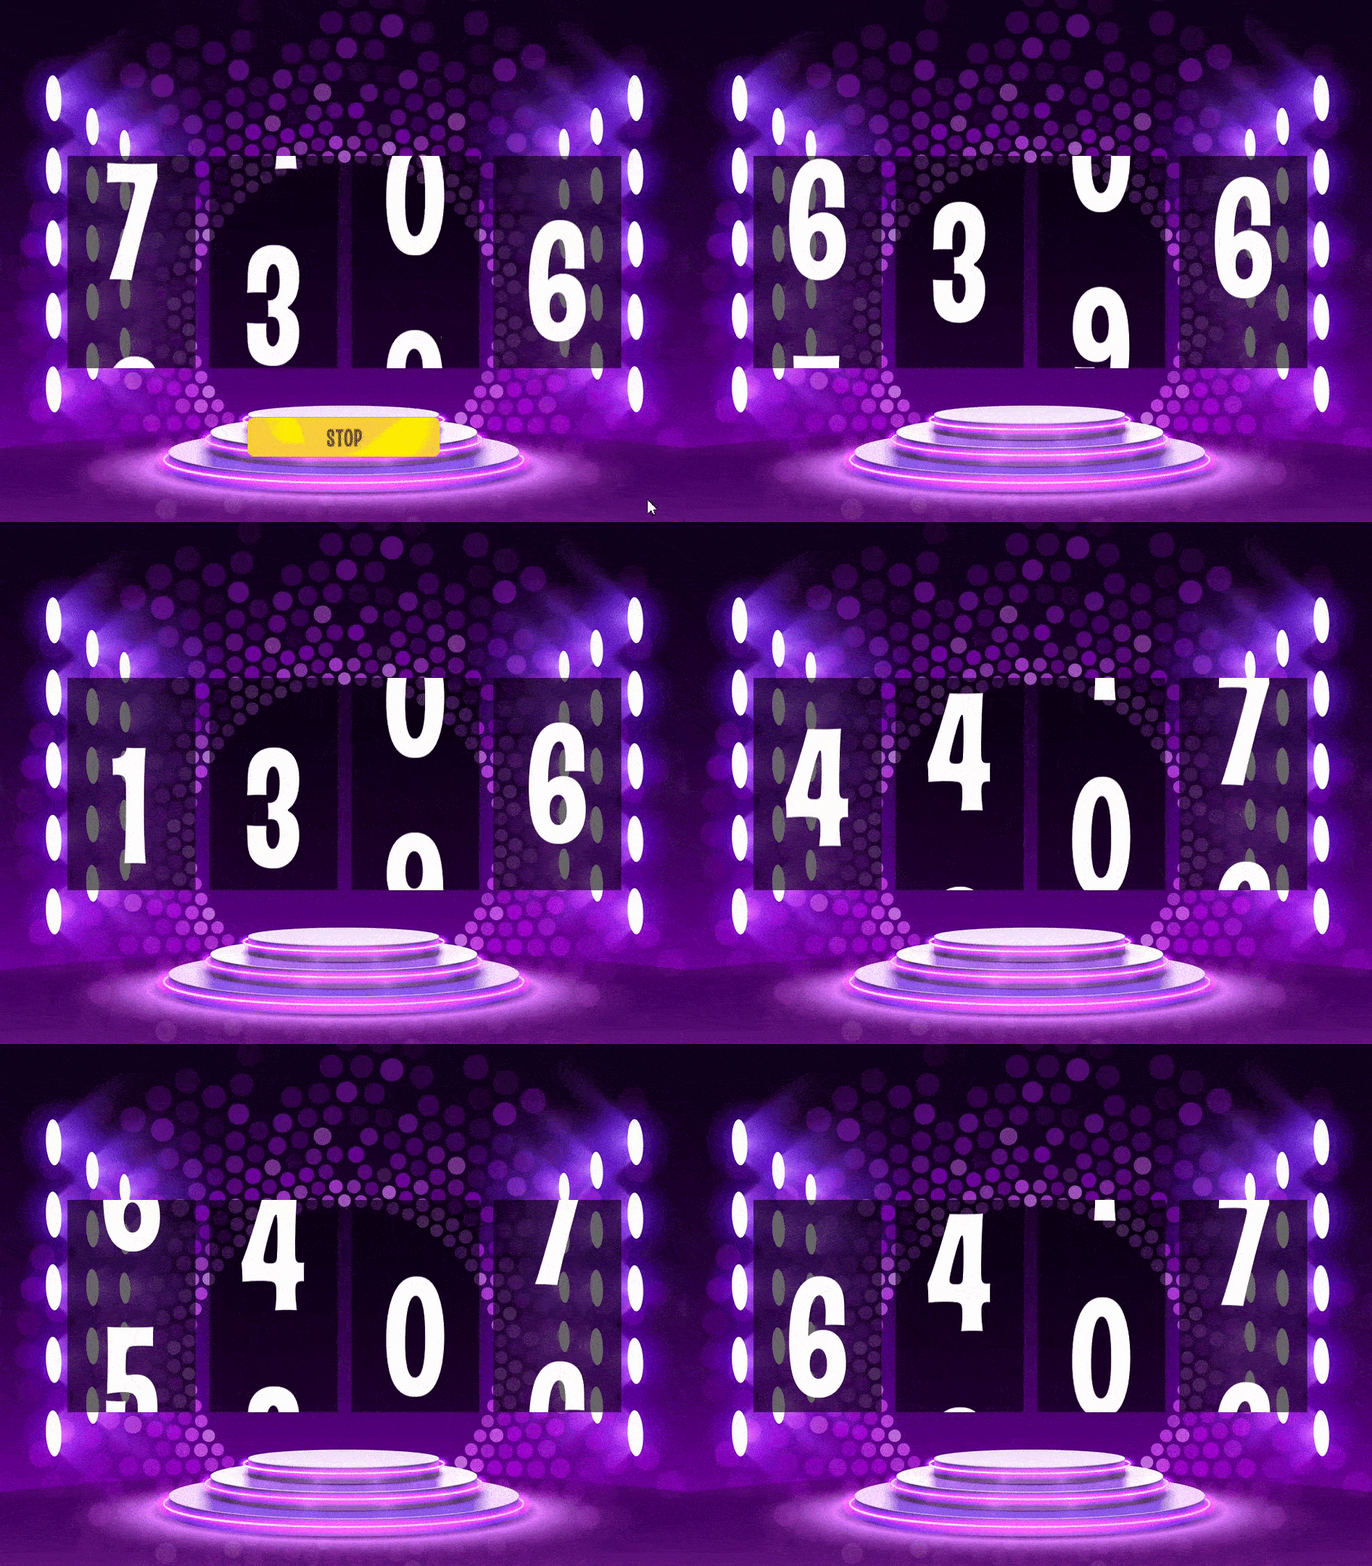
Samples\LuckyDraw
Engine Components are used:
- FreeType Font
- Glyph Font
- Graphics2D
- GUI Text
- GUI Image
- GUI Mask
- EventManager
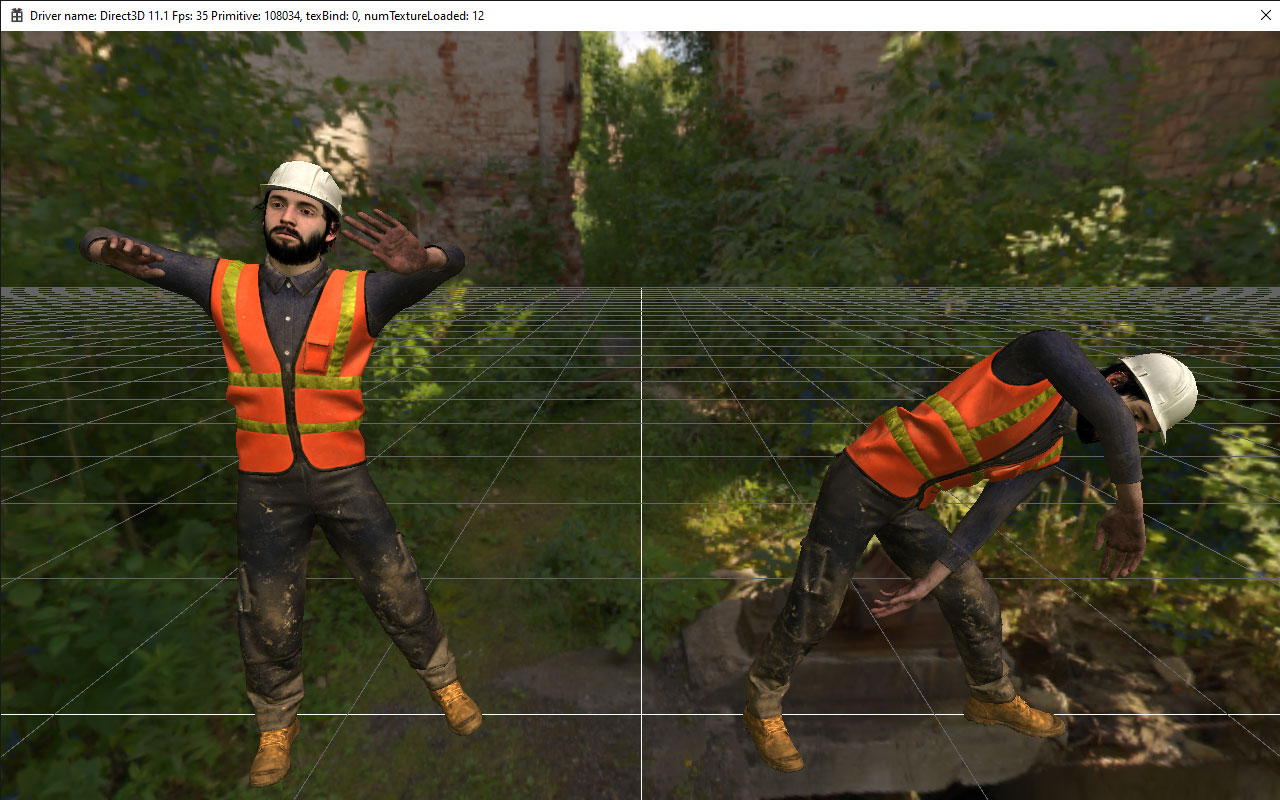
Samples\SkinnedMesh
This is an example of how to render a character model with animation. The models are downloaded from mixamo
- DAE Collada loader model/animation
- Forwarder rendering
- Skydome
- AnimationController
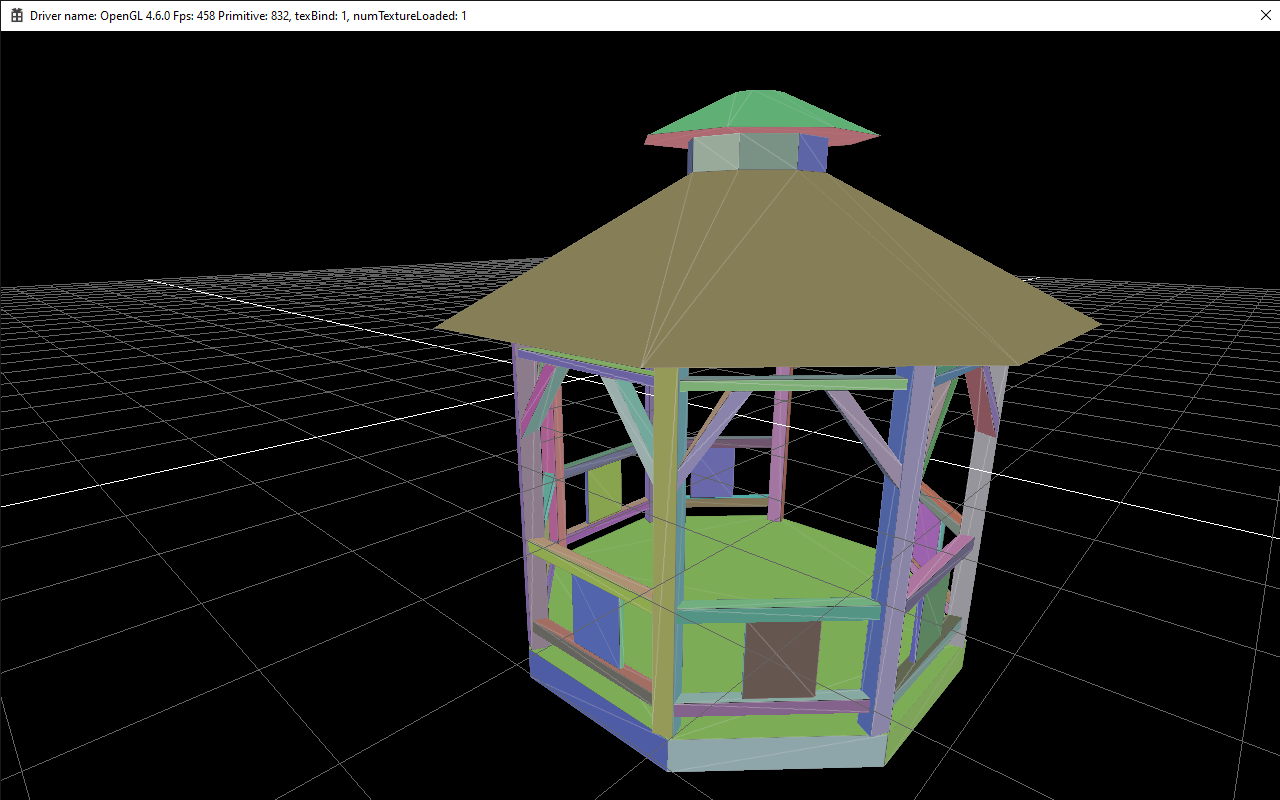
Samples\LightmapUV
This is a demo on how to use the UnwrapUV tool to create Lightmap UVs. Library xatlas is integrated to Skylicht Engine.
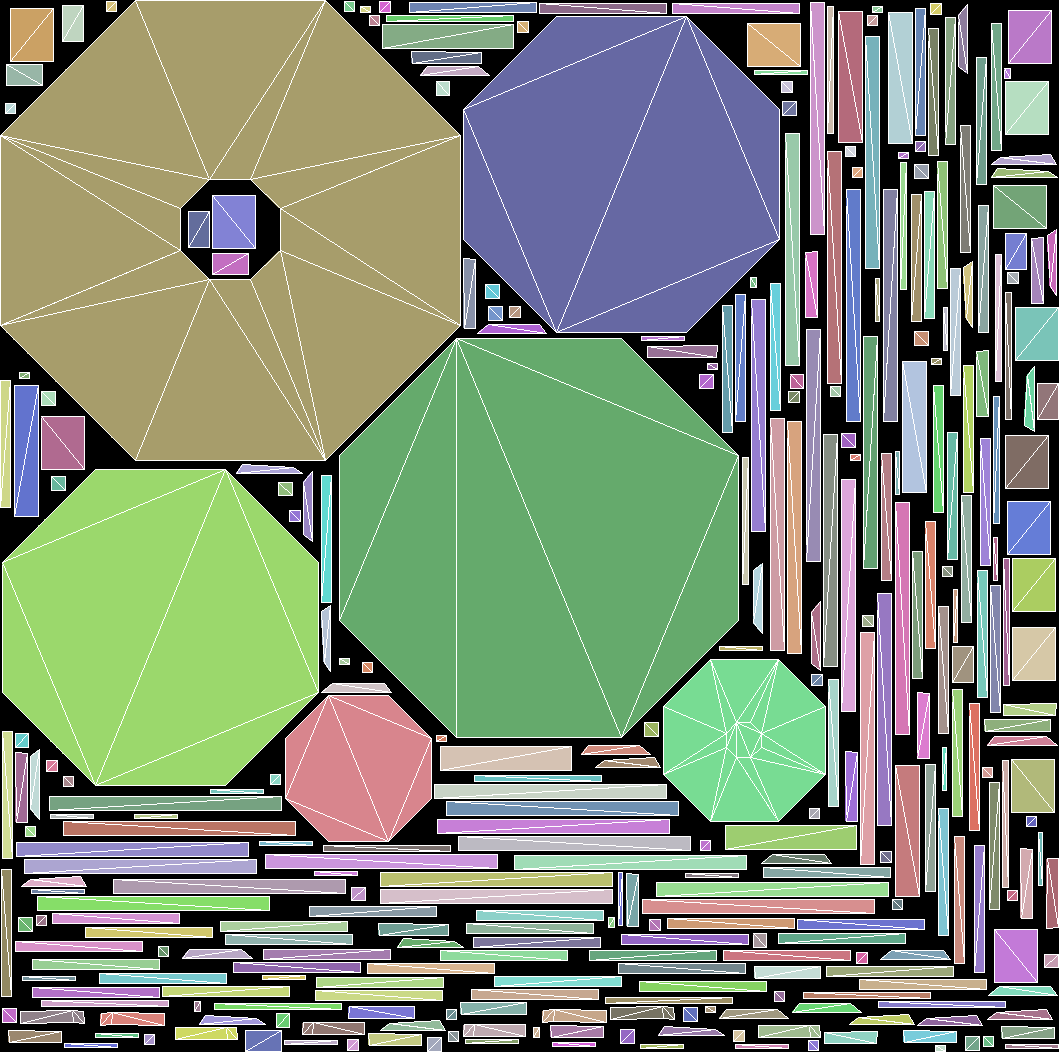
Samples\Lightmapping
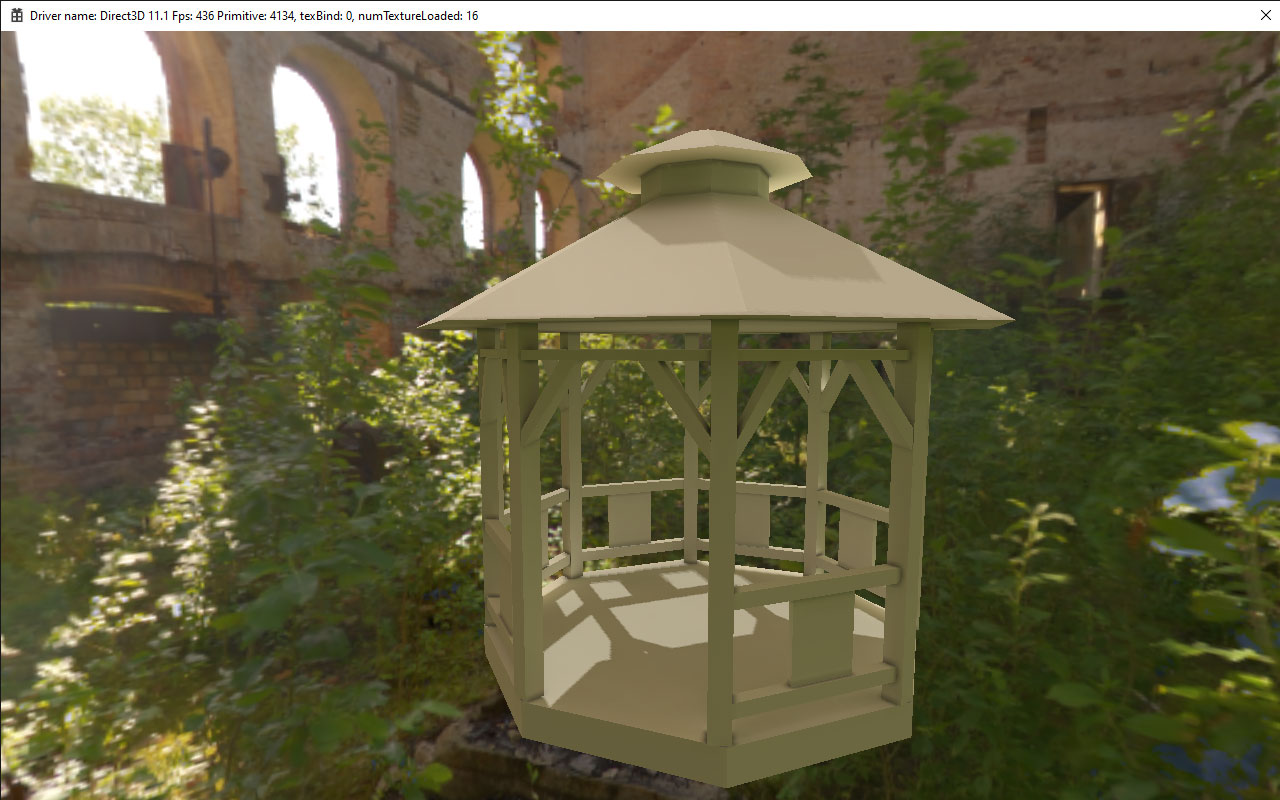
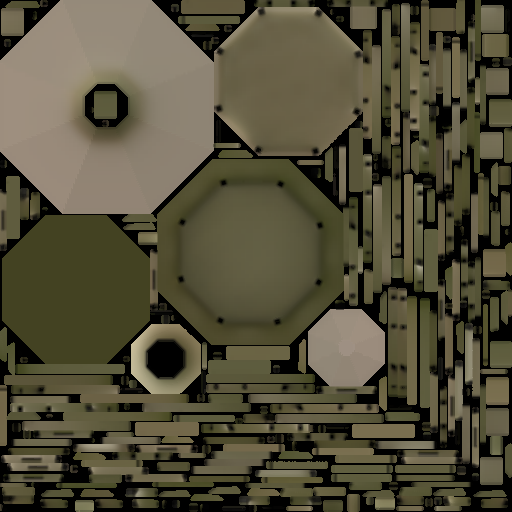
This is a demo showing how to use the lightmapper to bake indirect lighting colors onto a lightmap texture. Project references: Lightmapper
Gazebo
Result lightmap
Sponza lightmap
Indirect lighting on Sponza baked by Skylicht Lightmapper.
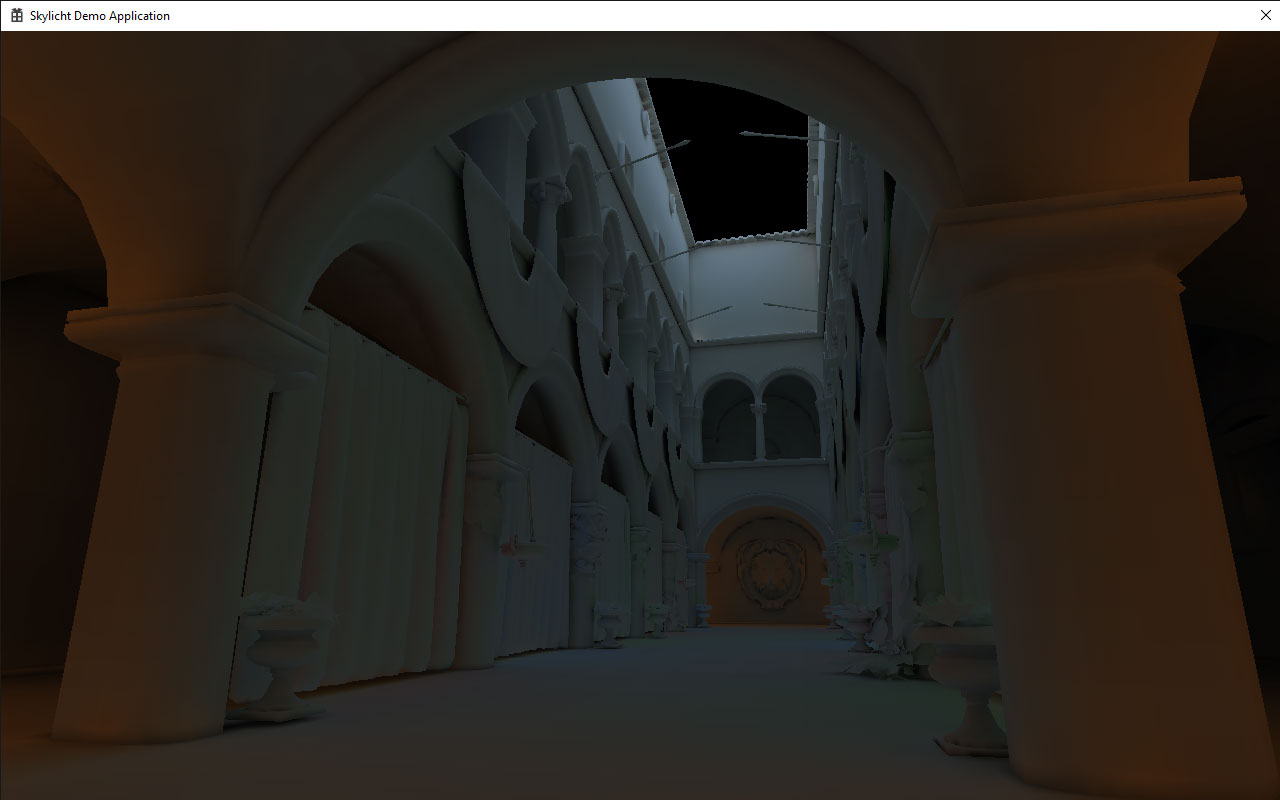
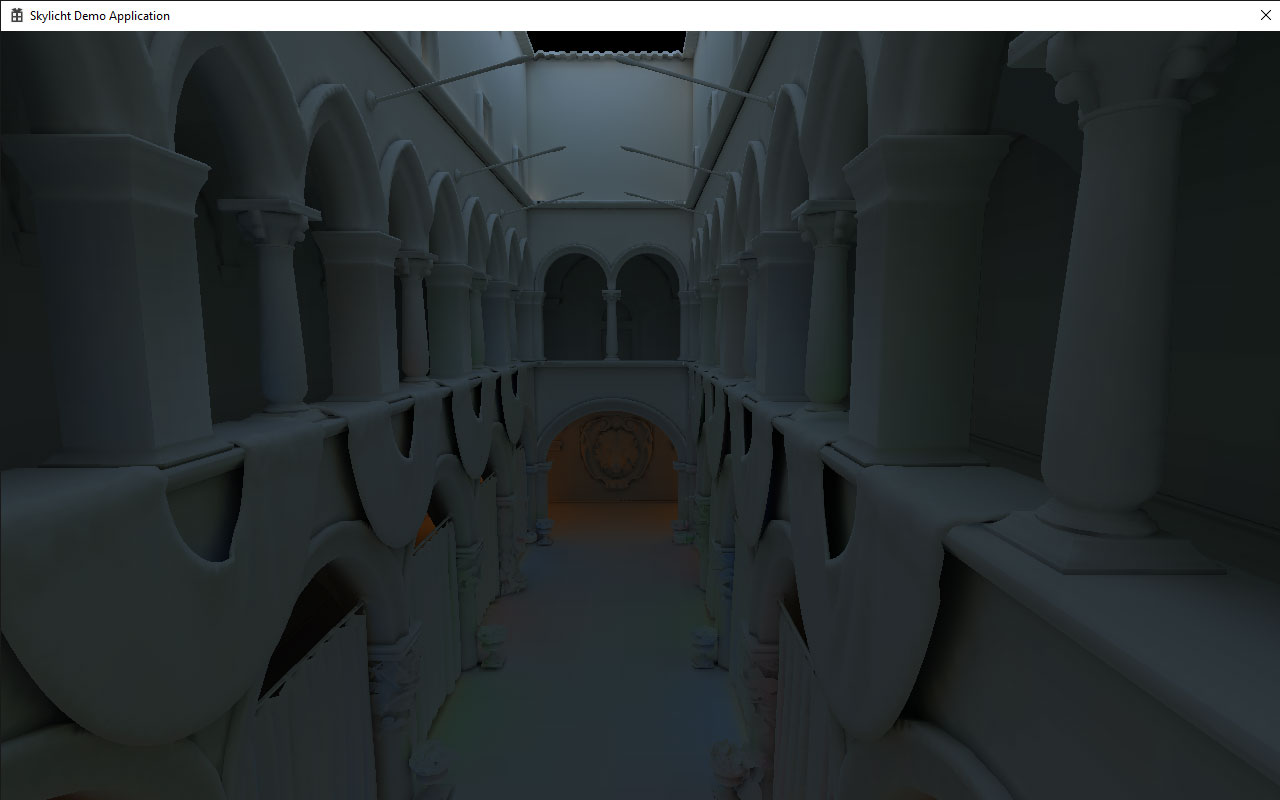
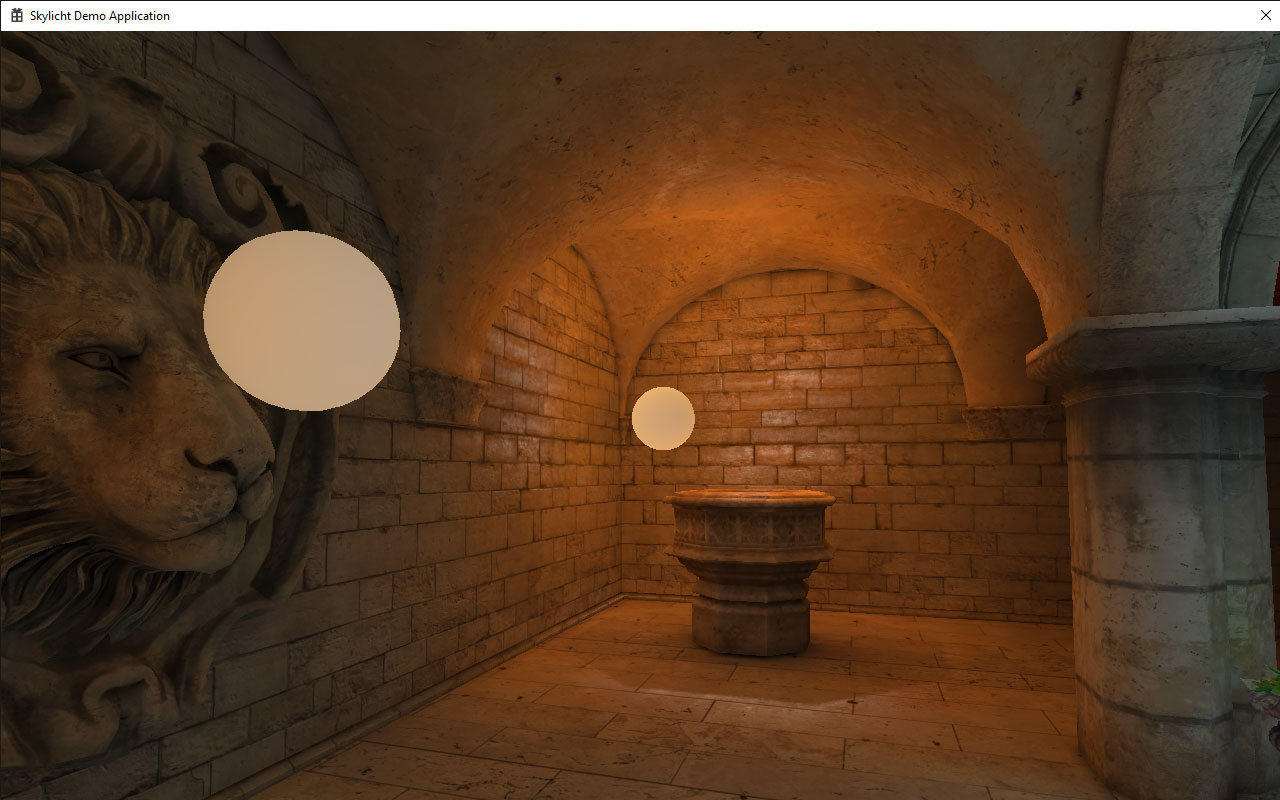
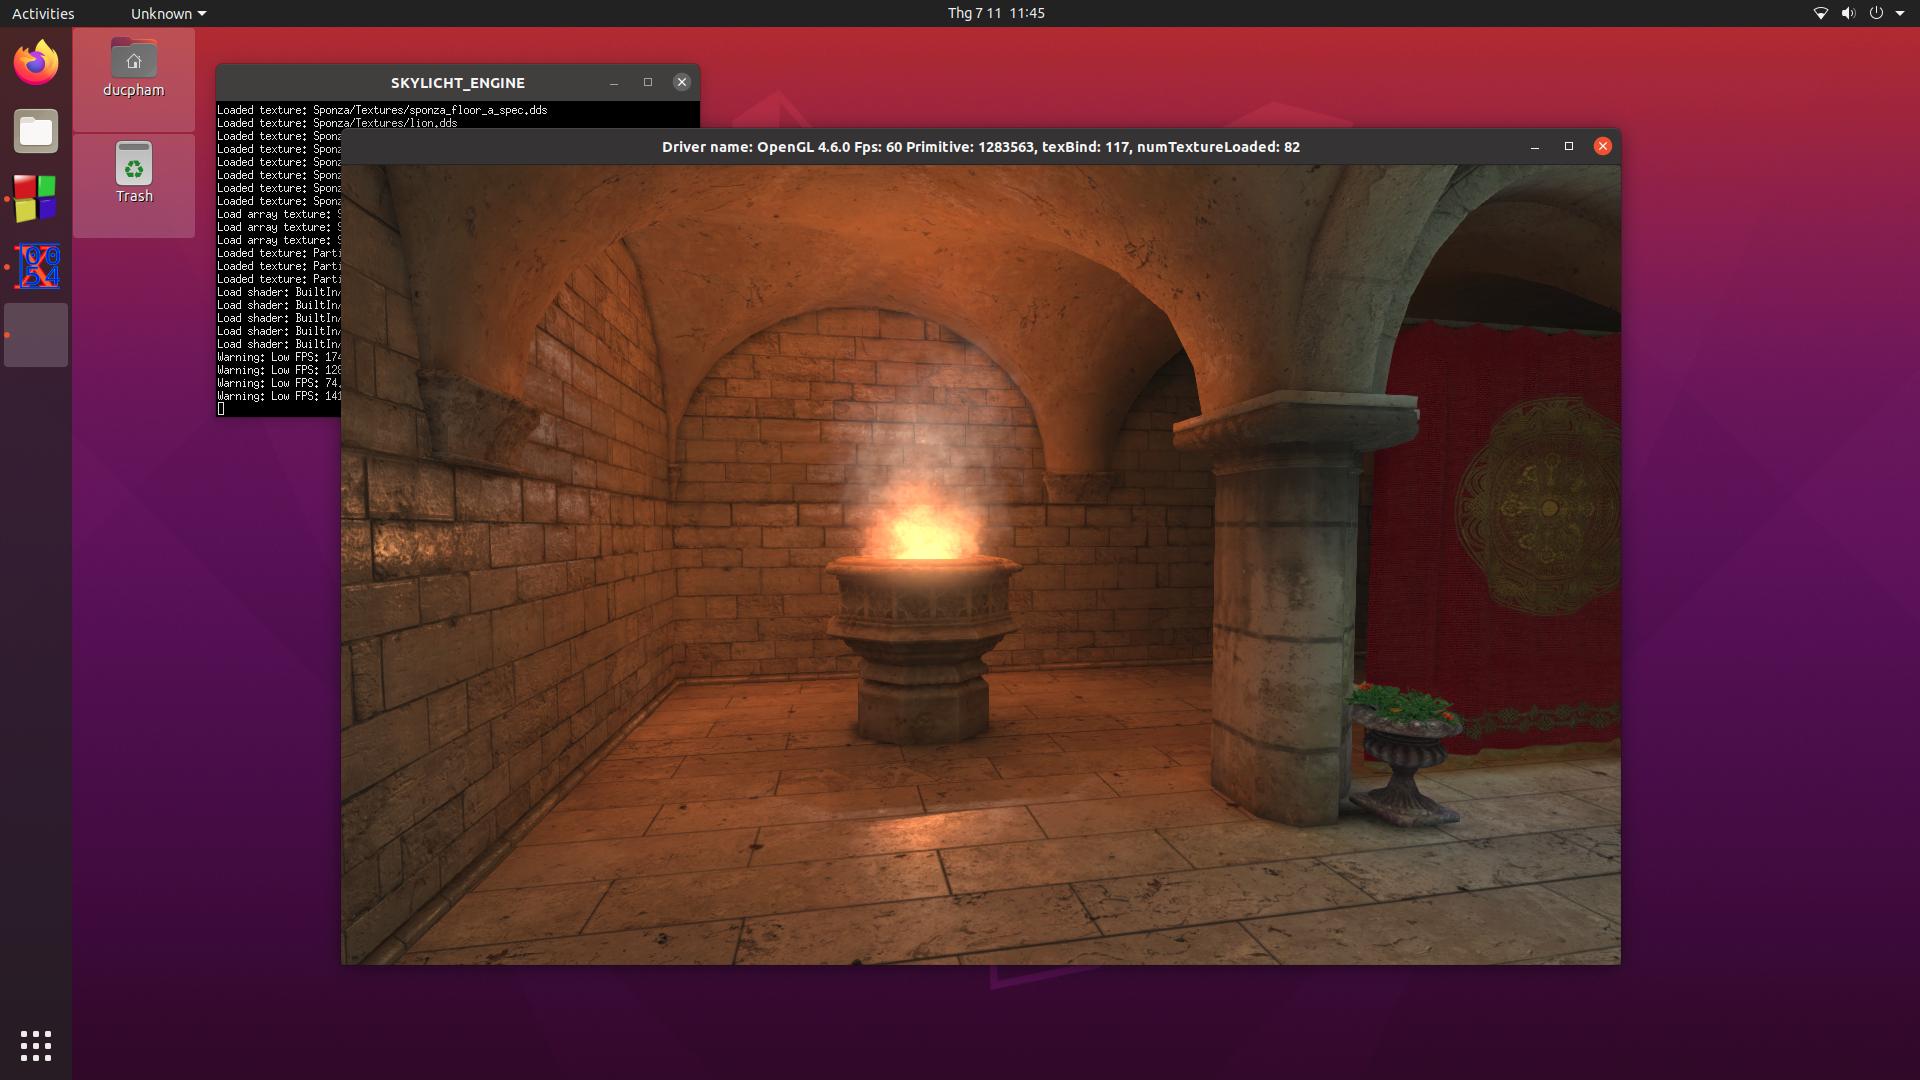
Samples\Sponza
This example is how to set up a simple lighting & lightmap. This scene uses basic diffuse bump specular shader.
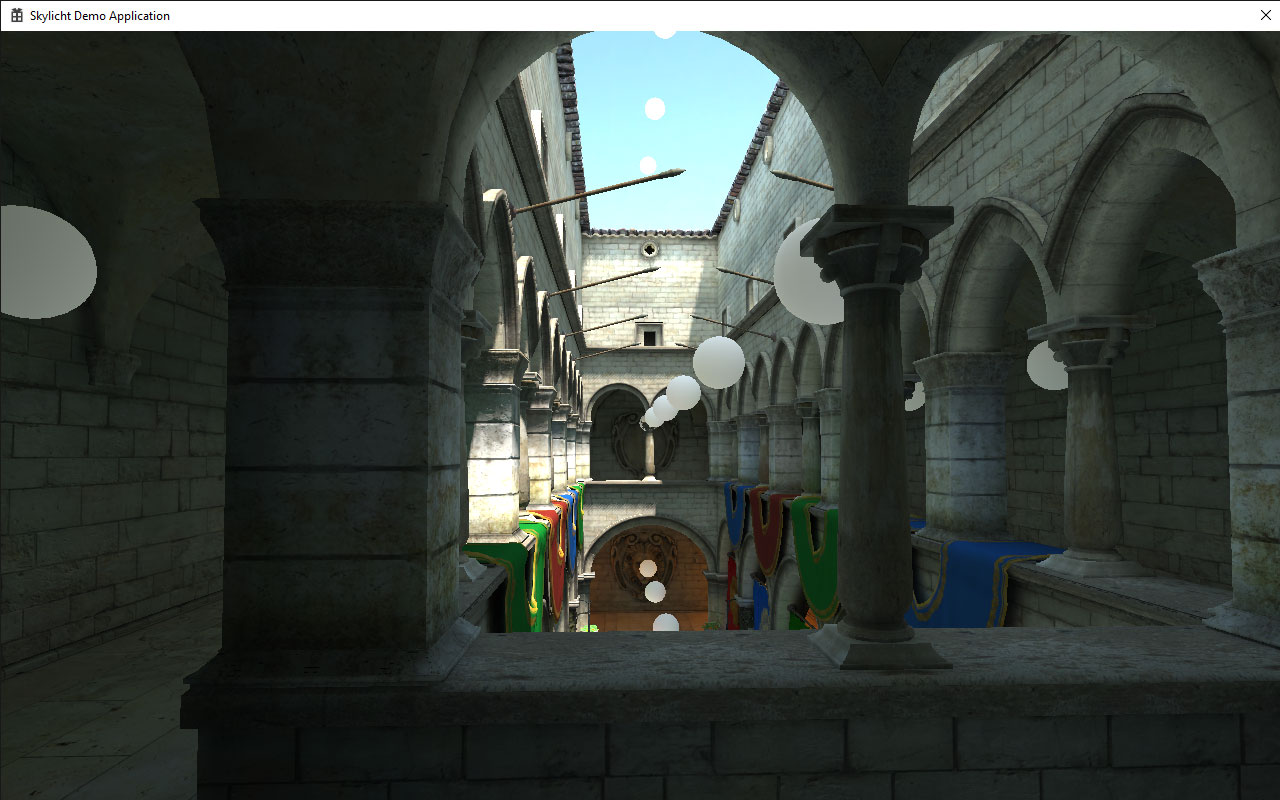
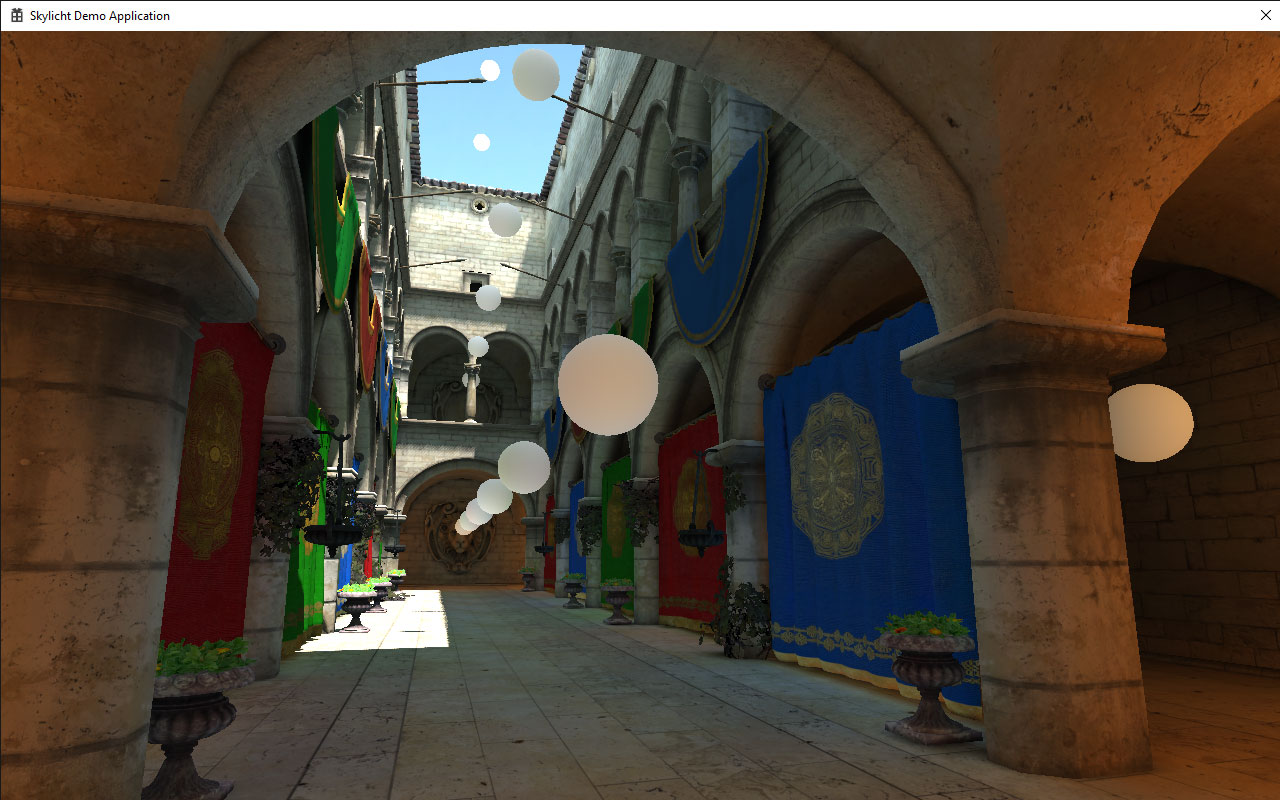
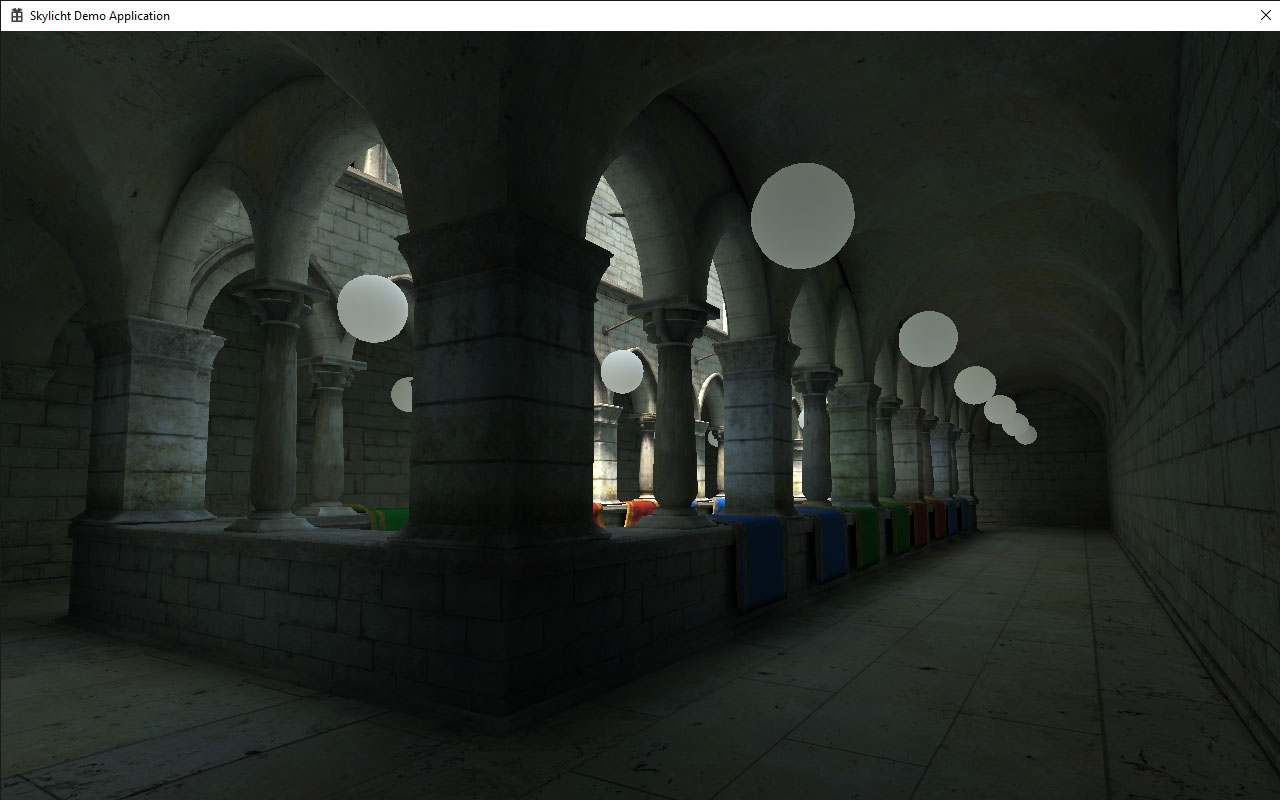
Run on Ubuntu 20.04
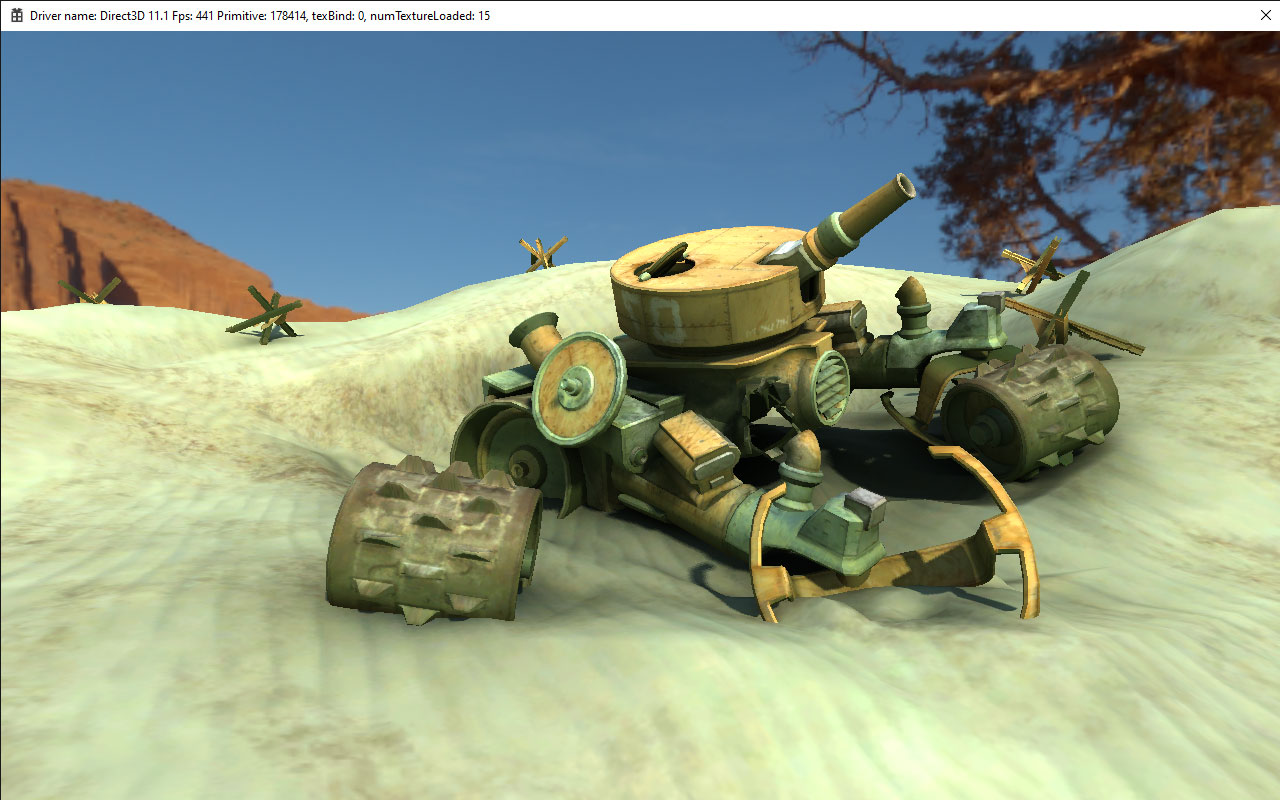
Samples\LightmappingVertex
This is a demo on how to use the lightmapper to apply indirect lighting color to vertex color.
Engine Components are used:
- OBJ Wavefront loader
- Deferred and Forwarder rendering
- Dynamic Direction Lighting
- Shadow Mapping
- Lightmapper
- Skydome
Baked Global Illumination (3 bounces)
Irradiance baked on Vertex Color:
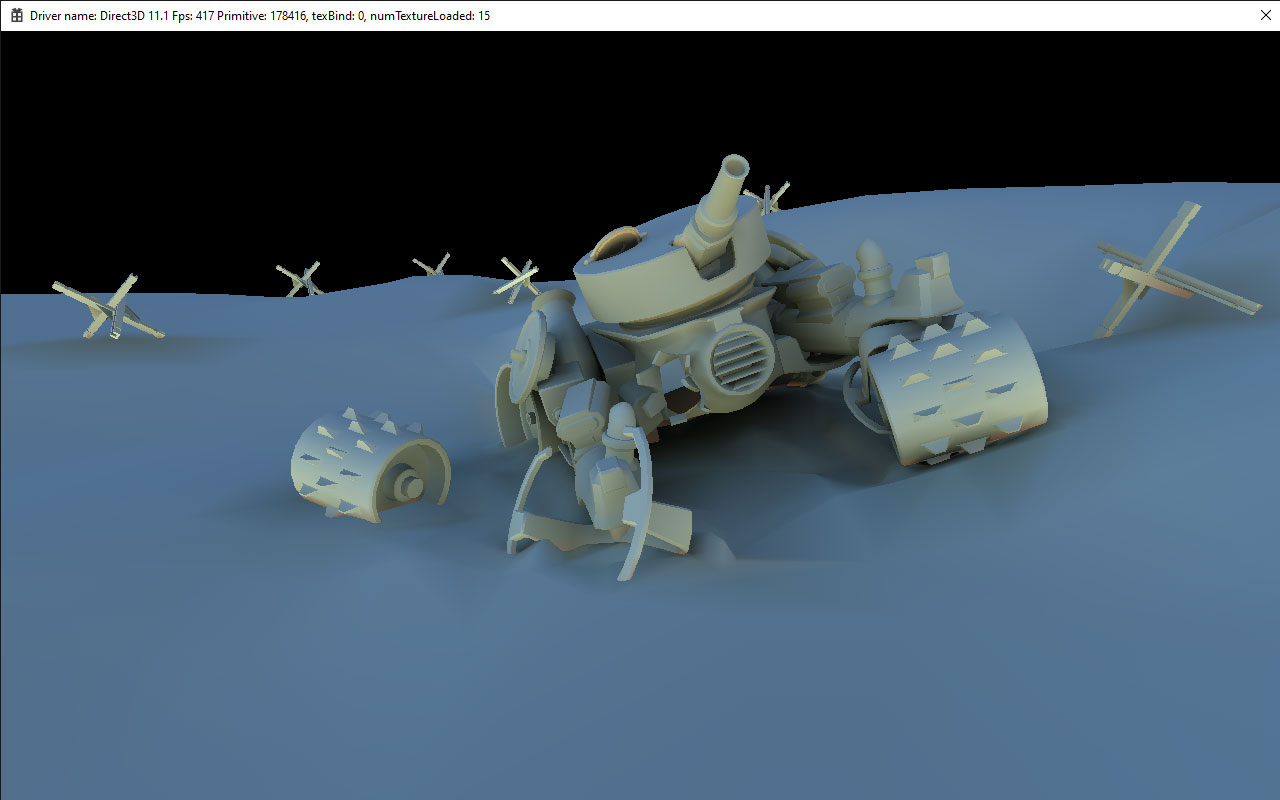
Indirect + Direction light - No post processing (3 bounces light)
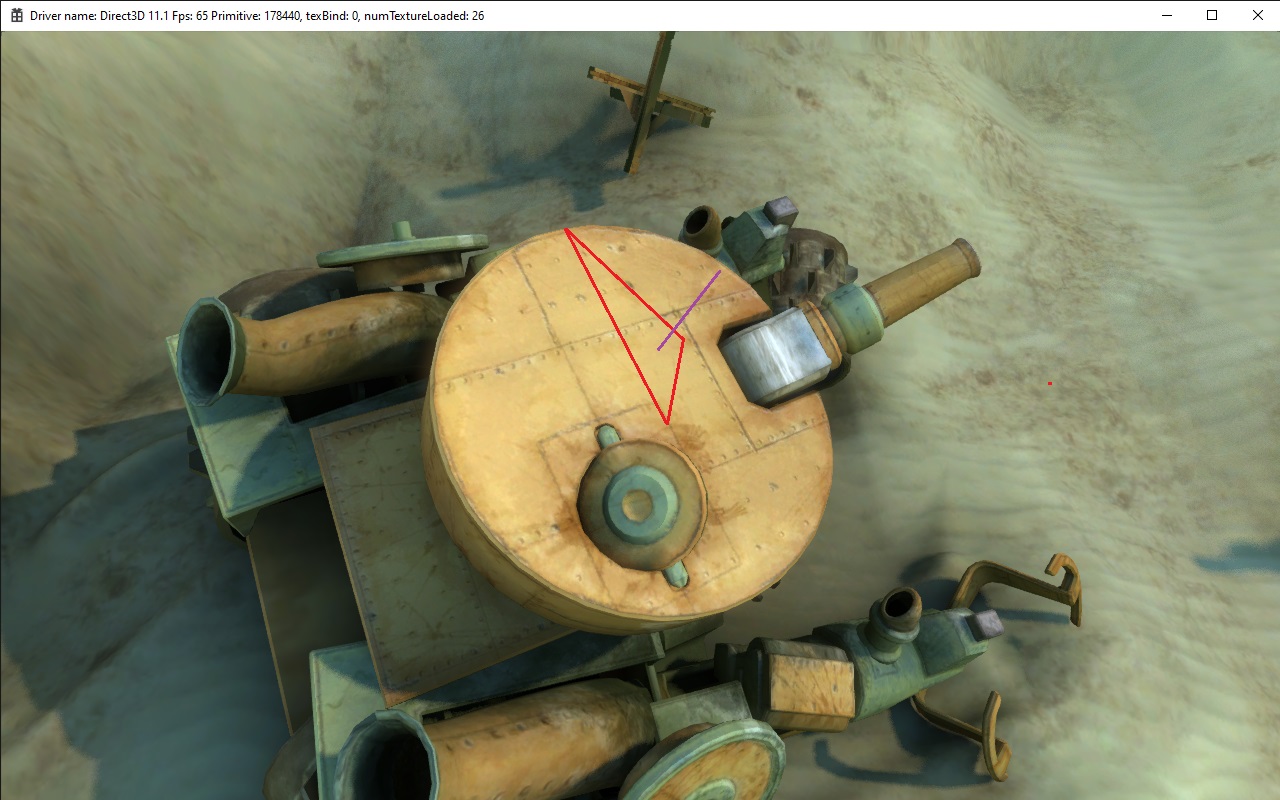
Samples\Collision
This is a demo to use CollisionManager to get collision point from the ray.
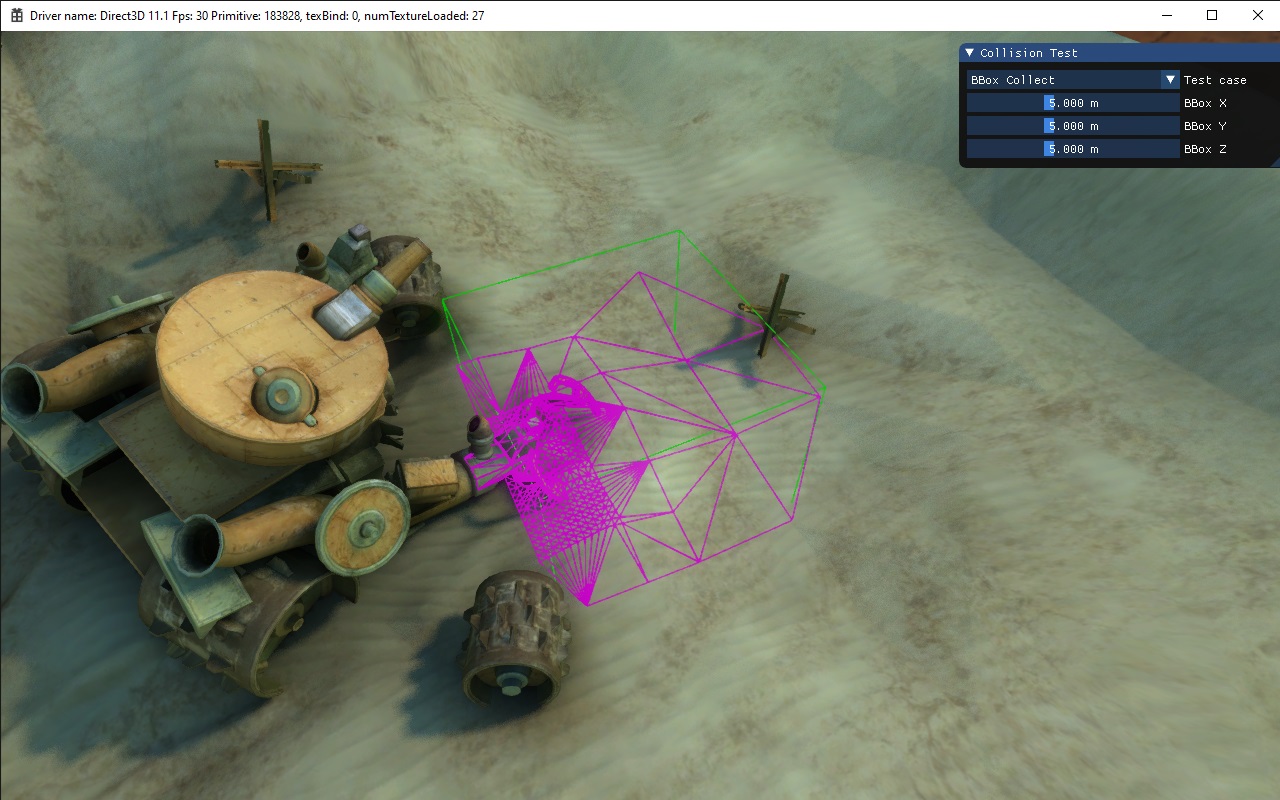
And how to query all triangles inside a Box
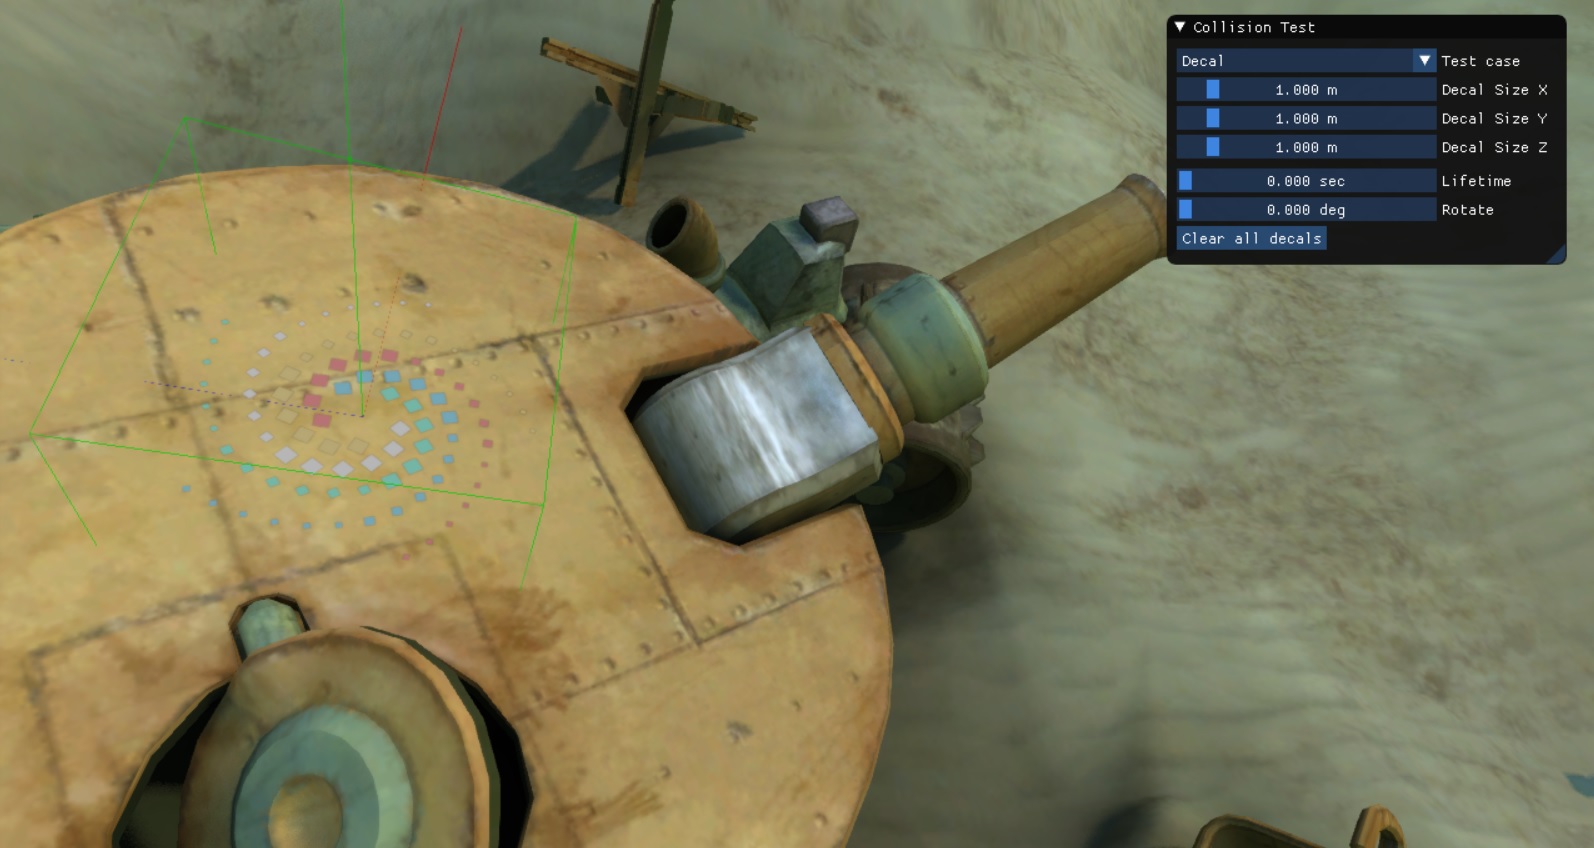
And how to use the decal projector feature
Samples\Instancing
This is a demo on setting up the rendering of many mesh instances to optimize draw calls and rendering performance.
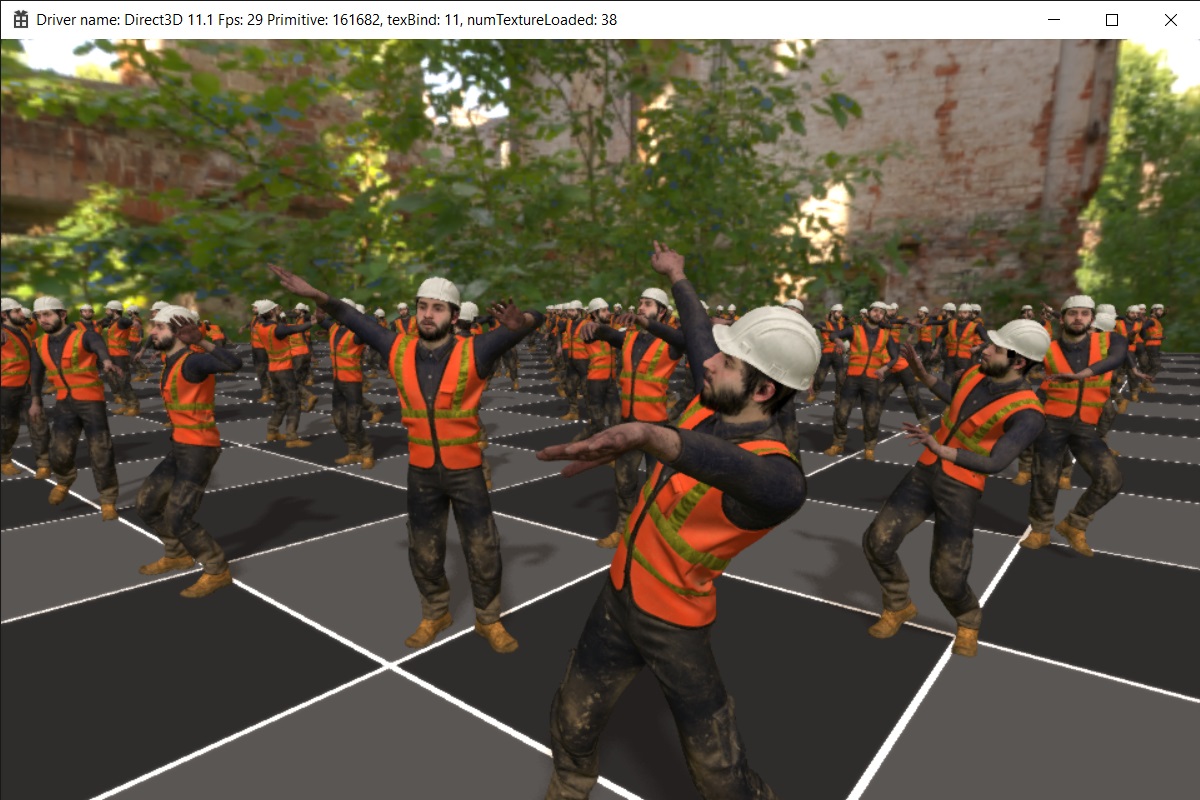
Samples\SkinnedMeshInstancing
This is a demo of drawing many characters and animations using the GPU Instancing technique.
Samples\BoidSystem
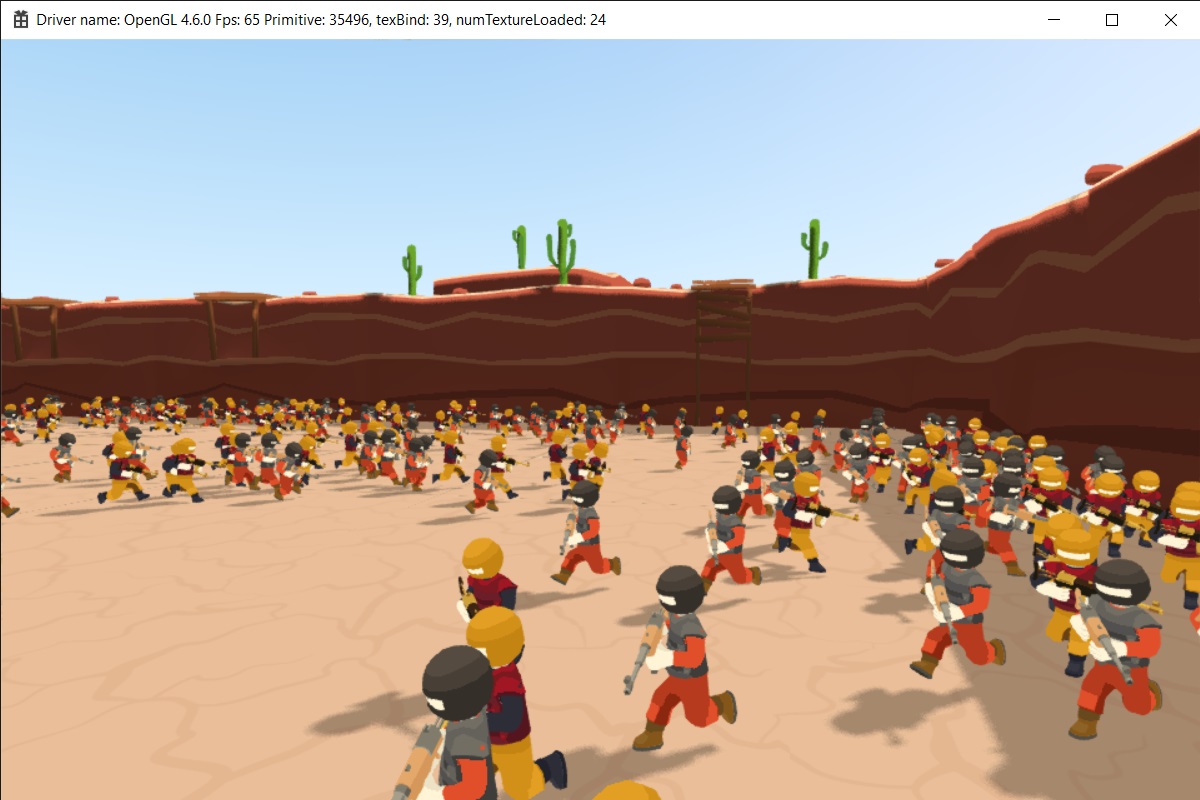
Samples\Particles
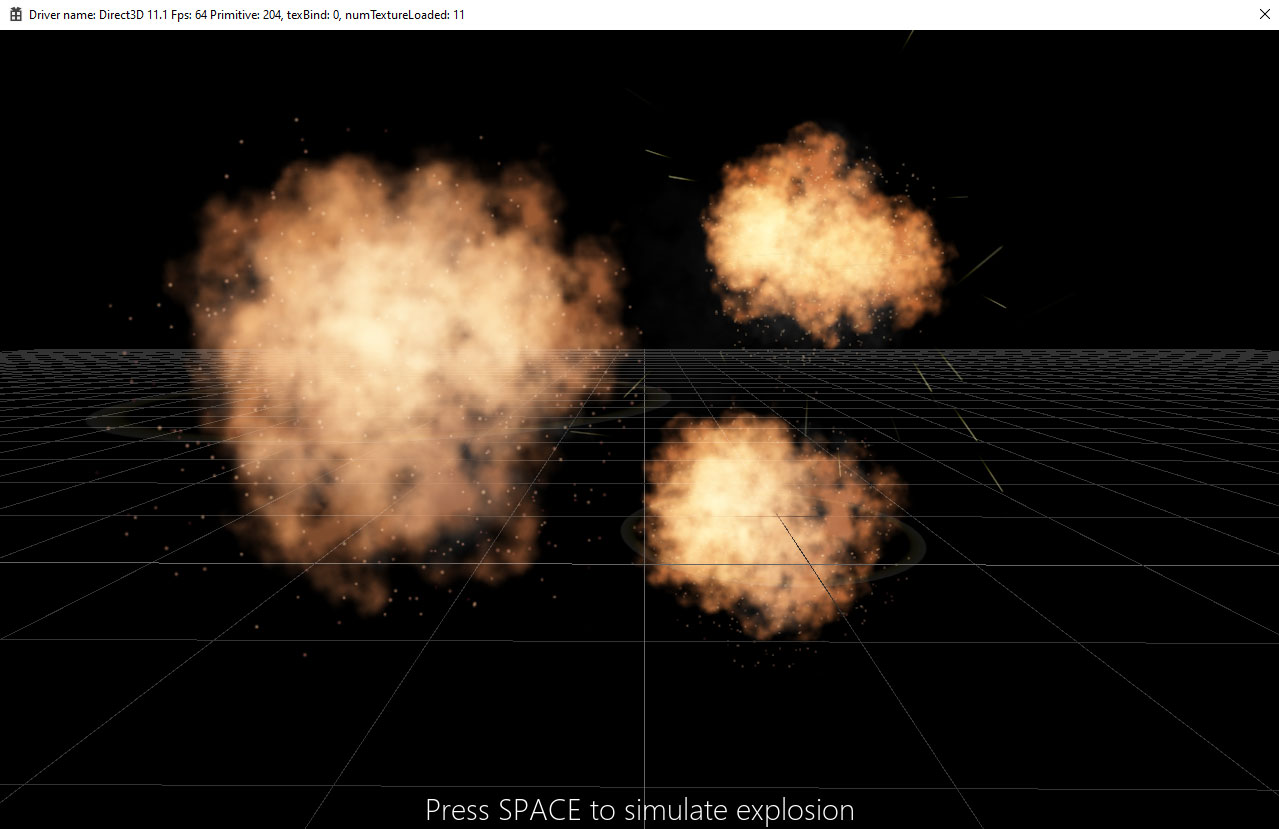
Skylicht Particle Component is a cleanup version of SPARK. We have optimized by GPU Billboard Instancing.
This is a demo showing how to create a particle system and use imgui
Basic particle
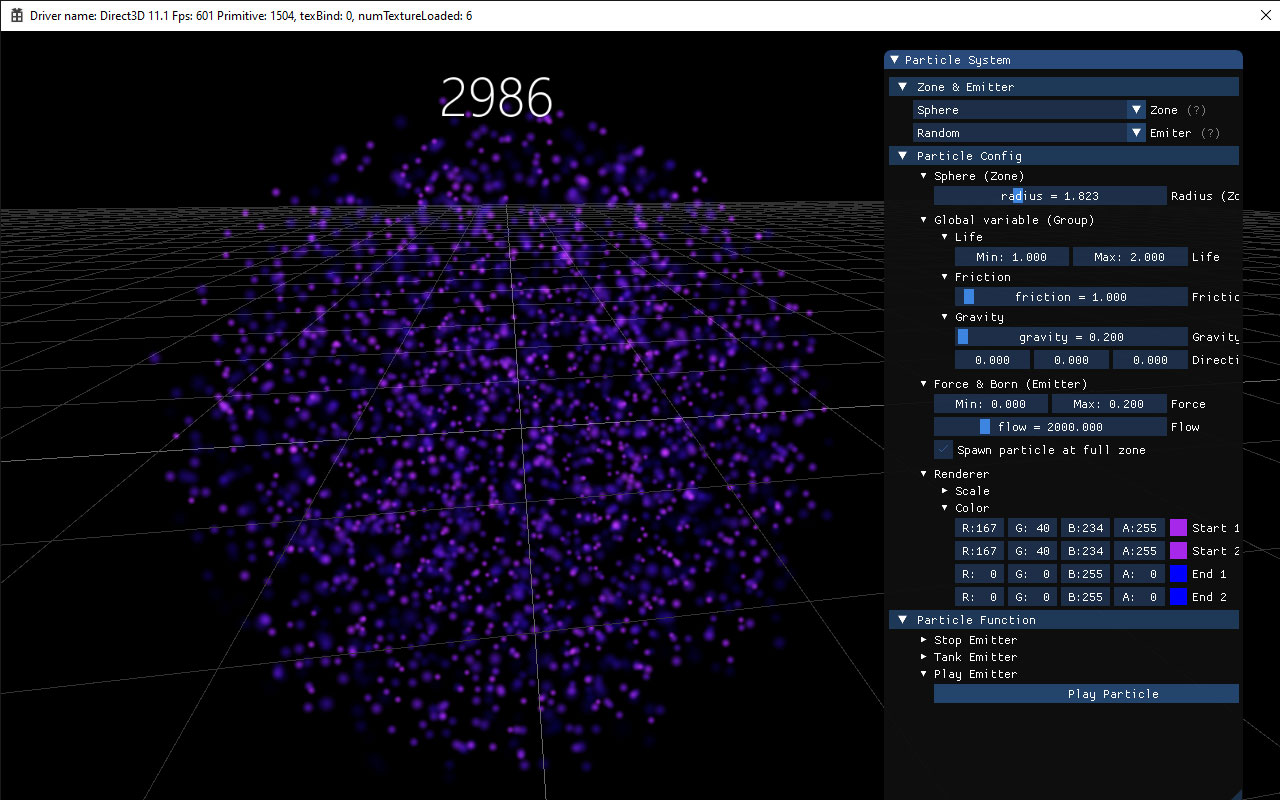
Explosion demo
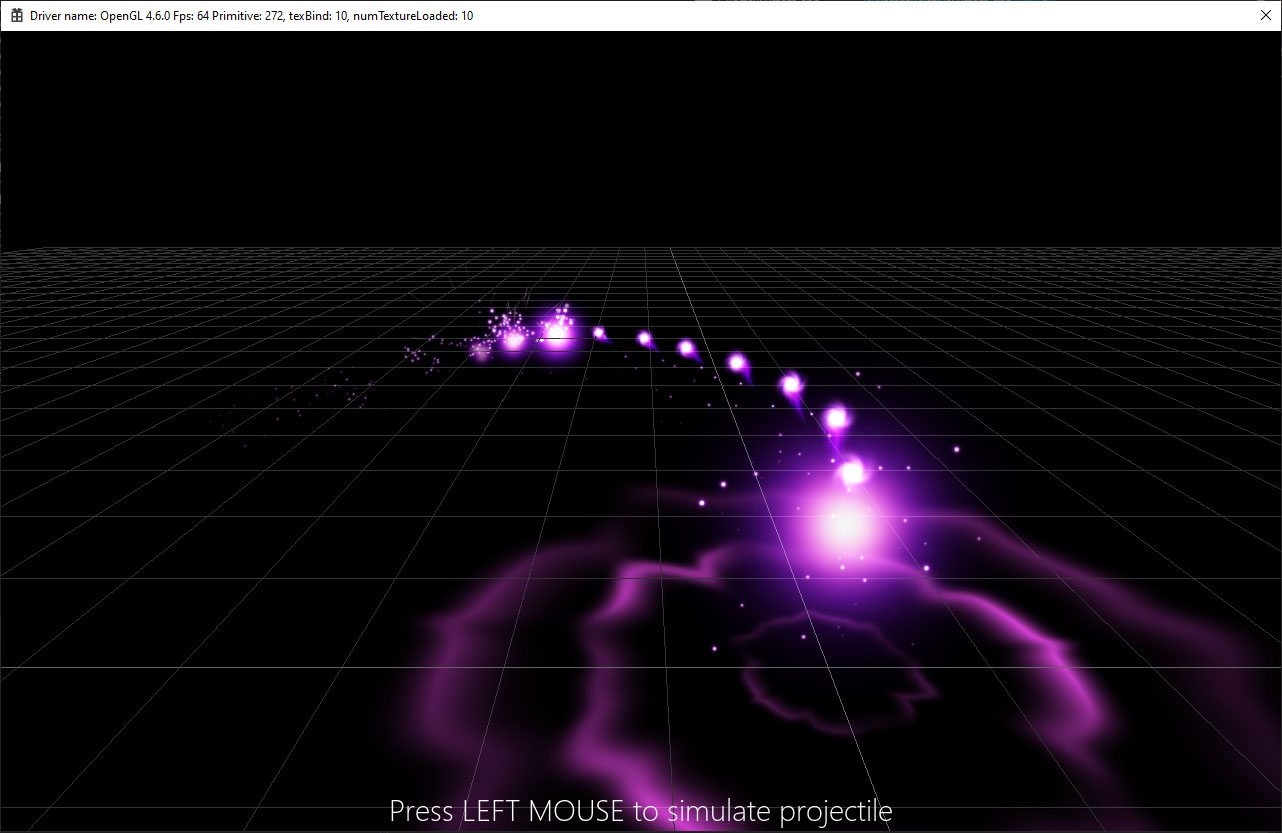
Magic particle
This is a demo code on how to use a simple projectile, impact, trail particle, sub emitter system.
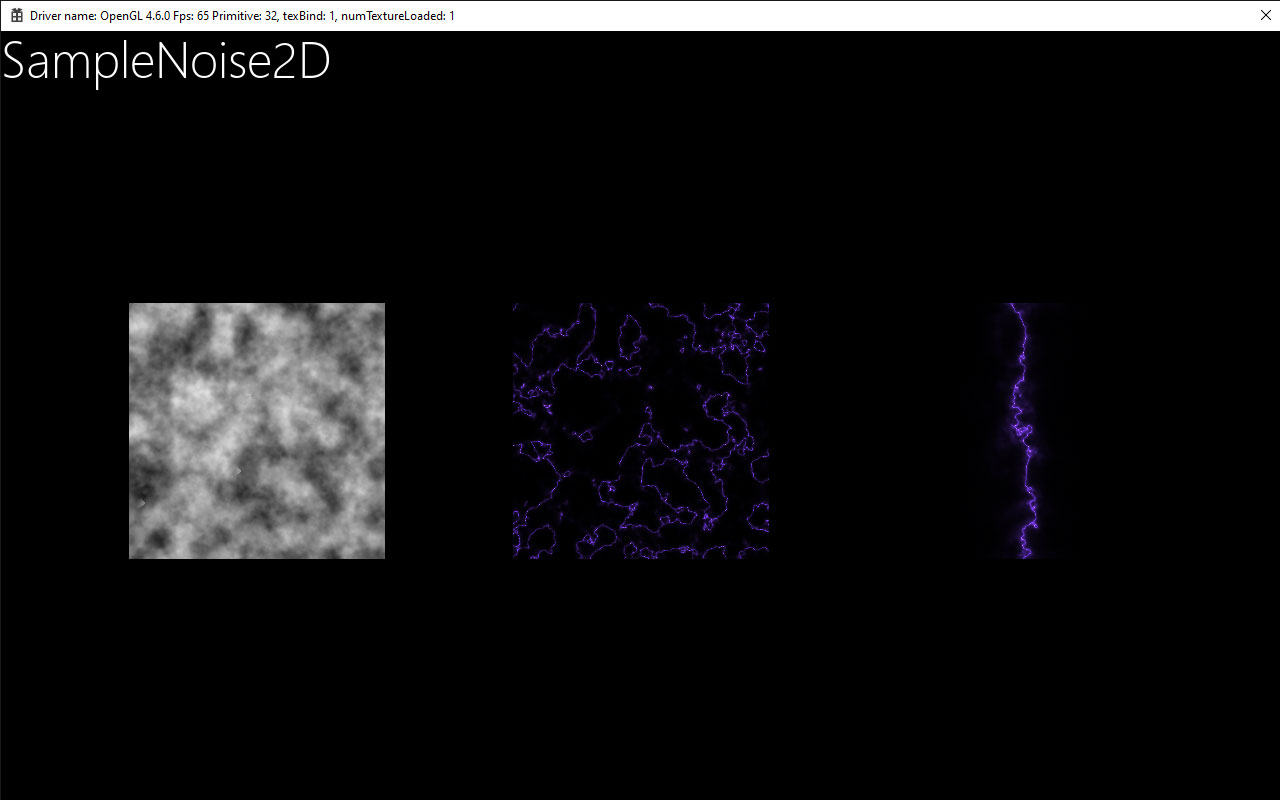
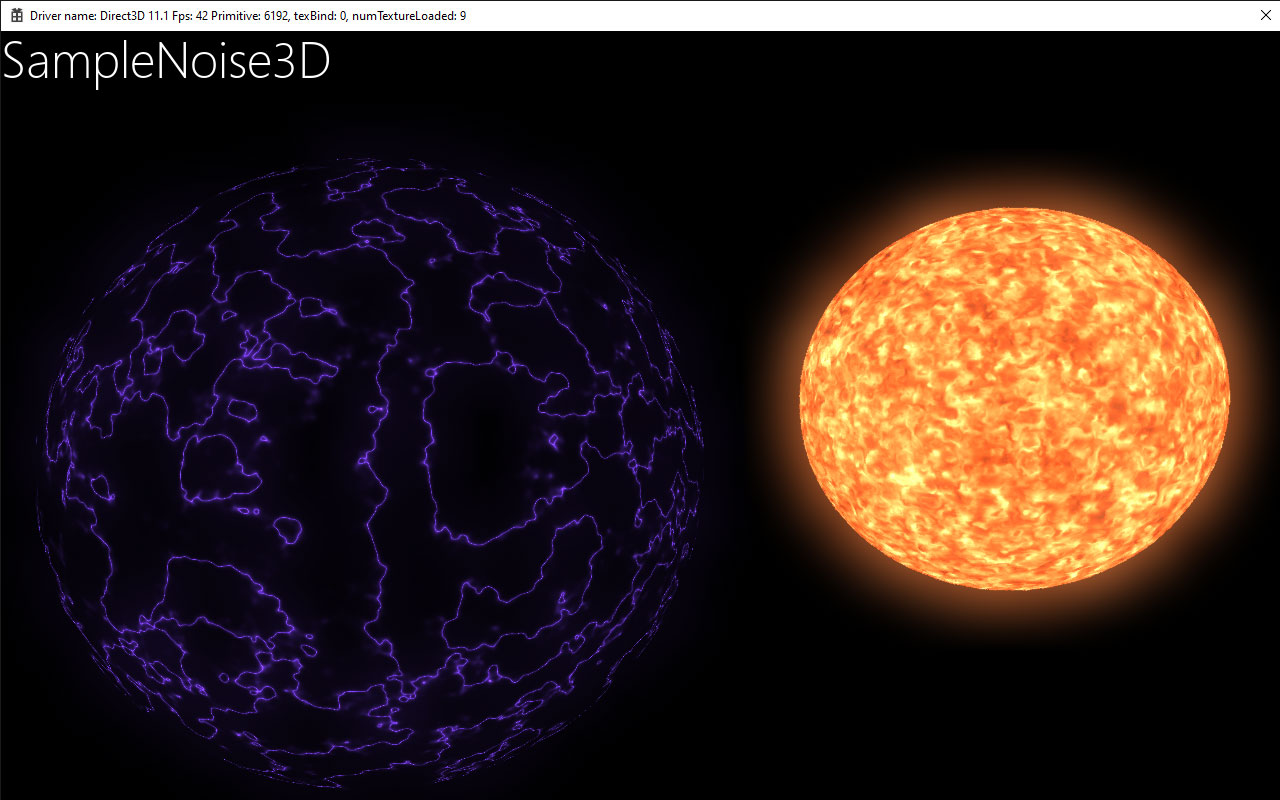
Samples\Noise2D, Noise3D
This is demo code how to use noise library shader to make vfx effect, particle turbulence.
Contributing
Welcome if you want to contribute your code to Skylicht Engine (Ex: add feature or fix bug). Wellcome to join the group. Open an issue and submit a pull request to this repository. Please read CONTRIBUTING.md for details on our code of conduct, and the process for submitting pull requests.
Thanks
- Julien Fryer (SPARK) about references and source code demo of particle system.
- Inigo Quilez about perlin noise reference.
- Irrlicht Community, who have shared some demo
License
Skylicht Engine is licensed under MIT License
Skylicht Engine is based in part on the work of:
- Irrlicht Engine
- Bullet Physics
- Google Angle
- Ocornut Imgui
- Xatlas
- ufbx
- Spark Particle
- Freetype2
- Independent JPEG Group, libPng, zlib, curl...
This means that if you've used the Skylicht Engine in your product, you must acknowledge somewhere in your documentation that you've used. It would also be nice to mention that you use the 3rd parties library... Please see the README files from 3rd parties for further information.
Thanks, Project Maintainer: Pham Hong Duc
Contributors




Similar repos





Languages
C++
67.4%
C
27.5%
HLSL
1.8%
GLSL
1.6%
Skylicht Engine is C++ Game Engine based on Irrlicht 3D. And my goal is to create a high-performance and lightweight Game Framework that can seamlessly function on both web and mobile platforms. This framework will be available to everyone for free.
771
stars
2,520
commits
C++
primary language
Sep 15, 2026
updated
README
Skylicht Engine
Skylicht Engine is an evolution of the Irrlicht Project. We have upgraded many features, including Sound Engine, Physics Engine, Particle Engine...
-
Core functionality: Direct3D11, OpenGL 4+, OpenGLES 3+, Google Angle GLES video driver backends.
-
Cross-Platform Framework: Android, IOS, Win32/Win64, UWP, Linux, MacOS, HTML5.
-
Render pipeline: Forwarder & Deferred.
Skylicht Engine is a super lightweight Game Engine that targets mobile platforms (Android, IOS). And, it's completely free.
How to build the project
| Platform | Build Status |
|---|---|
| Cygwin64 | |
| Windows | |
| MacOS, IOS | |
| Linux | |
| Emscripten | |
| Android | |
Prerequisites
- CMake 3.12 or higher
- Python 3.x
- Visual Studio (2017 or higher if you want to build on Windows OS)
Build source code
- Clone this repo
- Skylicht project have used the Large Files like .tga, .fbx... for demo samples, so you must install Git LFS
# call 'git lfs pull' after checkout
git lfs pull
- Build assets bundle
C:\skylicht-engine>cd Assets
C:\skylicht-engine\Assets>python BuildAssetBundles.py
C:\skylicht-engine\Assets>cd ..
- Run CMake from the current directory to generate visual studio project or xcode project
# Visual Studio 2019
C:\skylicht-engine>cmake -S . -B ./PrjVisualStudio -G "Visual Studio 16 2019" -A x64

# Visual Studio 2022
C:\skylicht-engine>cmake -S . -B ./PrjVisualStudio -G "Visual Studio 17 2022" -A x64

# Xcode
/User/Skylicht/Documents/skylicht-engine$cmake -S . -B ./PrjMac -G Xcode

# Linux
$ skylicht-engine$ cmake -S . -B ./PrjLinux -G "Unix Makefiles"
-
Open the generated solution
PrjVisualStudio/SKYLICHT_ENGINE.sln -
Once the solution opens, right click the SampleXXX project, click "Set as StartUp Project" and click the play button at the top to run the Demo App.
-
More details: please preview command in BuildCommand folder.
Build data assets
Compress Texture
- Optional, You can skip this step if you don't modify any resource texture.
- This python tool will convert texture .TGA to compressed texture (.DDS, .ETC2, .PVRTC) to optimize gpu memory on runtime.
# Install Tinydb
# https://pypi.org/project/tinydb
C:\skylicht-engine>C:\Python37\Scripts\pip install tinydb

# Install Pillow (Image processing)
# https://pillow.readthedocs.io/en/4.1.x/index.html
C:\skylicht-engine>C:\Python37\Scripts\pip install Pillow

# Compress TGA to DDS, ETC2 texture
C:\skylicht-engine>cd Assets
C:\skylicht-engine\Assets>python BuildTextureCompressDDS.py
C:\skylicht-engine\Assets>python BuildTextureCompressETC.py
C:\skylicht-engine\Assets>cd ..
Build Shader
- Optional, You can skip this step if you don't modify any shader.
- This python tool use C Preprocessor to inline shader (GLSL, HLSL) script.
# Install pcpp (C Preprocessor tool)
# https://pypi.org/project/pcpp
C:\skylicht-engine>C:\Python37\Scripts\pip install pcpp

# Build shader script
C:\skylicht-engine>cd Assets
C:\skylicht-engine\Assets>python BuildShader.py
C:\skylicht-engine\Assets>cd ..
- You can optimize shader for rendering on IOS, Android by recompiling the shader with HARD_SHADOW.
// Assets\BuiltIn\Shader\Shadow\GLSL\LibShadow.glsl

#define HARD_SHADOW
// #define PCF_NOISE
And re-build the shaders
# Build shader script
C:\skylicht-engine>cd Assets
C:\skylicht-engine\Assets>python BuildShader.py
C:\skylicht-engine\Assets>cd ..
Add your code to Project
Add source code
- Add new source files or subfolders on
Projects/{ProjectName}/Sourceand regenerate project
C:\skylicht-engine>cmake -S . -B ./PrjVisualStudio -G "Visual Studio 17 2022" -A x64
Create application project
- Run Scripts/create_project.py. Example: Create application NewApplication at folder Samples\NewApplication
C:\skylicht-engine>python Scripts\create_project.py NewApplication Samples\NewApplication
- Edit CMakeProjects.cmake, add new line:"subdirs (Samples/NewApplication)" and regenerate projects
- Open Visual Studio Solution and click NewApplication - "Set as StartUp Project".
Android
Prerequisites
- Install Android Studio and SDK
- Install mingw-w64 for Windows
- Install Android NDK
How to build
Step 1: Build native library
- Edit the file BuildCommand/BuildAndroidNDK.cmd by text editor and update your path MINGW and NDK
# BuildAndroidNDK.cmd
# Set your pc folder, example
set MINGW=C:\MinGW\bin
set NDK=C:\Android\android-ndk-r26d
...
- Run BuildCommand/BuildAndroidNDK.cmd to build android native library
Step 2: Copy native library to Gradle Project
# Make folder jniLibs on Android Project
C:\skylicht-engine>mkdir Projects\Android\app\src\main\jniLibs
C:\skylicht-engine>mkdir Projects\Android\app\src\main\jniLibs\armeabi-v7a
C:\skylicht-engine>mkdir Projects\Android\app\src\main\jniLibs\arm64-v8a

# Copy result native ndk (from step 1) to jniLibs
# Project SampleSkinnedMesh
C:\skylicht-engine>copy Bin\Android\Libs\arm64-v8a\libSampleSkinnedMesh.so Projects\Android\app\src\main\jniLibs\arm64-v8a
C:\skylicht-engine>copy Bin\Android\Libs\armeabi-v7a\libSampleSkinnedMesh.so Projects\Android\app\src\main\jniLibs\armeabi-v7a
Step 3: Copy asset resource to Gradle Project
C:\skylicht-engine\Assets>python BuildTextureCompressETC.py
C:\skylicht-engine\Assets>python BuildAssetBundles.py
C:\skylicht-engine\Assets>cd..
Android APK:
C:\skylicht-engine>SET ASSET_PATH=Projects\Android\app\src\main\assets
Android AAB: Assets will be copied to assetPack: appdata
C:\skylicht-engine>SET ASSET_PATH=Projects\Android\appdata\src\main\assets
And copy command
# Copy built-in asset
C:\skylicht-engine>copy Bin\BuiltIn.zip %ASSET_PATH%

# Copy project asset
# Project SampleSkinnedMesh
C:\skylicht-engine>copy Bin\Common.zip %ASSET_PATH%
C:\skylicht-engine>copy Bin\SampleModelsResource.zip %ASSET_PATH%

# Dont forget copy ETC texture
C:\skylicht-engine>copy Bin\SampleModelsETC.zip %ASSET_PATH%
Step 4: Build APK by Android Studio or Gradle
Open Android Studio and import project Projects\Android
Run command build from Android Studio:
Android development
- You can rename your package name at build.gradle (Projects\Android\app)
- You can rename your application name at string.xml (Projects\Android\app\src\main\res\values)
iOS
Prerequisites
- Apple arm64 device
- Install XCode
How to build
Step 1: Build compress texture ETC and Build Asset Bundles
# Grant permission executive for PVRTexTool
skylicht-engine/Tools/PVRTexTool/darwin$ chmod +x PVRTexToolCLI

# Build compress texture ETC
skylicht-engine/Assets$ python3 BuildTextureCompressETC.py

# Build asset bundles
skylicht-engine/Assets$ python3 BuildAssetBundles.py
Step 2: Generate iOS xCode Project
If you want build samples for iOS device, you should replace the bundleIdentifier in Samples/{ProjectName}/CMakeLists.txt.
elseif (BUILD_IOS)
    # replace your application name
    set(MACOSX_BUNDLE_EXECUTABLE_NAME SampleHelloWorld)
    set(APP_NAME "SampleHelloWorld")

    # replace your bundleIdentifier
    set(APP_BUNDLE_IDENTIFIER "com.skylicht.helloword")
    set(CODE_SIGN_IDENTITY "iPhone Developer")

else()
And generate iOS xCode Project by this script.
# generate project for iOS device
skylicht-engine/BuildCommand$ ./GenerateXCodeIOS.sh

# or generate for iOS simulator
skylicht-engine/BuildCommand$ ./GenerateXCodeIOSSimulator.sh
Open iOS XCode Project on folder skylicht-engine/PrjIOS/SKYLICHT_ENGINE.xcodeproj
Note: iOS Simulator is not yet support compressed texture and hardware skinning.
Build static or shared library
Skylicht Engine can be compiled into a standalone library to simplify integration into other projects.
Shared library
C:\skylicht-engine>cmake -S . -B ./PrjVisualStudio -G "Visual Studio 17 2022" -A x64 -DINSTALL_LIBS=ON -DBUILD_SHARED_LIBS=ON
C:\skylicht-engine>cmake --build ./PrjVisualStudio --target install --config Debug
Note: Use the parameters "-DINSTALL_LIBS=ON -DBUILD_SHARED_LIBS=ON" with cmake command
Static library
C:\skylicht-engine>cmake -S . -B ./PrjVisualStudio -G "Visual Studio 17 2022" -A x64 -DINSTALL_LIBS=ON
C:\skylicht-engine>cmake --build ./PrjVisualStudio --target install --config Debug
How to integrate
And then copy the resulting InstallLibs folder to another project. See the project example: https://github.com/skylicht-lab/hello-skylicht See the API Reference
Game Built with Skylicht
Mech Survival
Roadmap
Code example
// INIT SCENE FUNCTION
// init scene/zone
CScene* scene = new CScene();
CZone* zone = scene->createZone();

// camera
CGameObject *camObj = zone->createEmptyObject();
CCamera* camera = camObj->addComponent<CCamera>();
camera->setPosition(core::vector3df(0.0f, 1.5f, 4.0f));
camera->lookAt(
   core::vector3df(0.0f, 0.0f, 0.0f),  // look at target position
   core::vector3df(0.0f, 1.0f, 0.0f)   // head up vector
);

// load model
CMeshManager* meshManager = CMeshManager::getInstance();
CEntityPrefab* meshPrefab = meshManager->loadModel("SampleModels/BlendShape/Cat.fbx", NULL, true);

// load material
CMaterialManager* materialMgr = CMaterialManager::getInstance();

// search textures folder
std::vector<std::string> textureFolders;

// use Skylicht Editor to edit .mat file
ArrayMaterial& catMaterials = materialMgr->loadMaterial("SampleModels/BlendShape/Cat.mat", true, textureFolders);

// create 3d object
CGameObject* cat = zone->createEmptyObject();
cat->setName("Cat");
cat->getTransformEuler()->setPosition(core::vector3df(0.0f, 1.0f, 0.0f));

// add render mesh component & init material
CRenderMesh* meshRenderer = cat->addComponent<CRenderMesh>();
meshRenderer->initFromPrefab(meshPrefab);
meshRenderer->initMaterial(catMaterials);

// update scene (1 frame)
scene->update();

// render scene to screen
CForwardRP* renderPipeline = new CForwardRP();

CBaseApp* app = getApplication();
u32 w = app->getWidth();
u32 h = app->getHeight();
renderPipeline->initRender(w, h);

// RENDER TO SCREEN FUNCTION
renderPipeline->render(
    NULL, // render target is screen
    camera, // the camera
    scene->getEntityManager(), // all entities in scene
    core::recti() // the viewport is fullscreen
);
Sample Projects
Samples\HelloWorld
Engine Components are used:
- FreeType Font
- Glyph Font
- Canvas Component
- Graphics2D
- GUI Text
Samples\DrawPrimitives
This demo is to draw Cube 3D, set up, transform and use components.
Samples\Materials
This demo code renders a 3D sphere, loads textures (Diffuse, Normal, Specular), and binds a SpecGloss shader to the material.
Samples\PBR
This demo code renders a Sci-fi Helmet, loads textures (Albedo, Roughness, Metal, AO, Emissive), and binds a Physically Based Rendering (PBR) shader to the material.
Samples\SampleShader
This demo code shows how to bind a shader to a material.
Samples\LuckyDraw
Engine Components are used:
- FreeType Font
- Glyph Font
- Graphics2D
- GUI Text
- GUI Image
- GUI Mask
- EventManager
Samples\SkinnedMesh
This is an example of how to render a character model with animation. The models are downloaded from mixamo
- DAE Collada loader model/animation
- Forwarder rendering
- Skydome
- AnimationController
Samples\LightmapUV
This is a demo on how to use the UnwrapUV tool to create Lightmap UVs. Library xatlas is integrated to Skylicht Engine.
Samples\Lightmapping
This is a demo showing how to use the lightmapper to bake indirect lighting colors onto a lightmap texture. Project references: Lightmapper
Gazebo
Result lightmap
Sponza lightmap
Indirect lighting on Sponza baked by Skylicht Lightmapper.
Samples\Sponza
This example is how to set up a simple lighting & lightmap. This scene uses basic diffuse bump specular shader.
Run on Ubuntu 20.04
Samples\LightmappingVertex
This is a demo on how to use the lightmapper to apply indirect lighting color to vertex color.
Engine Components are used:
- OBJ Wavefront loader
- Deferred and Forwarder rendering
- Dynamic Direction Lighting
- Shadow Mapping
- Lightmapper
- Skydome
Baked Global Illumination (3 bounces)
Irradiance baked on Vertex Color:
Indirect + Direction light - No post processing (3 bounces light)
Samples\Collision
This is a demo to use CollisionManager to get collision point from the ray.
And how to query all triangles inside a Box
And how to use the decal projector feature
Samples\Instancing
This is a demo on setting up the rendering of many mesh instances to optimize draw calls and rendering performance.
Samples\SkinnedMeshInstancing
This is a demo of drawing many characters and animations using the GPU Instancing technique.
Samples\BoidSystem
Samples\Particles
Skylicht Particle Component is a cleanup version of SPARK. We have optimized by GPU Billboard Instancing.
This is a demo showing how to create a particle system and use imgui
Basic particle
Explosion demo
Magic particle
This is a demo code on how to use a simple projectile, impact, trail particle, sub emitter system.
Samples\Noise2D, Noise3D
This is demo code how to use noise library shader to make vfx effect, particle turbulence.
Contributing
Welcome if you want to contribute your code to Skylicht Engine (Ex: add feature or fix bug). Wellcome to join the group. Open an issue and submit a pull request to this repository. Please read CONTRIBUTING.md for details on our code of conduct, and the process for submitting pull requests.
Thanks
- Julien Fryer (SPARK) about references and source code demo of particle system.
- Inigo Quilez about perlin noise reference.
- Irrlicht Community, who have shared some demo
License
Skylicht Engine is licensed under MIT License
Skylicht Engine is based in part on the work of:
- Irrlicht Engine
- Bullet Physics
- Google Angle
- Ocornut Imgui
- Xatlas
- ufbx
- Spark Particle
- Freetype2
- Independent JPEG Group, libPng, zlib, curl...
This means that if you've used the Skylicht Engine in your product, you must acknowledge somewhere in your documentation that you've used. It would also be nice to mention that you use the 3rd parties library... Please see the README files from 3rd parties for further information.
Thanks, Project Maintainer: Pham Hong Duc
Similar repos
Contributors
Languages
C++
67.4%
C
27.5%
HLSL
1.8%
GLSL
1.6%