Software Developer Portfolio Website built with next.js and tailwind CSS that helps you showcase your work and skills as a software developer.
See the code
A modern, responsive, and customizable portfolio template for developers and freelancers




Demo • Features • Installation • Usage • Deployment • Tutorials
A professional portfolio template built with Next.js 16, React 19, and Tailwind CSS 4. Features a modern App Router architecture, server components, and data-driven configuration for easy customization.
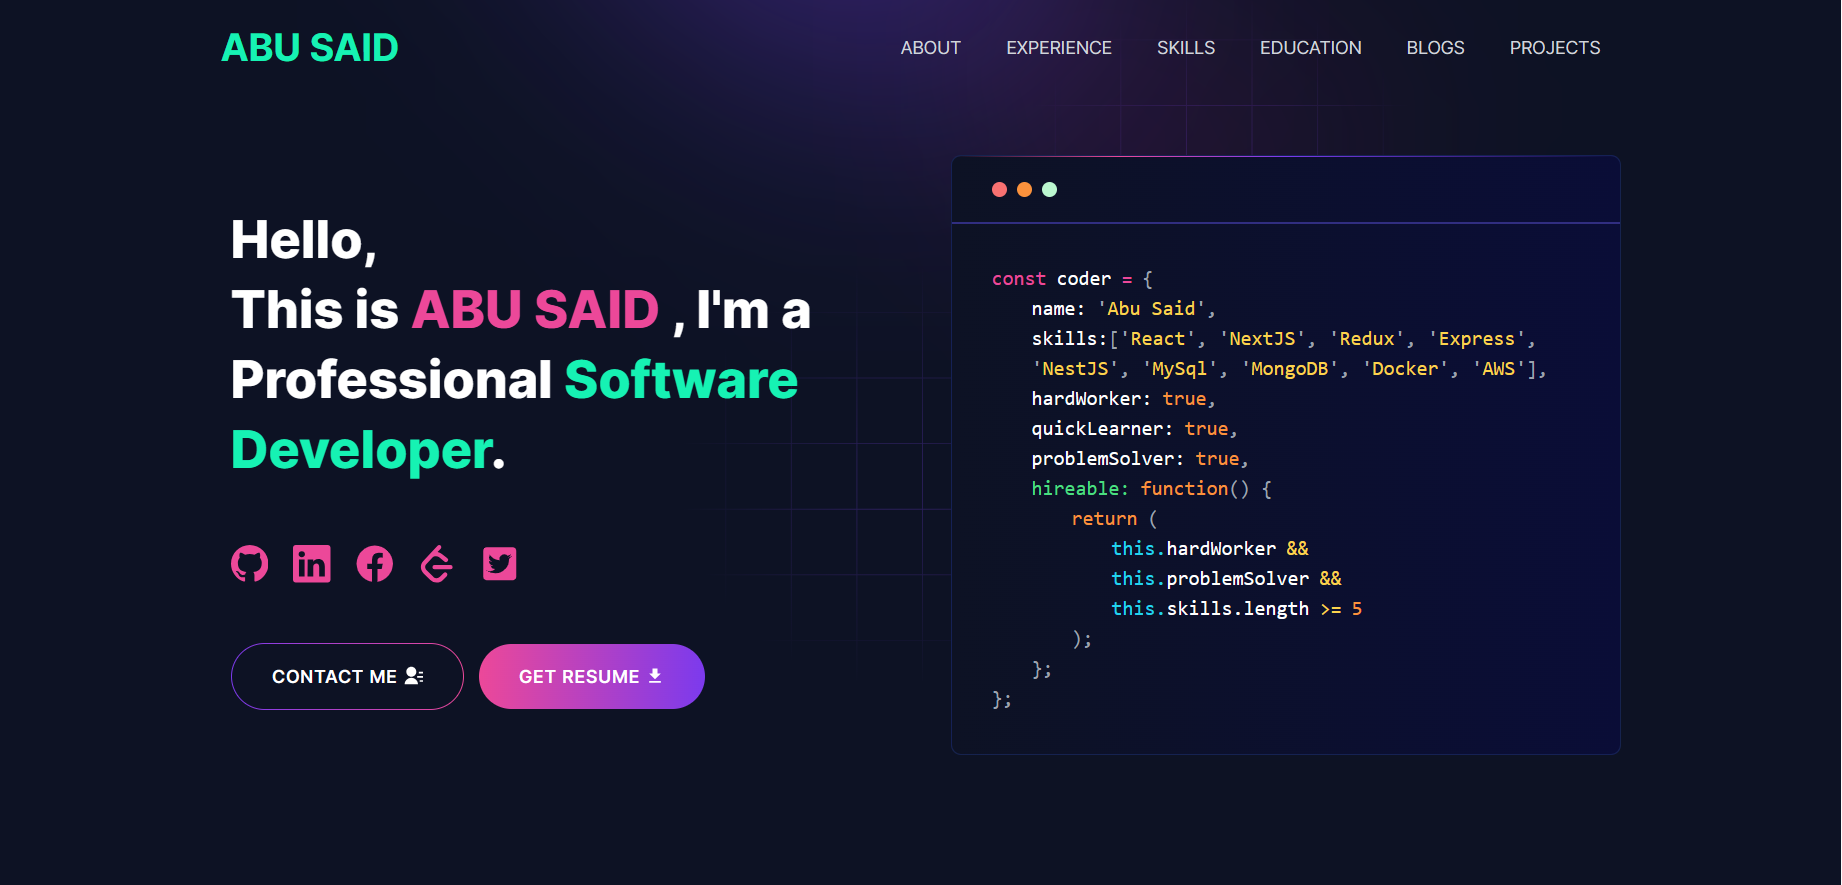
This portfolio leverages the latest Next.js 16 and React 19 capabilities:
| Feature | Benefit |
|---|---|
| App Router | Modern routing with layouts and nested routes |
| Server Components | Improved performance with zero JavaScript for static content |
| Server Actions | Simplified form handling in contact page |
| Metadata API | Enhanced SEO with type-safe metadata |
| Image Optimization | Automatic image optimization with next/image |
| Font Optimization | Automatic font loading with next/font |
| Streaming & Suspense | Better loading states and progressive rendering |
| React 19 Features | Actions, use hook, and improved hydration |
| Section | Description |
|---|---|
| 🦸 Hero | Eye-catching introduction with animated elements |
| 👤 About Me | Personal information and professional summary |
| 💼 Experience | Work history and professional accomplishments |
| 🛠️ Skills | Technical skills with animated marquee display |
| 🚀 Projects | Showcase your best work with descriptions and links |
| 🎓 Education | Academic background and certifications |
| 📝 Blog | Latest articles from dev.to (auto-fetched) |
| 📧 Contact | Get in touch form with email/Telegram integration |
| Technology | Version | Purpose |
|---|---|---|
| Next.js | 16.0.1 | React framework with App Router |
| React | 19.2.0 | UI component library with latest features |
| Tailwind CSS | 4.x | Utility-first CSS framework |
| SASS | Latest | CSS preprocessor |
| Lottie | Latest | Lightweight animations |
| Nodemailer | Latest | Email sending functionality |
| Axios | Latest | HTTP client for API requests |
| Docker | - | Containerization platform |
Before you begin, ensure you have the following installed on your machine:
| Tool | Minimum Version | Download Link |
|---|---|---|
| Node.js | v18.17.0+ | Download |
| Git | Latest | Download |
| pnpm (recommended) | Latest | Install |
Note: Next.js 16 requires Node.js 18.17 or later. Node.js 20+ is recommended for optimal performance.
Check your installations with these commands:
node --version
git --version
pnpm --version  # or npm --version
git clone https://github.com/<YOUR_GITHUB_USERNAME>/developer-portfolio.git
cd developer-portfolio
# Using pnpm (recommended)
pnpm install

# Using npm
npm install

# Using yarn
yarn install
cp .env.example .env
Edit the .env file with your values (see Usage section).
pnpm dev
# or
npm run dev
# or
yarn dev
Open http://localhost:3000 in your browser.
docker-compose up --build

# Run in detached mode
docker-compose up -d --build

# Stop
docker-compose down
For Development:
# Build the development image
docker build -t developer-portfolio:dev -f Dockerfile.dev .

# Run the container
docker run -p 3000:3000 --name portfolio-dev developer-portfolio:dev

# Stop and remove container
docker stop portfolio-dev && docker rm portfolio-dev
For Production:
# Build the production image
docker build -t developer-portfolio:prod -f Dockerfile.prod .

# Run the production container
docker run -p 3000:3000 --name portfolio-prod developer-portfolio:prod
Create a .env file in the root directory with the following variables:
# Google Tag Manager (Optional - for analytics)
NEXT_PUBLIC_GTM=GTM-XXXXXXX

# Your deployed app URL
NEXT_PUBLIC_APP_URL=https://your-domain.com

# Telegram Bot Configuration (for contact form notifications)
TELEGRAM_BOT_TOKEN=your_bot_token_here
TELEGRAM_CHAT_ID=your_chat_id_here

# Gmail Configuration (for contact form emails)
GMAIL_PASSKEY=your_gmail_app_password
EMAIL_ADDRESS=your_email@gmail.com
| Variable | Required | Description |
|---|---|---|
NEXT_PUBLIC_GTM | No | Google Tag Manager ID for analytics tracking |
NEXT_PUBLIC_APP_URL | Yes | Your portfolio's public URL |
TELEGRAM_BOT_TOKEN | No | Token for Telegram bot notifications |
TELEGRAM_CHAT_ID | No | Your Telegram chat ID for receiving messages |
GMAIL_PASSKEY | No | Gmail app password for email notifications |
EMAIL_ADDRESS | No | Your Gmail address for sending emails |
Note: Contact form features require either Telegram or Gmail configuration (or both).
All portfolio content is managed through data files in the utils/data/ folder:
personal-data.js)export const personalData = {
name: "YOUR NAME",
profile: "/profile.png", // Path to your profile image
designation: "Software Developer", // Your job title
description: "Your bio and introduction...", // About yourself
email: "your.email@example.com",
phone: "+1234567890",
address: "City, Country",
github: "https://github.com/yourusername",
facebook: "https://www.facebook.com/yourprofile",
linkedIn: "https://www.linkedin.com/in/yourprofile",
twitter: "https://twitter.com/yourusername",
stackOverflow: "https://stackoverflow.com/users/your-id",
leetcode: "https://leetcode.com/yourusername/",
devUsername: "yourusername", // dev.to username for blog integration
resume: "https://link-to-your-resume.pdf",
};
| File | Purpose |
|---|---|
experience.js | Your work experience and job history |
projects-data.js | Portfolio projects with descriptions and links |
skills.js | Technical skills and competencies |
educations.js | Academic background and certifications |
contactsData.js | Contact form configuration |
Place your profile picture in the public/ directory and update the profile field in personal-data.js:
profile: "/your-image-name.png"; // or .jpg, .webp
Manual Deployment:
Features:

Manual Deployment:
npm run build.next# Build production image
docker build -t developer-portfolio:prod -f Dockerfile.prod .
# Run
docker run -d -p 80:3000 --name portfolio developer-portfolio:prod
# Or use Docker Compose
docker-compose -f docker-compose.prod.yml up -d
.env file:GMAIL_PASSKEY=abcd efgh ijkl mnop
EMAIL_ADDRESS=your.email@gmail.com
@BotFather/newbot commandbot)https://api.telegram.org/bot<BOT_TOKEN>/getUpdates.env file:TELEGRAM_BOT_TOKEN=123456789:ABCdefGHIjklMNOpqrsTUVwxyz
TELEGRAM_CHAT_ID=123456789
utils/data/personal-data.jsexport const personalData = {
// ... other fields
devUsername: "yourusername",
};
The portfolio automatically fetches and displays your latest public articles. No API key required.
| Package | Version | Purpose |
|---|---|---|
| next | ^16.0.1 | Latest React framework with App Router and Server Components |
| react | ^19.2.0 | JavaScript library with improved concurrent rendering |
| react-dom | ^19.2.0 | React package for working with the DOM |
| tailwindcss | ^4.1.16 | Modern utility-first CSS framework |
| sass | Latest | CSS preprocessor for styling |
| Package | Purpose |
|---|---|
| lottie-react | Lightweight animations with Lottie files |
| react-fast-marquee | Smooth scrolling marquee component |
| react-icons | Popular icon library with easy integration |
| react-toastify | Beautiful notification toasts |
| Package | Purpose |
|---|---|
| axios | Promise-based HTTP client |
| nodemailer | Email sending functionality |
| @emailjs/browser | Client-side email service |
| react-google-recaptcha | Google reCAPTCHA integration |
| sharp | High-performance image processing |
| @next/third-parties | Third-party script optimization |
Solution:
# Option 1: Install Next.js globally
npm install -g next

# Option 2: Use npx (recommended)
npx next dev

# Option 3: Use package manager scripts
npm run dev
Solution:
# Find and kill the process using port 3000
# On macOS/Linux:
lsof -ti:3000 | xargs kill -9

# On Windows:
netstat -ano | findstr :3000
taskkill /PID <PID> /F

# Or use a different port:
PORT=3001 npm run dev
Solution:
# Clear cache and reinstall dependencies
rm -rf node_modules package-lock.json
npm cache clean --force
npm install

# Or with pnpm:
rm -rf node_modules pnpm-lock.yaml
pnpm store prune
pnpm install
Solution:
.env file is in the root directory.envNEXT_PUBLIC_ are used for client-side codeNEXT_PUBLIC_Solution:
public/ directory/ (e.g., /profile.png)Solution:
EMAIL_ADDRESS matches the Gmail accountgit checkout -b feature/AmazingFeaturegit commit -m 'Add some AmazingFeature'git push origin feature/AmazingFeatureThis project is licensed under the MIT License - see the LICENSE file for details.


8 followers · starred Apr 2025
8 followers · starred Apr 2024
58 followers · starred Mar 2024
585 followers · starred Jan 2025
Software Developer Portfolio Website built with next.js and tailwind CSS that helps you showcase your work and skills as a software developer.
See the code
A modern, responsive, and customizable portfolio template for developers and freelancers
Demo • Features • Installation • Usage • Deployment • Tutorials
A professional portfolio template built with Next.js 16, React 19, and Tailwind CSS 4. Features a modern App Router architecture, server components, and data-driven configuration for easy customization.
This portfolio leverages the latest Next.js 16 and React 19 capabilities:
| Feature | Benefit |
|---|---|
| App Router | Modern routing with layouts and nested routes |
| Server Components | Improved performance with zero JavaScript for static content |
| Server Actions | Simplified form handling in contact page |
| Metadata API | Enhanced SEO with type-safe metadata |
| Image Optimization | Automatic image optimization with next/image |
| Font Optimization | Automatic font loading with next/font |
| Streaming & Suspense | Better loading states and progressive rendering |
| React 19 Features | Actions, use hook, and improved hydration |
| Section | Description |
|---|---|
| 🦸 Hero | Eye-catching introduction with animated elements |
| 👤 About Me | Personal information and professional summary |
| 💼 Experience | Work history and professional accomplishments |
| 🛠️ Skills | Technical skills with animated marquee display |
| 🚀 Projects | Showcase your best work with descriptions and links |
| 🎓 Education | Academic background and certifications |
| 📝 Blog | Latest articles from dev.to (auto-fetched) |
| 📧 Contact | Get in touch form with email/Telegram integration |
| Technology | Version | Purpose |
|---|---|---|
| Next.js | 16.0.1 | React framework with App Router |
| React | 19.2.0 | UI component library with latest features |
| Tailwind CSS | 4.x | Utility-first CSS framework |
| SASS | Latest | CSS preprocessor |
| Lottie | Latest | Lightweight animations |
| Nodemailer | Latest | Email sending functionality |
| Axios | Latest | HTTP client for API requests |
| Docker | - | Containerization platform |
Before you begin, ensure you have the following installed on your machine:
| Tool | Minimum Version | Download Link |
|---|---|---|
| Node.js | v18.17.0+ | Download |
| Git | Latest | Download |
| pnpm (recommended) | Latest | Install |
Note: Next.js 16 requires Node.js 18.17 or later. Node.js 20+ is recommended for optimal performance.
Check your installations with these commands:
node --version
git --version
pnpm --version  # or npm --version
git clone https://github.com/<YOUR_GITHUB_USERNAME>/developer-portfolio.git
cd developer-portfolio
# Using pnpm (recommended)
pnpm install

# Using npm
npm install

# Using yarn
yarn install
cp .env.example .env
Edit the .env file with your values (see Usage section).
pnpm dev
# or
npm run dev
# or
yarn dev
Open http://localhost:3000 in your browser.
docker-compose up --build

# Run in detached mode
docker-compose up -d --build

# Stop
docker-compose down
For Development:
# Build the development image
docker build -t developer-portfolio:dev -f Dockerfile.dev .

# Run the container
docker run -p 3000:3000 --name portfolio-dev developer-portfolio:dev

# Stop and remove container
docker stop portfolio-dev && docker rm portfolio-dev
For Production:
# Build the production image
docker build -t developer-portfolio:prod -f Dockerfile.prod .

# Run the production container
docker run -p 3000:3000 --name portfolio-prod developer-portfolio:prod
Create a .env file in the root directory with the following variables:
# Google Tag Manager (Optional - for analytics)
NEXT_PUBLIC_GTM=GTM-XXXXXXX

# Your deployed app URL
NEXT_PUBLIC_APP_URL=https://your-domain.com

# Telegram Bot Configuration (for contact form notifications)
TELEGRAM_BOT_TOKEN=your_bot_token_here
TELEGRAM_CHAT_ID=your_chat_id_here

# Gmail Configuration (for contact form emails)
GMAIL_PASSKEY=your_gmail_app_password
EMAIL_ADDRESS=your_email@gmail.com
| Variable | Required | Description |
|---|---|---|
NEXT_PUBLIC_GTM | No | Google Tag Manager ID for analytics tracking |
NEXT_PUBLIC_APP_URL | Yes | Your portfolio's public URL |
TELEGRAM_BOT_TOKEN | No | Token for Telegram bot notifications |
TELEGRAM_CHAT_ID | No | Your Telegram chat ID for receiving messages |
GMAIL_PASSKEY | No | Gmail app password for email notifications |
EMAIL_ADDRESS | No | Your Gmail address for sending emails |
Note: Contact form features require either Telegram or Gmail configuration (or both).
All portfolio content is managed through data files in the utils/data/ folder:
personal-data.js)export const personalData = {
name: "YOUR NAME",
profile: "/profile.png", // Path to your profile image
designation: "Software Developer", // Your job title
description: "Your bio and introduction...", // About yourself
email: "your.email@example.com",
phone: "+1234567890",
address: "City, Country",
github: "https://github.com/yourusername",
facebook: "https://www.facebook.com/yourprofile",
linkedIn: "https://www.linkedin.com/in/yourprofile",
twitter: "https://twitter.com/yourusername",
stackOverflow: "https://stackoverflow.com/users/your-id",
leetcode: "https://leetcode.com/yourusername/",
devUsername: "yourusername", // dev.to username for blog integration
resume: "https://link-to-your-resume.pdf",
};
| File | Purpose |
|---|---|
experience.js | Your work experience and job history |
projects-data.js | Portfolio projects with descriptions and links |
skills.js | Technical skills and competencies |
educations.js | Academic background and certifications |
contactsData.js | Contact form configuration |
Place your profile picture in the public/ directory and update the profile field in personal-data.js:
profile: "/your-image-name.png"; // or .jpg, .webp
Manual Deployment:
Features:
Manual Deployment:
npm run build.next# Build production image
docker build -t developer-portfolio:prod -f Dockerfile.prod .
# Run
docker run -d -p 80:3000 --name portfolio developer-portfolio:prod
# Or use Docker Compose
docker-compose -f docker-compose.prod.yml up -d
.env file:GMAIL_PASSKEY=abcd efgh ijkl mnop
EMAIL_ADDRESS=your.email@gmail.com
@BotFather/newbot commandbot)https://api.telegram.org/bot<BOT_TOKEN>/getUpdates.env file:TELEGRAM_BOT_TOKEN=123456789:ABCdefGHIjklMNOpqrsTUVwxyz
TELEGRAM_CHAT_ID=123456789
utils/data/personal-data.jsexport const personalData = {
// ... other fields
devUsername: "yourusername",
};
The portfolio automatically fetches and displays your latest public articles. No API key required.
| Package | Version | Purpose |
|---|---|---|
| next | ^16.0.1 | Latest React framework with App Router and Server Components |
| react | ^19.2.0 | JavaScript library with improved concurrent rendering |
| react-dom | ^19.2.0 | React package for working with the DOM |
| tailwindcss | ^4.1.16 | Modern utility-first CSS framework |
| sass | Latest | CSS preprocessor for styling |
| Package | Purpose |
|---|---|
| lottie-react | Lightweight animations with Lottie files |
| react-fast-marquee | Smooth scrolling marquee component |
| react-icons | Popular icon library with easy integration |
| react-toastify | Beautiful notification toasts |
| Package | Purpose |
|---|---|
| axios | Promise-based HTTP client |
| nodemailer | Email sending functionality |
| @emailjs/browser | Client-side email service |
| react-google-recaptcha | Google reCAPTCHA integration |
| sharp | High-performance image processing |
| @next/third-parties | Third-party script optimization |
Solution:
# Option 1: Install Next.js globally
npm install -g next

# Option 2: Use npx (recommended)
npx next dev

# Option 3: Use package manager scripts
npm run dev
Solution:
# Find and kill the process using port 3000
# On macOS/Linux:
lsof -ti:3000 | xargs kill -9

# On Windows:
netstat -ano | findstr :3000
taskkill /PID <PID> /F

# Or use a different port:
PORT=3001 npm run dev
Solution:
# Clear cache and reinstall dependencies
rm -rf node_modules package-lock.json
npm cache clean --force
npm install

# Or with pnpm:
rm -rf node_modules pnpm-lock.yaml
pnpm store prune
pnpm install
Solution:
.env file is in the root directory.envNEXT_PUBLIC_ are used for client-side codeNEXT_PUBLIC_Solution:
public/ directory/ (e.g., /profile.png)Solution:
EMAIL_ADDRESS matches the Gmail accountgit checkout -b feature/AmazingFeaturegit commit -m 'Add some AmazingFeature'git push origin feature/AmazingFeatureThis project is licensed under the MIT License - see the LICENSE file for details.
8 followers · starred Apr 2025
8 followers · starred Apr 2024
58 followers · starred Mar 2024
585 followers · starred Jan 2025





