Simple RTSP (streaming image) server for the ESP32CAM. Easy configuration and monitoring through the web interface.
C++
1,207
249 commits
updated Oct 12, 2026



Simple RTSP, HTTP JPEG Streamer and image server with configuration through the web interface.
[!NOTE] A
developbranch is available with the newest boards (including the Seeed Studio XIAO ESP32S3). It may be ahead ofmain; feedback and testing are welcome.
Flashing this software on a ESP32CAM module will make it a RTSP streaming camera server, a HTTP Motion JPEG streamer and a HTTP image server.
Supported protocols
RTSP The RTSP protocol is an industry standard and allows many CCTV systems and applications (like for example VLC) to connect directly to the ESP32CAM camera stream. It is also possible to stream directly to a server using ffmpeg. This makes the module a camera server allowing recording and the stream can be stored on a disk and replayed later. The video is encoded as Motion-JPEG (RTP payload 26) and streamed over RTP/UDP (default) or RTP/RTSP/TCP. Boards with an onboard microphone (e.g. the Seeed Studio XIAO ESP32S3 SENSE) can additionally stream G.711 a-law audio (RTP payload 8). The URL is rtsp://<ip address>:554/mjpeg/1 Authentication is optional; when enabled, clients must provide credentials (see RTSP authentication).
HTTP Motion JPEG The HTTP JPEG streamer makes it possible to watch the camera stream directly in your browser. The URL is http://<ip address>/stream
HTTP image The HTTP Image returns an HTTP JPEG image of the camera. The URL is http://<ip address>/snapshot
Over-the-air (OTA) firmware update The firmware can be updated over WiFi from PlatformIO or the Arduino IDE (espota). See Updating the firmware (OTA).
This software supports the following ESP32-CAM (and alike) modules:
The software provides a configuration web server that can be used to:
The software also provides a mDNS server to be easily discoverable on the local network. It advertises HTTP (port 80) and RTSP (port 554).
There are a lot of boards available that are all called ESP32-CAM. However, there are differences in CPU (type/speed/cores), how the camera is connected, presence of PSRAM or not... To select the right board use the table below and use the configuration that is listed below for your board:
| Board | Image | CPU | SRAM | Flash | PSRAM | Camera | Extras | Manufacturer site |
|---|---|---|---|---|---|---|---|---|
| Espressif ESP32-Wrover CAM | 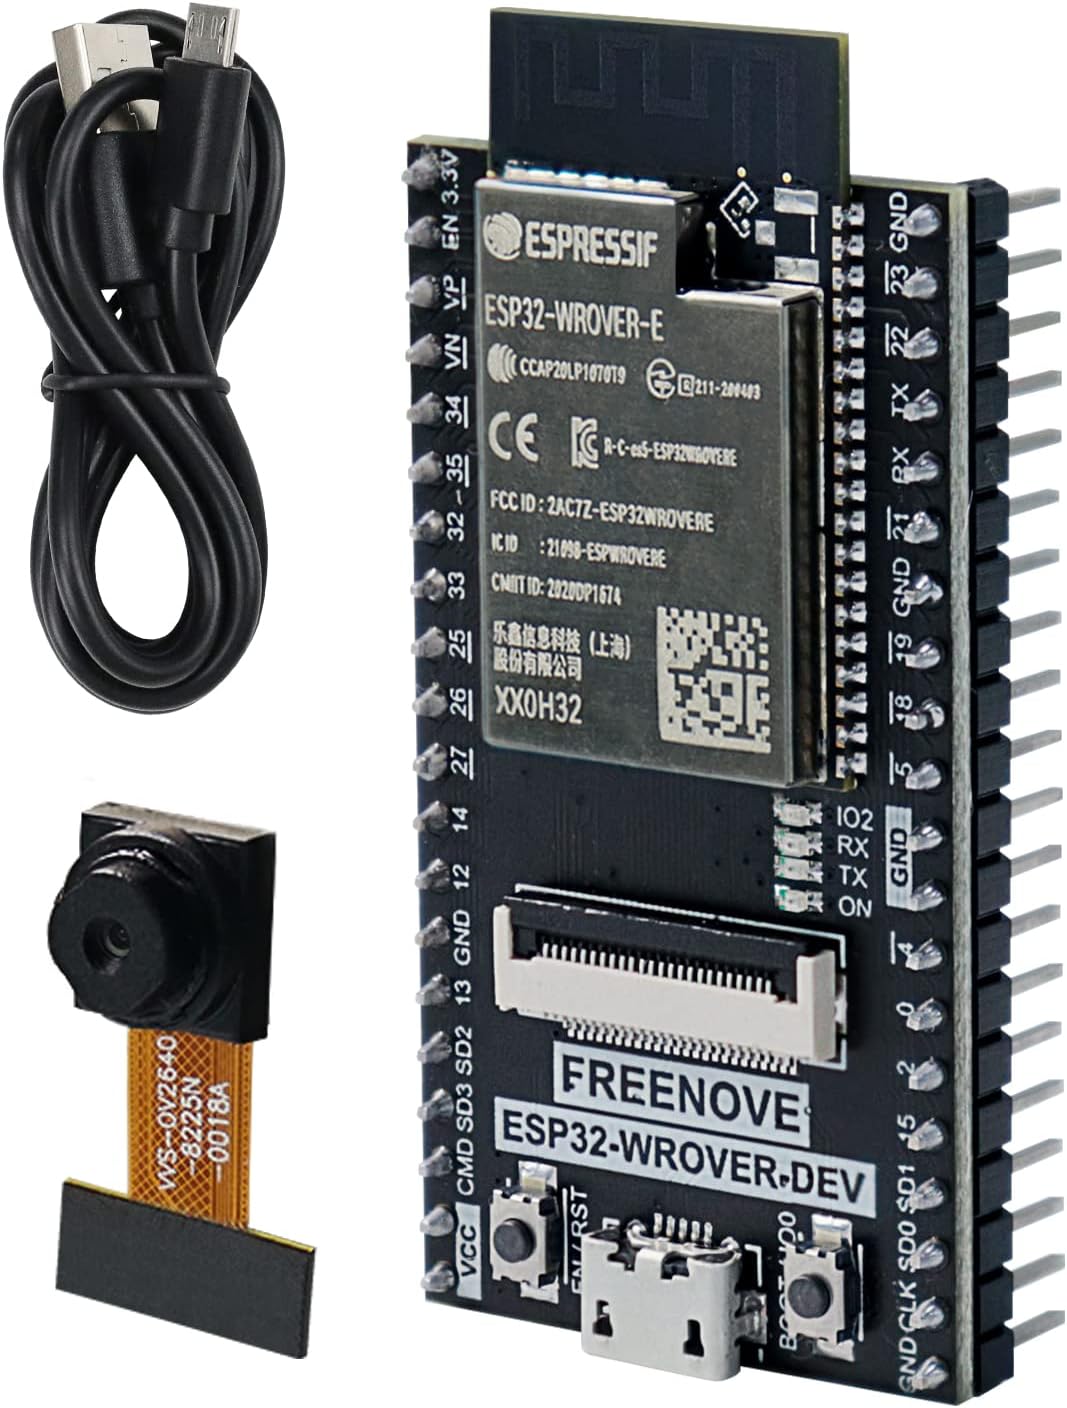 | ESP32 | 520KB | 4MB | 8MB | OV2640 | ||
| AI-Thinker ESP32-CAM | 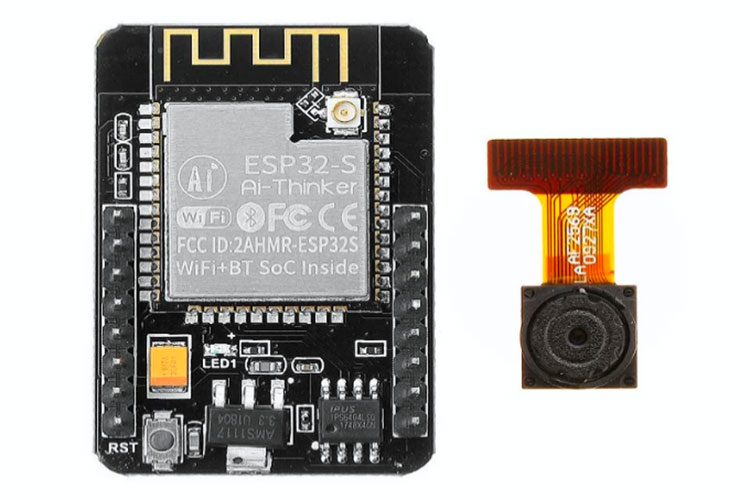 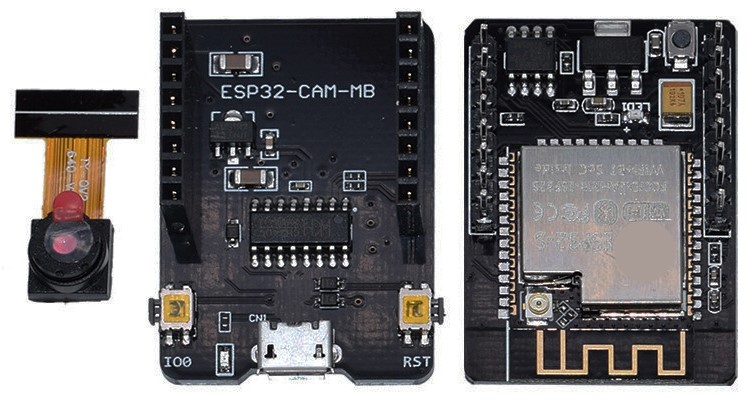 | ESP32 | 520KB | 4MB | 4MB | OV2640 | https://docs.ai-thinker.com/esp32-cam | |
| ESP32-S3-CAM V3 (Type-C) | 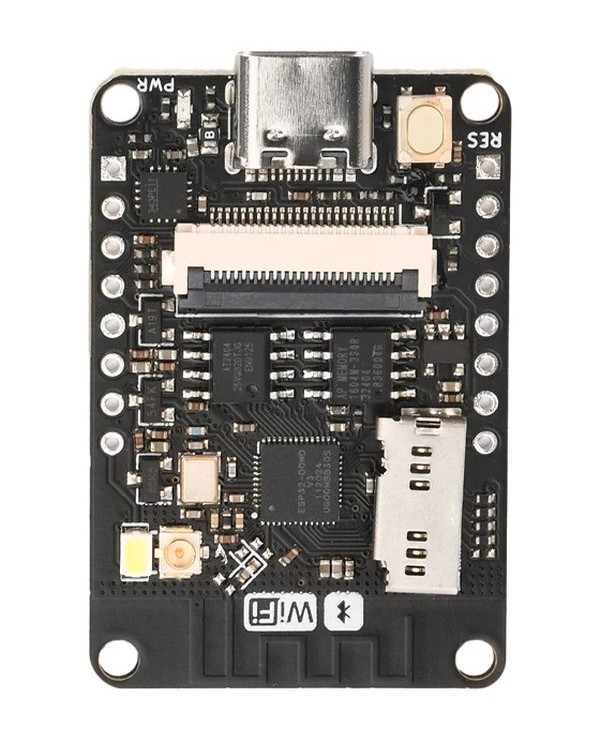 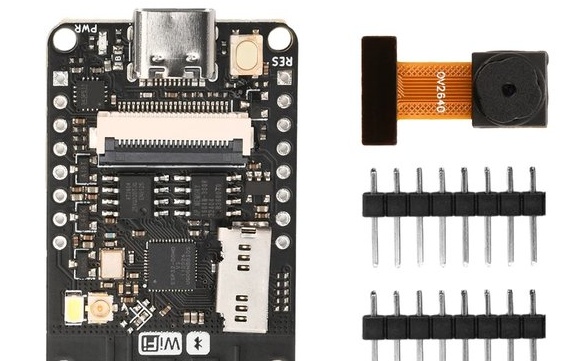 | ESP32-S3R8 | 512KB | 8MB | 8MB | OV2640 / OV3660 | Flash LED | https://nl.aliexpress.com/item/1005008678466795.html |
| Espressif ESP-EYE | 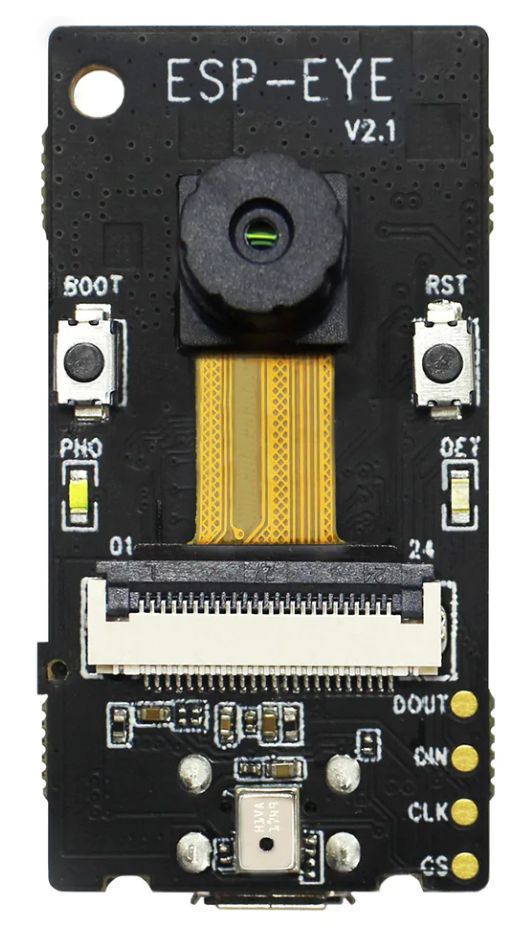 | ESP32 | 520KB | 4MB | 8MB | OV2640 | ||
| Espressif ESP32-S3-EYE | 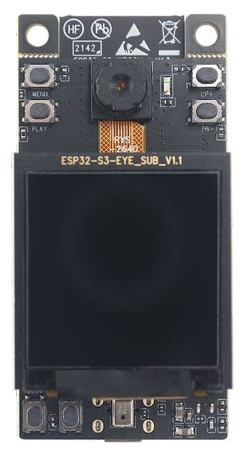 | ESP32-S3 | 520KB | 4MB | 8MB | OV2640 | https://www.espressif.com/en/products/devkits/esp-eye/overview | |
| LilyGo camera module | 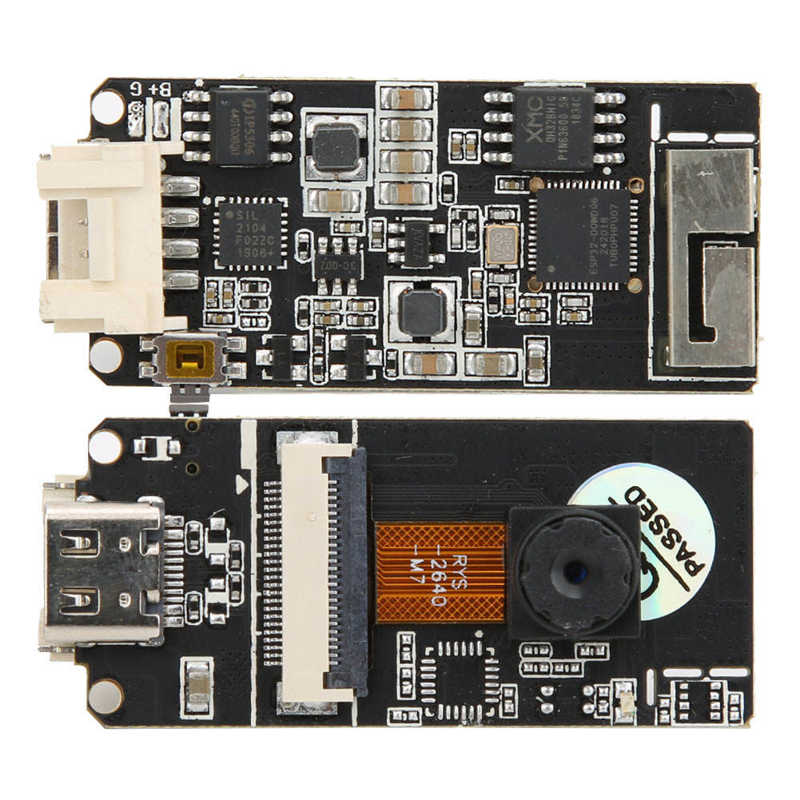 | ESP32 Wrover | 520KB | 4MB | 8MB | OV2640 / OV5640 | ||
| LilyGo Simcam | 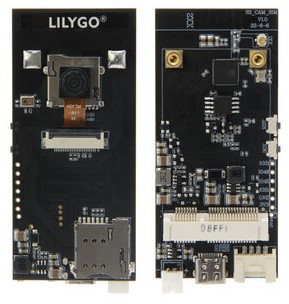 | OV2640 | ||||||
| LilyGo TTGO-T Camera | 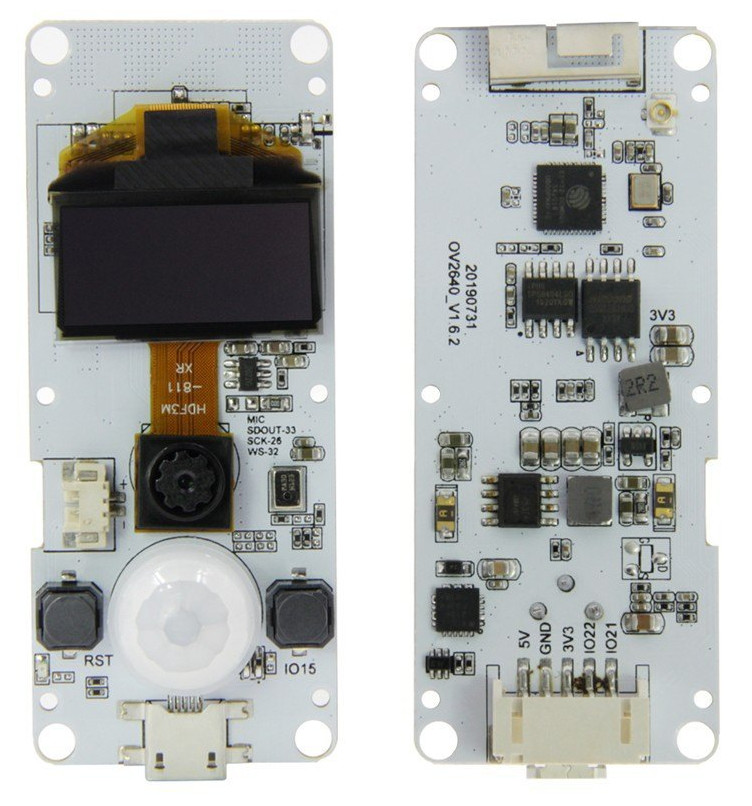 | OV2640 | ||||||
| M5Stack ESP32CAM | 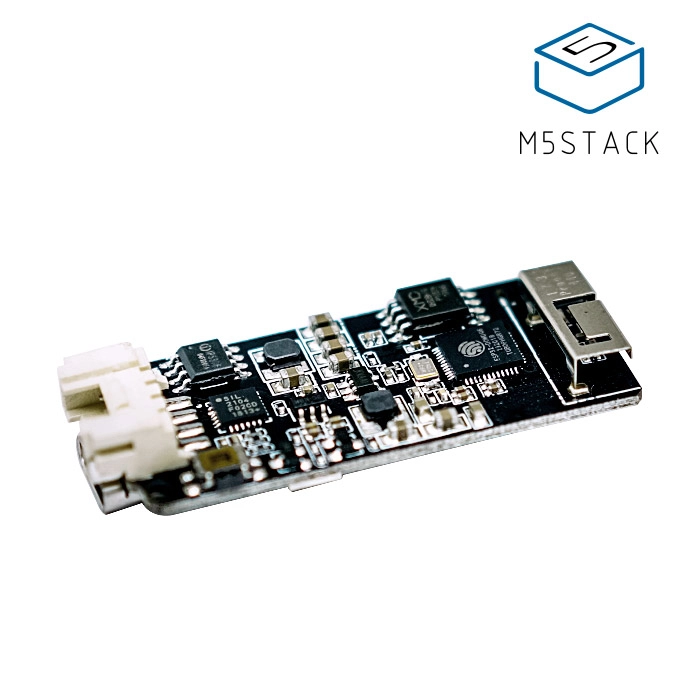 | ESP32 | 520KB | 4MB | - | OV2640 | Microphone | https://docs.m5stack.com/en/unit/esp32cam |
| M5Stack UnitCam | 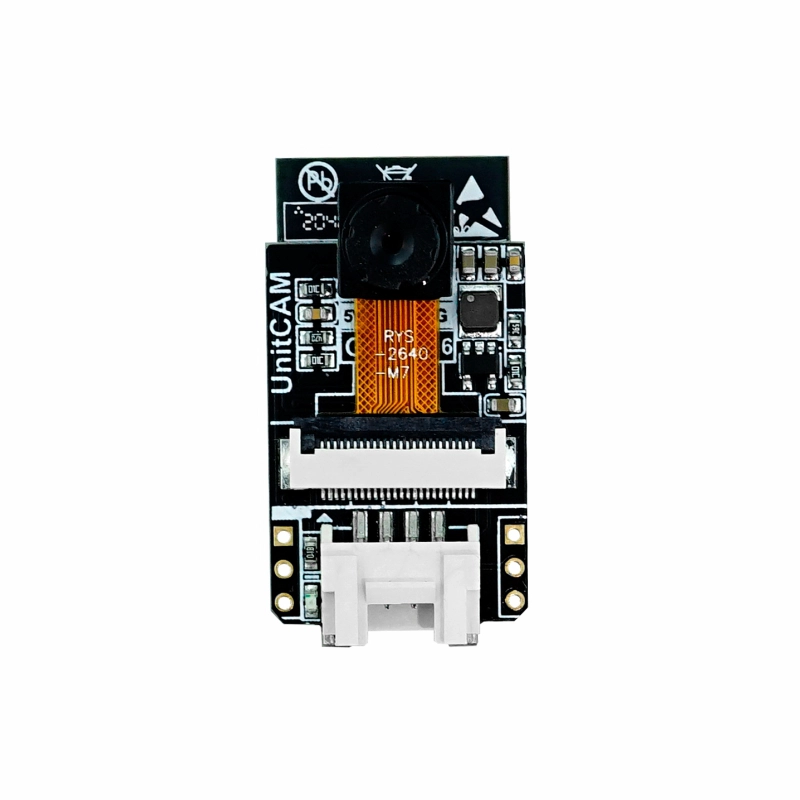 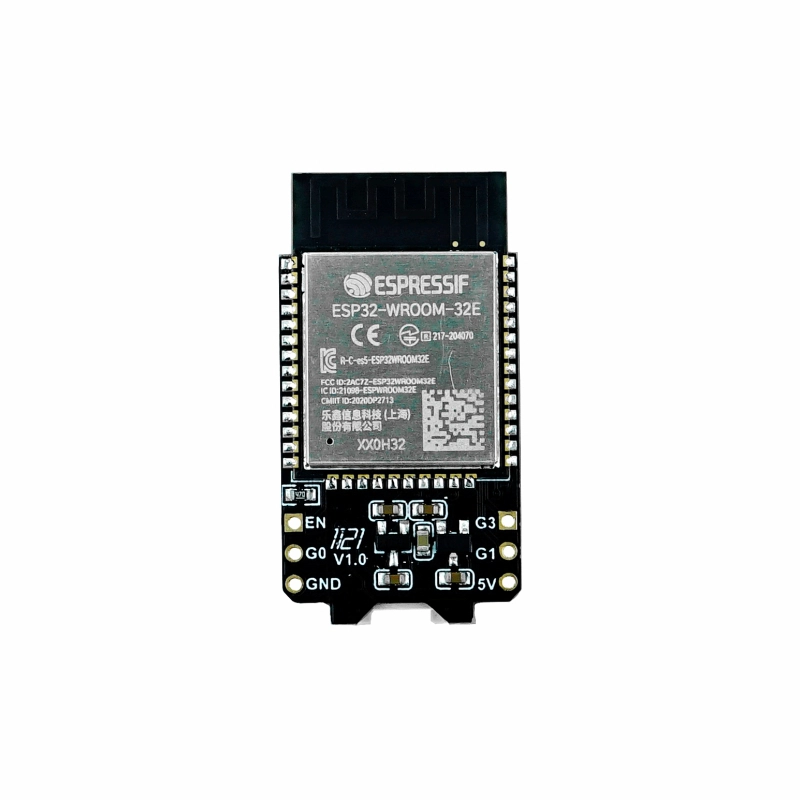 | ESP32-WROOM-32E | 520KB | 4MB | - | OV2640 | https://docs.m5stack.com/en/unit/unit_cam | |
| M5Stack Camera | 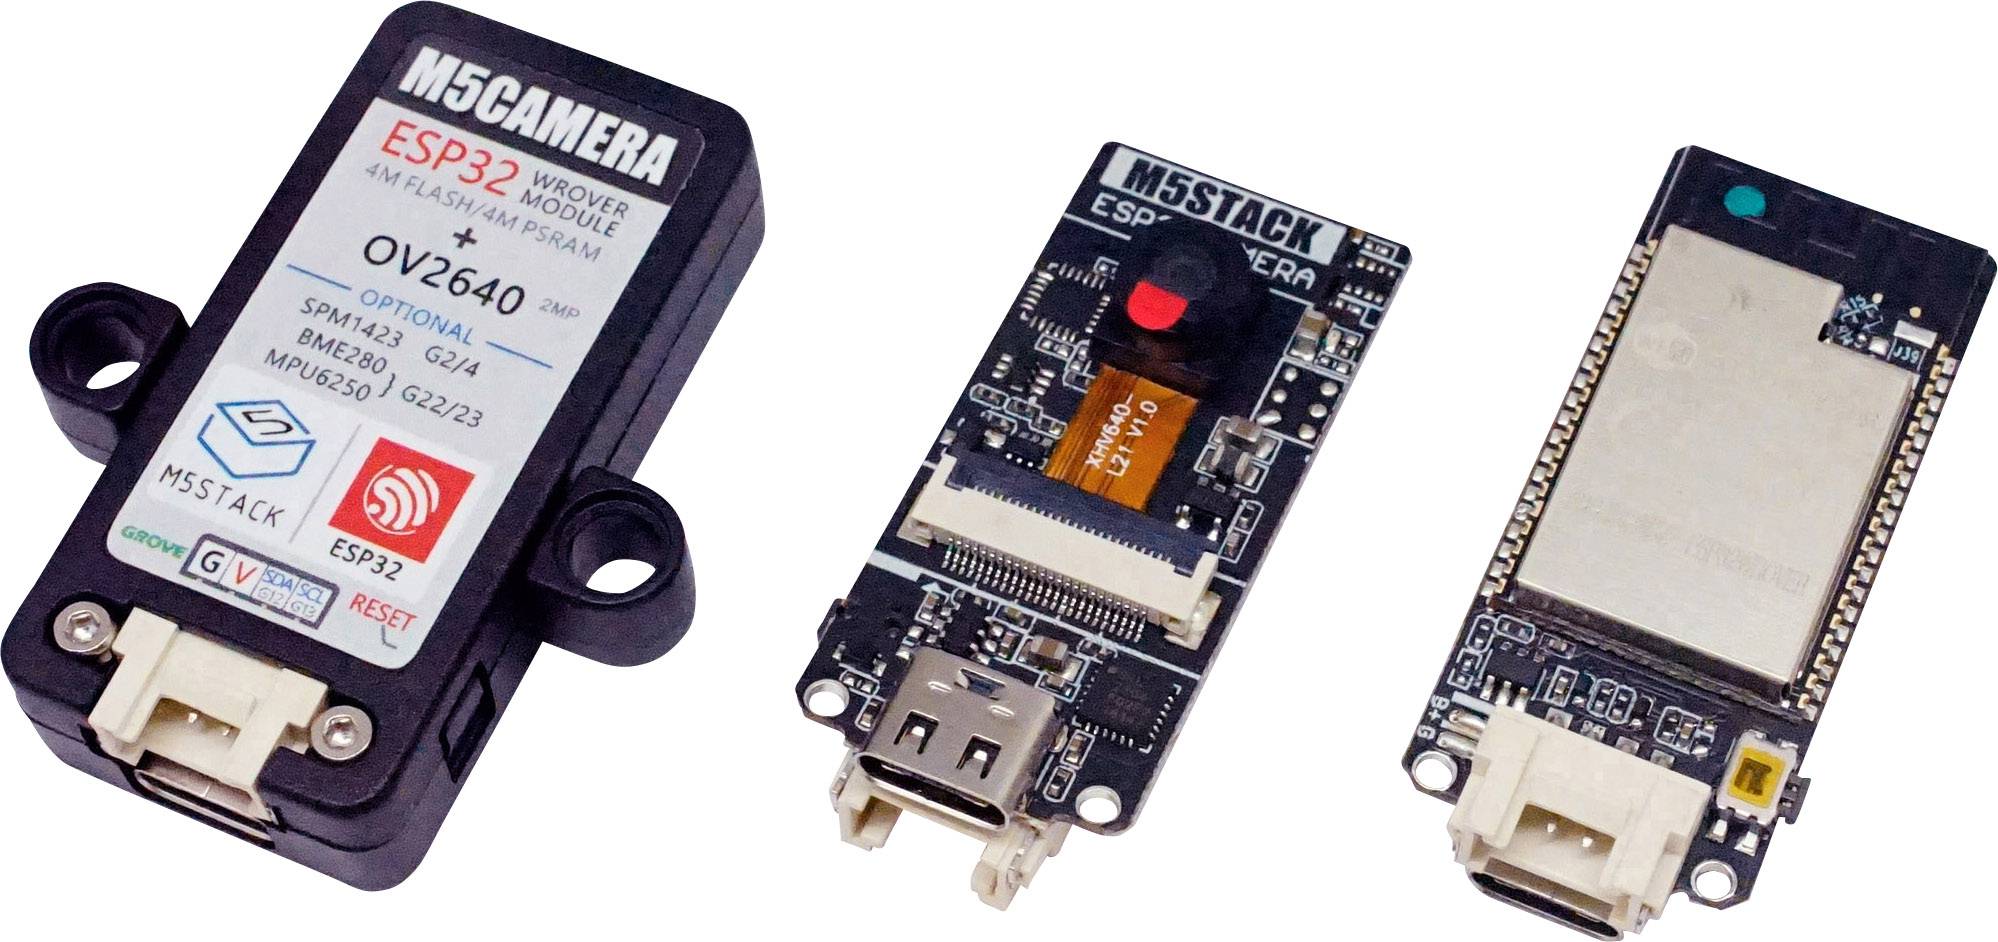 | ESP32 | 520KB | 4MB | - | OV2640 | https://docs.m5stack.com/en/unit/m5camera | |
| M5Stack Camera PSRAM | | ESP32 | 520KB | 4MB | 4MB | OV2640 | https://docs.m5stack.com/en/unit/m5camera | |
| M5Stack UnitCamS3 | 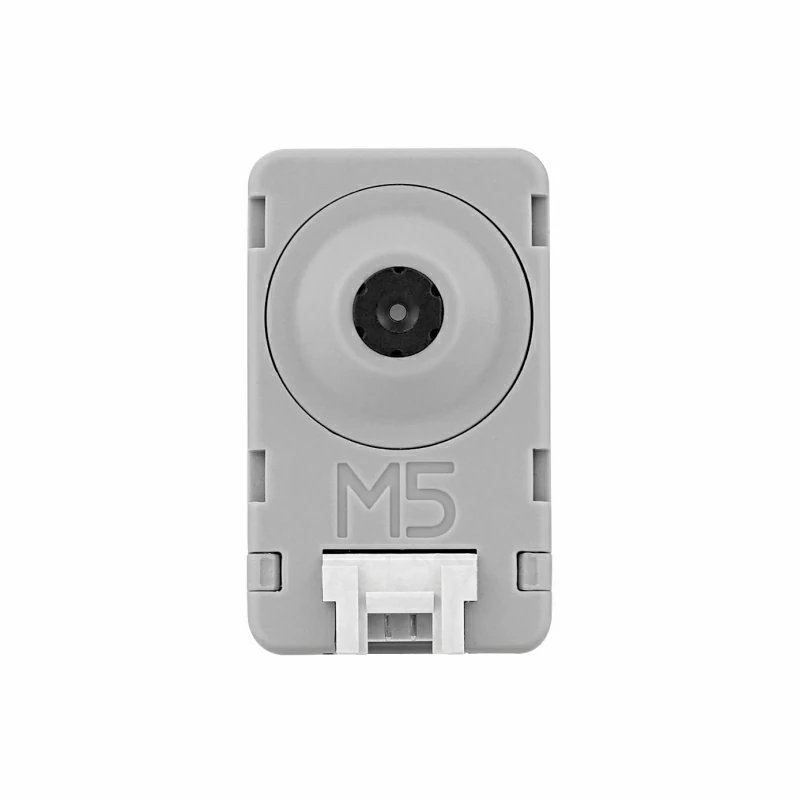 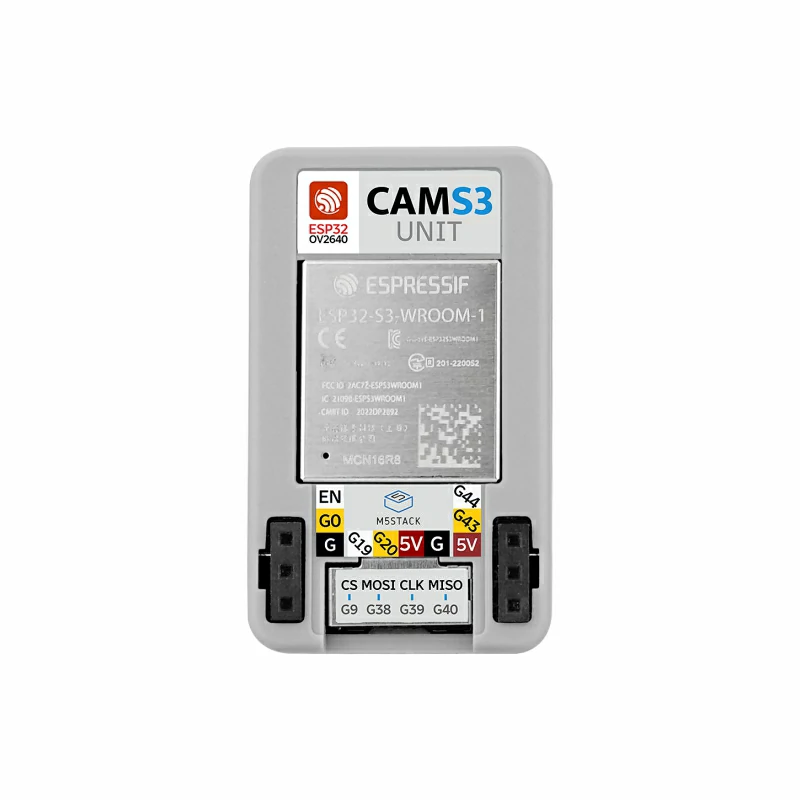 | ESP32-S3-WROOM-1-N16R8 | 520KB | 16MB | 8MB | OV2640 | https://docs.m5stack.com/en/unit/Unit-CamS3 | |
| Seeed Studio XIAO ESP32S3 Sense | 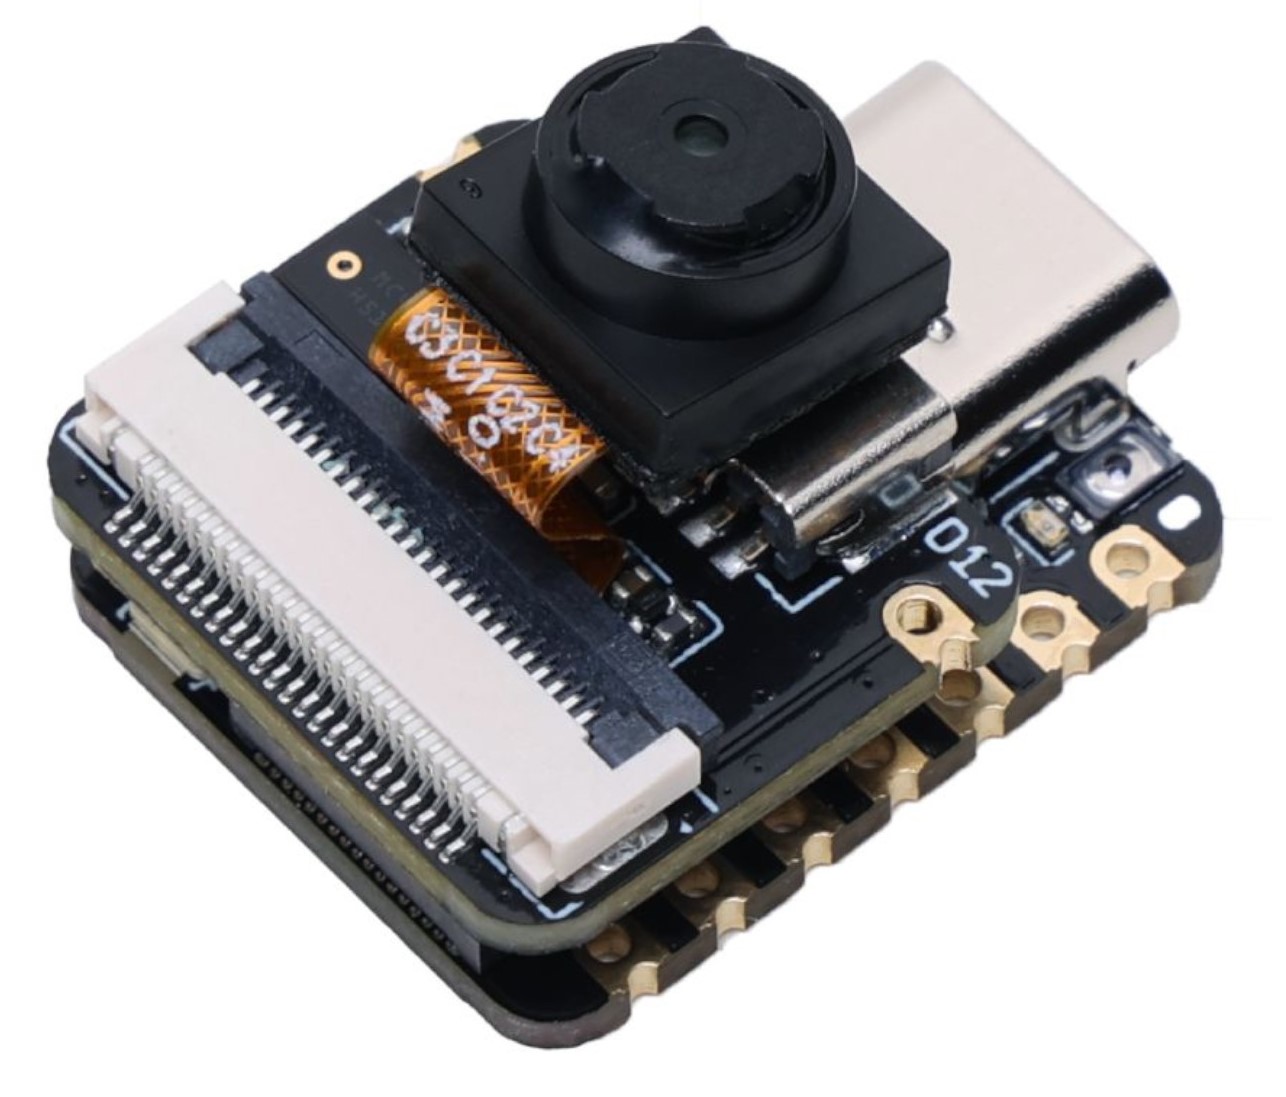 | ESP32-S3R8 | 520KB | 8MB | 8MB | OV2640 | Microphone | https://www.seeedstudio.com/XIAO-ESP32S3-Sense-p-5639.html |
PlatformIO is available for all major operating systems: Windows, Linux and MacOS. It is also provided as a plugin to Visual Studio Code. More information can be found at: https://docs.platformio.org/en/latest/installation.html below the basics.
Install Visual Studio Code and install the PlatformIO plugin.
Modules with an onboard USB Type-C connector (for example the ESP32-S3-CAM V3) can be programmed directly over USB; no FTDI adapter or ESP32-CAM-MB board is required. Connect the module with a USB-C cable and it will normally enter download mode automatically. If uploading fails, put it in download mode manually by holding BOOT, pressing and releasing RESET, and then releasing BOOT.
When using the ESP32-CAM-MB board, press and hold the GPIO0 button on the ESP32-CAM-MB board. Then press short the reset button (on the inside) on the ESP32-CAM board and release the GPIO0 button. This will put the ESP32-CAM board in download mode.
When using an FTDI adapter, make sure the adapter is set to 3.3 volt before connecting. Use the wiring schema below.
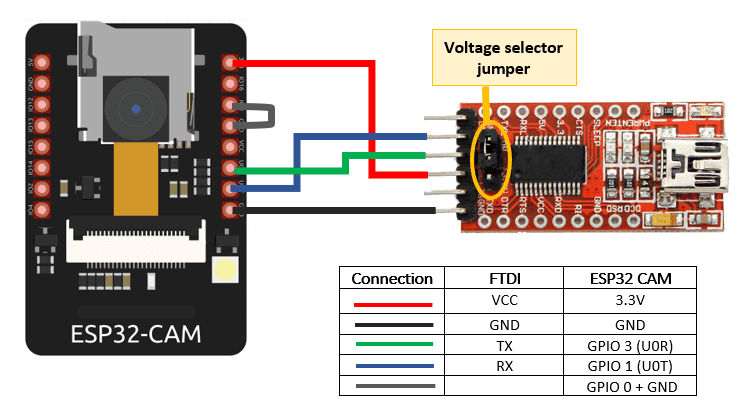
After programming remove the wire to the GPIO0 pin to exit the download mode.
Open a command line or terminal window and clone this repository from GitHub.
git clone https://github.com/rzeldent/esp32cam-rtsp.git
Go into the folder
cd esp32cam-rtsp
Next, the firmware has to be built and deployed to the ESP32. There are two flavours to do this; using the command line or the graphical interface of Visual Studio Code.
Make sure you have the latest version of the Espressif toolchain.
pio pkg update -g -p espressif32
First the source code has to be compiled to build all targets
pio run
If only a specific target is required, for example the esp32cam_ttgo_t_journal type:
pio run -e esp32cam_ttgo_t_journal
When finished, firmware has to be uploaded. Make sure the ESP32-CAM is in download mode (see previous section) and type:
pio run -t upload
or, again, for a specific target, for example esp32cam_ai_thinker
pio run -t upload -e esp32cam_ai_thinker
When done remove the jumper when using a FTDI adapter or press the reset button on the ESP32-CAM. To monitor the output, start a terminal using:
pio device monitor
Open the project in Visual Studio Code with the PlatformIO extension installed. Run the following tasks using Terminal -> Run Task (or Ctrl+Alt+T). Make sure the ESP32-CAM is in download mode during uploads.
After the programming of the ESP32, there is no configuration present. This needs to be added. To connect initially to the device open the WiFi connections and select the WiFi network / access point called ESP32CAM-RTSP. Initially there is no password present.
After connecting, the browser should automatically open the status page. In case this does not happen automatically, connect to http://192.168.4.1. In case this does not happen automatically, connect to http://192.168.4.1. This page will display the current settings and status. On the bottom, there is a link to the config. Click on this link.
This link brings up the configuration screen when connecting for the first time. This link brings up the configuration screen when connecting for the first time.
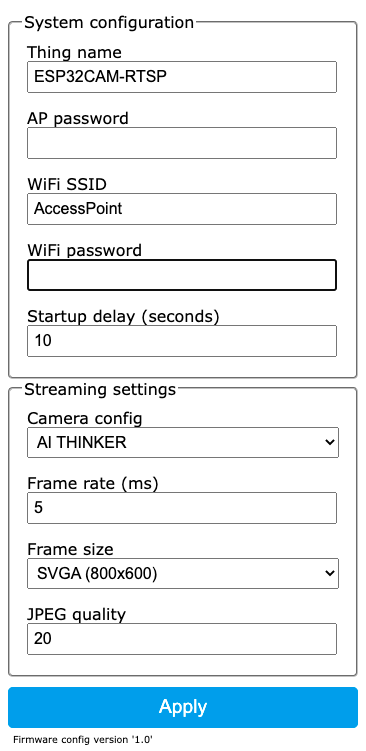
Configure at least:
When finished press Apply to save the configuration. The screen will redirect to the status screen.
Here it is possible to reboot the device so the settings take effect.
It is also possible to restart manually by pressing the reset button.
After the initial configuration and the device is connected to an access point, the device can be configured over http.
The device announces itself on the local network via mDNS as esp32cam-rtsp-<mac>.local, where <mac> is the device's MAC address (also shown on the status page). Connect to http://esp32cam-rtsp-<mac> — or to the device's IP address — to open the status screen.
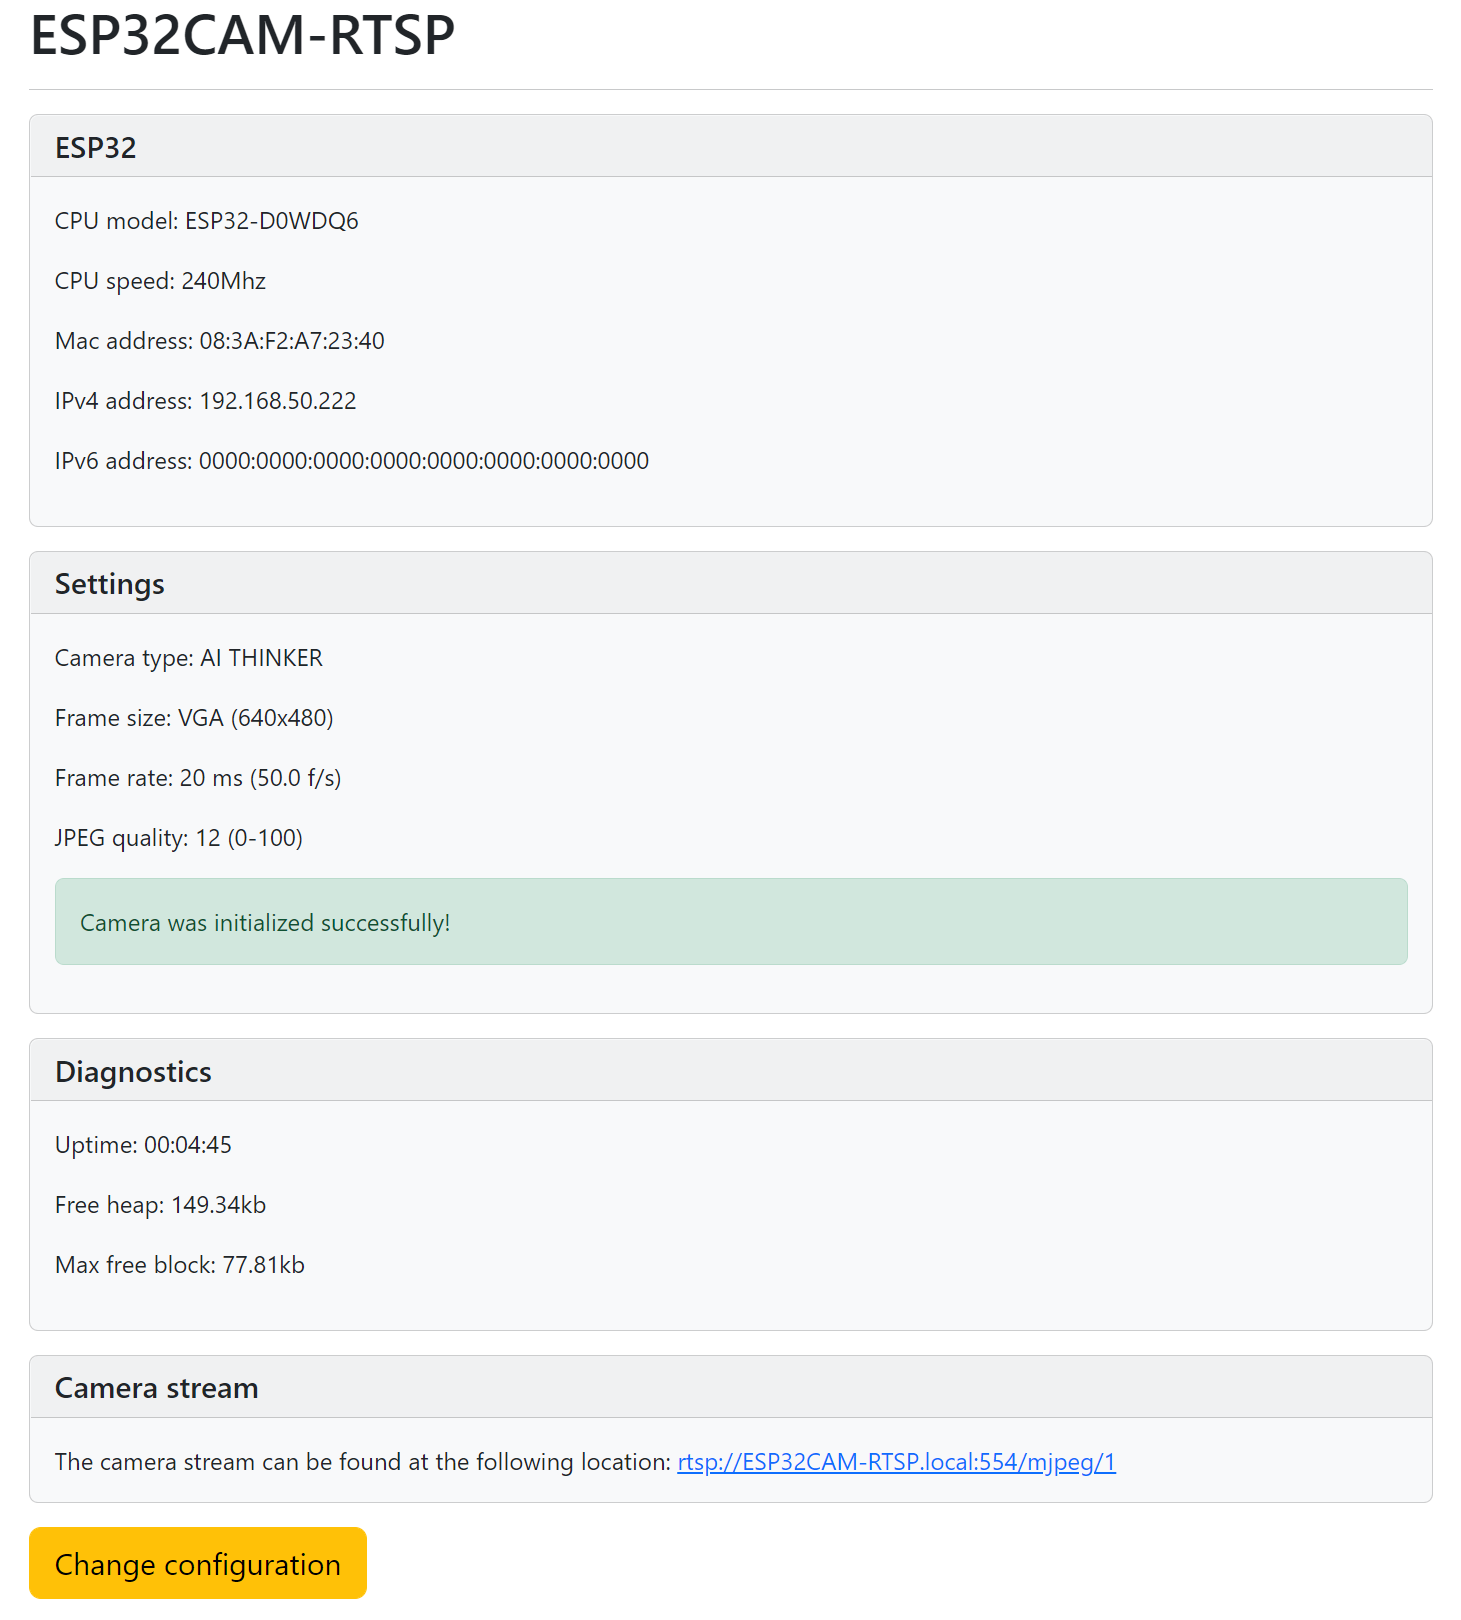
In case changes have been made to the configuration, this is shown and the possibility to restart is given.
Clicking on the change configuration button will open the configuration. It is possible that a password dialog is shown before entering.
If this happens, enter the RTSP username and password configured under RTSP settings
(see RTSP authentication).
RTSP stream is available at rtsp://esp32cam-rtsp-<mac>.local:554/mjpeg/1 (replace <mac> with the device's MAC address, or use its IP address).
This link can be opened with for example VLC.
By default RTP is sent over UDP (the client announces its RTP ports in the SETUP request).
When the network filters or firewalls UDP traffic, force the RTP/RTSP/TCP (interleaved) transport in VLC:
vlc rtsp://esp32cam-rtsp-<mac>.local:554/mjpeg/1 --rtsp-tcp
The server can stream over Secure RTP (RFC 3711, crypto suite AES_CM_128_HMAC_SHA1_80).
SRTP encrypts the RTP payload with AES-128 in counter mode and authenticates every packet
with an HMAC-SHA1 tag, so the video cannot be watched or tampered with by someone sniffing
the network.
To enable it, build with the MICRO_RTSP_ENABLE_SRTP define, for example in platformio.ini:
build_flags =
  -DMICRO_RTSP_ENABLE_SRTP
The keys are negotiated per session with the a=crypto attribute (RFC 4568) that the server
advertises in its DESCRIBE and SETUP replies. A client that offers its own a=crypto
in the SETUP request enables SRTP for that session as well. Receive the stream with FFmpeg
(which picks up the a=crypto key automatically):
ffmpeg -rtsp_transport tcp -i rtsp://esp32cam-rtsp-<mac>.local:554/mjpeg/1 -c copy out.mp4
[!NOTE] SRTP is intentionally not enabled by default: it requires an SRTP-capable client and breaks plain players such as VLC. The
a=cryptonegotiation is handled bylib/micro-rtsp-server.
srtp_client.pyThe repository contains a small Python client, tools/srtp_client.py, that verifies the
SRTP stream end-to-end. It negotiates SRTP by offering its own a=crypto attribute
(RFC 4568) in the RTSP SETUP request, derives the session keys exactly like the firmware
(lib/micro-rtsp-server/src/micro_rtsp_srtp.cpp), decrypts the incoming RTP, reassembles
the JPEG frames (RFC 2435) and saves them to disk.
Requirements:
pip install cryptography
Usage:
python tools/srtp_client.py --host <ip address> [--port 554] [--rtp-port 50000]
    [--frames 5] [--time 10] [--out frames]
| Option | Default | Description |
|---|---|---|
--host | — | IP address (or mDNS name) of the camera (required) |
--port | 554 | RTSP port |
--rtp-port | 50000 | Local UDP port to receive the RTP/SRTP stream |
--frames | 0 | Stop after N frames (0 = receive for --time seconds) |
--time | 10.0 | Receive for this many seconds |
--out | frames | Output directory for the raw JPEG frames |
Example run:
python tools/srtp_client.py --host 192.168.1.149
--- SDP ---
v=0
o=- 1085377743 1 IN IP4 192.168.1.149
s=
t=0 0
m=video 0 RTP/AVP 26
c=IN IP4 0.0.0.0
a=control:track1

--- SETUP response ---
a=crypto:1 AES_CM_128_HMAC_SHA1_80 inline:TUAwUoKwQs9G/qhlrmG5KnVyh/ZXLVUxtcGgabHB
Content-Type: application/sdp

server master key : 4d40305282b042cf46fea865ae61b92a
server master salt: 757287f6572d5531b5c1a069b1c1
Receiving SRTP on UDP 50000 ...
  frame 1: 3166 bytes -> frames\frame_0001.bin
  frame 2: 2770 bytes -> frames\frame_0002.bin
  frame 3: 3373 bytes -> frames\frame_0003.bin
  frame 4: 3373 bytes -> frames\frame_0004.bin
  frame 5: 3373 bytes -> frames\frame_0005.bin
[!IMPORTANT] Do not enable RTSP authentication (basic auth) when using this tool. The client sends
OPTIONS,DESCRIBE,SETUPandPLAYrequests without credentials, so when basic auth is enabled the server rejects them and the SRTP session cannot be established. Leave the username/password under RTSP settings empty while testing withsrtp_client.py.
When the board has an onboard I2S microphone, an additional audio track is offered and streamed
together with the video as G.711 a-law (PCMA, 8 kHz mono). VLC plays it automatically.
Currently audio is enabled for the Seeed Studio XIAO ESP32S3 SENSE board (see boards/ and the
MIC_I2S_* defines). To enable it on another board, add the microphone I2S pins to its board
configuration, for example:
"'-D MIC_I2S_BCLK=17'",
"'-D MIC_I2S_WS=42'",
"'-D MIC_I2S_DIN=41'"
The stream can be recorded to disk, for example:
ffmpeg -rtsp_transport tcp -i rtsp://esp32cam-rtsp-<mac>.local:554/mjpeg/1 -c copy out.mp4
The RTSP server is implemented by the micro-rtsp-server library (in lib/micro-rtsp-server),
a small single-threaded server that supports multiple simultaneous clients, RTP/UDP and
RTP/RTSP/TCP transports, and (optionally) an audio track. The video frames are captured with
esp32-camera, decoded with the micro-jpg library to locate the JPEG quantization tables, and
packetized into RFC 2435 (JPEG over RTP) packets.
The RTSP server supports HTTP Basic authentication (RFC 2617). When enabled, clients must present the configured credentials before they can describe, set up or play the stream.
Authentication is disabled by default. To enable it, open the configuration page and set a username and password under the RTSP settings group, then apply the configuration and reboot.
When authentication is enabled:
RTSP players such as VLC prompt for the username and password when connecting to the stream:
vlc rtsp://esp32cam-rtsp-<mac>.local:554/mjpeg/1
The credentials can also be embedded in the URL:
vlc rtsp://<username>:<password>@esp32cam-rtsp-<mac>.local:554/mjpeg/1
OPTIONS requests remain open (unauthenticated) so clients and monitoring tools can still
probe the endpoint without credentials.
The same credentials protect the configuration page at
http://esp32cam-rtsp-<mac>.local/config (HTTP Basic authentication, realm ESP32CAM-RTSP).
The /snapshot and /stream pages are not password protected.
The JPEG motion server is available in a web browser at http://esp32cam-rtsp-<mac>.local/stream (replace <mac> with the device's MAC address).
The image server is available in a web browser at http://esp32cam-rtsp-<mac>.local/snapshot.
[!WARNING] There is no password protection by default. Anyone with network access to the device can view the streams or images.
The device supports updating the firmware over WiFi (Over-The-Air, OTA), so it does not have to be connected to a USB programmer for every update.
[!IMPORTANT] OTA requires a partition table with two application slots. All boards in this repository use such a table (the 8MB/16MB boards ship one; the 4MB boards use
partitions/ota.csv). The first time you install a build that supports OTA you must flash it over USB so the new partition table is written. After that, updates can be done over WiFi.
Build the firmware normally and upload it over WiFi with PlatformIO, replacing the IP address and
environment with your own. The --auth password MUST equal OTA_PASSWORD in include/settings.h
(default ESP32CAM-RTSP) and must be passed without quotes (quotes become part of the password and break authentication):
pio run -t upload -e esp32cam_ai_thinker --upload-port 192.168.1.100 --upload-protocol espota --upload-flags=--auth=ESP32CAM-RTSP
The OTA password (OTA_PASSWORD in include/settings.h) is used to authenticate the update. The
Arduino IDE (Tools -> Port -> Network Ports) or espota.py can be used as well:
python espota.py -i 192.168.1.100 -p 3232 -a ESP32CAM-RTSP -f .pio/build/esp32cam_ai_thinker/firmware.bin
[!NOTE] Only upload a
firmware.binthat was built for the same board / flash layout as the installed firmware.
There is a minimal API to perform tasks via HTTP requests. Some endpoints require HTTP Basic Authentication.
| Credential | Value |
|---|---|
| Username | Your configured RTSP username |
| Password | Your configured RTSP password |
Set the credentials under
RTSP settingson the configuration page (see RTSP authentication). When no RTSP username is set, authentication is disabled. The credentials are cached in the browser session, so you only need to enter them once.
The available endpoints are:
Calling this URL will restart the device. Authentication is required.
Calling this URL will start the form for configuring the device in the browser. Authentication is required.
Calling this URL will return a JPEG snapshot of the camera in the browser. This request can also be used (for example using cURL) to save the snapshot to a file.
pio run -t erase command.
This will reset the device including configuration.
If using the esptool, you can do this using esptool.py --chip esp32 --port /dev/ttyUSB0 erase_flash.
However, after erasing, re-flashing of the firmware is required.Make sure the power is 5 volts and stable, although the ESP32 is a 3.3V module, this voltage is created on the board. If not stable, it has been reported that restarts occur when starting up (probably when power is required for WiFi). The software disables the brown out protection so there is some margin in the voltage. Some people suggest to add a capacitor over the 5V input to stabilize the voltage.
An unstable power supply is also the most common cause of horizontal color stripes/bands (blue, yellow or orange) in the camera image. The OV2640 sensor is sensitive to supply noise and voltage sag, which shows up as intermittent colored bands, often near the top or bottom of the frame. If you see these stripes:
Some esp32cam modules have additional ram on the board. This allows to use this ram as frame buffer. The availability of PSRAM can be seen in the HTML status overview.
Not all the boards are equipped with PSRAM:
| Board | PSRAM |
|---|---|
| WROVER_KIT | 8MB |
| ESP_EYE | 8MB |
| ESP32S3_EYE | 8MB |
| M5STACK_PSRAM | 8MB |
| M5STACK_V2_PSRAM | Version B only |
| M5STACK_WIDE | 8MB |
| M5STACK_ESP32CAM | No |
| M5STACK_UNITCAM | No |
| M5STACK_UNITCAMS3 | 8MB |
| M5STACK_M5PoECAM-W | 8MB |
| AI_THINKER | 4MB |
| S3_CAM_V3 | 8MB |
| TTGO_T_JOURNAL | No |
| ESP32_CAM_BOARD | ? |
| ESP32S2_CAM_BOARD | ? |
| ESP32S3_CAM_LCD | ? |
Depending on the image resolution, framerate and quality, the PSRAM must be enabled and/or the number of frame buffers increased to keep up with the data generated by the sensor. There are many boards around with faulty PSRAM. If the camera fails to initialize, this might be a reason — see this Reddit post. In this case disable the use of PSRAM in the configuration and do not use camera modes that require PSRAM.
For the setting JPEG quality, a lower number means higher quality. Be aware that a very high quality (low number) can cause the ESP32 cam to crash or return no image.
The default settings are:
Be careful when connecting the camera module. Make sure it is connected the right way around (Camera pointing away from the board) and the ribbon cable inserted to the end before locking it.
If the image shows horizontal color stripes or bands (e.g. blue, yellow or orange), the most likely causes are:
esp32cam-rtsp depends on PlatformIO, IotWebConf, Bootstrap 5, micro-moustache and micro-timezonedb, plus the bundled micro-rtsp-server and micro-jpg libraries.
micro-rtsp-server): RTP/UDP and RTP/RTSP/TCP, SRTP, G.711 audiopartitions/ota.csv) for the 4MB boards75 followers · starred Jan 2024
501 followers · starred Jun 2024
143 followers · starred Jul 2024
17 followers · starred Feb 2023
Simple RTSP (streaming image) server for the ESP32CAM. Easy configuration and monitoring through the web interface.
C++
1,207
249 commits
updated Oct 12, 2026
Simple RTSP, HTTP JPEG Streamer and image server with configuration through the web interface.
[!NOTE] A
developbranch is available with the newest boards (including the Seeed Studio XIAO ESP32S3). It may be ahead ofmain; feedback and testing are welcome.
Flashing this software on a ESP32CAM module will make it a RTSP streaming camera server, a HTTP Motion JPEG streamer and a HTTP image server.
Supported protocols
RTSP The RTSP protocol is an industry standard and allows many CCTV systems and applications (like for example VLC) to connect directly to the ESP32CAM camera stream. It is also possible to stream directly to a server using ffmpeg. This makes the module a camera server allowing recording and the stream can be stored on a disk and replayed later. The video is encoded as Motion-JPEG (RTP payload 26) and streamed over RTP/UDP (default) or RTP/RTSP/TCP. Boards with an onboard microphone (e.g. the Seeed Studio XIAO ESP32S3 SENSE) can additionally stream G.711 a-law audio (RTP payload 8). The URL is rtsp://<ip address>:554/mjpeg/1 Authentication is optional; when enabled, clients must provide credentials (see RTSP authentication).
HTTP Motion JPEG The HTTP JPEG streamer makes it possible to watch the camera stream directly in your browser. The URL is http://<ip address>/stream
HTTP image The HTTP Image returns an HTTP JPEG image of the camera. The URL is http://<ip address>/snapshot
Over-the-air (OTA) firmware update The firmware can be updated over WiFi from PlatformIO or the Arduino IDE (espota). See Updating the firmware (OTA).
This software supports the following ESP32-CAM (and alike) modules:
The software provides a configuration web server that can be used to:
The software also provides a mDNS server to be easily discoverable on the local network. It advertises HTTP (port 80) and RTSP (port 554).
There are a lot of boards available that are all called ESP32-CAM. However, there are differences in CPU (type/speed/cores), how the camera is connected, presence of PSRAM or not... To select the right board use the table below and use the configuration that is listed below for your board:
| Board | Image | CPU | SRAM | Flash | PSRAM | Camera | Extras | Manufacturer site |
|---|---|---|---|---|---|---|---|---|
| Espressif ESP32-Wrover CAM | | ESP32 | 520KB | 4MB | 8MB | OV2640 | ||
| AI-Thinker ESP32-CAM | | ESP32 | 520KB | 4MB | 4MB | OV2640 | https://docs.ai-thinker.com/esp32-cam | |
| ESP32-S3-CAM V3 (Type-C) | | ESP32-S3R8 | 512KB | 8MB | 8MB | OV2640 / OV3660 | Flash LED | https://nl.aliexpress.com/item/1005008678466795.html |
| Espressif ESP-EYE | | ESP32 | 520KB | 4MB | 8MB | OV2640 | ||
| Espressif ESP32-S3-EYE | | ESP32-S3 | 520KB | 4MB | 8MB | OV2640 | https://www.espressif.com/en/products/devkits/esp-eye/overview | |
| LilyGo camera module | | ESP32 Wrover | 520KB | 4MB | 8MB | OV2640 / OV5640 | ||
| LilyGo Simcam | | OV2640 | ||||||
| LilyGo TTGO-T Camera | | OV2640 | ||||||
| M5Stack ESP32CAM | | ESP32 | 520KB | 4MB | - | OV2640 | Microphone | https://docs.m5stack.com/en/unit/esp32cam |
| M5Stack UnitCam | | ESP32-WROOM-32E | 520KB | 4MB | - | OV2640 | https://docs.m5stack.com/en/unit/unit_cam | |
| M5Stack Camera | | ESP32 | 520KB | 4MB | - | OV2640 | https://docs.m5stack.com/en/unit/m5camera | |
| M5Stack Camera PSRAM | | ESP32 | 520KB | 4MB | 4MB | OV2640 | https://docs.m5stack.com/en/unit/m5camera | |
| M5Stack UnitCamS3 | | ESP32-S3-WROOM-1-N16R8 | 520KB | 16MB | 8MB | OV2640 | https://docs.m5stack.com/en/unit/Unit-CamS3 | |
| Seeed Studio XIAO ESP32S3 Sense | | ESP32-S3R8 | 520KB | 8MB | 8MB | OV2640 | Microphone | https://www.seeedstudio.com/XIAO-ESP32S3-Sense-p-5639.html |
PlatformIO is available for all major operating systems: Windows, Linux and MacOS. It is also provided as a plugin to Visual Studio Code. More information can be found at: https://docs.platformio.org/en/latest/installation.html below the basics.
Install Visual Studio Code and install the PlatformIO plugin.
Modules with an onboard USB Type-C connector (for example the ESP32-S3-CAM V3) can be programmed directly over USB; no FTDI adapter or ESP32-CAM-MB board is required. Connect the module with a USB-C cable and it will normally enter download mode automatically. If uploading fails, put it in download mode manually by holding BOOT, pressing and releasing RESET, and then releasing BOOT.
When using the ESP32-CAM-MB board, press and hold the GPIO0 button on the ESP32-CAM-MB board. Then press short the reset button (on the inside) on the ESP32-CAM board and release the GPIO0 button. This will put the ESP32-CAM board in download mode.
When using an FTDI adapter, make sure the adapter is set to 3.3 volt before connecting. Use the wiring schema below.
After programming remove the wire to the GPIO0 pin to exit the download mode.
Open a command line or terminal window and clone this repository from GitHub.
git clone https://github.com/rzeldent/esp32cam-rtsp.git
Go into the folder
cd esp32cam-rtsp
Next, the firmware has to be built and deployed to the ESP32. There are two flavours to do this; using the command line or the graphical interface of Visual Studio Code.
Make sure you have the latest version of the Espressif toolchain.
pio pkg update -g -p espressif32
First the source code has to be compiled to build all targets
pio run
If only a specific target is required, for example the esp32cam_ttgo_t_journal type:
pio run -e esp32cam_ttgo_t_journal
When finished, firmware has to be uploaded. Make sure the ESP32-CAM is in download mode (see previous section) and type:
pio run -t upload
or, again, for a specific target, for example esp32cam_ai_thinker
pio run -t upload -e esp32cam_ai_thinker
When done remove the jumper when using a FTDI adapter or press the reset button on the ESP32-CAM. To monitor the output, start a terminal using:
pio device monitor
Open the project in Visual Studio Code with the PlatformIO extension installed. Run the following tasks using Terminal -> Run Task (or Ctrl+Alt+T). Make sure the ESP32-CAM is in download mode during uploads.
After the programming of the ESP32, there is no configuration present. This needs to be added. To connect initially to the device open the WiFi connections and select the WiFi network / access point called ESP32CAM-RTSP. Initially there is no password present.
After connecting, the browser should automatically open the status page. In case this does not happen automatically, connect to http://192.168.4.1. In case this does not happen automatically, connect to http://192.168.4.1. This page will display the current settings and status. On the bottom, there is a link to the config. Click on this link.
This link brings up the configuration screen when connecting for the first time. This link brings up the configuration screen when connecting for the first time.
Configure at least:
When finished press Apply to save the configuration. The screen will redirect to the status screen.
Here it is possible to reboot the device so the settings take effect.
It is also possible to restart manually by pressing the reset button.
After the initial configuration and the device is connected to an access point, the device can be configured over http.
The device announces itself on the local network via mDNS as esp32cam-rtsp-<mac>.local, where <mac> is the device's MAC address (also shown on the status page). Connect to http://esp32cam-rtsp-<mac> — or to the device's IP address — to open the status screen.
In case changes have been made to the configuration, this is shown and the possibility to restart is given.
Clicking on the change configuration button will open the configuration. It is possible that a password dialog is shown before entering.
If this happens, enter the RTSP username and password configured under RTSP settings
(see RTSP authentication).
RTSP stream is available at rtsp://esp32cam-rtsp-<mac>.local:554/mjpeg/1 (replace <mac> with the device's MAC address, or use its IP address).
This link can be opened with for example VLC.
By default RTP is sent over UDP (the client announces its RTP ports in the SETUP request).
When the network filters or firewalls UDP traffic, force the RTP/RTSP/TCP (interleaved) transport in VLC:
vlc rtsp://esp32cam-rtsp-<mac>.local:554/mjpeg/1 --rtsp-tcp
The server can stream over Secure RTP (RFC 3711, crypto suite AES_CM_128_HMAC_SHA1_80).
SRTP encrypts the RTP payload with AES-128 in counter mode and authenticates every packet
with an HMAC-SHA1 tag, so the video cannot be watched or tampered with by someone sniffing
the network.
To enable it, build with the MICRO_RTSP_ENABLE_SRTP define, for example in platformio.ini:
build_flags =
  -DMICRO_RTSP_ENABLE_SRTP
The keys are negotiated per session with the a=crypto attribute (RFC 4568) that the server
advertises in its DESCRIBE and SETUP replies. A client that offers its own a=crypto
in the SETUP request enables SRTP for that session as well. Receive the stream with FFmpeg
(which picks up the a=crypto key automatically):
ffmpeg -rtsp_transport tcp -i rtsp://esp32cam-rtsp-<mac>.local:554/mjpeg/1 -c copy out.mp4
[!NOTE] SRTP is intentionally not enabled by default: it requires an SRTP-capable client and breaks plain players such as VLC. The
a=cryptonegotiation is handled bylib/micro-rtsp-server.
srtp_client.pyThe repository contains a small Python client, tools/srtp_client.py, that verifies the
SRTP stream end-to-end. It negotiates SRTP by offering its own a=crypto attribute
(RFC 4568) in the RTSP SETUP request, derives the session keys exactly like the firmware
(lib/micro-rtsp-server/src/micro_rtsp_srtp.cpp), decrypts the incoming RTP, reassembles
the JPEG frames (RFC 2435) and saves them to disk.
Requirements:
pip install cryptography
Usage:
python tools/srtp_client.py --host <ip address> [--port 554] [--rtp-port 50000]
    [--frames 5] [--time 10] [--out frames]
| Option | Default | Description |
|---|---|---|
--host | — | IP address (or mDNS name) of the camera (required) |
--port | 554 | RTSP port |
--rtp-port | 50000 | Local UDP port to receive the RTP/SRTP stream |
--frames | 0 | Stop after N frames (0 = receive for --time seconds) |
--time | 10.0 | Receive for this many seconds |
--out | frames | Output directory for the raw JPEG frames |
Example run:
python tools/srtp_client.py --host 192.168.1.149
--- SDP ---
v=0
o=- 1085377743 1 IN IP4 192.168.1.149
s=
t=0 0
m=video 0 RTP/AVP 26
c=IN IP4 0.0.0.0
a=control:track1

--- SETUP response ---
a=crypto:1 AES_CM_128_HMAC_SHA1_80 inline:TUAwUoKwQs9G/qhlrmG5KnVyh/ZXLVUxtcGgabHB
Content-Type: application/sdp

server master key : 4d40305282b042cf46fea865ae61b92a
server master salt: 757287f6572d5531b5c1a069b1c1
Receiving SRTP on UDP 50000 ...
  frame 1: 3166 bytes -> frames\frame_0001.bin
  frame 2: 2770 bytes -> frames\frame_0002.bin
  frame 3: 3373 bytes -> frames\frame_0003.bin
  frame 4: 3373 bytes -> frames\frame_0004.bin
  frame 5: 3373 bytes -> frames\frame_0005.bin
[!IMPORTANT] Do not enable RTSP authentication (basic auth) when using this tool. The client sends
OPTIONS,DESCRIBE,SETUPandPLAYrequests without credentials, so when basic auth is enabled the server rejects them and the SRTP session cannot be established. Leave the username/password under RTSP settings empty while testing withsrtp_client.py.
When the board has an onboard I2S microphone, an additional audio track is offered and streamed
together with the video as G.711 a-law (PCMA, 8 kHz mono). VLC plays it automatically.
Currently audio is enabled for the Seeed Studio XIAO ESP32S3 SENSE board (see boards/ and the
MIC_I2S_* defines). To enable it on another board, add the microphone I2S pins to its board
configuration, for example:
"'-D MIC_I2S_BCLK=17'",
"'-D MIC_I2S_WS=42'",
"'-D MIC_I2S_DIN=41'"
The stream can be recorded to disk, for example:
ffmpeg -rtsp_transport tcp -i rtsp://esp32cam-rtsp-<mac>.local:554/mjpeg/1 -c copy out.mp4
The RTSP server is implemented by the micro-rtsp-server library (in lib/micro-rtsp-server),
a small single-threaded server that supports multiple simultaneous clients, RTP/UDP and
RTP/RTSP/TCP transports, and (optionally) an audio track. The video frames are captured with
esp32-camera, decoded with the micro-jpg library to locate the JPEG quantization tables, and
packetized into RFC 2435 (JPEG over RTP) packets.
The RTSP server supports HTTP Basic authentication (RFC 2617). When enabled, clients must present the configured credentials before they can describe, set up or play the stream.
Authentication is disabled by default. To enable it, open the configuration page and set a username and password under the RTSP settings group, then apply the configuration and reboot.
When authentication is enabled:
RTSP players such as VLC prompt for the username and password when connecting to the stream:
vlc rtsp://esp32cam-rtsp-<mac>.local:554/mjpeg/1
The credentials can also be embedded in the URL:
vlc rtsp://<username>:<password>@esp32cam-rtsp-<mac>.local:554/mjpeg/1
OPTIONS requests remain open (unauthenticated) so clients and monitoring tools can still
probe the endpoint without credentials.
The same credentials protect the configuration page at
http://esp32cam-rtsp-<mac>.local/config (HTTP Basic authentication, realm ESP32CAM-RTSP).
The /snapshot and /stream pages are not password protected.
The JPEG motion server is available in a web browser at http://esp32cam-rtsp-<mac>.local/stream (replace <mac> with the device's MAC address).
The image server is available in a web browser at http://esp32cam-rtsp-<mac>.local/snapshot.
[!WARNING] There is no password protection by default. Anyone with network access to the device can view the streams or images.
The device supports updating the firmware over WiFi (Over-The-Air, OTA), so it does not have to be connected to a USB programmer for every update.
[!IMPORTANT] OTA requires a partition table with two application slots. All boards in this repository use such a table (the 8MB/16MB boards ship one; the 4MB boards use
partitions/ota.csv). The first time you install a build that supports OTA you must flash it over USB so the new partition table is written. After that, updates can be done over WiFi.
Build the firmware normally and upload it over WiFi with PlatformIO, replacing the IP address and
environment with your own. The --auth password MUST equal OTA_PASSWORD in include/settings.h
(default ESP32CAM-RTSP) and must be passed without quotes (quotes become part of the password and break authentication):
pio run -t upload -e esp32cam_ai_thinker --upload-port 192.168.1.100 --upload-protocol espota --upload-flags=--auth=ESP32CAM-RTSP
The OTA password (OTA_PASSWORD in include/settings.h) is used to authenticate the update. The
Arduino IDE (Tools -> Port -> Network Ports) or espota.py can be used as well:
python espota.py -i 192.168.1.100 -p 3232 -a ESP32CAM-RTSP -f .pio/build/esp32cam_ai_thinker/firmware.bin
[!NOTE] Only upload a
firmware.binthat was built for the same board / flash layout as the installed firmware.
There is a minimal API to perform tasks via HTTP requests. Some endpoints require HTTP Basic Authentication.
| Credential | Value |
|---|---|
| Username | Your configured RTSP username |
| Password | Your configured RTSP password |
Set the credentials under
RTSP settingson the configuration page (see RTSP authentication). When no RTSP username is set, authentication is disabled. The credentials are cached in the browser session, so you only need to enter them once.
The available endpoints are:
Calling this URL will restart the device. Authentication is required.
Calling this URL will start the form for configuring the device in the browser. Authentication is required.
Calling this URL will return a JPEG snapshot of the camera in the browser. This request can also be used (for example using cURL) to save the snapshot to a file.
pio run -t erase command.
This will reset the device including configuration.
If using the esptool, you can do this using esptool.py --chip esp32 --port /dev/ttyUSB0 erase_flash.
However, after erasing, re-flashing of the firmware is required.Make sure the power is 5 volts and stable, although the ESP32 is a 3.3V module, this voltage is created on the board. If not stable, it has been reported that restarts occur when starting up (probably when power is required for WiFi). The software disables the brown out protection so there is some margin in the voltage. Some people suggest to add a capacitor over the 5V input to stabilize the voltage.
An unstable power supply is also the most common cause of horizontal color stripes/bands (blue, yellow or orange) in the camera image. The OV2640 sensor is sensitive to supply noise and voltage sag, which shows up as intermittent colored bands, often near the top or bottom of the frame. If you see these stripes:
Some esp32cam modules have additional ram on the board. This allows to use this ram as frame buffer. The availability of PSRAM can be seen in the HTML status overview.
Not all the boards are equipped with PSRAM:
| Board | PSRAM |
|---|---|
| WROVER_KIT | 8MB |
| ESP_EYE | 8MB |
| ESP32S3_EYE | 8MB |
| M5STACK_PSRAM | 8MB |
| M5STACK_V2_PSRAM | Version B only |
| M5STACK_WIDE | 8MB |
| M5STACK_ESP32CAM | No |
| M5STACK_UNITCAM | No |
| M5STACK_UNITCAMS3 | 8MB |
| M5STACK_M5PoECAM-W | 8MB |
| AI_THINKER | 4MB |
| S3_CAM_V3 | 8MB |
| TTGO_T_JOURNAL | No |
| ESP32_CAM_BOARD | ? |
| ESP32S2_CAM_BOARD | ? |
| ESP32S3_CAM_LCD | ? |
Depending on the image resolution, framerate and quality, the PSRAM must be enabled and/or the number of frame buffers increased to keep up with the data generated by the sensor. There are many boards around with faulty PSRAM. If the camera fails to initialize, this might be a reason — see this Reddit post. In this case disable the use of PSRAM in the configuration and do not use camera modes that require PSRAM.
For the setting JPEG quality, a lower number means higher quality. Be aware that a very high quality (low number) can cause the ESP32 cam to crash or return no image.
The default settings are:
Be careful when connecting the camera module. Make sure it is connected the right way around (Camera pointing away from the board) and the ribbon cable inserted to the end before locking it.
If the image shows horizontal color stripes or bands (e.g. blue, yellow or orange), the most likely causes are:
esp32cam-rtsp depends on PlatformIO, IotWebConf, Bootstrap 5, micro-moustache and micro-timezonedb, plus the bundled micro-rtsp-server and micro-jpg libraries.
micro-rtsp-server): RTP/UDP and RTP/RTSP/TCP, SRTP, G.711 audiopartitions/ota.csv) for the 4MB boards75 followers · starred Jan 2024
501 followers · starred Jun 2024
143 followers · starred Jul 2024
17 followers · starred Feb 2023





