
See what people are saying
README
EarWing - Cloud free private transcription

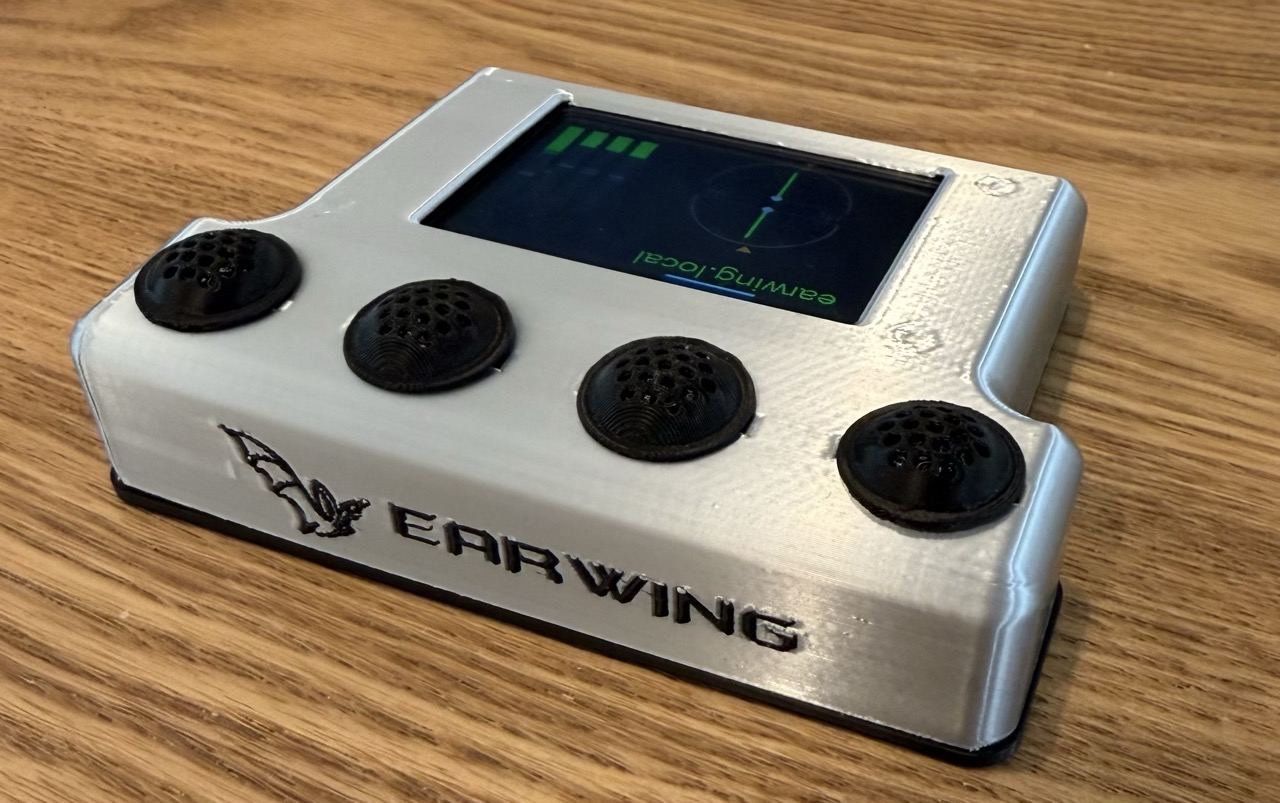
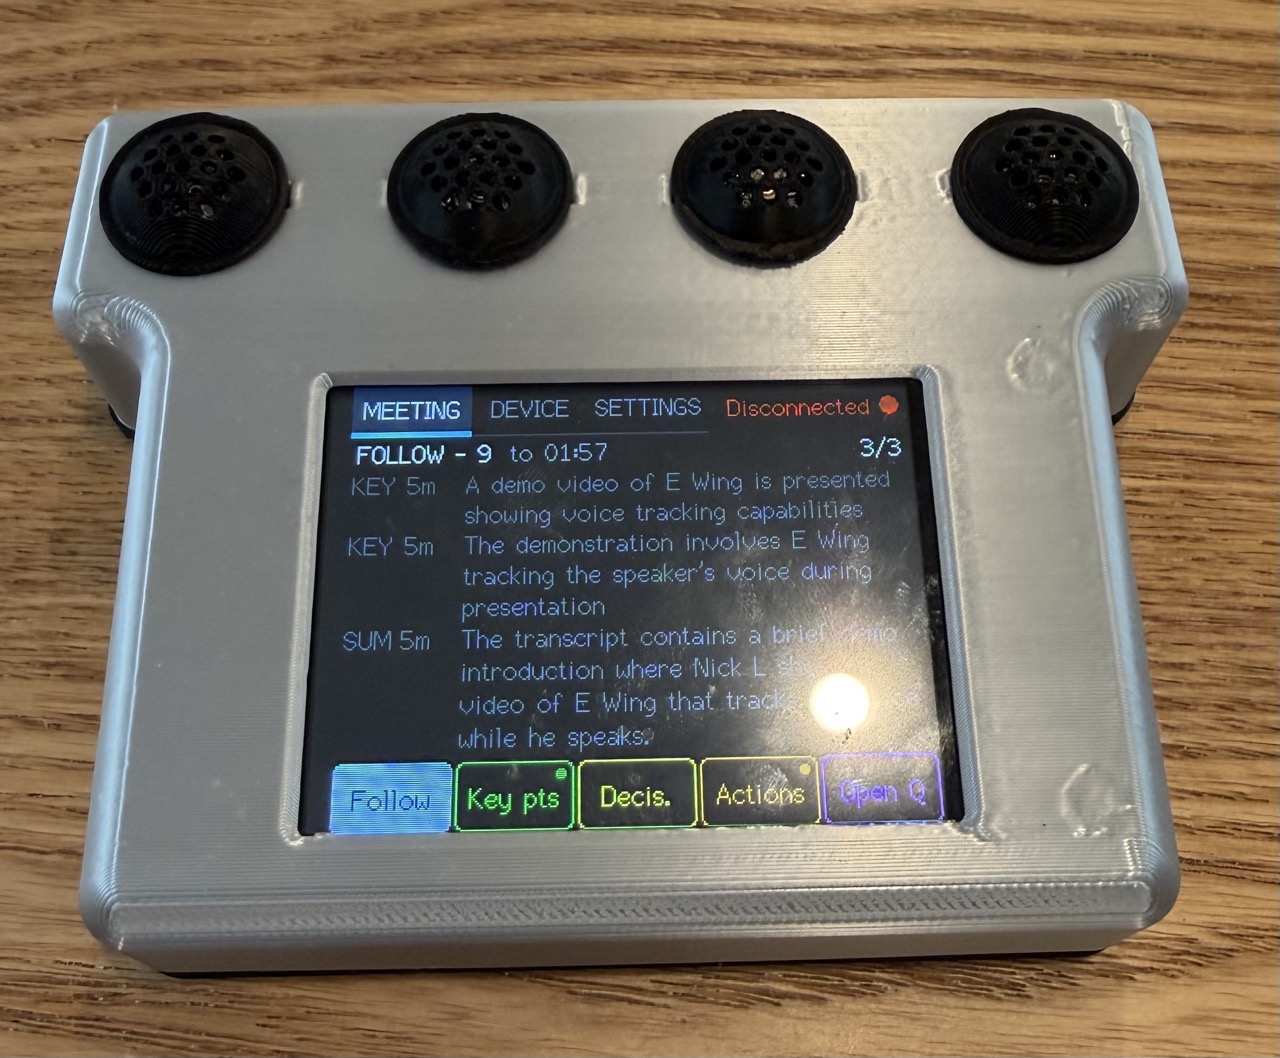
Earwing is a 3D printable beam-forming microphone array and transcription tool. It offloads transcription and meeting note generation to browser-hosted, private models and uses a ESP32 dev board to display meeting notes on the device.
This keeps it entirely cloud-free and self-hosted.
Hardware
- Freenove FNK0104 Devboard.
- 4x INMP441 microphones
Installation
Build the hardware
- Print the 3d Print from ./3dprint
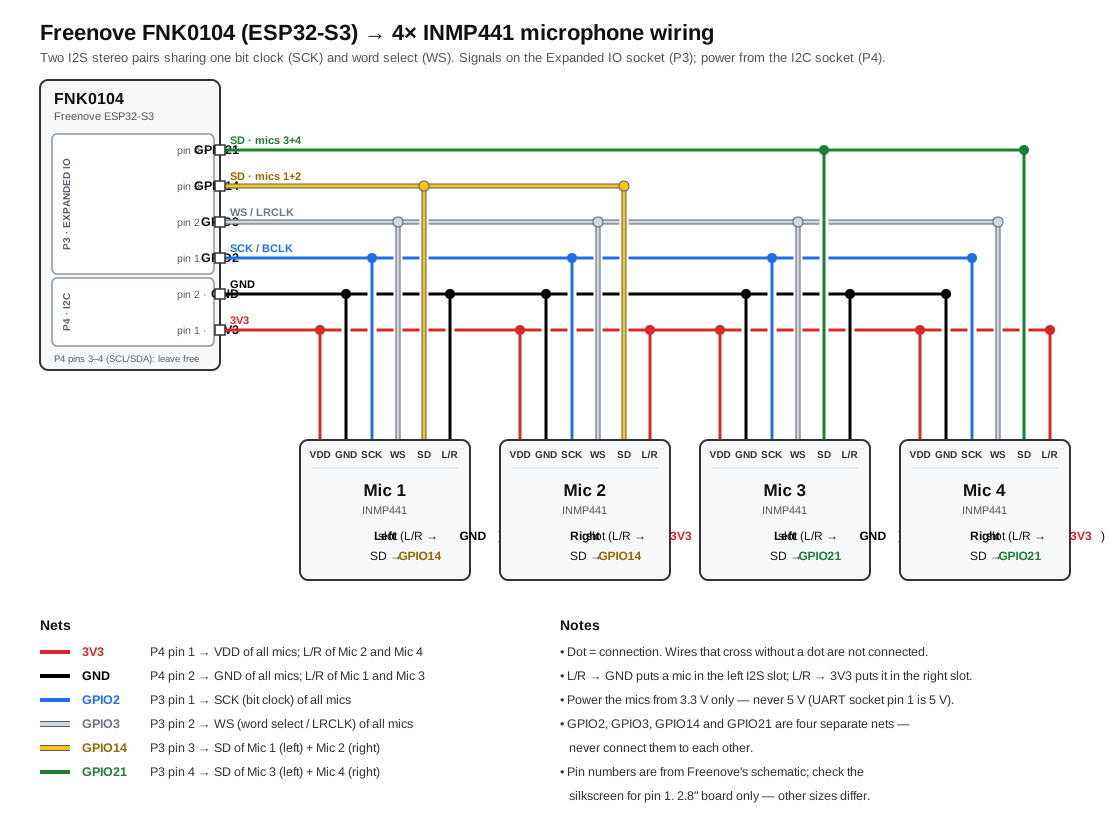
- Wire the four INMP441 microphones to the ESP32:
Flash the firmware onto the ESP32
The firmware and the web UI served by the ESP32 are flashed separately. You need to upload both for the first installation.
-
Install PlatformIO Core and Node.js 22 with npm. Make sure
pio,nodeandnpmare available in your terminal. Ifpiois missing after installation, follow PlatformIO's shell setup instructions. -
Connect the Freenove FNK0104 to your computer through its native USB port using a USB data cable.
-
From the repository root, build and upload the firmware:
pio run -d code -e fnk0104 -t uploadPlatformIO downloads the toolchain and libraries on the first build. The board, flash and PSRAM settings are already configured in
code/platformio.ini. -
Build and upload the web UI:
cd site npm ci npm run build:device pio run -d ../code -e fnk0104 -t uploadfs cd ..build:devicebuilds the site and packs it intocode/data/.uploadfsuploads that directory as a LittleFS image. For later web UI updates,npm run deployfromsite/combines the build and filesystem upload; firmware changes still need the command in step 3. -
Press RESET if the board does not restart after uploading. On a fresh installation, connect your computer or phone to the open earwing Wi-Fi network and visit
http://192.168.4.1/if the setup page does not open automatically. Select your Wi-Fi network and enter its password. -
Reconnect your computer to the same Wi-Fi network as the device, then open
https://earwing.local/. The device uses a self-signed certificate; the status page at/statuslinks to the certificate and trust instructions. The device's screen also shows its address. See the web app README for browser requirements and model setup.
If uploading fails: close any serial monitor and run pio device list to find
the board's port. PlatformIO normally detects it automatically, but you can specify
it with --upload-port on either upload command, for example from the repository
root:
pio run -d code -e fnk0104 -t upload --upload-port /dev/cu.usbmodemXXXX
pio run -d code -e fnk0104 -t uploadfs --upload-port /dev/cu.usbmodemXXXX
Replace the example port with your device's port (such as /dev/ttyACM0 on Linux
or COM3 on Windows). If the board does not enter download mode, hold BOOT,
press and release RESET, then release BOOT and retry the upload. Check the
port again after entering download mode, and press RESET after flashing to start
the firmware. This follows Espressif's USB flashing procedure.
For diagnostic output, run this from the repository root:
pio device monitor -d code -e fnk0104
The monitor uses the configured 115200 baud rate. Exit it with Ctrl+C before uploading again. To reopen Wi-Fi setup later, hold BOOT for two seconds while the firmware is running, or use Settings → WiFi settings on the touchscreen.
Similar repos


See what people are saying
README
EarWing - Cloud free private transcription
Earwing is a 3D printable beam-forming microphone array and transcription tool. It offloads transcription and meeting note generation to browser-hosted, private models and uses a ESP32 dev board to display meeting notes on the device.
This keeps it entirely cloud-free and self-hosted.
Hardware
- Freenove FNK0104 Devboard.
- 4x INMP441 microphones
Installation
Build the hardware
- Print the 3d Print from ./3dprint
- Wire the four INMP441 microphones to the ESP32:
Flash the firmware onto the ESP32
The firmware and the web UI served by the ESP32 are flashed separately. You need to upload both for the first installation.
-
Install PlatformIO Core and Node.js 22 with npm. Make sure
pio,nodeandnpmare available in your terminal. Ifpiois missing after installation, follow PlatformIO's shell setup instructions. -
Connect the Freenove FNK0104 to your computer through its native USB port using a USB data cable.
-
From the repository root, build and upload the firmware:
pio run -d code -e fnk0104 -t uploadPlatformIO downloads the toolchain and libraries on the first build. The board, flash and PSRAM settings are already configured in
code/platformio.ini. -
Build and upload the web UI:
cd site npm ci npm run build:device pio run -d ../code -e fnk0104 -t uploadfs cd ..build:devicebuilds the site and packs it intocode/data/.uploadfsuploads that directory as a LittleFS image. For later web UI updates,npm run deployfromsite/combines the build and filesystem upload; firmware changes still need the command in step 3. -
Press RESET if the board does not restart after uploading. On a fresh installation, connect your computer or phone to the open earwing Wi-Fi network and visit
http://192.168.4.1/if the setup page does not open automatically. Select your Wi-Fi network and enter its password. -
Reconnect your computer to the same Wi-Fi network as the device, then open
https://earwing.local/. The device uses a self-signed certificate; the status page at/statuslinks to the certificate and trust instructions. The device's screen also shows its address. See the web app README for browser requirements and model setup.
If uploading fails: close any serial monitor and run pio device list to find
the board's port. PlatformIO normally detects it automatically, but you can specify
it with --upload-port on either upload command, for example from the repository
root:
pio run -d code -e fnk0104 -t upload --upload-port /dev/cu.usbmodemXXXX
pio run -d code -e fnk0104 -t uploadfs --upload-port /dev/cu.usbmodemXXXX
Replace the example port with your device's port (such as /dev/ttyACM0 on Linux
or COM3 on Windows). If the board does not enter download mode, hold BOOT,
press and release RESET, then release BOOT and retry the upload. Check the
port again after entering download mode, and press RESET after flashing to start
the firmware. This follows Espressif's USB flashing procedure.
For diagnostic output, run this from the repository root:
pio device monitor -d code -e fnk0104
The monitor uses the configured 115200 baud rate. Exit it with Ctrl+C before uploading again. To reopen Wi-Fi setup later, hold BOOT for two seconds while the firmware is running, or use Settings → WiFi settings on the touchscreen.