
A multitasking IDE based terminal.
20
stars
1,863
commits
TypeScript
primary language
Sep 14, 2026
updated
README
Terminay
Terminay is a desktop terminal workspace built with Electron, React, and Vite. It pairs native shell sessions with dockable project tabs, file tools, macros, settings, and browser-based remote access so project work can stay in one focused desktop app.
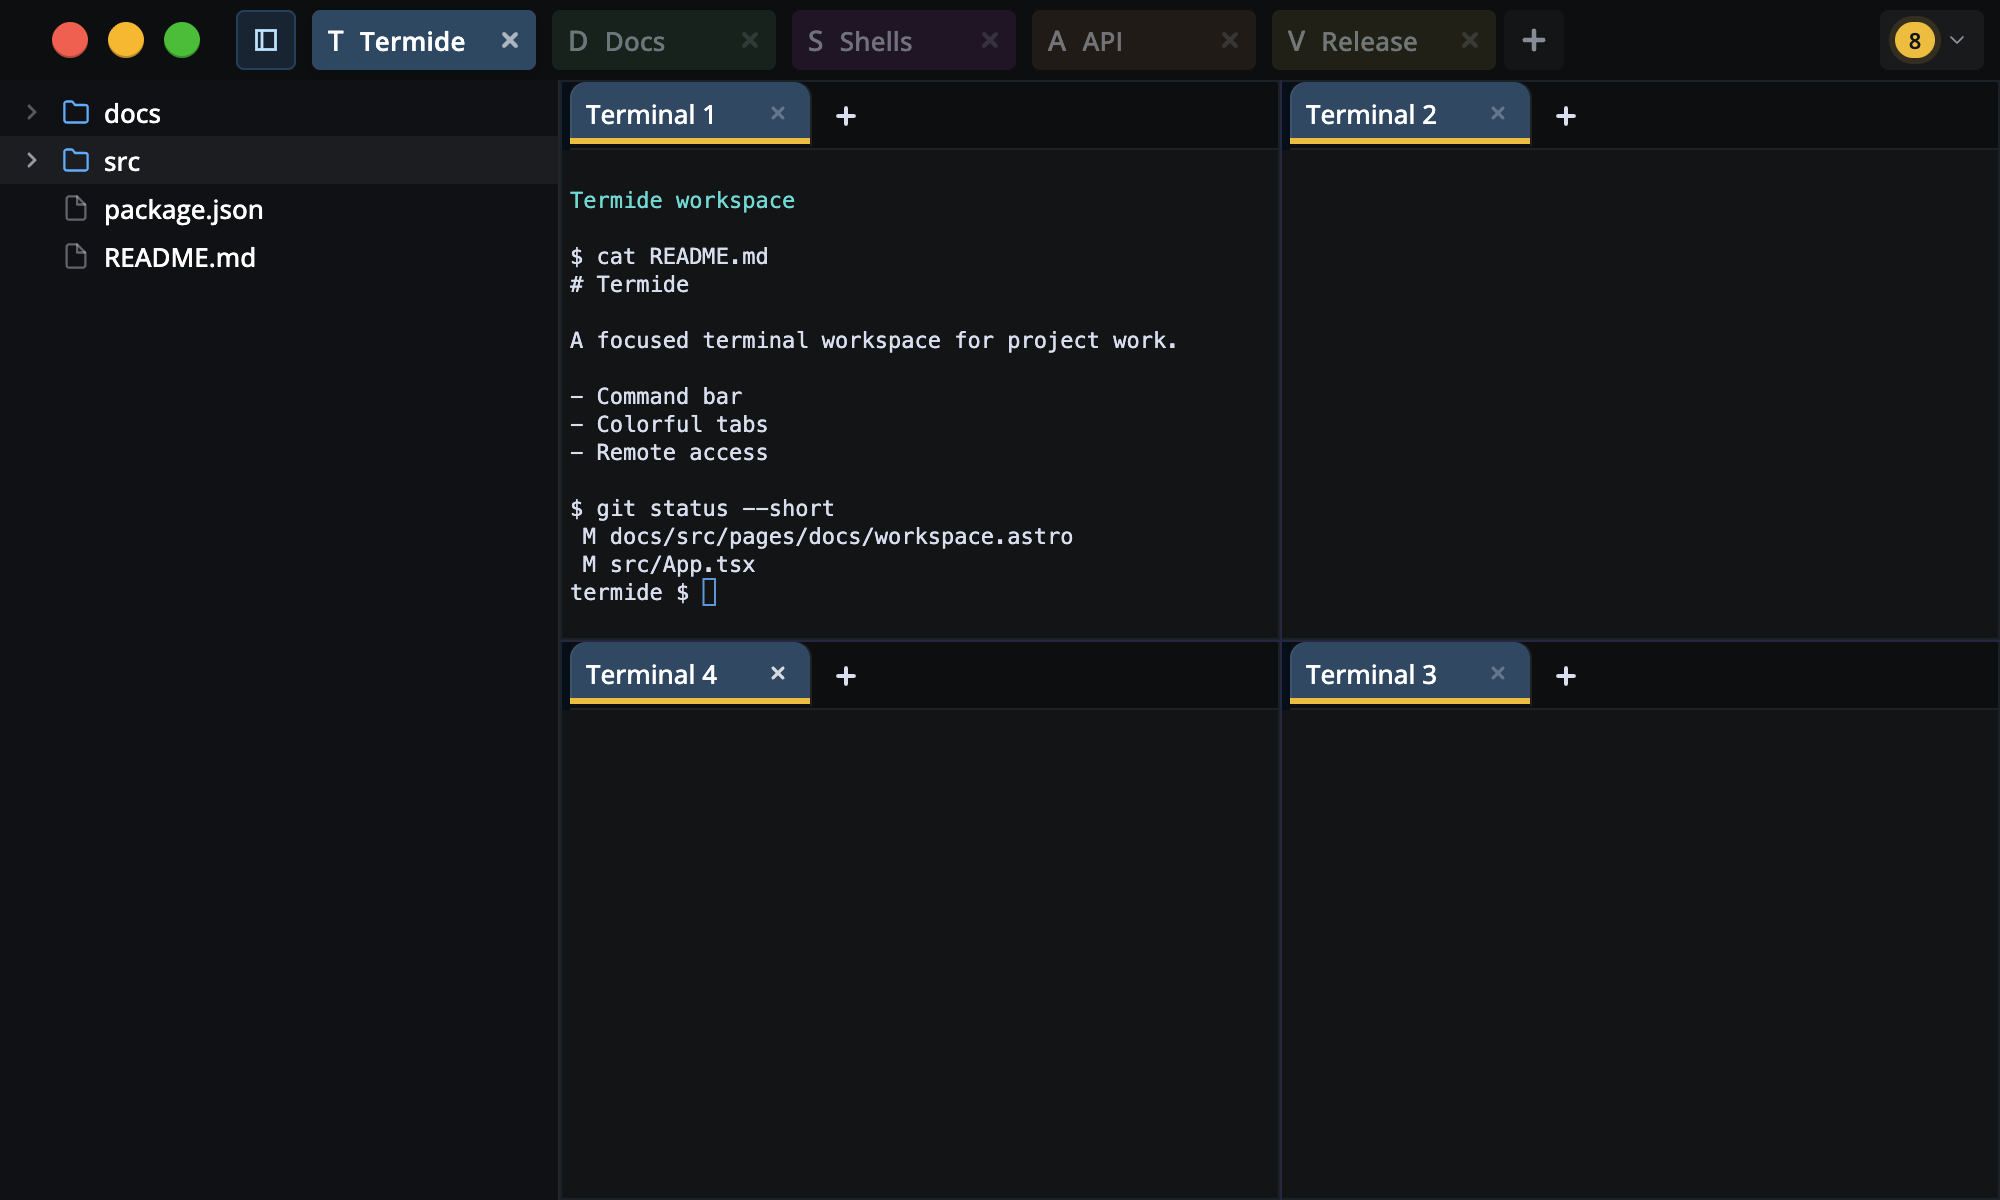

Generated automatically from the OpenSpec task checklists in
openspec/changes/*/tasks.md and openspec/changes/archive/*/tasks.md.
What it does
- Open multiple native shell sessions in project workspaces
- Split terminal, file, and folder tabs horizontally or vertically with Dockview
- Reorder tabs, pop active panels into separate windows, and close the active tab from shortcuts or menus
- See recognized Codex status at a glance with journal-driven RAG indicators, a project-scoped Agents pane, and exact click-to-focus navigation
- Keep activity indicators for ordinary terminals through structured terminal signals and raw-output fallback
- Create project tabs with root folders, per-project file explorer state, colors, and short icons
- Rename project and terminal tabs, set tab colors, and inherit project styling
- Use the Command bar to search app commands and run saved macros
- Build reusable macros with typed steps, placeholder fields, waits, clipboard paste, and stored secrets
- Browse project folders from a resizable sidebar with Git new/modified coloring
- Open folders as dockable folder tabs with tree, list, thumbnail, and gallery views
- Open files beside terminals with preview, text, hex, and Git diff modes
- Edit and save text/hex files, detect external changes, and resolve dirty-file conflicts
- Preview Markdown, images, and PDFs, with large-file handling for heavy text buffers
- Optionally record terminal sessions to local asciicast files and replay them from a timeline
- Tune terminal appearance, shell launch behavior, shortcuts, accessibility, scrolling, themes, and remote host settings
- Pair a browser over the built-in HTTPS remote host, manage devices, inspect live connections, and review audit events
- Check for GitHub release updates from the app chrome
Install
Packaged builds are published on GitHub Releases.
Desktop app
| Platform | Asset |
|---|---|
| macOS 12+ (arm64) | Terminay-Mac-<version>-Installer.dmg |
| GNU/Linux x64 | Terminay-Linux-<version>.AppImage |
Each carries a .sha256 sidecar. Verify it from the directory you downloaded
into, then install:
shasum -a 256 -c Terminay-Mac-<version>-Installer.dmg.sha256
On macOS, open the DMG and drag Terminay to Applications; the build is signed and notarized. On Linux, make the AppImage executable and run it:
chmod +x Terminay-Linux-<version>.AppImage
./Terminay-Linux-<version>.AppImage
There is no published Windows build.
Server on Linux
One command, on the machine you want to reach:
sudo npx terminay daemon install
It resolves the newest release, verifies its checksum and Ed25519 signature against a key built into the CLI, unpacks it, writes a systemd unit, and starts the service. The archive bundles its own pinned Node runtime, the native PTY addon, and the UI it serves, so the target needs neither Node nor a compiler for the server itself.
Supported hosts are GNU/Linux x64 and arm64 with systemd and a Debian 12-compatible userspace (glibc 2.36+).
The installer asks two questions when it has a terminal: whether to install a
system-wide service or one owned by your login, and which account the server
and its terminals should run as. That second choice decides whose files, keys,
and agents a paired device can reach; a dedicated terminay account is the
default. Pass --system/--user and --run-as <user> to answer them up
front, which is also required when there is no terminal.
Then pair a device:
sudo npx terminay daemon qr-code
That prints a scannable code and the pairing URLs, waits for the device that scans it, and asks you to approve it after comparing the match code shown on both sides. Open the URL in Terminay Desktop's Add connection if you would rather not scan.
Everyday commands
npx terminay daemon status        # unit state, version, channel, exposure
npx terminay daemon upgrade       # follow the installed channel
npx terminay daemon start|stop
npx terminay daemon approvals     # non-interactive pairing
npx terminay daemon uninstall     # keeps the data root unless --purge
upgrade stages the new version beside the running one, switches an atomic
current symlink, and rolls back to the version that was working if the new
one does not report ready. It refuses to move to an older version unless you
pass --allow-downgrade.
Choosing what to install
sudo npx terminay daemon install v4.1.1        # a specific release
sudo npx terminay daemon install main          # the rolling main channel
sudo npx terminay daemon install my-branch     # built from source on the target
A branch or commit has no published archive, so the CLI builds one on the
machine. It checks for git, python3, make, and a C++ compiler before
downloading anything.
Reaching it
By default the server exposes itself both through the hosted relay and directly, and derives its direct origin from the machine's primary address. If devices cannot reach that address — the box is behind NAT, or has a DNS name — say so:
sudo npx terminay daemon install --direct-origin https://box.example.com:8443
--expose off|hosted|direct|hosted,direct and --port control the rest.
Installing by hand
The CLI is the supported path. The archives are published on
GitHub Releases with a
.sha256 sidecar and a detached Ed25519 .sig, and the
standalone server runbook documents the
manual procedure for hosts where the CLI cannot run, along with hosted
exposure, backup, and restore. The
release install and update policy
covers channels, verification, and rollback.
Getting started
Prerequisites
- Node.js 22+
- npm 10+
- macOS or Linux for the packaged binaries in CI
Install dependencies
npm ci
Start local development
npm run dev
Run the smoke checks
npm run smoke
smoke runs Biome linting and the renderer/main TypeScript plus Vite build.
Shell profiles
New terminals use server-owned shell profiles. System default follows the connected server account shell, while custom profiles can select an executable or WSL distribution, preserve argument boundaries, apply an environment overlay, and carry optional presentation metadata. Server, project, and one-terminal choices are separate; changing a profile affects only terminals created afterward.
Configure profiles and the default working-directory policy under Settings → Terminal → Shell Profiles. Discovered shells can be used once or copied into a durable custom profile. Environment values are available only in the write-authorized editor and are omitted from catalogue, workspace, session, recording, diagnostic, and remote-summary data.
Version-1 shell.program, shell.startupMode, and shell.extraArgs settings
are imported once through a recoverable migration. They are no longer exposed
as production settings; the migration reader remains temporarily for existing
installations.
Terminal recordings
Terminal recording is off by default. Enable Record new terminals in Settings, or right-click a terminal tab and choose Start Recording for one session. Recordings are local asciicast v3 .cast files saved under ~/Documents/TerminaySessions/YYYY-MM-DD/ by default, with Terminay metadata stored beside each cast file.
Recording can capture terminal output, typed input, commands, file paths, tokens, and other sensitive text. Terminay uses a conservative best-effort filter for likely password or secret prompts, but terminal apps do not expose a perfect universal secure-input signal. Keep recordings local unless you deliberately share them.
Agent status and terminal activity
Terminay observes process-bound Claude Code, Codex, Grok, OpenCode, and omp session journals owned by the exact terminal process tree. Terminal tabs use compact RAG indicators: yellow while working, red when waiting for input or blocked, green when done, and neutral when idle. Unread acknowledgement is tracked separately, so viewing an agent never changes the state reported by the provider.
What each agent CLI can report
What Terminay can show differs by provider, because every fact comes from artifacts the CLI already writes for its own purposes — Terminay never modifies, configures, hooks or wraps a provider. Every cell below is verified against that provider's real CLI, on its latest release, running in that extension's own container.
| Capability | Claude Code | Codex | Grok | OpenCode |
|---|---|---|---|---|
| Appears when launched | ✅ | ✅ | ✅ | ✅ |
| Shows the session title | ✅ | ✅ | ✅ | ✅ |
| Idle before any work | ✅ | ✅ | ✅ | ✅ |
| Working through a turn | ✅ | ✅ | ✅ | ✅ |
| Waiting for your input | ✳️ | ❌ 1 | ✅ | ❌ 4 |
| Blocked needing intervention | ✅ | ❌ 2 | ❌ 3 | ✳️ |
| Done, with its outcome | ✅ | ✅ | ✅ | ✅ |
| Names each subagent | ✅ | ✅ | ✅ | ✅ |
| Each subagent's own state | ✅ | ✅ | ✅ | ✅ |
| Returns after a resume | ✅ | ✅ | ✅ | ✅ |
| Several sessions at once | ✅ | ✅ | ✅ | ✅ |
✅ the provider records it explicitly and Terminay reads it · ✳️ the provider records nothing, so Terminay derives it from that provider's own session journal by a named rule, and marks the entry as inferred · ❌ neither is possible from the provider's own artifacts
❌ is a tested result, not an untested one. The conformance run still raises a real permission prompt or provokes a real fault, then asserts the state was never reported. A provider that starts recording a capability marked ❌ fails its own test until this table is corrected.
1 Codex shows an approval prompt on screen but persists nothing that distinguishes it from ordinary work, so a Codex session awaiting approval reads as working. 2 Codex records a halting fault as the completion of the turn it halted, so it reads as done with an error outcome. 3 Grok records no fault distinct from a turn outcome — a failed turn is a completion carrying an error. 4 OpenCode persists no record of a permission request; every tool part is written pending whether or not a prompt is shown.
omp is a shipped provider whose conformance run is not yet complete, so it makes no claim here. Full detail, including the columns and how the tests run, is in docs/agent-provider-capabilities.md.
The project sidebar includes an Agents pane with root agents and their in-process subagents. It shows only agents belonging to that project. Root rows use a descriptive session title when available and retain their terminal title as context without repeating inherited child metadata. Codex subagents use their structured task name (for example, math_question_one) when available, with numbered labels only as a fallback. Prompts stay on one compact line. Subagents are collapsed by default, never auto-expand, and each root remembers its manual expansion state while switching projects. Selecting an agent switches to its exact terminal; selecting a subagent without its own PTY focuses the parent agent's terminal.
Explorer, Agents, and Git can be reordered vertically using the drag handle on each panel header (or the Up/Down arrow keys while that handle is focused). The chosen order is saved for future project tabs.
Agent status and sidebar under Settings → AI → Agents is enabled by default. It observes process-bound provider journals without modifying provider configuration. Turning it off stops observation and clears projected status.
The activity control in the app header shows current working agents plus items that need acknowledgement and provides the same click-to-focus behavior. Agent identity is tied to the exact Terminay terminal session, not a tab title or working directory.
Ordinary shells and unsupported agents continue to use terminal-activity fallback. Under Appearance → Tab Indicators, Use terminal signals for activity enables OSC 9;4 progress, OSC 133/633 command markers, OSC 9/777 notifications, and terminal BEL before falling back to recent raw output. These signals never override journal-backed agent state.
Progress signal timeout (default 15 seconds) controls how long an unrefreshed fallback progress signal can keep a tab working. Escape sequences are observed for state and still pass through to the terminal unchanged.
Run end-to-end tests
Local Electron tests run inside the pinned Linux Docker environment, so they
cannot open windows or steal focus from the host desktop. Optional Playwright
file, line, and grep arguments are forwarded into the container. Reports and
failure traces are copied to .docker-cache/e2e/<run>/.
npm run test:e2e
npm run test:e2e -- e2e/settings.spec.ts:212
Build the app locally
npm run build
Platform-specific packaging is also available:
npm run build:mac
npm run build:linux
Release packaging syncs package.json from the release tag during CI, so the source tree can use the placeholder version while published builds carry the tagged version.
Contributors

1,863 commits
Similar repos


Languages
TypeScript
58.6%
JavaScript
38.4%
CSS
2.6%
A multitasking IDE based terminal.
20
stars
1,863
commits
TypeScript
primary language
Sep 14, 2026
updated
README
Terminay
Terminay is a desktop terminal workspace built with Electron, React, and Vite. It pairs native shell sessions with dockable project tabs, file tools, macros, settings, and browser-based remote access so project work can stay in one focused desktop app.
Generated automatically from the OpenSpec task checklists in
openspec/changes/*/tasks.md and openspec/changes/archive/*/tasks.md.
What it does
- Open multiple native shell sessions in project workspaces
- Split terminal, file, and folder tabs horizontally or vertically with Dockview
- Reorder tabs, pop active panels into separate windows, and close the active tab from shortcuts or menus
- See recognized Codex status at a glance with journal-driven RAG indicators, a project-scoped Agents pane, and exact click-to-focus navigation
- Keep activity indicators for ordinary terminals through structured terminal signals and raw-output fallback
- Create project tabs with root folders, per-project file explorer state, colors, and short icons
- Rename project and terminal tabs, set tab colors, and inherit project styling
- Use the Command bar to search app commands and run saved macros
- Build reusable macros with typed steps, placeholder fields, waits, clipboard paste, and stored secrets
- Browse project folders from a resizable sidebar with Git new/modified coloring
- Open folders as dockable folder tabs with tree, list, thumbnail, and gallery views
- Open files beside terminals with preview, text, hex, and Git diff modes
- Edit and save text/hex files, detect external changes, and resolve dirty-file conflicts
- Preview Markdown, images, and PDFs, with large-file handling for heavy text buffers
- Optionally record terminal sessions to local asciicast files and replay them from a timeline
- Tune terminal appearance, shell launch behavior, shortcuts, accessibility, scrolling, themes, and remote host settings
- Pair a browser over the built-in HTTPS remote host, manage devices, inspect live connections, and review audit events
- Check for GitHub release updates from the app chrome
Install
Packaged builds are published on GitHub Releases.
Desktop app
| Platform | Asset |
|---|---|
| macOS 12+ (arm64) | Terminay-Mac-<version>-Installer.dmg |
| GNU/Linux x64 | Terminay-Linux-<version>.AppImage |
Each carries a .sha256 sidecar. Verify it from the directory you downloaded
into, then install:
shasum -a 256 -c Terminay-Mac-<version>-Installer.dmg.sha256
On macOS, open the DMG and drag Terminay to Applications; the build is signed and notarized. On Linux, make the AppImage executable and run it:
chmod +x Terminay-Linux-<version>.AppImage
./Terminay-Linux-<version>.AppImage
There is no published Windows build.
Server on Linux
One command, on the machine you want to reach:
sudo npx terminay daemon install
It resolves the newest release, verifies its checksum and Ed25519 signature against a key built into the CLI, unpacks it, writes a systemd unit, and starts the service. The archive bundles its own pinned Node runtime, the native PTY addon, and the UI it serves, so the target needs neither Node nor a compiler for the server itself.
Supported hosts are GNU/Linux x64 and arm64 with systemd and a Debian 12-compatible userspace (glibc 2.36+).
The installer asks two questions when it has a terminal: whether to install a
system-wide service or one owned by your login, and which account the server
and its terminals should run as. That second choice decides whose files, keys,
and agents a paired device can reach; a dedicated terminay account is the
default. Pass --system/--user and --run-as <user> to answer them up
front, which is also required when there is no terminal.
Then pair a device:
sudo npx terminay daemon qr-code
That prints a scannable code and the pairing URLs, waits for the device that scans it, and asks you to approve it after comparing the match code shown on both sides. Open the URL in Terminay Desktop's Add connection if you would rather not scan.
Everyday commands
npx terminay daemon status        # unit state, version, channel, exposure
npx terminay daemon upgrade       # follow the installed channel
npx terminay daemon start|stop
npx terminay daemon approvals     # non-interactive pairing
npx terminay daemon uninstall     # keeps the data root unless --purge
upgrade stages the new version beside the running one, switches an atomic
current symlink, and rolls back to the version that was working if the new
one does not report ready. It refuses to move to an older version unless you
pass --allow-downgrade.
Choosing what to install
sudo npx terminay daemon install v4.1.1        # a specific release
sudo npx terminay daemon install main          # the rolling main channel
sudo npx terminay daemon install my-branch     # built from source on the target
A branch or commit has no published archive, so the CLI builds one on the
machine. It checks for git, python3, make, and a C++ compiler before
downloading anything.
Reaching it
By default the server exposes itself both through the hosted relay and directly, and derives its direct origin from the machine's primary address. If devices cannot reach that address — the box is behind NAT, or has a DNS name — say so:
sudo npx terminay daemon install --direct-origin https://box.example.com:8443
--expose off|hosted|direct|hosted,direct and --port control the rest.
Installing by hand
The CLI is the supported path. The archives are published on
GitHub Releases with a
.sha256 sidecar and a detached Ed25519 .sig, and the
standalone server runbook documents the
manual procedure for hosts where the CLI cannot run, along with hosted
exposure, backup, and restore. The
release install and update policy
covers channels, verification, and rollback.
Getting started
Prerequisites
- Node.js 22+
- npm 10+
- macOS or Linux for the packaged binaries in CI
Install dependencies
npm ci
Start local development
npm run dev
Run the smoke checks
npm run smoke
smoke runs Biome linting and the renderer/main TypeScript plus Vite build.
Shell profiles
New terminals use server-owned shell profiles. System default follows the connected server account shell, while custom profiles can select an executable or WSL distribution, preserve argument boundaries, apply an environment overlay, and carry optional presentation metadata. Server, project, and one-terminal choices are separate; changing a profile affects only terminals created afterward.
Configure profiles and the default working-directory policy under Settings → Terminal → Shell Profiles. Discovered shells can be used once or copied into a durable custom profile. Environment values are available only in the write-authorized editor and are omitted from catalogue, workspace, session, recording, diagnostic, and remote-summary data.
Version-1 shell.program, shell.startupMode, and shell.extraArgs settings
are imported once through a recoverable migration. They are no longer exposed
as production settings; the migration reader remains temporarily for existing
installations.
Terminal recordings
Terminal recording is off by default. Enable Record new terminals in Settings, or right-click a terminal tab and choose Start Recording for one session. Recordings are local asciicast v3 .cast files saved under ~/Documents/TerminaySessions/YYYY-MM-DD/ by default, with Terminay metadata stored beside each cast file.
Recording can capture terminal output, typed input, commands, file paths, tokens, and other sensitive text. Terminay uses a conservative best-effort filter for likely password or secret prompts, but terminal apps do not expose a perfect universal secure-input signal. Keep recordings local unless you deliberately share them.
Agent status and terminal activity
Terminay observes process-bound Claude Code, Codex, Grok, OpenCode, and omp session journals owned by the exact terminal process tree. Terminal tabs use compact RAG indicators: yellow while working, red when waiting for input or blocked, green when done, and neutral when idle. Unread acknowledgement is tracked separately, so viewing an agent never changes the state reported by the provider.
What each agent CLI can report
What Terminay can show differs by provider, because every fact comes from artifacts the CLI already writes for its own purposes — Terminay never modifies, configures, hooks or wraps a provider. Every cell below is verified against that provider's real CLI, on its latest release, running in that extension's own container.
| Capability | Claude Code | Codex | Grok | OpenCode |
|---|---|---|---|---|
| Appears when launched | ✅ | ✅ | ✅ | ✅ |
| Shows the session title | ✅ | ✅ | ✅ | ✅ |
| Idle before any work | ✅ | ✅ | ✅ | ✅ |
| Working through a turn | ✅ | ✅ | ✅ | ✅ |
| Waiting for your input | ✳️ | ❌ 1 | ✅ | ❌ 4 |
| Blocked needing intervention | ✅ | ❌ 2 | ❌ 3 | ✳️ |
| Done, with its outcome | ✅ | ✅ | ✅ | ✅ |
| Names each subagent | ✅ | ✅ | ✅ | ✅ |
| Each subagent's own state | ✅ | ✅ | ✅ | ✅ |
| Returns after a resume | ✅ | ✅ | ✅ | ✅ |
| Several sessions at once | ✅ | ✅ | ✅ | ✅ |
✅ the provider records it explicitly and Terminay reads it · ✳️ the provider records nothing, so Terminay derives it from that provider's own session journal by a named rule, and marks the entry as inferred · ❌ neither is possible from the provider's own artifacts
❌ is a tested result, not an untested one. The conformance run still raises a real permission prompt or provokes a real fault, then asserts the state was never reported. A provider that starts recording a capability marked ❌ fails its own test until this table is corrected.
1 Codex shows an approval prompt on screen but persists nothing that distinguishes it from ordinary work, so a Codex session awaiting approval reads as working. 2 Codex records a halting fault as the completion of the turn it halted, so it reads as done with an error outcome. 3 Grok records no fault distinct from a turn outcome — a failed turn is a completion carrying an error. 4 OpenCode persists no record of a permission request; every tool part is written pending whether or not a prompt is shown.
omp is a shipped provider whose conformance run is not yet complete, so it makes no claim here. Full detail, including the columns and how the tests run, is in docs/agent-provider-capabilities.md.
The project sidebar includes an Agents pane with root agents and their in-process subagents. It shows only agents belonging to that project. Root rows use a descriptive session title when available and retain their terminal title as context without repeating inherited child metadata. Codex subagents use their structured task name (for example, math_question_one) when available, with numbered labels only as a fallback. Prompts stay on one compact line. Subagents are collapsed by default, never auto-expand, and each root remembers its manual expansion state while switching projects. Selecting an agent switches to its exact terminal; selecting a subagent without its own PTY focuses the parent agent's terminal.
Explorer, Agents, and Git can be reordered vertically using the drag handle on each panel header (or the Up/Down arrow keys while that handle is focused). The chosen order is saved for future project tabs.
Agent status and sidebar under Settings → AI → Agents is enabled by default. It observes process-bound provider journals without modifying provider configuration. Turning it off stops observation and clears projected status.
The activity control in the app header shows current working agents plus items that need acknowledgement and provides the same click-to-focus behavior. Agent identity is tied to the exact Terminay terminal session, not a tab title or working directory.
Ordinary shells and unsupported agents continue to use terminal-activity fallback. Under Appearance → Tab Indicators, Use terminal signals for activity enables OSC 9;4 progress, OSC 133/633 command markers, OSC 9/777 notifications, and terminal BEL before falling back to recent raw output. These signals never override journal-backed agent state.
Progress signal timeout (default 15 seconds) controls how long an unrefreshed fallback progress signal can keep a tab working. Escape sequences are observed for state and still pass through to the terminal unchanged.
Run end-to-end tests
Local Electron tests run inside the pinned Linux Docker environment, so they
cannot open windows or steal focus from the host desktop. Optional Playwright
file, line, and grep arguments are forwarded into the container. Reports and
failure traces are copied to .docker-cache/e2e/<run>/.
npm run test:e2e
npm run test:e2e -- e2e/settings.spec.ts:212
Build the app locally
npm run build
Platform-specific packaging is also available:
npm run build:mac
npm run build:linux
Release packaging syncs package.json from the release tag during CI, so the source tree can use the placeholder version while published builds carry the tagged version.
Similar repos
Contributors
1,863 commits
Languages
TypeScript
58.6%
JavaScript
38.4%
CSS
2.6%