🚀 Full-stack Next.js 15 + Cloudflare Workers template with D1 database, R2 storage, Better Auth, and Server Actions. Production-ready with automated CI/CD and generous free tiers.
See the code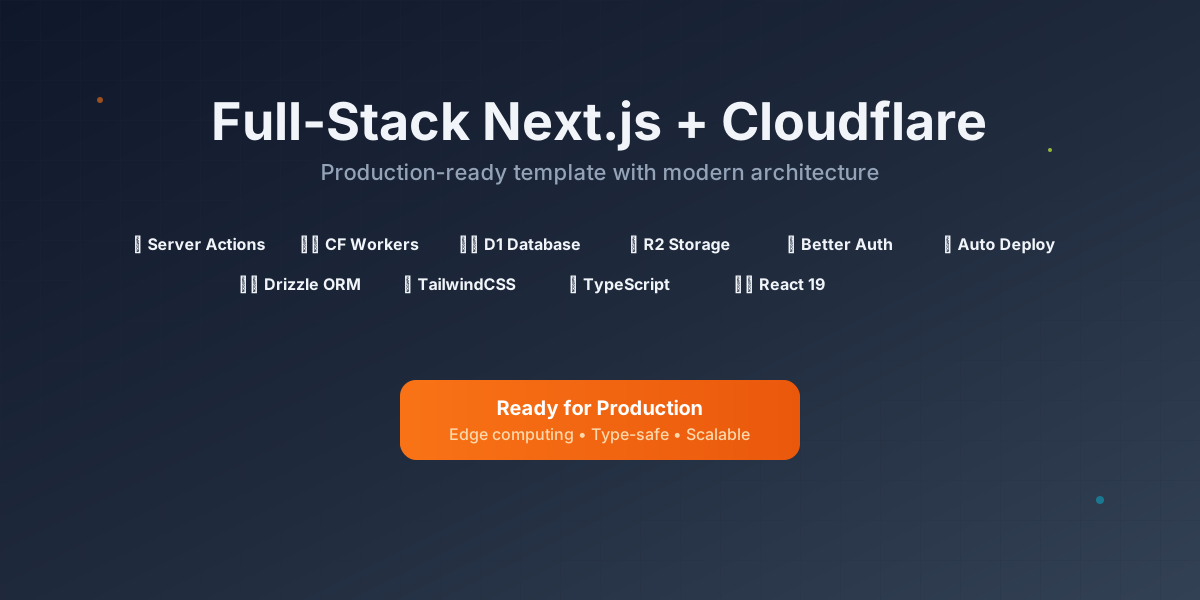
A production-ready template for building full-stack applications with Next.js 15 and Cloudflare's powerful edge infrastructure. Perfect for MVPs with generous free tiers and seamless scaling to enterprise-level applications.
Inspired by the Cloudflare SaaS Stack - the same stack powering Supermemory.ai, which serves 20k+ users on just $5/month. This template modernizes that approach with Cloudflare Workers (vs Pages), includes comprehensive D1 and R2 examples, and provides a complete development workflow.
You can read detail explanations and code architecture of this template from Devin AI on Deepwiki.
Don't forget to leave a star if you find this helpful ⭐️
Cloudflare's Edge Network provides unparalleled performance and reliability:
Combined with Next.js 15, you get modern React features, Server Components, and Server Actions for optimal performance and developer experience.
This template uses a feature-based/module-sliced architecture for better maintainability and scalability:
src/
├── app/                    # Next.js App Router
│   ├── (auth)/            # Auth-related pages
│   ├── api/               # API routes (for external access)
│   │   └── summarize/     # AI summarization endpoint
│   ├── dashboard/         # Dashboard pages
│   └── globals.css        # Global styles
├── components/            # Shared UI components
├── constants/             # App constants
├── db/                    # Database configuration
│   ├── index.ts          # DB connection
│   └── schema.ts         # Database schemas
├── lib/                   # Shared utilities
├── modules/               # Feature modules
│   ├── auth/             # Authentication module
│   │   ├── actions/      # Auth server actions
│   │   ├── components/   # Auth components
│   │   ├── hooks/        # Auth hooks
│   │   ├── models/       # Auth models
│   │   ├── schemas/      # Auth schemas
│   │   └── utils/        # Auth utilities
│   ├── dashboard/        # Dashboard module
│   └── todos/            # Todo module
│       ├── actions/      # Todo server actions
│       ├── components/   # Todo components
│       ├── models/       # Todo models
│       └── schemas/      # Todo schemas
├── services/              # Business logic services
│   └── summarizer.service.ts  # AI summarization service
└── drizzle/              # Database migrations
Key Architecture Benefits:
Create an API token for Wrangler authentication:
Final Token Permissions:
# Clone the repository
git clone https://github.com/ifindev/fullstack-next-cloudflare.git
cd fullstack-next-cloudflare

# Install dependencies
pnpm install
Create your environment file:
# Copy example environment file
cp .dev.vars.example .dev.vars
Edit .dev.vars with your credentials:
# Cloudflare Configuration
CLOUDFLARE_ACCOUNT_ID=your-account-id
CLOUDFLARE_D1_TOKEN=your-api-token

# Authentication Secrets
BETTER_AUTH_SECRET=your-random-secret-here
GOOGLE_CLIENT_ID=your-google-client-id
GOOGLE_CLIENT_SECRET=your-google-client-secret

# Storage
CLOUDFLARE_R2_URL=your-r2-bucket-url
Better Auth Secret:
# Generate a random secret
openssl rand -base64 32
# Add to BETTER_AUTH_SECRET in .dev.vars
Google OAuth Setup: Follow the Better Auth Google documentation to:
Understanding R2 URLs: Cloudflare R2 has different URL behaviors for development vs production:
Step 1: Create R2 Bucket
# Create R2 bucket for development
wrangler r2 bucket create your-app-bucket-dev

# For production, create a separate bucket
wrangler r2 bucket create your-app-bucket-prod
Step 2: Get R2 URL for Development
Enable Public Development URL:
https://pub-xxxxx.r2.dev)Example URL Format:
https://pub-a1b2c3d4e5f6g7h8i9j0.r2.dev
Important Notes:
Step 3: Add R2 URL to Environment Variables
# Add to your .dev.vars file (use the URL you copied from dashboard)
CLOUDFLARE_R2_URL=https://pub-a1b2c3d4e5f6g7h8i9j0.r2.dev
Note: Replace the example URL with the actual URL you copied from your R2 bucket settings.
For Production - Custom Domain Setup (Required):
⚠️ Important: The default R2 public URL should NOT be used in production as it's not optimized for performance and may have limitations.
Setup Custom Domain for R2:
# 1. Go to Cloudflare Dashboard → R2 Storage → Your Bucket → Custom Domains
# 2. Click "Connect Domain" and enter your desired domain (e.g., files.yourdomain.com)
# 3. Update your DNS records as instructed by Cloudflare
# 4. Wait for SSL certificate to be issued (usually a few minutes)

# Your production R2 URL will be:
# https://files.yourdomain.com

# Add this to your production secrets:
echo "https://files.yourdomain.com" | wrangler secret put CLOUDFLARE_R2_URL
R2 URL Summary:
How R2 URLs Work:
https://pub-xxxxx.r2.dev)https://pub-xxxxx.r2.dev/{folder}/{file-name}.{extension}CLOUDFLARE_R2_URLIf you prefer to set everything up manually or want to understand each step in detail, follow this comprehensive guide.
Create D1 Database:
# Create a new SQLite database at the edge
wrangler d1 create your-app-name

# Output will show:
# database_name = "your-app-name"
# database_id = "xxxxxxxx-xxxx-xxxx-xxxx-xxxxxxxxxxxx"
Create R2 Bucket:
# Create object storage bucket
wrangler r2 bucket create your-app-bucket

# List buckets to confirm
wrangler r2 bucket list
Update wrangler.jsonc with your resource IDs:
{
    "name": "your-app-name",
    "d1_databases": [
        {
            "binding": "DB",
            "database_name": "your-app-name",
            "database_id": "your-database-id-from-step-1",
            "migrations_dir": "./src/drizzle"
        }
    ],
    "r2_buckets": [
        {
            "bucket_name": "your-app-bucket",
            "binding": "FILES"
        }
    ],
    "ai": {
        "binding": "AI"
    }
}
Generate Better Auth Secret:
# On macOS/Linux
openssl rand -base64 32

# On Windows (PowerShell)
[System.Convert]::ToBase64String([System.Security.Cryptography.RandomNumberGenerator]::GetBytes(32))

# Or use online generator: https://generate-secret.vercel.app/32
Configure Google OAuth:
http://localhost:3000/api/auth/callback/google (development)https://your-app.your-subdomain.workers.dev/api/auth/callback/google (production)Create Local Environment File:
# .dev.vars for local development
CLOUDFLARE_ACCOUNT_ID=your-account-id
CLOUDFLARE_D1_TOKEN=your-api-token
BETTER_AUTH_SECRET=your-generated-secret
GOOGLE_CLIENT_ID=your-google-client-id.apps.googleusercontent.com
GOOGLE_CLIENT_SECRET=your-google-client-secret
# Get this from R2 bucket settings: R2 Object Storage → Your Bucket → Settings → Public Development URL
CLOUDFLARE_R2_URL=https://pub-a1b2c3d4e5f6g7h8i9j0.r2.dev
Set Production Secrets:
# Add each secret to Cloudflare Workers
echo "your-secret-here" | wrangler secret put BETTER_AUTH_SECRET
echo "your-client-id" | wrangler secret put GOOGLE_CLIENT_ID
echo "your-client-secret" | wrangler secret put GOOGLE_CLIENT_SECRET
echo "your-r2-url" | wrangler secret put CLOUDFLARE_R2_URL
Generate TypeScript Types:
# Generate Cloudflare bindings for TypeScript
pnpm run cf-typegen
Initialize Database:
# Generate initial migration from schema
pnpm run db:generate

# Apply migrations to local database
pnpm run db:migrate:local

# Verify database structure
pnpm run db:inspect:local
Optional: Seed Sample Data
# Create and run a seed script
wrangler d1 execute your-app-name --local --command="
INSERT INTO todos (id, title, description, completed, created_at, updated_at) VALUES
('1', 'Welcome to your app', 'This is a sample todo item', false, datetime('now'), datetime('now')),
('2', 'Set up authentication', 'Configure Google OAuth', true, datetime('now'), datetime('now'));
"
Start Development Servers:
# Terminal 1: Start Wrangler (provides D1 access)
pnpm run wrangler:dev

# Terminal 2: Start Next.js (provides HMR)
pnpm run dev

# Alternative: Single command (no HMR)
pnpm run dev:cf
Verify Everything Works:
http://localhost:3000pnpm run db:studio:localAdd Repository Secrets: Go to your GitHub repository → Settings → Secrets and add:
CLOUDFLARE_API_TOKEN - Your API token from Step 2CLOUDFLARE_ACCOUNT_ID - Your account IDBETTER_AUTH_SECRET - Your auth secretGOOGLE_CLIENT_ID - Your Google client IDGOOGLE_CLIENT_SECRET - Your Google client secretCLOUDFLARE_R2_URL - Your R2 bucket URLDeploy Production Database:
# Apply migrations to production
pnpm run db:migrate:prod

# Verify production database
pnpm run db:inspect:prod
Add Custom Domain:
Update OAuth Redirect URLs: Add your custom domain to Google OAuth settings:
https://yourdomain.com/api/auth/callback/googleAdd Indexes for Performance:
-- Create indexes for better query performance
CREATE INDEX IF NOT EXISTS idx_todos_user_id ON todos(user_id);
CREATE INDEX IF NOT EXISTS idx_todos_created_at ON todos(created_at);
CREATE INDEX IF NOT EXISTS idx_todos_completed ON todos(completed);
Monitor Database Performance:
# View database insights
wrangler d1 insights your-app-name --since 1h

# Export data for analysis
wrangler d1 export your-app-name --output backup.sql
Configure CORS for Direct Uploads:
# Create CORS policy file
echo '[
  {
    "AllowedOrigins": ["https://yourdomain.com", "http://localhost:3000"],
    "AllowedMethods": ["GET", "PUT", "POST", "DELETE"],
    "AllowedHeaders": ["*"],
    "ExposeHeaders": [],
    "MaxAgeSeconds": 3000
  }
]' > cors.json

# Apply CORS policy
wrangler r2 bucket cors put your-app-bucket --file cors.json
# 1. Generate Cloudflare types (run after any wrangler.jsonc changes)
pnpm run cf-typegen

# 2. Apply database migrations
pnpm run db:migrate:local

# 3. Build the application for Cloudflare
pnpm run build:cf
# Terminal 1: Start Wrangler for D1 database access
pnpm run wrangler:dev

# Terminal 2: Start Next.js development server with HMR
pnpm run dev
Development URLs:
http://localhost:3000 (recommended)http://localhost:8787# Single command - Cloudflare runtime (no HMR)
pnpm run dev:cf
# Test with remote Cloudflare resources
pnpm run dev:remote
| Script | Description |
|---|---|
pnpm dev | Start Next.js with HMR |
pnpm run build:cf | Build for Cloudflare Workers |
pnpm run wrangler:dev | Start Wrangler for local D1 access |
pnpm run dev:cf | Combined build + Cloudflare dev server |
| Script | Description |
|---|---|
pnpm run db:generate | Generate new migration |
pnpm run db:generate:named "migration_name" | Generate named migration |
pnpm run db:migrate:local | Apply migrations to local D1 |
pnpm run db:migrate:preview | Apply migrations to preview |
pnpm run db:migrate:prod | Apply migrations to production |
pnpm run db:studio:local | Open Drizzle Studio for local DB |
pnpm run db:inspect:local | List local database tables |
pnpm run db:reset:local | Reset local database |
| Script | Description |
|---|---|
pnpm run deploy | Deploy to production |
pnpm run deploy:preview | Deploy to preview environment |
pnpm run cf-typegen | Generate Cloudflare TypeScript types |
pnpm run cf:secret | Add secrets to Cloudflare Workers |
First-time setup:
pnpm run cf-typegen - Generate typespnpm run db:migrate:local - Setup databasepnpm run build:cf - Build applicationDaily development:
pnpm run wrangler:dev - Start D1 access (Terminal 1)pnpm run dev - Start Next.js with HMR (Terminal 2)After schema changes:
pnpm run db:generate - Generate migrationpnpm run db:migrate:local - Apply to local DBAfter wrangler.jsonc changes:
pnpm run cf-typegen - Regenerate types⚠️ Authentication Required: Login to your app first, then test the API.
Browser Console (Easiest):
http://localhost:3000fetch('/api/summarize', {
method: 'POST',
headers: { 'Content-Type': 'application/json' },
credentials: 'include',
body: JSON.stringify({
text: "Your text to summarize here...",
config: { maxLength: 100, style: "concise" }
})
}).then(r => r.json()).then(console.log);
cURL (with session cookies):
better-auth.session_tokencurl -X POST http://localhost:3000/api/summarize \
-H "Content-Type: application/json" \
-H "Cookie: better-auth.session_token=your-token-here" \
-d '{"text": "Your text here...", "config": {"maxLength": 100}}'
Postman:
Cookie: better-auth.session_token=your-token-hereUnauthenticated Request Response:
{
  "success": false,
  "error": "Authentication required",
  "data": null
}
The AI integration follows a clean service-based architecture:
/api/summarize) - Handles HTTP requests, authentication, and validationCloudflare Workers AI supports various models:
# 1. Modify schema files in src/db/schemas/
# 2. Generate migration
pnpm run db:generate:named "add_user_table"
# 3. Apply to local database
pnpm run db:migrate:local
# 4. Test your changes
# 5. Commit and deploy (migrations run automatically)
# 1. Update wrangler.jsonc with new resources
# 2. Regenerate types
pnpm run cf-typegen
# 3. Update your code to use new bindings
# Add secrets to production environment
pnpm run cf:secret BETTER_AUTH_SECRET
pnpm run cf:secret GOOGLE_CLIENT_ID
pnpm run cf:secret GOOGLE_CLIENT_SECRET
Built-in Observability:
Database Monitoring:
# Monitor database performance
wrangler d1 insights next-cf-app

# View database metrics in Cloudflare Dashboard
# Navigate to Workers & Pages → D1 → next-cf-app → Metrics
Push to main branch triggers automatic deployment via GitHub Actions:
git add .
git commit -m "feat: add new feature"
git push origin main
Deployment Pipeline:
# Deploy to production
pnpm run deploy

# Deploy to preview environment
pnpm run deploy:preview
@cf/meta/m2m100-1.2b@cf/baai/bge-base-en-v1.5@cf/microsoft/resnet-50Contributions are welcome! Please feel free to submit issues and pull requests.
This project is licensed under the MIT License - see the LICENSE file for details.
© 2025 Muhammad Arifin. All rights reserved.
3,925 followers · starred Oct 2025
12 followers · starred Sep 2025
44 followers · starred Sep 2025
64 followers · starred Sep 2025
🚀 Full-stack Next.js 15 + Cloudflare Workers template with D1 database, R2 storage, Better Auth, and Server Actions. Production-ready with automated CI/CD and generous free tiers.
See the code
A production-ready template for building full-stack applications with Next.js 15 and Cloudflare's powerful edge infrastructure. Perfect for MVPs with generous free tiers and seamless scaling to enterprise-level applications.
Inspired by the Cloudflare SaaS Stack - the same stack powering Supermemory.ai, which serves 20k+ users on just $5/month. This template modernizes that approach with Cloudflare Workers (vs Pages), includes comprehensive D1 and R2 examples, and provides a complete development workflow.
You can read detail explanations and code architecture of this template from Devin AI on Deepwiki.
Don't forget to leave a star if you find this helpful ⭐️
Cloudflare's Edge Network provides unparalleled performance and reliability:
Combined with Next.js 15, you get modern React features, Server Components, and Server Actions for optimal performance and developer experience.
This template uses a feature-based/module-sliced architecture for better maintainability and scalability:
src/
├── app/                    # Next.js App Router
│   ├── (auth)/            # Auth-related pages
│   ├── api/               # API routes (for external access)
│   │   └── summarize/     # AI summarization endpoint
│   ├── dashboard/         # Dashboard pages
│   └── globals.css        # Global styles
├── components/            # Shared UI components
├── constants/             # App constants
├── db/                    # Database configuration
│   ├── index.ts          # DB connection
│   └── schema.ts         # Database schemas
├── lib/                   # Shared utilities
├── modules/               # Feature modules
│   ├── auth/             # Authentication module
│   │   ├── actions/      # Auth server actions
│   │   ├── components/   # Auth components
│   │   ├── hooks/        # Auth hooks
│   │   ├── models/       # Auth models
│   │   ├── schemas/      # Auth schemas
│   │   └── utils/        # Auth utilities
│   ├── dashboard/        # Dashboard module
│   └── todos/            # Todo module
│       ├── actions/      # Todo server actions
│       ├── components/   # Todo components
│       ├── models/       # Todo models
│       └── schemas/      # Todo schemas
├── services/              # Business logic services
│   └── summarizer.service.ts  # AI summarization service
└── drizzle/              # Database migrations
Key Architecture Benefits:
Create an API token for Wrangler authentication:
Final Token Permissions:
# Clone the repository
git clone https://github.com/ifindev/fullstack-next-cloudflare.git
cd fullstack-next-cloudflare

# Install dependencies
pnpm install
Create your environment file:
# Copy example environment file
cp .dev.vars.example .dev.vars
Edit .dev.vars with your credentials:
# Cloudflare Configuration
CLOUDFLARE_ACCOUNT_ID=your-account-id
CLOUDFLARE_D1_TOKEN=your-api-token

# Authentication Secrets
BETTER_AUTH_SECRET=your-random-secret-here
GOOGLE_CLIENT_ID=your-google-client-id
GOOGLE_CLIENT_SECRET=your-google-client-secret

# Storage
CLOUDFLARE_R2_URL=your-r2-bucket-url
Better Auth Secret:
# Generate a random secret
openssl rand -base64 32
# Add to BETTER_AUTH_SECRET in .dev.vars
Google OAuth Setup: Follow the Better Auth Google documentation to:
Understanding R2 URLs: Cloudflare R2 has different URL behaviors for development vs production:
Step 1: Create R2 Bucket
# Create R2 bucket for development
wrangler r2 bucket create your-app-bucket-dev

# For production, create a separate bucket
wrangler r2 bucket create your-app-bucket-prod
Step 2: Get R2 URL for Development
Enable Public Development URL:
https://pub-xxxxx.r2.dev)Example URL Format:
https://pub-a1b2c3d4e5f6g7h8i9j0.r2.dev
Important Notes:
Step 3: Add R2 URL to Environment Variables
# Add to your .dev.vars file (use the URL you copied from dashboard)
CLOUDFLARE_R2_URL=https://pub-a1b2c3d4e5f6g7h8i9j0.r2.dev
Note: Replace the example URL with the actual URL you copied from your R2 bucket settings.
For Production - Custom Domain Setup (Required):
⚠️ Important: The default R2 public URL should NOT be used in production as it's not optimized for performance and may have limitations.
Setup Custom Domain for R2:
# 1. Go to Cloudflare Dashboard → R2 Storage → Your Bucket → Custom Domains
# 2. Click "Connect Domain" and enter your desired domain (e.g., files.yourdomain.com)
# 3. Update your DNS records as instructed by Cloudflare
# 4. Wait for SSL certificate to be issued (usually a few minutes)

# Your production R2 URL will be:
# https://files.yourdomain.com

# Add this to your production secrets:
echo "https://files.yourdomain.com" | wrangler secret put CLOUDFLARE_R2_URL
R2 URL Summary:
How R2 URLs Work:
https://pub-xxxxx.r2.dev)https://pub-xxxxx.r2.dev/{folder}/{file-name}.{extension}CLOUDFLARE_R2_URLIf you prefer to set everything up manually or want to understand each step in detail, follow this comprehensive guide.
Create D1 Database:
# Create a new SQLite database at the edge
wrangler d1 create your-app-name

# Output will show:
# database_name = "your-app-name"
# database_id = "xxxxxxxx-xxxx-xxxx-xxxx-xxxxxxxxxxxx"
Create R2 Bucket:
# Create object storage bucket
wrangler r2 bucket create your-app-bucket

# List buckets to confirm
wrangler r2 bucket list
Update wrangler.jsonc with your resource IDs:
{
    "name": "your-app-name",
    "d1_databases": [
        {
            "binding": "DB",
            "database_name": "your-app-name",
            "database_id": "your-database-id-from-step-1",
            "migrations_dir": "./src/drizzle"
        }
    ],
    "r2_buckets": [
        {
            "bucket_name": "your-app-bucket",
            "binding": "FILES"
        }
    ],
    "ai": {
        "binding": "AI"
    }
}
Generate Better Auth Secret:
# On macOS/Linux
openssl rand -base64 32

# On Windows (PowerShell)
[System.Convert]::ToBase64String([System.Security.Cryptography.RandomNumberGenerator]::GetBytes(32))

# Or use online generator: https://generate-secret.vercel.app/32
Configure Google OAuth:
http://localhost:3000/api/auth/callback/google (development)https://your-app.your-subdomain.workers.dev/api/auth/callback/google (production)Create Local Environment File:
# .dev.vars for local development
CLOUDFLARE_ACCOUNT_ID=your-account-id
CLOUDFLARE_D1_TOKEN=your-api-token
BETTER_AUTH_SECRET=your-generated-secret
GOOGLE_CLIENT_ID=your-google-client-id.apps.googleusercontent.com
GOOGLE_CLIENT_SECRET=your-google-client-secret
# Get this from R2 bucket settings: R2 Object Storage → Your Bucket → Settings → Public Development URL
CLOUDFLARE_R2_URL=https://pub-a1b2c3d4e5f6g7h8i9j0.r2.dev
Set Production Secrets:
# Add each secret to Cloudflare Workers
echo "your-secret-here" | wrangler secret put BETTER_AUTH_SECRET
echo "your-client-id" | wrangler secret put GOOGLE_CLIENT_ID
echo "your-client-secret" | wrangler secret put GOOGLE_CLIENT_SECRET
echo "your-r2-url" | wrangler secret put CLOUDFLARE_R2_URL
Generate TypeScript Types:
# Generate Cloudflare bindings for TypeScript
pnpm run cf-typegen
Initialize Database:
# Generate initial migration from schema
pnpm run db:generate

# Apply migrations to local database
pnpm run db:migrate:local

# Verify database structure
pnpm run db:inspect:local
Optional: Seed Sample Data
# Create and run a seed script
wrangler d1 execute your-app-name --local --command="
INSERT INTO todos (id, title, description, completed, created_at, updated_at) VALUES
('1', 'Welcome to your app', 'This is a sample todo item', false, datetime('now'), datetime('now')),
('2', 'Set up authentication', 'Configure Google OAuth', true, datetime('now'), datetime('now'));
"
Start Development Servers:
# Terminal 1: Start Wrangler (provides D1 access)
pnpm run wrangler:dev

# Terminal 2: Start Next.js (provides HMR)
pnpm run dev

# Alternative: Single command (no HMR)
pnpm run dev:cf
Verify Everything Works:
http://localhost:3000pnpm run db:studio:localAdd Repository Secrets: Go to your GitHub repository → Settings → Secrets and add:
CLOUDFLARE_API_TOKEN - Your API token from Step 2CLOUDFLARE_ACCOUNT_ID - Your account IDBETTER_AUTH_SECRET - Your auth secretGOOGLE_CLIENT_ID - Your Google client IDGOOGLE_CLIENT_SECRET - Your Google client secretCLOUDFLARE_R2_URL - Your R2 bucket URLDeploy Production Database:
# Apply migrations to production
pnpm run db:migrate:prod

# Verify production database
pnpm run db:inspect:prod
Add Custom Domain:
Update OAuth Redirect URLs: Add your custom domain to Google OAuth settings:
https://yourdomain.com/api/auth/callback/googleAdd Indexes for Performance:
-- Create indexes for better query performance
CREATE INDEX IF NOT EXISTS idx_todos_user_id ON todos(user_id);
CREATE INDEX IF NOT EXISTS idx_todos_created_at ON todos(created_at);
CREATE INDEX IF NOT EXISTS idx_todos_completed ON todos(completed);
Monitor Database Performance:
# View database insights
wrangler d1 insights your-app-name --since 1h

# Export data for analysis
wrangler d1 export your-app-name --output backup.sql
Configure CORS for Direct Uploads:
# Create CORS policy file
echo '[
  {
    "AllowedOrigins": ["https://yourdomain.com", "http://localhost:3000"],
    "AllowedMethods": ["GET", "PUT", "POST", "DELETE"],
    "AllowedHeaders": ["*"],
    "ExposeHeaders": [],
    "MaxAgeSeconds": 3000
  }
]' > cors.json

# Apply CORS policy
wrangler r2 bucket cors put your-app-bucket --file cors.json
# 1. Generate Cloudflare types (run after any wrangler.jsonc changes)
pnpm run cf-typegen

# 2. Apply database migrations
pnpm run db:migrate:local

# 3. Build the application for Cloudflare
pnpm run build:cf
# Terminal 1: Start Wrangler for D1 database access
pnpm run wrangler:dev

# Terminal 2: Start Next.js development server with HMR
pnpm run dev
Development URLs:
http://localhost:3000 (recommended)http://localhost:8787# Single command - Cloudflare runtime (no HMR)
pnpm run dev:cf
# Test with remote Cloudflare resources
pnpm run dev:remote
| Script | Description |
|---|---|
pnpm dev | Start Next.js with HMR |
pnpm run build:cf | Build for Cloudflare Workers |
pnpm run wrangler:dev | Start Wrangler for local D1 access |
pnpm run dev:cf | Combined build + Cloudflare dev server |
| Script | Description |
|---|---|
pnpm run db:generate | Generate new migration |
pnpm run db:generate:named "migration_name" | Generate named migration |
pnpm run db:migrate:local | Apply migrations to local D1 |
pnpm run db:migrate:preview | Apply migrations to preview |
pnpm run db:migrate:prod | Apply migrations to production |
pnpm run db:studio:local | Open Drizzle Studio for local DB |
pnpm run db:inspect:local | List local database tables |
pnpm run db:reset:local | Reset local database |
| Script | Description |
|---|---|
pnpm run deploy | Deploy to production |
pnpm run deploy:preview | Deploy to preview environment |
pnpm run cf-typegen | Generate Cloudflare TypeScript types |
pnpm run cf:secret | Add secrets to Cloudflare Workers |
First-time setup:
pnpm run cf-typegen - Generate typespnpm run db:migrate:local - Setup databasepnpm run build:cf - Build applicationDaily development:
pnpm run wrangler:dev - Start D1 access (Terminal 1)pnpm run dev - Start Next.js with HMR (Terminal 2)After schema changes:
pnpm run db:generate - Generate migrationpnpm run db:migrate:local - Apply to local DBAfter wrangler.jsonc changes:
pnpm run cf-typegen - Regenerate types⚠️ Authentication Required: Login to your app first, then test the API.
Browser Console (Easiest):
http://localhost:3000fetch('/api/summarize', {
method: 'POST',
headers: { 'Content-Type': 'application/json' },
credentials: 'include',
body: JSON.stringify({
text: "Your text to summarize here...",
config: { maxLength: 100, style: "concise" }
})
}).then(r => r.json()).then(console.log);
cURL (with session cookies):
better-auth.session_tokencurl -X POST http://localhost:3000/api/summarize \
-H "Content-Type: application/json" \
-H "Cookie: better-auth.session_token=your-token-here" \
-d '{"text": "Your text here...", "config": {"maxLength": 100}}'
Postman:
Cookie: better-auth.session_token=your-token-hereUnauthenticated Request Response:
{
  "success": false,
  "error": "Authentication required",
  "data": null
}
The AI integration follows a clean service-based architecture:
/api/summarize) - Handles HTTP requests, authentication, and validationCloudflare Workers AI supports various models:
# 1. Modify schema files in src/db/schemas/
# 2. Generate migration
pnpm run db:generate:named "add_user_table"
# 3. Apply to local database
pnpm run db:migrate:local
# 4. Test your changes
# 5. Commit and deploy (migrations run automatically)
# 1. Update wrangler.jsonc with new resources
# 2. Regenerate types
pnpm run cf-typegen
# 3. Update your code to use new bindings
# Add secrets to production environment
pnpm run cf:secret BETTER_AUTH_SECRET
pnpm run cf:secret GOOGLE_CLIENT_ID
pnpm run cf:secret GOOGLE_CLIENT_SECRET
Built-in Observability:
Database Monitoring:
# Monitor database performance
wrangler d1 insights next-cf-app

# View database metrics in Cloudflare Dashboard
# Navigate to Workers & Pages → D1 → next-cf-app → Metrics
Push to main branch triggers automatic deployment via GitHub Actions:
git add .
git commit -m "feat: add new feature"
git push origin main
Deployment Pipeline:
# Deploy to production
pnpm run deploy

# Deploy to preview environment
pnpm run deploy:preview
@cf/meta/m2m100-1.2b@cf/baai/bge-base-en-v1.5@cf/microsoft/resnet-50Contributions are welcome! Please feel free to submit issues and pull requests.
This project is licensed under the MIT License - see the LICENSE file for details.
© 2025 Muhammad Arifin. All rights reserved.
3,925 followers · starred Oct 2025
12 followers · starred Sep 2025
44 followers · starred Sep 2025
64 followers · starred Sep 2025



