Snapshot a React Native view and save it to an image
See the code

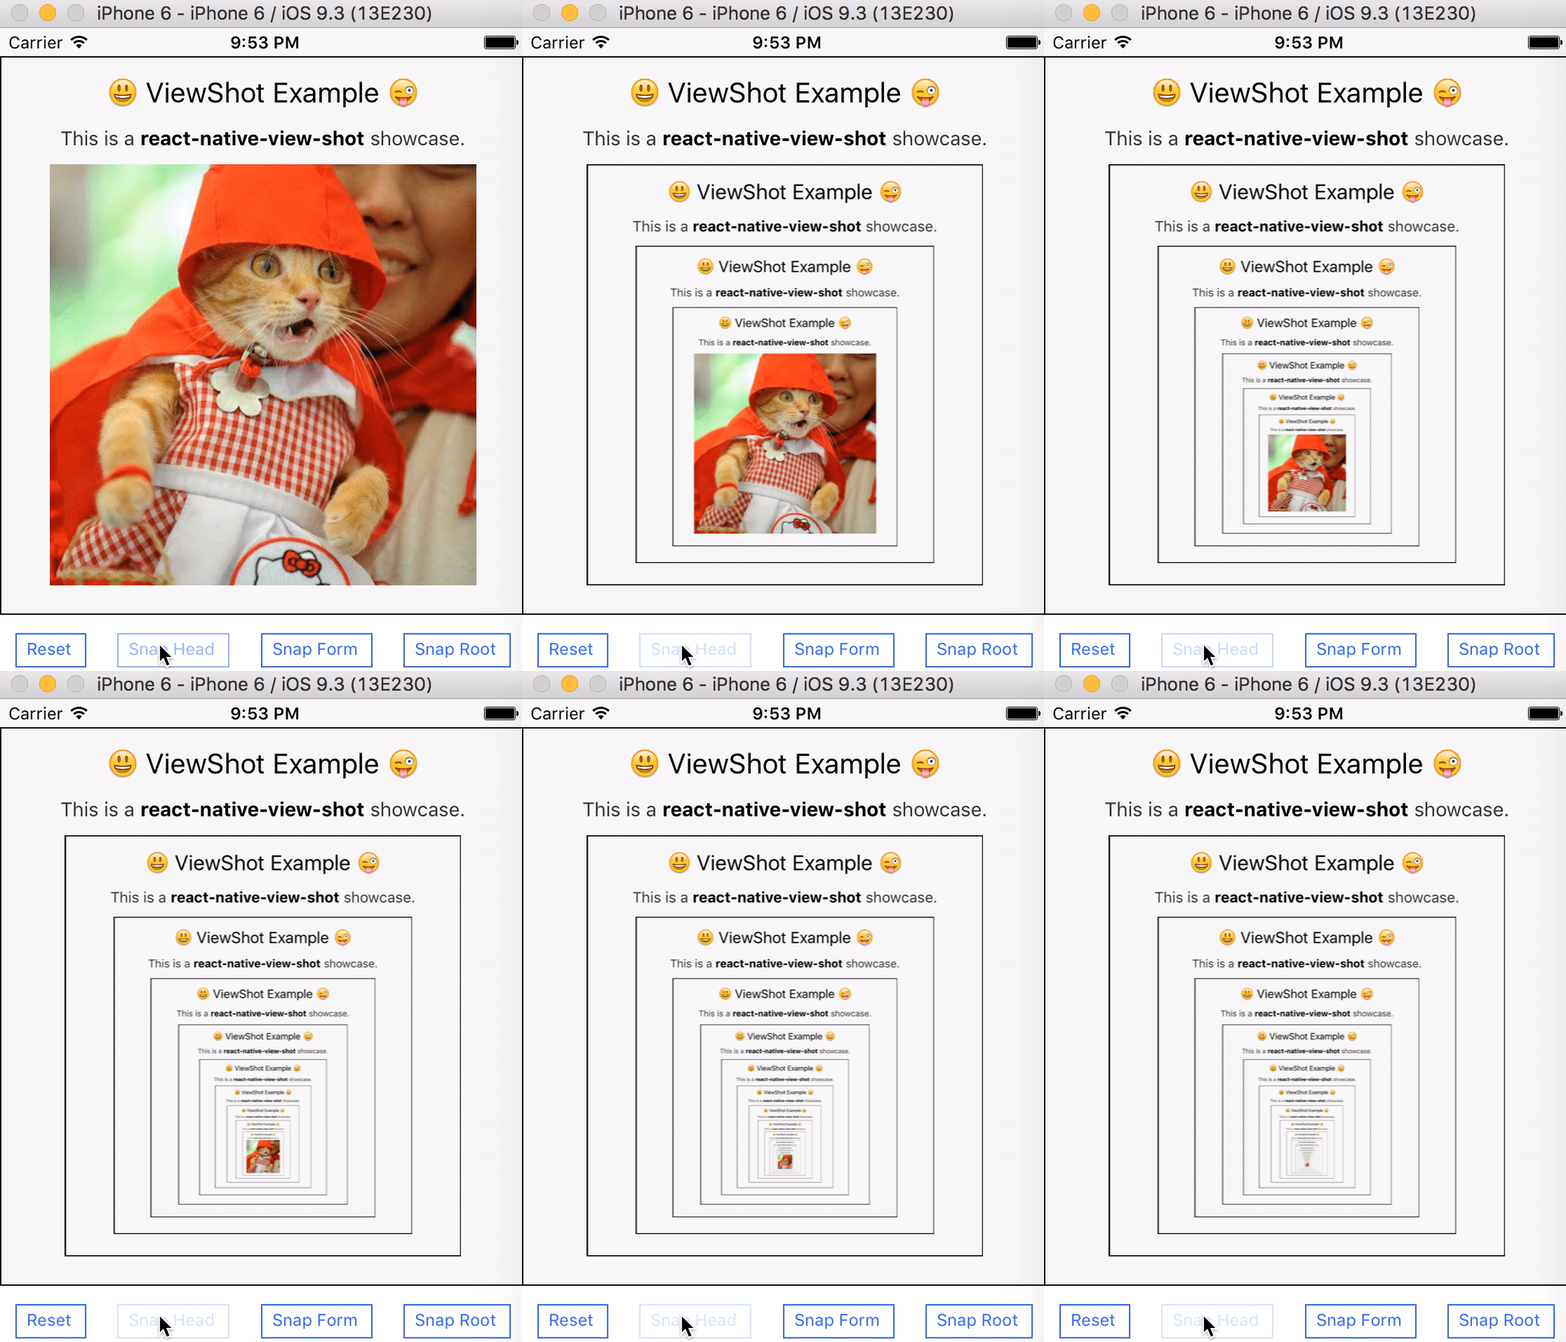
Capture a React Native view to an image.
This library fully supports React Native's new architecture (Fabric + TurboModules) from version 4.0+.
Requirements:
Both old and new architectures are supported for seamless migration.
npm install react-native-view-shot

# or with Yarn
yarn add react-native-view-shot

# In Expo
npx expo install react-native-view-shot
Since React Native 0.60+, autolink handles the linking automatically. On iOS, install the CocoaPods dependencies:
npx pod-install
On web (react-native-web, Expo web), captures are rendered with html2canvas-pro. It is an optional peer dependency, so it is not installed on native-only projects — add it yourself when targeting the web:
npm install html2canvas-pro
It is loaded lazily on the first capture. If it is missing, your bundler (webpack, Metro) fails at build time with Can't resolve 'html2canvas-pro'; in environments that resolve modules at runtime, captureRef rejects with an explicit install hint instead.
react-native is also an optional peer dependency, so a web-only project can install react-native-web without pulling react-native (alias react-native to react-native-web in your bundler as usual).
The library reads the __DEV__ global, as React Native code does. Metro and Expo define it for you; with a custom webpack/esbuild setup you must define it yourself, otherwise the page throws ReferenceError: __DEV__ is not defined:
// webpack.config.js
new webpack.DefinePlugin({ __DEV__: JSON.stringify(process.env.NODE_ENV !== "production") })
// esbuild
--define:__DEV__=false
import React, {useCallback, useEffect, useRef} from "react";
import {Image, ScrollView, Text} from "react-native";
import ViewShot from "react-native-view-shot";

function ExampleCaptureOnMountManually() {
  const ref = useRef();

  useEffect(() => {
    // on mount
    ref.current
      .capture()
      .then(uri => {
        console.log("do something with ", uri);
      })
      .catch(console.error);
  }, []);

  return (
    <ViewShot
      ref={ref}
      options={{fileName: "Your-File-Name", format: "jpg", quality: 0.9}}
    >
      <Text>...Something to rasterize...</Text>
    </ViewShot>
  );
}

// alternative
function ExampleCaptureOnMountSimpler() {
  const onCapture = useCallback(uri => {
    console.log("do something with ", uri);
  }, []);

  return (
    <ViewShot onCapture={onCapture} captureMode="mount">
      <Text>...Something to rasterize...</Text>
    </ViewShot>
  );
}

// waiting an image

function ExampleWaitingCapture({imageSource}) {
  const ref = useRef();

  const onImageLoad = useCallback(() => {
    ref.current
      .capture()
      .then(uri => {
        console.log("do something with ", uri);
      })
      .catch(console.error);
  }, []);

  return (
    <ViewShot ref={ref}>
      <Text>...Something to rasterize...</Text>
      <Image source={imageSource} onLoad={onImageLoad} />
    </ViewShot>
  );
}

// capture ScrollView content
// NB: you may need to go the "imperative way" to use snapshotContentContainer with the scrollview ref instead
function ExampleCaptureScrollContent() {
  const onCapture = useCallback(uri => {
    console.log("do something with ", uri);
  }, []);

  return (
    <ScrollView>
      <ViewShot onCapture={onCapture} captureMode="mount">
        <Text>...The Scroll View Content Goes Here...</Text>
      </ViewShot>
    </ScrollView>
  );
}
Props:
children: the actual content to rasterize.options: the same options as in captureRef method.captureMode (string):
capture() yourself."mount". Capture the view once at mount. Image loading is not awaited; omit captureMode and call viewShotRef.current.capture() after Image#onLoad when needed."continuous" EXPERIMENTAL, this will capture A LOT of images continuously. For very specific use-cases."update" EXPERIMENTAL, this will capture images each time React redraw (on did update). For very specific use-cases.onCapture: when a captureMode is defined, this callback will be called with the capture result.onCaptureFailure: when a captureMode is defined, this callback will be called when a capture fails.captureRef(view, options) lower level imperative APIimport {captureRef} from "react-native-view-shot";
captureRef(viewRef, {
format: "jpg",
quality: 0.8,
}).then(
uri => console.log("Image saved to", uri),
error => console.error("Oops, snapshot failed", error),
);
Returns a Promise of the image URI.
view is a reference to a React Native component.options may include:
fileName (string): (Android only) the file name of the file. Must be at least 3 characters long.width / height (number): the width and height of the final image (resized from the View bound. don't provide it if you want the original pixel size).format (string): png or jpg, plus webp and raw on Android. Defaults to png. webm is a deprecated alias for webp; it produces WebP image data, not a video.quality (number): the quality. 0.0 - 1.0 (default). (only available on lossy formats like jpg)result (string), the method you want to use to save the snapshot, one of:
"tmpfile" (default): save to a temporary file (that will only exist for as long as the app is running)."base64": encode as base64 and returns the raw string. Use only with small images as this may result of lags (the string is sent over the bridge). N.B. This is not a data uri, use data-uri instead."data-uri": same as base64 but also includes the Data URI scheme header.snapshotContentContainer (bool): if true and when the captured ref is a ScrollView, the entire scrollable content is captured rather than just the visible viewport. Works on both iOS and Android (the lib temporarily expands the ScrollView to its full content size during the draw, then restores). Android caveat: only vertical <ScrollView> is supported — horizontal scroll views (<ScrollView horizontal>, backed by HorizontalScrollView) are not expanded and will fall back to capturing the visible bounds. iOS handles both axes via UIScrollView. Windows: not supported — UWP's RenderTargetBitmap respects the live ScrollViewer clip and we have no reliable way to capture the full scrollable area; the option is ignored and only the visible viewport is captured (a console.warn fires in __DEV__). FlatList note: virtualization (removeClippedSubviews, windowSize) means off-screen items aren't mounted at the React layer and will be missing from the capture. Set removeClippedSubviews={false} and a large windowSize, or use a plain <ScrollView> for content up to a few hundred items. See example/src/screens/ScrollViewTestScreen.tsx for a working demo.useRenderInContext (bool): change the iOS snapshot strategy to use method renderInContext instead of drawViewHierarchyInRect which may help for some use cases.releaseCapture(uri)This method release a previously captured uri. For tmpfile it will clean them out, for other result types it just won't do anything.
NB: the tmpfile captures are automatically cleaned out after the app closes, so you might not have to worry about this unless advanced usecases. The ViewShot component will use it each time you capture more than once (useful for continuous capture to not leak files).
captureScreen() Android, iOS, and Windowsimport {captureScreen} from "react-native-view-shot";
captureScreen({
format: "jpg",
quality: 0.8,
}).then(
uri => console.log("Image saved to", uri),
error => console.error("Oops, snapshot failed", error),
);
This method will capture the contents of the currently displayed screen as a native hardware screenshot. It does not require a ref input, as it does not work at the view level. This means that ScrollViews will not be captured in their entirety - only the portions currently visible to the user.
Returns a Promise of the image URI.
options: the same options as in captureRef method.Checkout react-native-view-shot-example - Comprehensive example app demonstrating all features on iOS and Android.
Checkout react-native-view-shot-web-example - Web example demonstrating how the library works in browsers using html2canvas-pro.
Snapshots are not guaranteed to be pixel perfect. It also depends on the platform. Here is some difference we have noticed and how to workaround.
Model tested: iPhone 6 (iOS), Nexus 5 (Android).
| System | iOS | Android | Windows | Web |
|---|---|---|---|---|
| View,Text,Image,.. | YES | YES | YES | YES |
| WebView | YES | YES1 | YES | N/A |
| gl-react v2 | YES | NO2 | NO3 | NO3 |
| react-native-video | NO | NO | NO | NO |
| react-native-maps | YES | NO4 | NO3 | NO3 |
| react-native-svg | YES | YES | maybe? | LIMITED5 |
| react-native-camera | NO | YES | NO 3 | NO3 |
<View collapsable={false}> parent and snapshotting it.During profiling captured several things that influence on performance:
To solve that in code introduced several new approaches:
Bitmap.compressmore details and code snippet are below.
Introduced a new image format RAW. it correspond a ARGB array of pixels.
Advantages:
RAW format supported for zip-base64, base64 and tmpfile result types.
RAW files contain an ASCII ${width}:${height}| header followed by binary pixel bytes. The base64 result instead returns that header followed by base64-encoded pixels; zip-base64 returns the header followed by base64-encoded, zlib-compressed pixels.
In compare to BASE64 result string this format fast try to apply zip/deflate compression on screenshot results and only after that convert results to base64 string. In combination zip-base64 + raw we got a super fast approach for capturing screen views and deliver them to the react side.
Capture in React Native, then send the result and format to a Node.js process for conversion. Node's fs and zlib modules are not built into React Native.
import {Platform} from "react-native";
import {captureRef} from "react-native-view-shot";

const format = Platform.OS === "android" ? "raw" : "png";
const result = Platform.OS === "android" ? "zip-base64" : "base64";

captureRef(viewRef, {result, format})
  .then(data => {
    // Send {data, format} to your Node.js conversion process.
  })
  .catch(console.error);
In Node.js:
const fs = require("node:fs");
const zlib = require("node:zlib");
const {PNG} = require("pngjs");

function saveCapture(data, format, outputPath) {
  let pngData;
  if (format === "raw") {
    const resolution = /^(\d+):(\d+)\|/.exec(data);
    if (!resolution) throw new Error("Missing RAW dimensions");
    const width = Number(resolution[1]);
    const height = Number(resolution[2]);
    const compressed = Buffer.from(data.slice(resolution[0].length), "base64");
    const pixels = zlib.inflateSync(compressed);
    if (!width || !height || pixels.length !== width * height * 4) {
      throw new Error("Invalid RAW dimensions or pixel data");
    }
    const png = new PNG({width, height});
    png.data = pixels;
    pngData = PNG.sync.write(png);
  } else {
    // The iOS/Windows fallback is already PNG, not zlib-compressed RAW.
    pngData = Buffer.from(data, "base64");
  }
  fs.writeFileSync(outputPath, pngData);
}
Keep in mind that packaging PNG data is a CPU consuming operation as a zlib.inflate.
Hint: use process.fork() approach for converting raw data into PNGs.
Install the PNG encoder in your Node.js conversion project (
zlibis built in):npm install pngjs
captureRef promise gets rejected (the library won't crash).Check the Interoperability Table above. Some special components are unfortunately not supported. If you have a View that contains one of an unsupported component, the whole snapshot might be compromised as well.
you need to make sure
collapsableis set tofalseif you want to snapshot a View. Some content might even need to be wrapped into such<View collapsable={false}>to actually make them snapshotable! Otherwise that view won't reflect any UI View. (found by @gaguirre)
Alternatively, you can use the ViewShot component that will have collapsable={false} set to solve this problem.
Make sure you don't snapshot instantly, you need to wait at least there is a first
onLayoutevent, or after a timeout, otherwise the View might not be ready yet. (It should also be safe to just wait ImageonLoadif you have one). If you still have the problem, make sure your view actually have a width and height > 0.
Alternatively, you can use the ViewShot component that will wait the first onLayout.
This is because the snapshot image result is in real pixel size where the width/height defined in a React Native style are defined in "point" unit. You might want to set width and height option to force a resize. (might affect image quality)
A prop may be necessary to properly capture GL Surface View in the view tree:
// Opt in to SurfaceView capture; it can have a significant performance cost.
captureRef(viewRef, {handleGLSurfaceViewOnAndroid: true});
expo-sharing?tmpfile or the default capture result works best for this. Add file:// only when it is absent; Android already returns a file URI.
captureRef(viewRef)
  .then(uri =>
    Sharing.shareAsync(
      uri.startsWith("file://") ? uri : `file://${uri}`,
      options,
    ),
  )
  .catch(console.error);
41 followers · starred Aug 2022
488 followers · starred Feb 2025
15 followers · starred Nov 2016
218 followers · starred Oct 2016
Snapshot a React Native view and save it to an image
See the code Capture a React Native view to an image.
This library fully supports React Native's new architecture (Fabric + TurboModules) from version 4.0+.
Requirements:
Both old and new architectures are supported for seamless migration.
npm install react-native-view-shot

# or with Yarn
yarn add react-native-view-shot

# In Expo
npx expo install react-native-view-shot
Since React Native 0.60+, autolink handles the linking automatically. On iOS, install the CocoaPods dependencies:
npx pod-install
On web (react-native-web, Expo web), captures are rendered with html2canvas-pro. It is an optional peer dependency, so it is not installed on native-only projects — add it yourself when targeting the web:
npm install html2canvas-pro
It is loaded lazily on the first capture. If it is missing, your bundler (webpack, Metro) fails at build time with Can't resolve 'html2canvas-pro'; in environments that resolve modules at runtime, captureRef rejects with an explicit install hint instead.
react-native is also an optional peer dependency, so a web-only project can install react-native-web without pulling react-native (alias react-native to react-native-web in your bundler as usual).
The library reads the __DEV__ global, as React Native code does. Metro and Expo define it for you; with a custom webpack/esbuild setup you must define it yourself, otherwise the page throws ReferenceError: __DEV__ is not defined:
// webpack.config.js
new webpack.DefinePlugin({ __DEV__: JSON.stringify(process.env.NODE_ENV !== "production") })
// esbuild
--define:__DEV__=false
import React, {useCallback, useEffect, useRef} from "react";
import {Image, ScrollView, Text} from "react-native";
import ViewShot from "react-native-view-shot";

function ExampleCaptureOnMountManually() {
  const ref = useRef();

  useEffect(() => {
    // on mount
    ref.current
      .capture()
      .then(uri => {
        console.log("do something with ", uri);
      })
      .catch(console.error);
  }, []);

  return (
    <ViewShot
      ref={ref}
      options={{fileName: "Your-File-Name", format: "jpg", quality: 0.9}}
    >
      <Text>...Something to rasterize...</Text>
    </ViewShot>
  );
}

// alternative
function ExampleCaptureOnMountSimpler() {
  const onCapture = useCallback(uri => {
    console.log("do something with ", uri);
  }, []);

  return (
    <ViewShot onCapture={onCapture} captureMode="mount">
      <Text>...Something to rasterize...</Text>
    </ViewShot>
  );
}

// waiting an image

function ExampleWaitingCapture({imageSource}) {
  const ref = useRef();

  const onImageLoad = useCallback(() => {
    ref.current
      .capture()
      .then(uri => {
        console.log("do something with ", uri);
      })
      .catch(console.error);
  }, []);

  return (
    <ViewShot ref={ref}>
      <Text>...Something to rasterize...</Text>
      <Image source={imageSource} onLoad={onImageLoad} />
    </ViewShot>
  );
}

// capture ScrollView content
// NB: you may need to go the "imperative way" to use snapshotContentContainer with the scrollview ref instead
function ExampleCaptureScrollContent() {
  const onCapture = useCallback(uri => {
    console.log("do something with ", uri);
  }, []);

  return (
    <ScrollView>
      <ViewShot onCapture={onCapture} captureMode="mount">
        <Text>...The Scroll View Content Goes Here...</Text>
      </ViewShot>
    </ScrollView>
  );
}
Props:
children: the actual content to rasterize.options: the same options as in captureRef method.captureMode (string):
capture() yourself."mount". Capture the view once at mount. Image loading is not awaited; omit captureMode and call viewShotRef.current.capture() after Image#onLoad when needed."continuous" EXPERIMENTAL, this will capture A LOT of images continuously. For very specific use-cases."update" EXPERIMENTAL, this will capture images each time React redraw (on did update). For very specific use-cases.onCapture: when a captureMode is defined, this callback will be called with the capture result.onCaptureFailure: when a captureMode is defined, this callback will be called when a capture fails.captureRef(view, options) lower level imperative APIimport {captureRef} from "react-native-view-shot";
captureRef(viewRef, {
format: "jpg",
quality: 0.8,
}).then(
uri => console.log("Image saved to", uri),
error => console.error("Oops, snapshot failed", error),
);
Returns a Promise of the image URI.
view is a reference to a React Native component.options may include:
fileName (string): (Android only) the file name of the file. Must be at least 3 characters long.width / height (number): the width and height of the final image (resized from the View bound. don't provide it if you want the original pixel size).format (string): png or jpg, plus webp and raw on Android. Defaults to png. webm is a deprecated alias for webp; it produces WebP image data, not a video.quality (number): the quality. 0.0 - 1.0 (default). (only available on lossy formats like jpg)result (string), the method you want to use to save the snapshot, one of:
"tmpfile" (default): save to a temporary file (that will only exist for as long as the app is running)."base64": encode as base64 and returns the raw string. Use only with small images as this may result of lags (the string is sent over the bridge). N.B. This is not a data uri, use data-uri instead."data-uri": same as base64 but also includes the Data URI scheme header.snapshotContentContainer (bool): if true and when the captured ref is a ScrollView, the entire scrollable content is captured rather than just the visible viewport. Works on both iOS and Android (the lib temporarily expands the ScrollView to its full content size during the draw, then restores). Android caveat: only vertical <ScrollView> is supported — horizontal scroll views (<ScrollView horizontal>, backed by HorizontalScrollView) are not expanded and will fall back to capturing the visible bounds. iOS handles both axes via UIScrollView. Windows: not supported — UWP's RenderTargetBitmap respects the live ScrollViewer clip and we have no reliable way to capture the full scrollable area; the option is ignored and only the visible viewport is captured (a console.warn fires in __DEV__). FlatList note: virtualization (removeClippedSubviews, windowSize) means off-screen items aren't mounted at the React layer and will be missing from the capture. Set removeClippedSubviews={false} and a large windowSize, or use a plain <ScrollView> for content up to a few hundred items. See example/src/screens/ScrollViewTestScreen.tsx for a working demo.useRenderInContext (bool): change the iOS snapshot strategy to use method renderInContext instead of drawViewHierarchyInRect which may help for some use cases.releaseCapture(uri)This method release a previously captured uri. For tmpfile it will clean them out, for other result types it just won't do anything.
NB: the tmpfile captures are automatically cleaned out after the app closes, so you might not have to worry about this unless advanced usecases. The ViewShot component will use it each time you capture more than once (useful for continuous capture to not leak files).
captureScreen() Android, iOS, and Windowsimport {captureScreen} from "react-native-view-shot";
captureScreen({
format: "jpg",
quality: 0.8,
}).then(
uri => console.log("Image saved to", uri),
error => console.error("Oops, snapshot failed", error),
);
This method will capture the contents of the currently displayed screen as a native hardware screenshot. It does not require a ref input, as it does not work at the view level. This means that ScrollViews will not be captured in their entirety - only the portions currently visible to the user.
Returns a Promise of the image URI.
options: the same options as in captureRef method.Checkout react-native-view-shot-example - Comprehensive example app demonstrating all features on iOS and Android.
Checkout react-native-view-shot-web-example - Web example demonstrating how the library works in browsers using html2canvas-pro.
Snapshots are not guaranteed to be pixel perfect. It also depends on the platform. Here is some difference we have noticed and how to workaround.
Model tested: iPhone 6 (iOS), Nexus 5 (Android).
| System | iOS | Android | Windows | Web |
|---|---|---|---|---|
| View,Text,Image,.. | YES | YES | YES | YES |
| WebView | YES | YES1 | YES | N/A |
| gl-react v2 | YES | NO2 | NO3 | NO3 |
| react-native-video | NO | NO | NO | NO |
| react-native-maps | YES | NO4 | NO3 | NO3 |
| react-native-svg | YES | YES | maybe? | LIMITED5 |
| react-native-camera | NO | YES | NO 3 | NO3 |
<View collapsable={false}> parent and snapshotting it.During profiling captured several things that influence on performance:
To solve that in code introduced several new approaches:
Bitmap.compressmore details and code snippet are below.
Introduced a new image format RAW. it correspond a ARGB array of pixels.
Advantages:
RAW format supported for zip-base64, base64 and tmpfile result types.
RAW files contain an ASCII ${width}:${height}| header followed by binary pixel bytes. The base64 result instead returns that header followed by base64-encoded pixels; zip-base64 returns the header followed by base64-encoded, zlib-compressed pixels.
In compare to BASE64 result string this format fast try to apply zip/deflate compression on screenshot results and only after that convert results to base64 string. In combination zip-base64 + raw we got a super fast approach for capturing screen views and deliver them to the react side.
Capture in React Native, then send the result and format to a Node.js process for conversion. Node's fs and zlib modules are not built into React Native.
import {Platform} from "react-native";
import {captureRef} from "react-native-view-shot";

const format = Platform.OS === "android" ? "raw" : "png";
const result = Platform.OS === "android" ? "zip-base64" : "base64";

captureRef(viewRef, {result, format})
  .then(data => {
    // Send {data, format} to your Node.js conversion process.
  })
  .catch(console.error);
In Node.js:
const fs = require("node:fs");
const zlib = require("node:zlib");
const {PNG} = require("pngjs");

function saveCapture(data, format, outputPath) {
  let pngData;
  if (format === "raw") {
    const resolution = /^(\d+):(\d+)\|/.exec(data);
    if (!resolution) throw new Error("Missing RAW dimensions");
    const width = Number(resolution[1]);
    const height = Number(resolution[2]);
    const compressed = Buffer.from(data.slice(resolution[0].length), "base64");
    const pixels = zlib.inflateSync(compressed);
    if (!width || !height || pixels.length !== width * height * 4) {
      throw new Error("Invalid RAW dimensions or pixel data");
    }
    const png = new PNG({width, height});
    png.data = pixels;
    pngData = PNG.sync.write(png);
  } else {
    // The iOS/Windows fallback is already PNG, not zlib-compressed RAW.
    pngData = Buffer.from(data, "base64");
  }
  fs.writeFileSync(outputPath, pngData);
}
Keep in mind that packaging PNG data is a CPU consuming operation as a zlib.inflate.
Hint: use process.fork() approach for converting raw data into PNGs.
Install the PNG encoder in your Node.js conversion project (
zlibis built in):npm install pngjs
captureRef promise gets rejected (the library won't crash).Check the Interoperability Table above. Some special components are unfortunately not supported. If you have a View that contains one of an unsupported component, the whole snapshot might be compromised as well.
you need to make sure
collapsableis set tofalseif you want to snapshot a View. Some content might even need to be wrapped into such<View collapsable={false}>to actually make them snapshotable! Otherwise that view won't reflect any UI View. (found by @gaguirre)
Alternatively, you can use the ViewShot component that will have collapsable={false} set to solve this problem.
Make sure you don't snapshot instantly, you need to wait at least there is a first
onLayoutevent, or after a timeout, otherwise the View might not be ready yet. (It should also be safe to just wait ImageonLoadif you have one). If you still have the problem, make sure your view actually have a width and height > 0.
Alternatively, you can use the ViewShot component that will wait the first onLayout.
This is because the snapshot image result is in real pixel size where the width/height defined in a React Native style are defined in "point" unit. You might want to set width and height option to force a resize. (might affect image quality)
A prop may be necessary to properly capture GL Surface View in the view tree:
// Opt in to SurfaceView capture; it can have a significant performance cost.
captureRef(viewRef, {handleGLSurfaceViewOnAndroid: true});
expo-sharing?tmpfile or the default capture result works best for this. Add file:// only when it is absent; Android already returns a file URI.
captureRef(viewRef)
  .then(uri =>
    Sharing.shareAsync(
      uri.startsWith("file://") ? uri : `file://${uri}`,
      options,
    ),
  )
  .catch(console.error);
41 followers · starred Aug 2022
488 followers · starred Feb 2025
15 followers · starred Nov 2016
218 followers · starred Oct 2016



