A privacy-first platform for deploying and operating open‑weight LLMs.
Python
3
1,050 commits
updated Sep 30, 2026

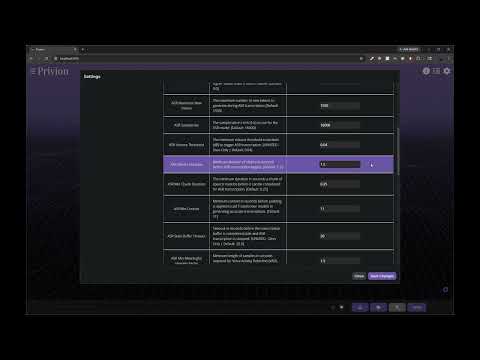
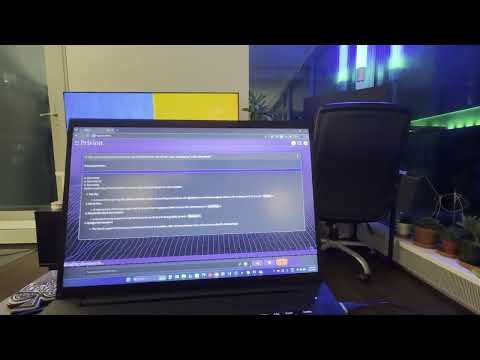
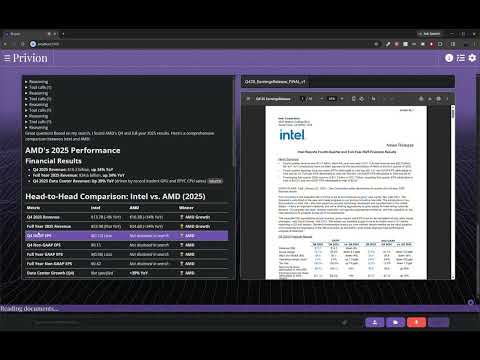
Privion is a versatile AI application focused on privacy and offline inferencing, capable of leveraging a multitude of open-source LLMs to perform a range of diverse tasks. Privion's current feature set includes:
Advanced RAG Capabilities:
Butler Mode:
Advanced LLM Platform:
Download and install the Visual Studio IDE:
NOTE: The latest VS 2026 is NOT compatible with CUDA yet! Make sure to install VS 2022!
However, MS has decided to play dirty since releasing VS2026, and has not only obsured the location of its download page, but also mandates a sign-in to your MS/GitHub account to download it! Trusted third party download sites come to the rescue here.
Pick your preferred source accordingly:
GitHub-Gist (RECOMMENDED - Also contains link for VS-BuildTools)
NOTE: Make sure to select "Desktop Development with C++"!
Required by Nvidia-CUDA on Windows specifically for MSVC (Microsoft Visual C++) Compiler
CUDA integrates into MS Visual Studio in various ways, facilitating development, debugging and profiling, which may not be available with other IDEs.
See above section for notes on VS2026 and download BuildTools for VS2022 from your preferred link below:
NOTE: Scroll down to "Tools for Visual Studio"
NOTE: When installing the above, make sure to select the following components:
Desktop development with C++
# Then from the "Optional" category on the right, make sure to select the following:
MSVC C++ x64/x86 build tools
C++ CMake tools for Windows
Refer to the screenshot below:

Desktop development with C++ workload and the MSVC and C++ CMake Optionals are selected as outlined aboveDownload and install Nvidia's CUDA Toolkit
NOTE: LARS built and tested with v12.2 and v12.4.1 on Ampere & Ada GPUs, and v12.8.1 on Ada & Blackwell GPUs
NOTE: Make sure to "Visual-Studio integration" is selected at the time of installation!
To verify the installation:
Basic Check via Terminal:
nvcc -V
nvidia-smi
Or, write & compile a Hello World Test Program:
Save the following as hello.cu:
#include <stdio.h>
#include <cuda_runtime.h>

__global__ void helloCUDA()
{
    printf("Hello from the GPU!\n");
}

int main()
{
    printf("Starting CUDA program...\n");

    int deviceCount;
    cudaGetDeviceCount(&deviceCount);
    printf("Number of CUDA devices: %d\n", deviceCount);

    if (deviceCount > 0) {
        helloCUDA<<<1, 1>>>();
        cudaDeviceSynchronize();

        cudaError_t error = cudaGetLastError();
        if (error != cudaSuccess) {
            printf("CUDA error: %s\n", cudaGetErrorString(error));
        }
    }

    printf("CUDA program finished.\n");
    return 0;
}
Add cl.exe to PATH (exact path may differ slightly on your setup, use the following as a guideline): C:\Program Files (x86)\Microsoft Visual Studio\2022\BuildTools\VC\Tools\MSVC\14.43.34808\bin\Hostx64\x64
Open a terminal in the same directory and compile the program: nvcc hello.cu -o hello
As it finishes compilation, you should see an output akin to the below:
hello.cu
tmpxft_0000579c_00000000-10_hello.cudafe1.cpp
Creating library hello.lib and object hello.exp
Run: ./hello
The output should be the following:
Starting CUDA program...
Number of CUDA devices: 1
Hello from the GPU!
CUDA program finished.
- Done & done!
Verify (and implement if missing) CUDA-Visual Studio Integration:
Copy all the four files from the following directory (path changes basis CUDA version):
C:\Program Files\NVIDIA GPU Computing Toolkit\CUDA\v12.2\extras\visual_studio_integration\MSBuildExtensions
and Paste them to the following directory:
C:\Program Files (x86)\Microsoft Visual Studio\2022\BuildTools\MSBuild\Microsoft\VC\v170\BuildCustomizations
3.10.x or 3.11.x versions)NOTE: Git is required by the automated installer script
Download and install Git
NOTE: Override default branch name from 'master' to 'main' during installation!
Clone the repository:
git clone https://github.com/abgulati/LARS-Enterprise
cd LARS-Enterprise
GitHub Settings -> Developer settings (located on the bottom left!) -> Personal access tokensPrivion uses Docker to pull & run the latest FalkorDB Graph Database container - without Docker, GraphRAG features will NOT work!
Your CPU should support virtualization, and it should be enabled in your system's BIOS/UEFI
If on Windows, you need to install the Windows Subsystem for Linux if it's not already present. To do so, open PowerShell as an Administrator and run the following:
wsl --install -d Ubuntu-22.04
Ensure the correct distro is set as the default:
wsl --set-default Ubuntu-22.04
Ensure you have WSL version 2 by running:
wsl -v
# or
wsl --status
Update WSL if required:
wsl --update
Download and install Docker Desktop
Ensure Docker Desktop is up and running, then open a Command Prompt / Terminal and execute the following command to ensure Docker is correctly installed and up and running:
docker ps
On Windows, run PowerShell as an Administrator and navigate (cd) to the 'installer' directory in the cloned repo
Verify the current ExecutionPolicy:
Get-ExecutionPolicy
By default, script execution is disabled for safety, enable this with:
Set-ExecutionPolicy RemoteSigned
NOTE: For security, it is recommended to revert the above once done via:
Set-ExecutionPolicy Restricted
Having installed all dependencies and verified/set a permissive ExecutionPolicy, Privion is ready for Installation via the automated script
From an Administrator PowerShell, run:
./install.ps1
NOTE: Installation may take upwards of an hour! Ensure internet access throughout. If errors are encountered midway, it's safe to rerun the script after attending to the issue.
Install Core Python Dependencies:
Windows via PIP:
pip install -r .\requirements.txt
Linux via PIP3:
pip3 install -r ./requirements.txt
Note on Azure: Some libraries are NOT available on the MacOS platform! A separate requirements_mac.txt file is therefore included for MacOS excluding these:
MacOS:
pip3 install -r ./requirements_mac.txt
If Using Smart-Home Automation Features, Install Butler Requirements:
pip install -r reqs_butler.txt
Install Pytorch
NOTE: LARS built and tested with Pytorch v2.5.0 with CUDA 12.4.1 for Ampere & Ada GPUs, and Pytorch v2.9 with CUDA 12.8.1 for Ada & Blackwell GPUs
IMP: Make sure to add torchaudio to the install list (if planning to use Privion's speech features, which is recommended) as the website might not include it by default! For example:
pip3 install torch torchvision torchaudio --index-url https://download.pytorch.org/whl/cu128
Flash-Attention 2 is used to reduce the memory footprint of a model's KV-Cache context space and speed up inferencing.
It has very specific hardware and software pre-requisites, make sure to check the official repo for the most up-to-date list of requirements.
NOTE (V. Imp): Make sure that ninja is installed and that it works correctly (e.g. ninja --version then echo $? should return exit code 0). If not (sometimes ninja --version then echo $? returns a nonzero exit code), uninstall then reinstall ninja (pip uninstall -y ninja && pip install ninja). Without ninja, compiling can take a very long time (2h) since it does not use multiple CPU cores. With ninja compiling takes 3-5 minutes on a 64-core machine using CUDA toolkit.
To install:
Disable filename length limit - Git has a limit of 4096 chars for a filename which can lead to "Filename too long" errors when compiling FA2. To mitigate this, open an Admin command-prompt and run:
git config --system core.longpaths true
Clone the latest stable release (v2.7.4.post1 as of this writing, update as necessary) from the official repository:
git clone -b v2.7.4.post1 https://github.com/Dao-AILab/flash-attention.git
cd flash-attention
Open the setup.py file and uncomment (or add) the following lines to the extra_compile_args on line 287 or thereabouts:
"-DFLASHATTENTION_DISABLE_BACKWARD",
"-DFLASHATTENTION_DISABLE_DROPOUT",
"-DFLASHATTENTION_DISABLE_ALIBI",
"-DFLASHATTENTION_DISABLE_UNEVEN_K",
"-DFLASHATTENTION_DISABLE_LOCAL",
This is as per an official comment on how to reduce compilation times
Set MAX_JOBS (as per CPU thread-count) and run pip install to build (make sure Ninja is correctly installed as noted above):
On Windows:
set MAX_JOBS=20
pip install . --no-build-isolation
On Linux:
MAX_JOBS=20 pip install . --no-build-isolation
Verify Installation with Test:
# python3 CMD
import flash_attn
print(flash_attn.__version__)
Backup Wheels:
Once built, wheels can and should be backed up for reuse on the same system in the future, unless Python, Torch, CUDA and FA2 versions need to be updated.
To Backup, look for built wheels in the following location:
On Windows:
C:\Users\<username>\AppData\Local\pip\cache\wheels # PIP Wheels Location

# Example locations:

C:\Users\<username>\AppData\Local\pip\cache\wheels\3d\88\d8\284b89f56af7d5bf366b10d6b8e251ac8a7c7bf3f04203fb4f

C:\Users\<username>\AppData\Local\pip\cache\wheels\45\31\56\0ad23c683f47a2cd1854109d5f61d2b9798aadb382e5c1a656
On Linux:
/home/<username>/.cache/pip/wheels/f6/b4/f5/30df6540ed09f56a99a1138f669e1dbee729478850845504f0/flash_attn-2.5.9.post1-cp310-cp310-linux_x86_64.whl
Privion, via HF-Waitress, can leverage various Automatic Speech Recogniton (ASR) models for Speech Transcription, so you can interact using your voice.
Further, Privion can leverage the Kokoro Text-To-Speech (TTS) model and voice package to speak to the user, thereby enabling full vocal interaction.
The following ASR models are supported as of November 2025:
While the Nvidia models typically require Nvidia GPUs, the others work across a broad range of hardware via Transformers
To install these and enable both ASR & TTS, following the below steps:
Install ESpeak-NG (for Kokoro-TTS):
Either download the installer via the official releases on GitHub, or via an admin PowerShell, run the below and enter Y when prompted:
winget install --id=eSpeak-NG.eSpeak-NG -e
Tested with v1.52 as of Nov-2025
Install FFMpeg:
The specific version is related to TochCodec (specified in reqs_speech.txt, but more on this in a bit), which states that, "TorchCodec with CUDA should work with FFmpeg versions in [4, 7] on all platforms, and FFmpeg version 8 is supported on Linux.", and "TorchCodec for CPU supports major FFmpeg versions in [4, 7] on all platforms, and FFmpeg version 8 is supported on Mac and Linux."
Also, a Torchcodec-Torch-Python version compatibility table can be found on the pages linked above.
That said, I had no issues with the latest FFmpeg v8 build on Windows, but no harm sticking to the recommendation above!
Having determined the version, Download the SHARED (V.IMP!) version of FFmpeg from this link, for example ffmpeg-7.1.1-full_build-shared.7z or for v8, ffmpeg-release-full-shared.7z
Unzip and add the bin directory to PATH in System Variables: <full-path>\ffmpeg-7.1.1-full_build-shared\bin
Verify installation via a CMD window:
ffmpeg -version
To verify GPU acceleration, run:
ffmpeg -encoders | findstr nvenc
And look for a list of Nvidia Encoders (nvenc), such as:
V....D av1_nvenc            NVIDIA NVENC av1 encoder (codec av1)
V....D h264_nvenc           NVIDIA NVENC H.264 encoder (codec h264)
V....D hevc_nvenc           NVIDIA NVENC hevc encoder (codec hevc)
There's one last step, which we'll come back to it after the next step.
Install Python Libs:
Determine the correct version of TorchCodec by cross-referencing the Official Support-Matrix with the version of PyTorch installed previously in Installation - Step 7
Edit line 2 in the reqs_speech.txt file accordingly, and then install:
pip install -r reqs_speech.txt
NOTE: If encountering Nvidia/Nemo-Toolkit errors when installing on system without Nvidia GPUs and CUDA, edit the reqs_speech.txt file to remove nemo_toolkit and re-try.
Install nemo-asr dependencies (may not work without an Nvidia GPU!):
pip install nemo_toolkit['asr']
This might change the version of NumPy & Transformers to one incompatible with other dependencies, so lastly:
pip install numpy==2.2.6
pip install transformers==4.57.3
Recommended ASR Settings in Privion:
ASR Model: Nvidia/Parakeet-tdt-0.6B-v2 (v3 for multi-lingual)
ASR Torch Device: cuda:0
Copy FFmpeg bin dir contents to the TorchCodec dir:
This is a brute-force method that technically shouldn't be required as FFmpeg has been added to path, but was the only way to resolve a nasty error encountered when running ASR models:
[start of libtorchcodec loading traceback]
FFmpeg version 7: Could not find module 'C:\Users\bob\AppData\Local\Programs\Python\Python311\Lib\site-packages\torchcodec\libtorchcodec_core7.dll' (or one of its dependencies). Try using the full path with constructor syntax.
FFmpeg version 6: Could not find module 'C:\Users\bob\AppData\Local\Programs\Python\Python311\Lib\site-packages\torchcodec\libtorchcodec_core6.dll' (or one of its dependencies). Try using the full path with constructor syntax.
FFmpeg version 5: Could not find module 'C:\Users\bob\AppData\Local\Programs\Python\Python311\Lib\site-packages\torchcodec\libtorchcodec_core5.dll' (or one of its dependencies). Try using the full path with constructor syntax.
FFmpeg version 4: Could not find module 'C:\Users\bob\AppData\Local\Programs\Python\Python311\Lib\site-packages\torchcodec\libtorchcodec_core4.dll' (or one of its dependencies). Try using the full path with constructor syntax.
[end of libtorchcodec loading traceback].
To mitigate the above, copy everything from the FFmpeg bin dir that was added to path previously to the location where the TorchCodec package was installed. Example:
<full-path>\ffmpeg-7.1.1-full_build-shared\binC:\Users\<username>\AppData\Local\Programs\Python\Python311\Lib\site-packages\torchcodec\This is why we downloaded the shared version of FFmpeg earlier: The other versions only have the FFmpeg executables but not the DLLs!
ExLlama is a highly optimized LLM inference library specifically for consumer GPUs.
LARS-Enterprise/Privion supports ExLlamaV2 and ExLlamaV3 natively via the bundled HF-Waitress LLM Server, which includes full management of both backends: The entire process of downloading and quantizing LLMs, including persistent storage of the measurements.json for exl2 and the automatic application of the necessary prompt-template format for any LLM served via either backend is completely managed by HF-Waitress - simply paste in the model's ID from HuggingFace.co!
The latest exllamav3 leverages a new State-of-the-Art (SOTA) quantization technique called QTIP
Additionally, it's built from the ground-up to support modern LLM architectures as recent LLMs have increasingly diverged away from the basic LLaMa architecure, including a rise of hybrid Transformer-Mamba architecture LLMs coupled with cutting-edge advances in inferencing efficiency (via multi-token prediction etc).
Supporting these by retrofitting the heavily LLaMa-based ExLlamaV2 became increasingly difficult with time, and with the rise in popularity of Tensor Parallelism for multiple-GPU inferencing, ExLlama had to be rebuilt from the ground-up to serve modern requirements.
Thus we have the latest ExLlamaV3, which is still in its infancy and early development cycle so keep an eye on the official repo!
While ExLlamaV2 is compatible with a host of GPUs, ExLlamaV3 presently only supports Nvidia GPUs. Check the official repos and install either/both accordingly!
On a system with Nvidia GPUs, if you wish to install only one of these backends, go with exllamav3. However, it's recommended to install both as v2 is more mature and can serve as a fallback for v3.
Do NOT set this up in a location that's synced by a cloud-backup service, such as OneDrive! This is because a lot of files are created & updated during quantizing and deleted during or thereafter, and cloud-syncing services will hold permissions hostage as they attempt to upload backups. If unavoidable, make sure to disable the cloud-backup service temporarily when quantizing models.
Special Note On Windows/OS Reinstalls: If this application was setup in a location synced by OneDrive, all files may appear to be present after an OS re-install. However, when disabling OneDrive as per the note above for quantizing models, errors may be encountered. This is because while all files show up in Explorer, they aren't actually downloaded by OneDrive unless required, which then leads to an error as OneDrive isn't running! Terrible UX from MS, but resolving this is simple: delete the exllamav2 and exllamav3 dirs as HF-Waitress will reclone them on load.
ENSURE YOU'RE DOING THIS AFTER INSTALLING FLASH ATTENTION 2 AND POST FIRST-RUN! SEE BELOW FOR FULL DETAILS:
Since the bundled HF-Waitress LLM server includes full management of ExLlama, both repos with be auto-cloned by HF-Waitress when it loads up.
It's very important to run the pip installation from within these cloned dirs! See below for details.
The requirements.txt file does not contain exllamav2 and exllamav3 for a reason: installing via pip install exllamav2 exllamav3 while quantizing models via the scripts in the cloned repos will result in errors! Simply put, for some reason, the pip installs of exllama are not compatible with the cloned repos of exllama that we use for quantization!
So the correct procedure for installation of the exl backends is to work through the below steps:
localhost:5000 via the browser and complete first loadexllamav2 and exllamav3 repos would have been cloned from GitHub and dirs of those names will be found in LARS-Enterprise\web_appcd LARS-Enterprise\web_app\exllamav2
pip install . --no-build-isolation --no-deps
# After completion, repeat for v3:
cd LARS-Enterprise\web_app\exllamav3
pip install . --no-build-isolation --no-deps
--no-build-isolation flag is crucial as newer versions of PIP strictly enforce the PEP 517 standard wherein a hermetically sealed (airtight) "clean room" is created for the build
Cannot precompile unless torch is installed.--verbose flag: pip install . -vpip uninstall -y exllamav2 exllamav3
cd web_app/exllamav2
pip install . -v
Ignoring the above steps will result in a cryptic error pertaining to Ninja when attempting quantization, with a collosal and completely useless traceback!
Specifically, the error will be along the lines of subprocess.CalledProcessError: Command '['ninja', '-v']' returned non-zero exit status 1104.
LLMs, even the likes of Gemini-3 and GPT5 etc will be unable to assist in resolving this - they'll fixate on the error code as LNK1104: cannot open file points to a Windows-Linker error caused by file permissions or other issues and they'll insist it's a hung Python process or other issues with Ninja, CUDA, and Visual Studio / CMake on Windows.
However the error has nothing to do with Ninja, VS, CUDA or anything of the like and is simply a mismatch between the pip installed and git cloned versions of ExLlama! So, if this error is encountered, the solution is to simply pip uninstall -y exllamav2 exllamav3, followed by pip install . from with the exllamav2 and exllamav3 dirs as detailed above!
If you do encounter the above error, it is however a good idea to validate that Ninja is correctly installed - via Git Bash:
ninja --version
echo $?     # should return exit-code 0
If the exit-code from the above is anything other than 0, then pip uninstall -y ninja and pip install ninja and retry, however this is unlikely to be an issue!
Lastly of note, pip install exllamav2 exllamav3 will install the Just-In-Time (JIT) compile versions of these packages, which leads to very slow startup times for HF-Waitress as the backends must be compiled on load, while performing pip install . from within the cloned repos builds the entire package and allows for near-instant startup of the HF-Waitress server.
In case you encounter Permission Errors when quantizing models with ExLlama, try the following:
FIRSTLY, see the above sections on OneDrive & the proper installation procedures!!
OneDrive is the most likely culprit if on a synced folder so make sure to disable it, even if temporarily.
If that doesn't work/apply, try running python hf_waitress.py --exl2 (or --exl3 depending on which backend you were trying to run) via an Admin shell from within the LARS-Enterprise/web_app dir.
If all else fails, try uninstalling and re-installing via an Admin shell: run pip uninstall exllamav2 -y, delete the entire exllamav2 directory, re-clone and re-install, and retry quantization via python hf_waitress.py --exl2 from within the LARS-Enterprise/web_app dir. Again, swap for exl3 depending on what you were trying to run.
After installing, run LARS using:
cd web_app
python app.py   # Use 'python3' on Linux/macOS
Navigate to http://localhost:5000/ in your browser
All application directories required by LARS will now be created on disk
The HF-Waitress server will automatically start and will download an LLM (Qwen/Qwen2.5-1.5B-Instruct) on the first-run, which may take a while depending on your internet connection speed
On first query, an embedding model (all-mpnet-base-v2) will be downloaded from HuggingFace Hub, which should take a brief time
NOTE: ASR & TTS are not enabled by default, and must be enabled manually via the Settings menu!
Windows 11 by default now only exposes a 'Balanced' powerplan, with no straight forward way to add a higher performance mode.
The issue with this is that when running an application like Privion with several background processes, responsiveness can suffer on laptops even when plugged in.
However, an 'Ultimate Performance' powerplan can be enabled which really helps with overall system responsiveness, even when unplugged!
So it's highly recommended to follow the below steps:
From an Admin PowerShell, run:
powercfg -duplicatescheme e9a42b02-d5df-448d-aa00-03f14749eb61
There'll be an output like: Power Scheme GUID: ced6a11f-6240-47fd-a32a-7020739e7a2b (Ultimate Performance)
Use the GUID (changes everytime!) to activate the plan - Run:
powercfg -setactive ced6a11f-6240-47fd-a32a-7020739e7a2b
Now, an 'Ultimate Performance' powerplan will show up in Control Panel/Hardware and Sound/Power Options
However, this will vanish after a reboot or anytime you manually switch back to the Balanced powerplan, necessitating a re-do of both the above steps.
Installing 'Powerplan Switcher' from the MS Store is highly recommended to easily switch powerplans as required!
Occasionally, a new LLM architecture might require the installation of Transformers from source, as the stable pip version may not be equipped to support the new model.
In this case, install from source with the understanding that overall stability may be impacted - in almost all cases it's better to wait for a stable release!
pip uninstall -y transformers
pip install git+https://github.com/huggingface/transformers
Two Approaches: Either download a pre-built release or clone the repo and build manually
While the former is easier, often CUDA does not work right, and high CPU usage might be observed even with full GPU offloading, so building from scratch is often the best practice
If setting up a pre-built version, skip straight to the last two steps in this section (i.e. add to PATH and Test)
To self-build, start by downloading the Source code (zip) of the latest release from the Official Repo's Releases Page
Ensure VS20222 & VSBuildTools (both with CMake) are installed if on Windows as per Dependencies & Requirements #2
Launch a Visual Studio Developer PowerShell from Start Menu -> Visual Studio 2022 -> Developer PowerShell for VS2022
You might see two versions of the above Developer PowerShell for VS2022 and Developer PowerShell for VS2022(2), this is due to the VS2022 + VSBuildTools installation and is no issue, launch either (I just go with the VS2022 prompt rather than the BuildTools (2) prompt)
NOTE: In case cmake fails with an unrecognized error, run the following command within the Developer PowerShell and retry:
& "C:\Program Files\Microsoft Visual Studio\2022\Community\Common7\Tools\Launch-VsDevShell.ps1" -Arch amd64 -HostArch amd64
Build llama.cpp with CMAKE:
Note: For faster compilation, add the -j argument to run multiple jobs in parallel. For example, cmake --build build --config Release -j 8 will run 8 jobs in parallel.
Open a command window in llama.cpp dir
Build with CUDA (see notes below BEFORE running):
cmake -B build -DGGML_CUDA=ON -DCMAKE_CUDA_ARCHITECTURES="52;61;70;75;80;86"
cmake --build build  --config Release -j 8
NOTE: Check the Official llama.cpp CUDA Guide for the latest instructions
Check Nvidia's CUDA GPU Compatibility Chart here. Example:
# If building on a system with a 3090 and a 5090, which have CUDA compatibility 8.6 and 12.0 respectively, set archs as follows:
cmake -B build -DGGML_CUDA=ON -DCMAKE_CUDA_ARCHITECTURES="86;120"
NOTE: In case Flash Attention is setup on your system and llama.cpp will be run with -fa=on/auto, ensure the following lauch arg is included too:
cmake -B build -DGGML_CUDA=ON -DCMAKE_CUDA_ARCHITECTURES="86;120" -DGGML_CUDA_FA_ALL_QUANTS=ON
What it does in practice:
Without the flag (default OFF): Only three FlashAttention vector kernel variants are compiled — q4_0, q8_0, and f16 (K and V types must match).
With the flag (ON): All fattn-vec*.cu template instances are compiled, enabling every KV cache quantization type combination (e.g., different quant types for K and V caches, plus additional model quant types like q4_1, q5_0, q5_1 and notable, Unsloth UD_K_XL quants). The tradeoff is significantly longer compilation times.
NOTE: Flash-Attention is REQUIRED for KV-cache quantization!
Build without CUDA:
cmake -B build
cmake --build build  --config Release -j 8
If you face issues when attempting to run CMake -B build, check the extensive CMake Installation Troubleshooting steps below
Add to PATH: path_to_cloned_repo\llama.cpp\build\bin\Release
Verify Installation via the terminal:
llama-server
This is an optional, but highly recommended dependency - Only PDFs are supported if this setup is not completed
Windows:
Download from the Official Site
Add to PATH, either via:
Advanced System Settings -> Environment Variables -> System Variables -> EDIT PATH Variable -> Add the below (change as per your installation location):
C:\Program Files\LibreOffice\program
Or via PowerShell:
Set PATH=%PATH%;C:\Program Files\LibreOffice\program
Ubuntu & Debian-based Linux - Download from the Official Site or install via terminal:
sudo apt-get update
sudo apt-get install -y libreoffice
Fedora and other RPM-based distros - Download from the Official Site or install via terminal:
sudo dnf update
sudo dnf install libreoffice
MacOS - Download from the Official Site or install via Homebrew:
brew install --cask libreoffice
Verify Installation:
On Windows and MacOS: Run the LibreOffice application
On Linux via the terminal:
libreoffice --version
LARS utilizes the pdf2image Python library to convert each page of a document into an image as required for OCR. This library is essentially a wrapper around the Poppler utility which handles the conversion process.
Windows:
Download from the Official Repo
Add to PATH, either via:
Advanced System Settings -> Environment Variables -> System Variables -> EDIT PATH Variable -> Add the below (change as per your installation location):
path_to_installation\poppler_version\Library\bin
Or via PowerShell:
Set PATH=%PATH%;path_to_installation\poppler_version\Library\bin
Linux:
sudo apt-get update
sudo apt-get install -y poppler-utils wget
This is an optional dependency - Tesseract-OCR is not actively used in LARS but methods to use it are present in the source code
Windows:
Download Tesseract-OCR for Windows via UB-Mannheim
Add to PATH, either via:
Advanced System Settings -> Environment Variables -> System Variables -> EDIT PATH Variable -> Add the below (change as per your installation location):
C:\Program Files\Tesseract-OCR
Or via PowerShell:
Set PATH=%PATH%;C:\Program Files\Tesseract-OCR
LARS has been built and tested with Python v3.11.x
Install Python v3.11.x on Windows:
Download and install Python 3.11.5 (should also work with any 3.10.x or 3.11.x versions)
During installation, ensure you check "Add Python 3.11 to PATH" or manually add it later, either via:
Advanced System Settings -> Environment Variables -> System Variables -> EDIT PATH Variable -> Add the below (change as per your installation location):
C:\Users\user_name\AppData\Local\Programs\Python\Python311\
Or via PowerShell:
Set PATH=%PATH%;C:\Users\user_name\AppData\Local\Programs\Python\Python311
Install Python v3.11.x on Linux (Ubuntu and Debian-based):
sudo add-apt-repository ppa:deadsnakes/ppa -y
sudo apt-get update
sudo apt-get install -y python3.11 python3.11-venv python3.11-dev
sudo python3.11 -m ensurepip
Verify Installation via the terminal:
python3 --version
For issues with specific packages or cached wheels, try the following:
Rebuild packages without using cached wheels or pre-compiled binaries:
pip install ninja --no-binary ninja --no-cache-dir
Inspect local cache for a specific package:
pip cache list ninja
pip cache list flash_attn
Remove local cache for a specified package:
pip cache remove ninja
Inspect and if necessary, purge local cache:
Get an overview of the current cache, including total size and directory location:
pip cache info
Show all wheel files currently stored in the cache:
pip cache list
Show the exact file path where the cache is located on your system:
pip cache dir
Clear everything stored in pip's local cache:
pip cache purge
If you encounter errors with pip install, try the following:
Remove version numbers:
==version.number segment, for example:urllib3==2.0.4urllib3Create and use a Python virtual environment:
NOTE: THIS IS NOT ADVISABLE FOR NOW AS A NUMBER OF PROCESS ARE LAUNCHED BY PRIVION WHICH WILL FAIL AS THEY MIGHT START IN THE GLOBAL NAMESPACE! RETAINING THIS SECTION FOR REF BUT DO NOT DO THIS FOR NOW!
It's advisable to use a virtual environment to avoid conflicts with other Python projects
Windows:
Create a Python virtual environment (venv):
python -m venv larsenv
Activate, and subsequently use, the venv:
.\larsenv\Scripts\activate
Deactivate venv when done:
deactivate
Linux and MacOS:
Create a Python virtual environment (venv):
python3 -m venv larsenv
Activate, and subsequently use, the venv:
source larsenv/bin/activate
Deactivate venv when done:
deactivate
If problems persist, consider opening an issue on the LARS GitHub repository for support.
CMake nmake failed error when attempting to build llama.cpp such as below:

Ensure you've followed llama.cpp setup instructions mentioned above, especially trying the & ... -Arch amd64 -HostArch amd64 command in the Developer PowerShell.
Ensure Visual Studio Build Tools are Installed:
Make sure you have the Visual Studio build tools installed, including cmake. You can install these tools through the Visual Studio Installer by selecting the Desktop development with C++ workload, and the MSVC and C++ CMake Optionals
Check Step 0 of the Dependencies section, specifically the screenshot therein
Check Environment Variables:
C:\Program Files (x86)\Microsoft Visual Studio\2019\Community\VC\Auxiliary\Build
C:\Program Files (x86)\Microsoft Visual Studio\2019\Community\Common7\IDE
C:\Program Files (x86)\Microsoft Visual Studio\2019\Community\Common7\Tools
Use Developer Command Prompt:
Open a "Developer Command Prompt for Visual Studio" which sets up the necessary environment variables for you
You can find this prompt from the Start menu under Visual Studio
Set CMake Generator:
cmake -G "NMake Makefiles" -B build -DLLAMA_CUDA=ON
If problems persist, consider opening an issue on the LARS GitHub repository for support.
On WSL, if installing pip packages fails with UNKNOWN, be sure to update PIP: python3 -m pip install --upgrade pip
Eventually (after approximately 60 seconds) you'll see an alert on the page indicating an error:
Failed to start llama.cpp local-server
This indicates that first-run has completed, all app directories have been created, but no LLMs are present in the models directory and may now be moved to it
Move your LLMs (any file format supported by llama.cpp, preferably GGUF) to the newly created models dir, located by default in the following locations:
C:/web_app_storage/models/app/storage/models/app/modelsOnce you've placed your LLMs in the appropriate models dir above, refresh http://localhost:5000/
You may once again receive an error alert stating Failed to start llama.cpp local-server after approximately 60 seconds
This is because your LLM might need to be manually selected via Settings
Accept the alert and click on the Settings gear icon in the top-right
In the LLM Selection tab, select your LLM and the appropriate Prompt-Template format from the appropriate dropdowns
Modify Advanced Settings to correctly set GPU options, the Context-Length, and optionally, the token generation limit (Maximum tokens to predict) for your selected LLM
Hit Save and if an automatic refresh is not triggered, manually refresh the page
If all steps have been executed correctly, first-time setup is now complete, and LARS is ready for use
LARS will also remember your LLM settings for subsequent use
Document Formats Supported:
If LibreOffice is installed and added to PATH as detailed in Step 4 of the Dependencies section, the following formats are supported:
If LibreOffice is not setup, only PDFs are supported
OCR Options for Text Extraction:
LARS provides three methods for extracting text from documents, accommodating various document types and quality:
Local Text Extraction: Uses PyPDF2 for efficient text extraction from non-scanned PDFs. Ideal for quick processing when high accuracy is not critical, or entirely local processing is a necessity.
Azure ComputerVision OCR - Enhances text extraction accuracy and supports scanned documents. Useful for handling standard document layouts. Offers a free tier suitable for initial trials and low-volume use, capped at 5000 transactions/month at 20 transactions/minute.
Azure AI Document Intelligence OCR - Best for documents with complex structures like tables. A custom parser in LARS optimizes the extraction process.
NOTES:
Azure OCR options incur API-costs in most cases and are not bundled with LARS.
A limited free-tier for ComputerVision OCR is available as linked above. This service is cheaper overall but slower and may not work for non-standard document layouts (other than A4 etc).
Consider the document types and your accuracy needs when selecting an OCR option.
LLMs:
Only local-LLMs are presently supported
The Settings menu provides many options for the power-user to configure and change the LLM via the LLM Selection tab
Note if using llama.cpp: Very-Important: Select the appropriate prompt-template format for the LLM you're running
LLMs trained for the following prompt-template formats are presently supported via llama.cpp:
Tweak Core-configuration settings via Advanced Settings (triggers LLM-reload and page-refresh):
Tweak settings to change response behavior at any time:
Embedding models and Vector Database:
Four embedding models are provided in LARS:
With the exception of the Azure-OpenAI embeddings, all other models run entirely locally and for free. On first run, these models will be downloaded from the HuggingFace Hub. This is a one-time download and they'll subsequently be present locally.
The user may switch between these embedding models at any time via the VectorDB & Embedding Models tab in the Settings menu
Docs-Loaded Table: In the Settings menu, a table is displayed for the selected embedding model displaying the list of documents embedded to the associated vector-database. If a document is loaded multiple times, it’ll have multiple entries in this table, which could be useful for debugging any issues.
Clearing the VectorDB: Use the Reset button and provide confirmation to clear the selected vector database. This creates a new vectorDB on-disk for the selected embedding model. The old vectorDB is still preserved and may be reverted to by manually modifying the config.json file.
Edit System-Prompt:
The System-Prompt serves as an instruction to the LLM for the entire conversation
LARS provides the user with the ability to edit the System-Prompt via the Settings menu by selecting the Custom option from the dropdown in the System Prompt tab
Changes to the System-Prompt will start a new chat
Force Enable/Disable RAG:
Via the Settings menu, the user may force enable or disable RAG (Retrieval Augmented Generation – the use of content from your documents to improve LLM-generated responses) whenever required
This is often useful for the purpose of evaluating LLM responses in both scenarios
Force disabling will also turn off attribution features
The default setting, which uses NLP to determine when RAG should and shouldn’t be performed, is the recommended option
This setting can be changed at any time
Chat History:
Use the chat history menu on the top-left to browse and resume prior conversations
Very-Important: Be mindful of prompt-template mismatches when resuming prior conversations! Use the Information icon on the top-right to ensure the LLM used in the prior-conversation, and the LLM presently in use, are both based on the same prompt-template formats!
User rating:
Each response may be rated on a 5-point scale by the user at any time
Ratings data is stored in the chat-history.db SQLite3 database located in the app directory:
C:/web_app_storage/app/storage/appRatings data is very valuable for evaluation and refinement of the tool for your workflows
Dos and Don’ts:
If a chat goes awry, or any odd responses are generated, simply try starting a New Chat via the menu on the top-left
Alternatively, start a new chat by simply refreshing the page
If issues are faced with citations or RAG performance, try resetting the vectorDB as described in Step 4 of the General User Guide above
If any application issues crop up and are not resolved simply by starting a new chat or restarting LARS, try deleting the config.json file by following the steps below:
CTRL+Cconfig.json file located in LARS/web_app (same directory as app.py)For any severe data and citation issues that are not resolved even by resetting the VectorDB as described in Step 4 of the General User Guide above, perform the following steps:
CTRL+CC:/web_app_storage/app/storage/appIf problems persist, consider opening an issue on the LARS GitHub repository for support.
NOTE: THE BELOW IS MAINTAINED FOR LEGACY REASONS BUT NO LONGER SUPPORTED NOR RECOMMENDED. DO NOT FOLLOW THESE STEPS, THERE MAY BE A CONTAINER UPDATE IN THE FUTURE, BUT IT'S CURRENTLY NON-FUNCTIONAL.
LARS has been adapted to a Docker container-deployment environment via two separate images as below:
Both have different requirements with the former being a simpler deployment, but suffering far slower inferencing performance due to the CPU and DDR memory acting as bottlenecks
While not explicitly required, some experience with Docker containers and familiarity with the concepts of containerization and virtualization will be very helpful in this section!
Beginning with common setup steps for both:
Installing Docker
Your CPU should support virtualization and it should be enabled in your system's BIOS/UEFI
Download and install Docker Desktop
If on Windows, you may need to install the Windows Subsystem for Linux if it's not already present. To do so, open PowerShell as an Administrator and run the following:
wsl --install
Ensure Docker Desktop is up and running, then open a Command Prompt / Terminal and execute the following command to ensure Docker is correctly installed and up and running:
docker ps
Create a Docker storage volume, which will be attached to the LARS containers at runtime:
Creating a storage volume for use with the LARS container is highly advantageous as it'll allow you to upgrade the LARS container to a newer version, or switch between the CPU & GPU container variants while persisting all your settings, chat history and vector databases seamlessly.
Execute the following command in a Command Prompt / Terminal:
docker volume create lars_storage_volue
This volume will be attached to the LARS container later at runtime, for now proceed to building the LARS image in the steps below.
In a Command Prompt / Terminal, execute the following commands:
git clone https://github.com/abgulati/LARS  # skip if already done

cd LARS # skip if already done

cd dockerized

docker build -t lars-no-gpu .

# Once the build is complete, run the container:

docker run -p 5000:5000 -p 8080:8080 -v lars_storage:/app/storage lars-no-gpu
Once done, Navigate to http://localhost:5000/ in your browser and follow the remainder of the First Run Steps and User Guide
The Troubleshooting sections applies to Container-LARS as well
Requirements (in addition to Docker):
Compatible Nvidia GPU(s)
Nvidia GPU drivers
Nvidia CUDA Toolkit v12.2
For Linux, you're all set up with the above so skip the next step and head directly to the build and run steps further below
If on Windows, and if this is your first time running an Nvidia GPU container on Docker, strap in as this is going to be quite the ride (favorite beverage or three highly recommended!)
Risking extreme redundancy, before proceeding ensure the following dependencies are present:
Compatible Nvidia GPU(s)
Nvidia GPU drivers
Nvidia CUDA Toolkit v12.2
Docker Desktop
Windows Subsystem for Linux (WSL)
Refer to the Nvidia CUDA Dependencies section and the Docker Setup section above if unsure
If the above are present and setup, you're clear to proceed
Open the Microsoft Store app on your PC, and download & install Ubuntu 22.04.3 LTS (must match the version on line 2 in the dockerfile)
Yes you read the above right: download and install Ubuntu from the Microsoft store app, refer screenshot below:

It's now time to install the Nvidia Container Toolkit within Ubuntu, follow the steps below to do so:
Launch an Ubuntu shell in Windows by searching for Ubuntu in the Start-menu after the installation above is completed
In this Ubuntu command-line that opens, perform the following steps:
Install the prerequisites:
sudo apt-get update && sudo apt-get install -y --no-install-recommends \
ca-certificates \
curl \
gnupg2
Configure the production repository:
curl -fsSL https://nvidia.github.io/libnvidia-container/gpgkey | sudo gpg --dearmor -o /usr/share/keyrings/nvidia-container-toolkit-keyring.gpg \
    && curl -s -L https://nvidia.github.io/libnvidia-container/stable/deb/nvidia-container-toolkit.list | \
        sed 's#deb https://#deb [signed-by=/usr/share/keyrings/nvidia-container-toolkit-keyring.gpg] https://#g' | \
        sudo tee /etc/apt/sources.list.d/nvidia-container-toolkit.list
Update the packages list from the repository & Install the Nvidia Container Toolkit Packages:
sudo apt-get update
Install the NVIDIA Container Toolkit packages:
export NVIDIA_CONTAINER_TOOLKIT_VERSION=1.19.0-1
sudo apt-get install -y \
    nvidia-container-toolkit=${NVIDIA_CONTAINER_TOOLKIT_VERSION} \
    nvidia-container-toolkit-base=${NVIDIA_CONTAINER_TOOLKIT_VERSION} \
    libnvidia-container-tools=${NVIDIA_CONTAINER_TOOLKIT_VERSION} \
    libnvidia-container1=${NVIDIA_CONTAINER_TOOLKIT_VERSION}
[Optional] Install CUDA (in WSL):
Do NOT install NVIDIA Linux display drivers inside WSL. Since NVIDIA drivers are already working on the native Windows 11 host, they are automatically "mapped" into your WSL 2 environment through a process called GPU Paravirtualization.
On the CUDA download page, select Linux->x86_64->WSL->2.0->local runfile which then provides the following instructions:
wget https://developer.download.nvidia.com/compute/cuda/12.8.1/local_installers/cuda_12.8.1_570.124.06_linux.run
sudo sh cuda_12.8.1_570.124.06_linux.run
On running sudo sh cuda_12.8.1_570.124.06_linux.run, a text-based menu will appear in your terminal. Follow these steps:
The wsl cmd may blank out when trying to select driver options, and pressing enter after a while may show Segmentation fault (core dumped)
That Segmentation fault is a common headache with the CUDA .run file in WSL. It usually happens because the installer's "ncurses" UI (the interactive menu) crashes when trying to render in the WSL terminal.
Bypass this by running in silent mode:
sudo sh cuda_12.8.1_570.124.06_linux.run --silent --toolkit --no-opengl-libs
Once it finishes (it might take a minute and won't show a progress bar), check if the directory exists:
ls /usr/local/cuda-12.8
Now, add these new paths to ~/.bashrc automatically so nvcc starts working:
echo 'export PATH=/usr/local/cuda-12.8/bin${PATH:+:${PATH}}' >> ~/.bashrc
echo 'export LD_LIBRARY_PATH=/usr/local/cuda-12.8/lib64${LD_LIBRARY_PATH:+:${LD_LIBRARY_PATH}}' >> ~/.bashrc
And restart to apply changes:
source ~/.bashrc
Test:
nvcc --version
nvidia-smi
Now your Ubuntu setup is complete, time to complete the WSL and Docker Integrations:
Open a new PowerShell window and set this Ubuntu installation as the WSL default:
wsl --list
wsl --set-default Ubuntu-22.04 # if not already marked as Default
Navigate to Docker Desktop -> Settings -> Resources -> WSL Integration -> Check Default & Ubuntu 22.04 integrations. Refer to the screenshot below:

Now if everything has been done correctly, you're ready to build and run the container!
In a Command Prompt / Terminal, execute the following commands:
git clone https://github.com/abgulati/LARS  # skip if already done

cd LARS # skip if already done

cd dockerized_nvidia_cuda_gpu

docker build -t lars-nvcuda .

# Once the build is complete, run the container:

docker run --gpus all -p 5000:5000 -p 8080:8080 -v lars_storage:/app/storage lars-nvcuda
Once done, navigate to http://localhost:5000/ in your browser and follow the remainder of the First Run Steps and User Guide
The Troubleshooting sections applies to Container-LARS as well
In case you encounter Network-related errors, especially pertaining to unavailable package repositories when building the container, this is a networking issue at your end often pertaining to Firewall issues
On Windows, navigate to Control Panel\System and Security\Windows Defender Firewall\Allowed apps, or search Firewall in the Start-Menu and head to Allow an app through the firewall and ensure ```Docker Desktop Backend`` is allowed through
The first time you run LARS, the sentence-transformers embedding model will be downloaded
In the containerized environment, this download can sometimes be problematic and result in errors when you ask a query
If this occurs, simply head to the LARS Settings menu: Settings->VectorDB & Embedding Models and change the Embedding Model to either BGE-Base or BGE-Large, this will force a reload and redownload
Once done, proceed to ask questions again and the response should generate as normal
You can switch back to the sentence-transformers embedding model and the issue should be resolved
As stated in the Troubleshooting section above, embedding models are downloaded the first time LARS runs
It's best to save the state of the container before shutting it down so this download step need-not be repeated every subsequent time the container is launched
To do so, open another Command Prompt / Terminal and commit changes BEFORE shutting the running LARS container:
docker ps # note the container_id here

docker commit <container_ID> <new_image_name>   # for new_image_name, I simply add 'pfr', for 'post-first-run' to the current image name, example: lars-nvcuda-pfr
This will create an updated image that you can use on subsequent runs:
docker run --gpus all -p 5000:5000 -p 8080:8080 -v lars_storage:/app/storage lars-nvcuda-pfr
NOTE: Having done the above, if you check the space used by images with docker images, you'll notice a lot of space used. BUT, don’t take the sizes here literally! The size shown for each image includes the total size of all its layers, but many of those layers are shared between images, especially if those images are based on the same base image or if one image is a committed version of another. To see how much disk space your Docker images are actually using, use:
docker system df
A privacy-first platform for deploying and operating open‑weight LLMs.
Python
3
1,050 commits
updated Sep 30, 2026
Privion is a versatile AI application focused on privacy and offline inferencing, capable of leveraging a multitude of open-source LLMs to perform a range of diverse tasks. Privion's current feature set includes:
Advanced RAG Capabilities:
Butler Mode:
Advanced LLM Platform:
Download and install the Visual Studio IDE:
NOTE: The latest VS 2026 is NOT compatible with CUDA yet! Make sure to install VS 2022!
However, MS has decided to play dirty since releasing VS2026, and has not only obsured the location of its download page, but also mandates a sign-in to your MS/GitHub account to download it! Trusted third party download sites come to the rescue here.
Pick your preferred source accordingly:
GitHub-Gist (RECOMMENDED - Also contains link for VS-BuildTools)
NOTE: Make sure to select "Desktop Development with C++"!
Required by Nvidia-CUDA on Windows specifically for MSVC (Microsoft Visual C++) Compiler
CUDA integrates into MS Visual Studio in various ways, facilitating development, debugging and profiling, which may not be available with other IDEs.
See above section for notes on VS2026 and download BuildTools for VS2022 from your preferred link below:
NOTE: Scroll down to "Tools for Visual Studio"
NOTE: When installing the above, make sure to select the following components:
Desktop development with C++
# Then from the "Optional" category on the right, make sure to select the following:
MSVC C++ x64/x86 build tools
C++ CMake tools for Windows
Refer to the screenshot below:
Desktop development with C++ workload and the MSVC and C++ CMake Optionals are selected as outlined aboveDownload and install Nvidia's CUDA Toolkit
NOTE: LARS built and tested with v12.2 and v12.4.1 on Ampere & Ada GPUs, and v12.8.1 on Ada & Blackwell GPUs
NOTE: Make sure to "Visual-Studio integration" is selected at the time of installation!
To verify the installation:
Basic Check via Terminal:
nvcc -V
nvidia-smi
Or, write & compile a Hello World Test Program:
Save the following as hello.cu:
#include <stdio.h>
#include <cuda_runtime.h>

__global__ void helloCUDA()
{
    printf("Hello from the GPU!\n");
}

int main()
{
    printf("Starting CUDA program...\n");

    int deviceCount;
    cudaGetDeviceCount(&deviceCount);
    printf("Number of CUDA devices: %d\n", deviceCount);

    if (deviceCount > 0) {
        helloCUDA<<<1, 1>>>();
        cudaDeviceSynchronize();

        cudaError_t error = cudaGetLastError();
        if (error != cudaSuccess) {
            printf("CUDA error: %s\n", cudaGetErrorString(error));
        }
    }

    printf("CUDA program finished.\n");
    return 0;
}
Add cl.exe to PATH (exact path may differ slightly on your setup, use the following as a guideline): C:\Program Files (x86)\Microsoft Visual Studio\2022\BuildTools\VC\Tools\MSVC\14.43.34808\bin\Hostx64\x64
Open a terminal in the same directory and compile the program: nvcc hello.cu -o hello
As it finishes compilation, you should see an output akin to the below:
hello.cu
tmpxft_0000579c_00000000-10_hello.cudafe1.cpp
Creating library hello.lib and object hello.exp
Run: ./hello
The output should be the following:
Starting CUDA program...
Number of CUDA devices: 1
Hello from the GPU!
CUDA program finished.
- Done & done!
Verify (and implement if missing) CUDA-Visual Studio Integration:
Copy all the four files from the following directory (path changes basis CUDA version):
C:\Program Files\NVIDIA GPU Computing Toolkit\CUDA\v12.2\extras\visual_studio_integration\MSBuildExtensions
and Paste them to the following directory:
C:\Program Files (x86)\Microsoft Visual Studio\2022\BuildTools\MSBuild\Microsoft\VC\v170\BuildCustomizations
3.10.x or 3.11.x versions)NOTE: Git is required by the automated installer script
Download and install Git
NOTE: Override default branch name from 'master' to 'main' during installation!
Clone the repository:
git clone https://github.com/abgulati/LARS-Enterprise
cd LARS-Enterprise
GitHub Settings -> Developer settings (located on the bottom left!) -> Personal access tokensPrivion uses Docker to pull & run the latest FalkorDB Graph Database container - without Docker, GraphRAG features will NOT work!
Your CPU should support virtualization, and it should be enabled in your system's BIOS/UEFI
If on Windows, you need to install the Windows Subsystem for Linux if it's not already present. To do so, open PowerShell as an Administrator and run the following:
wsl --install -d Ubuntu-22.04
Ensure the correct distro is set as the default:
wsl --set-default Ubuntu-22.04
Ensure you have WSL version 2 by running:
wsl -v
# or
wsl --status
Update WSL if required:
wsl --update
Download and install Docker Desktop
Ensure Docker Desktop is up and running, then open a Command Prompt / Terminal and execute the following command to ensure Docker is correctly installed and up and running:
docker ps
On Windows, run PowerShell as an Administrator and navigate (cd) to the 'installer' directory in the cloned repo
Verify the current ExecutionPolicy:
Get-ExecutionPolicy
By default, script execution is disabled for safety, enable this with:
Set-ExecutionPolicy RemoteSigned
NOTE: For security, it is recommended to revert the above once done via:
Set-ExecutionPolicy Restricted
Having installed all dependencies and verified/set a permissive ExecutionPolicy, Privion is ready for Installation via the automated script
From an Administrator PowerShell, run:
./install.ps1
NOTE: Installation may take upwards of an hour! Ensure internet access throughout. If errors are encountered midway, it's safe to rerun the script after attending to the issue.
Install Core Python Dependencies:
Windows via PIP:
pip install -r .\requirements.txt
Linux via PIP3:
pip3 install -r ./requirements.txt
Note on Azure: Some libraries are NOT available on the MacOS platform! A separate requirements_mac.txt file is therefore included for MacOS excluding these:
MacOS:
pip3 install -r ./requirements_mac.txt
If Using Smart-Home Automation Features, Install Butler Requirements:
pip install -r reqs_butler.txt
Install Pytorch
NOTE: LARS built and tested with Pytorch v2.5.0 with CUDA 12.4.1 for Ampere & Ada GPUs, and Pytorch v2.9 with CUDA 12.8.1 for Ada & Blackwell GPUs
IMP: Make sure to add torchaudio to the install list (if planning to use Privion's speech features, which is recommended) as the website might not include it by default! For example:
pip3 install torch torchvision torchaudio --index-url https://download.pytorch.org/whl/cu128
Flash-Attention 2 is used to reduce the memory footprint of a model's KV-Cache context space and speed up inferencing.
It has very specific hardware and software pre-requisites, make sure to check the official repo for the most up-to-date list of requirements.
NOTE (V. Imp): Make sure that ninja is installed and that it works correctly (e.g. ninja --version then echo $? should return exit code 0). If not (sometimes ninja --version then echo $? returns a nonzero exit code), uninstall then reinstall ninja (pip uninstall -y ninja && pip install ninja). Without ninja, compiling can take a very long time (2h) since it does not use multiple CPU cores. With ninja compiling takes 3-5 minutes on a 64-core machine using CUDA toolkit.
To install:
Disable filename length limit - Git has a limit of 4096 chars for a filename which can lead to "Filename too long" errors when compiling FA2. To mitigate this, open an Admin command-prompt and run:
git config --system core.longpaths true
Clone the latest stable release (v2.7.4.post1 as of this writing, update as necessary) from the official repository:
git clone -b v2.7.4.post1 https://github.com/Dao-AILab/flash-attention.git
cd flash-attention
Open the setup.py file and uncomment (or add) the following lines to the extra_compile_args on line 287 or thereabouts:
"-DFLASHATTENTION_DISABLE_BACKWARD",
"-DFLASHATTENTION_DISABLE_DROPOUT",
"-DFLASHATTENTION_DISABLE_ALIBI",
"-DFLASHATTENTION_DISABLE_UNEVEN_K",
"-DFLASHATTENTION_DISABLE_LOCAL",
This is as per an official comment on how to reduce compilation times
Set MAX_JOBS (as per CPU thread-count) and run pip install to build (make sure Ninja is correctly installed as noted above):
On Windows:
set MAX_JOBS=20
pip install . --no-build-isolation
On Linux:
MAX_JOBS=20 pip install . --no-build-isolation
Verify Installation with Test:
# python3 CMD
import flash_attn
print(flash_attn.__version__)
Backup Wheels:
Once built, wheels can and should be backed up for reuse on the same system in the future, unless Python, Torch, CUDA and FA2 versions need to be updated.
To Backup, look for built wheels in the following location:
On Windows:
C:\Users\<username>\AppData\Local\pip\cache\wheels # PIP Wheels Location

# Example locations:

C:\Users\<username>\AppData\Local\pip\cache\wheels\3d\88\d8\284b89f56af7d5bf366b10d6b8e251ac8a7c7bf3f04203fb4f

C:\Users\<username>\AppData\Local\pip\cache\wheels\45\31\56\0ad23c683f47a2cd1854109d5f61d2b9798aadb382e5c1a656
On Linux:
/home/<username>/.cache/pip/wheels/f6/b4/f5/30df6540ed09f56a99a1138f669e1dbee729478850845504f0/flash_attn-2.5.9.post1-cp310-cp310-linux_x86_64.whl
Privion, via HF-Waitress, can leverage various Automatic Speech Recogniton (ASR) models for Speech Transcription, so you can interact using your voice.
Further, Privion can leverage the Kokoro Text-To-Speech (TTS) model and voice package to speak to the user, thereby enabling full vocal interaction.
The following ASR models are supported as of November 2025:
While the Nvidia models typically require Nvidia GPUs, the others work across a broad range of hardware via Transformers
To install these and enable both ASR & TTS, following the below steps:
Install ESpeak-NG (for Kokoro-TTS):
Either download the installer via the official releases on GitHub, or via an admin PowerShell, run the below and enter Y when prompted:
winget install --id=eSpeak-NG.eSpeak-NG -e
Tested with v1.52 as of Nov-2025
Install FFMpeg:
The specific version is related to TochCodec (specified in reqs_speech.txt, but more on this in a bit), which states that, "TorchCodec with CUDA should work with FFmpeg versions in [4, 7] on all platforms, and FFmpeg version 8 is supported on Linux.", and "TorchCodec for CPU supports major FFmpeg versions in [4, 7] on all platforms, and FFmpeg version 8 is supported on Mac and Linux."
Also, a Torchcodec-Torch-Python version compatibility table can be found on the pages linked above.
That said, I had no issues with the latest FFmpeg v8 build on Windows, but no harm sticking to the recommendation above!
Having determined the version, Download the SHARED (V.IMP!) version of FFmpeg from this link, for example ffmpeg-7.1.1-full_build-shared.7z or for v8, ffmpeg-release-full-shared.7z
Unzip and add the bin directory to PATH in System Variables: <full-path>\ffmpeg-7.1.1-full_build-shared\bin
Verify installation via a CMD window:
ffmpeg -version
To verify GPU acceleration, run:
ffmpeg -encoders | findstr nvenc
And look for a list of Nvidia Encoders (nvenc), such as:
V....D av1_nvenc            NVIDIA NVENC av1 encoder (codec av1)
V....D h264_nvenc           NVIDIA NVENC H.264 encoder (codec h264)
V....D hevc_nvenc           NVIDIA NVENC hevc encoder (codec hevc)
There's one last step, which we'll come back to it after the next step.
Install Python Libs:
Determine the correct version of TorchCodec by cross-referencing the Official Support-Matrix with the version of PyTorch installed previously in Installation - Step 7
Edit line 2 in the reqs_speech.txt file accordingly, and then install:
pip install -r reqs_speech.txt
NOTE: If encountering Nvidia/Nemo-Toolkit errors when installing on system without Nvidia GPUs and CUDA, edit the reqs_speech.txt file to remove nemo_toolkit and re-try.
Install nemo-asr dependencies (may not work without an Nvidia GPU!):
pip install nemo_toolkit['asr']
This might change the version of NumPy & Transformers to one incompatible with other dependencies, so lastly:
pip install numpy==2.2.6
pip install transformers==4.57.3
Recommended ASR Settings in Privion:
ASR Model: Nvidia/Parakeet-tdt-0.6B-v2 (v3 for multi-lingual)
ASR Torch Device: cuda:0
Copy FFmpeg bin dir contents to the TorchCodec dir:
This is a brute-force method that technically shouldn't be required as FFmpeg has been added to path, but was the only way to resolve a nasty error encountered when running ASR models:
[start of libtorchcodec loading traceback]
FFmpeg version 7: Could not find module 'C:\Users\bob\AppData\Local\Programs\Python\Python311\Lib\site-packages\torchcodec\libtorchcodec_core7.dll' (or one of its dependencies). Try using the full path with constructor syntax.
FFmpeg version 6: Could not find module 'C:\Users\bob\AppData\Local\Programs\Python\Python311\Lib\site-packages\torchcodec\libtorchcodec_core6.dll' (or one of its dependencies). Try using the full path with constructor syntax.
FFmpeg version 5: Could not find module 'C:\Users\bob\AppData\Local\Programs\Python\Python311\Lib\site-packages\torchcodec\libtorchcodec_core5.dll' (or one of its dependencies). Try using the full path with constructor syntax.
FFmpeg version 4: Could not find module 'C:\Users\bob\AppData\Local\Programs\Python\Python311\Lib\site-packages\torchcodec\libtorchcodec_core4.dll' (or one of its dependencies). Try using the full path with constructor syntax.
[end of libtorchcodec loading traceback].
To mitigate the above, copy everything from the FFmpeg bin dir that was added to path previously to the location where the TorchCodec package was installed. Example:
<full-path>\ffmpeg-7.1.1-full_build-shared\binC:\Users\<username>\AppData\Local\Programs\Python\Python311\Lib\site-packages\torchcodec\This is why we downloaded the shared version of FFmpeg earlier: The other versions only have the FFmpeg executables but not the DLLs!
ExLlama is a highly optimized LLM inference library specifically for consumer GPUs.
LARS-Enterprise/Privion supports ExLlamaV2 and ExLlamaV3 natively via the bundled HF-Waitress LLM Server, which includes full management of both backends: The entire process of downloading and quantizing LLMs, including persistent storage of the measurements.json for exl2 and the automatic application of the necessary prompt-template format for any LLM served via either backend is completely managed by HF-Waitress - simply paste in the model's ID from HuggingFace.co!
The latest exllamav3 leverages a new State-of-the-Art (SOTA) quantization technique called QTIP
Additionally, it's built from the ground-up to support modern LLM architectures as recent LLMs have increasingly diverged away from the basic LLaMa architecure, including a rise of hybrid Transformer-Mamba architecture LLMs coupled with cutting-edge advances in inferencing efficiency (via multi-token prediction etc).
Supporting these by retrofitting the heavily LLaMa-based ExLlamaV2 became increasingly difficult with time, and with the rise in popularity of Tensor Parallelism for multiple-GPU inferencing, ExLlama had to be rebuilt from the ground-up to serve modern requirements.
Thus we have the latest ExLlamaV3, which is still in its infancy and early development cycle so keep an eye on the official repo!
While ExLlamaV2 is compatible with a host of GPUs, ExLlamaV3 presently only supports Nvidia GPUs. Check the official repos and install either/both accordingly!
On a system with Nvidia GPUs, if you wish to install only one of these backends, go with exllamav3. However, it's recommended to install both as v2 is more mature and can serve as a fallback for v3.
Do NOT set this up in a location that's synced by a cloud-backup service, such as OneDrive! This is because a lot of files are created & updated during quantizing and deleted during or thereafter, and cloud-syncing services will hold permissions hostage as they attempt to upload backups. If unavoidable, make sure to disable the cloud-backup service temporarily when quantizing models.
Special Note On Windows/OS Reinstalls: If this application was setup in a location synced by OneDrive, all files may appear to be present after an OS re-install. However, when disabling OneDrive as per the note above for quantizing models, errors may be encountered. This is because while all files show up in Explorer, they aren't actually downloaded by OneDrive unless required, which then leads to an error as OneDrive isn't running! Terrible UX from MS, but resolving this is simple: delete the exllamav2 and exllamav3 dirs as HF-Waitress will reclone them on load.
ENSURE YOU'RE DOING THIS AFTER INSTALLING FLASH ATTENTION 2 AND POST FIRST-RUN! SEE BELOW FOR FULL DETAILS:
Since the bundled HF-Waitress LLM server includes full management of ExLlama, both repos with be auto-cloned by HF-Waitress when it loads up.
It's very important to run the pip installation from within these cloned dirs! See below for details.
The requirements.txt file does not contain exllamav2 and exllamav3 for a reason: installing via pip install exllamav2 exllamav3 while quantizing models via the scripts in the cloned repos will result in errors! Simply put, for some reason, the pip installs of exllama are not compatible with the cloned repos of exllama that we use for quantization!
So the correct procedure for installation of the exl backends is to work through the below steps:
localhost:5000 via the browser and complete first loadexllamav2 and exllamav3 repos would have been cloned from GitHub and dirs of those names will be found in LARS-Enterprise\web_appcd LARS-Enterprise\web_app\exllamav2
pip install . --no-build-isolation --no-deps
# After completion, repeat for v3:
cd LARS-Enterprise\web_app\exllamav3
pip install . --no-build-isolation --no-deps
--no-build-isolation flag is crucial as newer versions of PIP strictly enforce the PEP 517 standard wherein a hermetically sealed (airtight) "clean room" is created for the build
Cannot precompile unless torch is installed.--verbose flag: pip install . -vpip uninstall -y exllamav2 exllamav3
cd web_app/exllamav2
pip install . -v
Ignoring the above steps will result in a cryptic error pertaining to Ninja when attempting quantization, with a collosal and completely useless traceback!
Specifically, the error will be along the lines of subprocess.CalledProcessError: Command '['ninja', '-v']' returned non-zero exit status 1104.
LLMs, even the likes of Gemini-3 and GPT5 etc will be unable to assist in resolving this - they'll fixate on the error code as LNK1104: cannot open file points to a Windows-Linker error caused by file permissions or other issues and they'll insist it's a hung Python process or other issues with Ninja, CUDA, and Visual Studio / CMake on Windows.
However the error has nothing to do with Ninja, VS, CUDA or anything of the like and is simply a mismatch between the pip installed and git cloned versions of ExLlama! So, if this error is encountered, the solution is to simply pip uninstall -y exllamav2 exllamav3, followed by pip install . from with the exllamav2 and exllamav3 dirs as detailed above!
If you do encounter the above error, it is however a good idea to validate that Ninja is correctly installed - via Git Bash:
ninja --version
echo $?     # should return exit-code 0
If the exit-code from the above is anything other than 0, then pip uninstall -y ninja and pip install ninja and retry, however this is unlikely to be an issue!
Lastly of note, pip install exllamav2 exllamav3 will install the Just-In-Time (JIT) compile versions of these packages, which leads to very slow startup times for HF-Waitress as the backends must be compiled on load, while performing pip install . from within the cloned repos builds the entire package and allows for near-instant startup of the HF-Waitress server.
In case you encounter Permission Errors when quantizing models with ExLlama, try the following:
FIRSTLY, see the above sections on OneDrive & the proper installation procedures!!
OneDrive is the most likely culprit if on a synced folder so make sure to disable it, even if temporarily.
If that doesn't work/apply, try running python hf_waitress.py --exl2 (or --exl3 depending on which backend you were trying to run) via an Admin shell from within the LARS-Enterprise/web_app dir.
If all else fails, try uninstalling and re-installing via an Admin shell: run pip uninstall exllamav2 -y, delete the entire exllamav2 directory, re-clone and re-install, and retry quantization via python hf_waitress.py --exl2 from within the LARS-Enterprise/web_app dir. Again, swap for exl3 depending on what you were trying to run.
After installing, run LARS using:
cd web_app
python app.py   # Use 'python3' on Linux/macOS
Navigate to http://localhost:5000/ in your browser
All application directories required by LARS will now be created on disk
The HF-Waitress server will automatically start and will download an LLM (Qwen/Qwen2.5-1.5B-Instruct) on the first-run, which may take a while depending on your internet connection speed
On first query, an embedding model (all-mpnet-base-v2) will be downloaded from HuggingFace Hub, which should take a brief time
NOTE: ASR & TTS are not enabled by default, and must be enabled manually via the Settings menu!
Windows 11 by default now only exposes a 'Balanced' powerplan, with no straight forward way to add a higher performance mode.
The issue with this is that when running an application like Privion with several background processes, responsiveness can suffer on laptops even when plugged in.
However, an 'Ultimate Performance' powerplan can be enabled which really helps with overall system responsiveness, even when unplugged!
So it's highly recommended to follow the below steps:
From an Admin PowerShell, run:
powercfg -duplicatescheme e9a42b02-d5df-448d-aa00-03f14749eb61
There'll be an output like: Power Scheme GUID: ced6a11f-6240-47fd-a32a-7020739e7a2b (Ultimate Performance)
Use the GUID (changes everytime!) to activate the plan - Run:
powercfg -setactive ced6a11f-6240-47fd-a32a-7020739e7a2b
Now, an 'Ultimate Performance' powerplan will show up in Control Panel/Hardware and Sound/Power Options
However, this will vanish after a reboot or anytime you manually switch back to the Balanced powerplan, necessitating a re-do of both the above steps.
Installing 'Powerplan Switcher' from the MS Store is highly recommended to easily switch powerplans as required!
Occasionally, a new LLM architecture might require the installation of Transformers from source, as the stable pip version may not be equipped to support the new model.
In this case, install from source with the understanding that overall stability may be impacted - in almost all cases it's better to wait for a stable release!
pip uninstall -y transformers
pip install git+https://github.com/huggingface/transformers
Two Approaches: Either download a pre-built release or clone the repo and build manually
While the former is easier, often CUDA does not work right, and high CPU usage might be observed even with full GPU offloading, so building from scratch is often the best practice
If setting up a pre-built version, skip straight to the last two steps in this section (i.e. add to PATH and Test)
To self-build, start by downloading the Source code (zip) of the latest release from the Official Repo's Releases Page
Ensure VS20222 & VSBuildTools (both with CMake) are installed if on Windows as per Dependencies & Requirements #2
Launch a Visual Studio Developer PowerShell from Start Menu -> Visual Studio 2022 -> Developer PowerShell for VS2022
You might see two versions of the above Developer PowerShell for VS2022 and Developer PowerShell for VS2022(2), this is due to the VS2022 + VSBuildTools installation and is no issue, launch either (I just go with the VS2022 prompt rather than the BuildTools (2) prompt)
NOTE: In case cmake fails with an unrecognized error, run the following command within the Developer PowerShell and retry:
& "C:\Program Files\Microsoft Visual Studio\2022\Community\Common7\Tools\Launch-VsDevShell.ps1" -Arch amd64 -HostArch amd64
Build llama.cpp with CMAKE:
Note: For faster compilation, add the -j argument to run multiple jobs in parallel. For example, cmake --build build --config Release -j 8 will run 8 jobs in parallel.
Open a command window in llama.cpp dir
Build with CUDA (see notes below BEFORE running):
cmake -B build -DGGML_CUDA=ON -DCMAKE_CUDA_ARCHITECTURES="52;61;70;75;80;86"
cmake --build build  --config Release -j 8
NOTE: Check the Official llama.cpp CUDA Guide for the latest instructions
Check Nvidia's CUDA GPU Compatibility Chart here. Example:
# If building on a system with a 3090 and a 5090, which have CUDA compatibility 8.6 and 12.0 respectively, set archs as follows:
cmake -B build -DGGML_CUDA=ON -DCMAKE_CUDA_ARCHITECTURES="86;120"
NOTE: In case Flash Attention is setup on your system and llama.cpp will be run with -fa=on/auto, ensure the following lauch arg is included too:
cmake -B build -DGGML_CUDA=ON -DCMAKE_CUDA_ARCHITECTURES="86;120" -DGGML_CUDA_FA_ALL_QUANTS=ON
What it does in practice:
Without the flag (default OFF): Only three FlashAttention vector kernel variants are compiled — q4_0, q8_0, and f16 (K and V types must match).
With the flag (ON): All fattn-vec*.cu template instances are compiled, enabling every KV cache quantization type combination (e.g., different quant types for K and V caches, plus additional model quant types like q4_1, q5_0, q5_1 and notable, Unsloth UD_K_XL quants). The tradeoff is significantly longer compilation times.
NOTE: Flash-Attention is REQUIRED for KV-cache quantization!
Build without CUDA:
cmake -B build
cmake --build build  --config Release -j 8
If you face issues when attempting to run CMake -B build, check the extensive CMake Installation Troubleshooting steps below
Add to PATH: path_to_cloned_repo\llama.cpp\build\bin\Release
Verify Installation via the terminal:
llama-server
This is an optional, but highly recommended dependency - Only PDFs are supported if this setup is not completed
Windows:
Download from the Official Site
Add to PATH, either via:
Advanced System Settings -> Environment Variables -> System Variables -> EDIT PATH Variable -> Add the below (change as per your installation location):
C:\Program Files\LibreOffice\program
Or via PowerShell:
Set PATH=%PATH%;C:\Program Files\LibreOffice\program
Ubuntu & Debian-based Linux - Download from the Official Site or install via terminal:
sudo apt-get update
sudo apt-get install -y libreoffice
Fedora and other RPM-based distros - Download from the Official Site or install via terminal:
sudo dnf update
sudo dnf install libreoffice
MacOS - Download from the Official Site or install via Homebrew:
brew install --cask libreoffice
Verify Installation:
On Windows and MacOS: Run the LibreOffice application
On Linux via the terminal:
libreoffice --version
LARS utilizes the pdf2image Python library to convert each page of a document into an image as required for OCR. This library is essentially a wrapper around the Poppler utility which handles the conversion process.
Windows:
Download from the Official Repo
Add to PATH, either via:
Advanced System Settings -> Environment Variables -> System Variables -> EDIT PATH Variable -> Add the below (change as per your installation location):
path_to_installation\poppler_version\Library\bin
Or via PowerShell:
Set PATH=%PATH%;path_to_installation\poppler_version\Library\bin
Linux:
sudo apt-get update
sudo apt-get install -y poppler-utils wget
This is an optional dependency - Tesseract-OCR is not actively used in LARS but methods to use it are present in the source code
Windows:
Download Tesseract-OCR for Windows via UB-Mannheim
Add to PATH, either via:
Advanced System Settings -> Environment Variables -> System Variables -> EDIT PATH Variable -> Add the below (change as per your installation location):
C:\Program Files\Tesseract-OCR
Or via PowerShell:
Set PATH=%PATH%;C:\Program Files\Tesseract-OCR
LARS has been built and tested with Python v3.11.x
Install Python v3.11.x on Windows:
Download and install Python 3.11.5 (should also work with any 3.10.x or 3.11.x versions)
During installation, ensure you check "Add Python 3.11 to PATH" or manually add it later, either via:
Advanced System Settings -> Environment Variables -> System Variables -> EDIT PATH Variable -> Add the below (change as per your installation location):
C:\Users\user_name\AppData\Local\Programs\Python\Python311\
Or via PowerShell:
Set PATH=%PATH%;C:\Users\user_name\AppData\Local\Programs\Python\Python311
Install Python v3.11.x on Linux (Ubuntu and Debian-based):
sudo add-apt-repository ppa:deadsnakes/ppa -y
sudo apt-get update
sudo apt-get install -y python3.11 python3.11-venv python3.11-dev
sudo python3.11 -m ensurepip
Verify Installation via the terminal:
python3 --version
For issues with specific packages or cached wheels, try the following:
Rebuild packages without using cached wheels or pre-compiled binaries:
pip install ninja --no-binary ninja --no-cache-dir
Inspect local cache for a specific package:
pip cache list ninja
pip cache list flash_attn
Remove local cache for a specified package:
pip cache remove ninja
Inspect and if necessary, purge local cache:
Get an overview of the current cache, including total size and directory location:
pip cache info
Show all wheel files currently stored in the cache:
pip cache list
Show the exact file path where the cache is located on your system:
pip cache dir
Clear everything stored in pip's local cache:
pip cache purge
If you encounter errors with pip install, try the following:
Remove version numbers:
==version.number segment, for example:urllib3==2.0.4urllib3Create and use a Python virtual environment:
NOTE: THIS IS NOT ADVISABLE FOR NOW AS A NUMBER OF PROCESS ARE LAUNCHED BY PRIVION WHICH WILL FAIL AS THEY MIGHT START IN THE GLOBAL NAMESPACE! RETAINING THIS SECTION FOR REF BUT DO NOT DO THIS FOR NOW!
It's advisable to use a virtual environment to avoid conflicts with other Python projects
Windows:
Create a Python virtual environment (venv):
python -m venv larsenv
Activate, and subsequently use, the venv:
.\larsenv\Scripts\activate
Deactivate venv when done:
deactivate
Linux and MacOS:
Create a Python virtual environment (venv):
python3 -m venv larsenv
Activate, and subsequently use, the venv:
source larsenv/bin/activate
Deactivate venv when done:
deactivate
If problems persist, consider opening an issue on the LARS GitHub repository for support.
CMake nmake failed error when attempting to build llama.cpp such as below:
Ensure you've followed llama.cpp setup instructions mentioned above, especially trying the & ... -Arch amd64 -HostArch amd64 command in the Developer PowerShell.
Ensure Visual Studio Build Tools are Installed:
Make sure you have the Visual Studio build tools installed, including cmake. You can install these tools through the Visual Studio Installer by selecting the Desktop development with C++ workload, and the MSVC and C++ CMake Optionals
Check Step 0 of the Dependencies section, specifically the screenshot therein
Check Environment Variables:
C:\Program Files (x86)\Microsoft Visual Studio\2019\Community\VC\Auxiliary\Build
C:\Program Files (x86)\Microsoft Visual Studio\2019\Community\Common7\IDE
C:\Program Files (x86)\Microsoft Visual Studio\2019\Community\Common7\Tools
Use Developer Command Prompt:
Open a "Developer Command Prompt for Visual Studio" which sets up the necessary environment variables for you
You can find this prompt from the Start menu under Visual Studio
Set CMake Generator:
cmake -G "NMake Makefiles" -B build -DLLAMA_CUDA=ON
If problems persist, consider opening an issue on the LARS GitHub repository for support.
On WSL, if installing pip packages fails with UNKNOWN, be sure to update PIP: python3 -m pip install --upgrade pip
Eventually (after approximately 60 seconds) you'll see an alert on the page indicating an error:
Failed to start llama.cpp local-server
This indicates that first-run has completed, all app directories have been created, but no LLMs are present in the models directory and may now be moved to it
Move your LLMs (any file format supported by llama.cpp, preferably GGUF) to the newly created models dir, located by default in the following locations:
C:/web_app_storage/models/app/storage/models/app/modelsOnce you've placed your LLMs in the appropriate models dir above, refresh http://localhost:5000/
You may once again receive an error alert stating Failed to start llama.cpp local-server after approximately 60 seconds
This is because your LLM might need to be manually selected via Settings
Accept the alert and click on the Settings gear icon in the top-right
In the LLM Selection tab, select your LLM and the appropriate Prompt-Template format from the appropriate dropdowns
Modify Advanced Settings to correctly set GPU options, the Context-Length, and optionally, the token generation limit (Maximum tokens to predict) for your selected LLM
Hit Save and if an automatic refresh is not triggered, manually refresh the page
If all steps have been executed correctly, first-time setup is now complete, and LARS is ready for use
LARS will also remember your LLM settings for subsequent use
Document Formats Supported:
If LibreOffice is installed and added to PATH as detailed in Step 4 of the Dependencies section, the following formats are supported:
If LibreOffice is not setup, only PDFs are supported
OCR Options for Text Extraction:
LARS provides three methods for extracting text from documents, accommodating various document types and quality:
Local Text Extraction: Uses PyPDF2 for efficient text extraction from non-scanned PDFs. Ideal for quick processing when high accuracy is not critical, or entirely local processing is a necessity.
Azure ComputerVision OCR - Enhances text extraction accuracy and supports scanned documents. Useful for handling standard document layouts. Offers a free tier suitable for initial trials and low-volume use, capped at 5000 transactions/month at 20 transactions/minute.
Azure AI Document Intelligence OCR - Best for documents with complex structures like tables. A custom parser in LARS optimizes the extraction process.
NOTES:
Azure OCR options incur API-costs in most cases and are not bundled with LARS.
A limited free-tier for ComputerVision OCR is available as linked above. This service is cheaper overall but slower and may not work for non-standard document layouts (other than A4 etc).
Consider the document types and your accuracy needs when selecting an OCR option.
LLMs:
Only local-LLMs are presently supported
The Settings menu provides many options for the power-user to configure and change the LLM via the LLM Selection tab
Note if using llama.cpp: Very-Important: Select the appropriate prompt-template format for the LLM you're running
LLMs trained for the following prompt-template formats are presently supported via llama.cpp:
Tweak Core-configuration settings via Advanced Settings (triggers LLM-reload and page-refresh):
Tweak settings to change response behavior at any time:
Embedding models and Vector Database:
Four embedding models are provided in LARS:
With the exception of the Azure-OpenAI embeddings, all other models run entirely locally and for free. On first run, these models will be downloaded from the HuggingFace Hub. This is a one-time download and they'll subsequently be present locally.
The user may switch between these embedding models at any time via the VectorDB & Embedding Models tab in the Settings menu
Docs-Loaded Table: In the Settings menu, a table is displayed for the selected embedding model displaying the list of documents embedded to the associated vector-database. If a document is loaded multiple times, it’ll have multiple entries in this table, which could be useful for debugging any issues.
Clearing the VectorDB: Use the Reset button and provide confirmation to clear the selected vector database. This creates a new vectorDB on-disk for the selected embedding model. The old vectorDB is still preserved and may be reverted to by manually modifying the config.json file.
Edit System-Prompt:
The System-Prompt serves as an instruction to the LLM for the entire conversation
LARS provides the user with the ability to edit the System-Prompt via the Settings menu by selecting the Custom option from the dropdown in the System Prompt tab
Changes to the System-Prompt will start a new chat
Force Enable/Disable RAG:
Via the Settings menu, the user may force enable or disable RAG (Retrieval Augmented Generation – the use of content from your documents to improve LLM-generated responses) whenever required
This is often useful for the purpose of evaluating LLM responses in both scenarios
Force disabling will also turn off attribution features
The default setting, which uses NLP to determine when RAG should and shouldn’t be performed, is the recommended option
This setting can be changed at any time
Chat History:
Use the chat history menu on the top-left to browse and resume prior conversations
Very-Important: Be mindful of prompt-template mismatches when resuming prior conversations! Use the Information icon on the top-right to ensure the LLM used in the prior-conversation, and the LLM presently in use, are both based on the same prompt-template formats!
User rating:
Each response may be rated on a 5-point scale by the user at any time
Ratings data is stored in the chat-history.db SQLite3 database located in the app directory:
C:/web_app_storage/app/storage/appRatings data is very valuable for evaluation and refinement of the tool for your workflows
Dos and Don’ts:
If a chat goes awry, or any odd responses are generated, simply try starting a New Chat via the menu on the top-left
Alternatively, start a new chat by simply refreshing the page
If issues are faced with citations or RAG performance, try resetting the vectorDB as described in Step 4 of the General User Guide above
If any application issues crop up and are not resolved simply by starting a new chat or restarting LARS, try deleting the config.json file by following the steps below:
CTRL+Cconfig.json file located in LARS/web_app (same directory as app.py)For any severe data and citation issues that are not resolved even by resetting the VectorDB as described in Step 4 of the General User Guide above, perform the following steps:
CTRL+CC:/web_app_storage/app/storage/appIf problems persist, consider opening an issue on the LARS GitHub repository for support.
NOTE: THE BELOW IS MAINTAINED FOR LEGACY REASONS BUT NO LONGER SUPPORTED NOR RECOMMENDED. DO NOT FOLLOW THESE STEPS, THERE MAY BE A CONTAINER UPDATE IN THE FUTURE, BUT IT'S CURRENTLY NON-FUNCTIONAL.
LARS has been adapted to a Docker container-deployment environment via two separate images as below:
Both have different requirements with the former being a simpler deployment, but suffering far slower inferencing performance due to the CPU and DDR memory acting as bottlenecks
While not explicitly required, some experience with Docker containers and familiarity with the concepts of containerization and virtualization will be very helpful in this section!
Beginning with common setup steps for both:
Installing Docker
Your CPU should support virtualization and it should be enabled in your system's BIOS/UEFI
Download and install Docker Desktop
If on Windows, you may need to install the Windows Subsystem for Linux if it's not already present. To do so, open PowerShell as an Administrator and run the following:
wsl --install
Ensure Docker Desktop is up and running, then open a Command Prompt / Terminal and execute the following command to ensure Docker is correctly installed and up and running:
docker ps
Create a Docker storage volume, which will be attached to the LARS containers at runtime:
Creating a storage volume for use with the LARS container is highly advantageous as it'll allow you to upgrade the LARS container to a newer version, or switch between the CPU & GPU container variants while persisting all your settings, chat history and vector databases seamlessly.
Execute the following command in a Command Prompt / Terminal:
docker volume create lars_storage_volue
This volume will be attached to the LARS container later at runtime, for now proceed to building the LARS image in the steps below.
In a Command Prompt / Terminal, execute the following commands:
git clone https://github.com/abgulati/LARS  # skip if already done

cd LARS # skip if already done

cd dockerized

docker build -t lars-no-gpu .

# Once the build is complete, run the container:

docker run -p 5000:5000 -p 8080:8080 -v lars_storage:/app/storage lars-no-gpu
Once done, Navigate to http://localhost:5000/ in your browser and follow the remainder of the First Run Steps and User Guide
The Troubleshooting sections applies to Container-LARS as well
Requirements (in addition to Docker):
Compatible Nvidia GPU(s)
Nvidia GPU drivers
Nvidia CUDA Toolkit v12.2
For Linux, you're all set up with the above so skip the next step and head directly to the build and run steps further below
If on Windows, and if this is your first time running an Nvidia GPU container on Docker, strap in as this is going to be quite the ride (favorite beverage or three highly recommended!)
Risking extreme redundancy, before proceeding ensure the following dependencies are present:
Compatible Nvidia GPU(s)
Nvidia GPU drivers
Nvidia CUDA Toolkit v12.2
Docker Desktop
Windows Subsystem for Linux (WSL)
Refer to the Nvidia CUDA Dependencies section and the Docker Setup section above if unsure
If the above are present and setup, you're clear to proceed
Open the Microsoft Store app on your PC, and download & install Ubuntu 22.04.3 LTS (must match the version on line 2 in the dockerfile)
Yes you read the above right: download and install Ubuntu from the Microsoft store app, refer screenshot below:
It's now time to install the Nvidia Container Toolkit within Ubuntu, follow the steps below to do so:
Launch an Ubuntu shell in Windows by searching for Ubuntu in the Start-menu after the installation above is completed
In this Ubuntu command-line that opens, perform the following steps:
Install the prerequisites:
sudo apt-get update && sudo apt-get install -y --no-install-recommends \
ca-certificates \
curl \
gnupg2
Configure the production repository:
curl -fsSL https://nvidia.github.io/libnvidia-container/gpgkey | sudo gpg --dearmor -o /usr/share/keyrings/nvidia-container-toolkit-keyring.gpg \
    && curl -s -L https://nvidia.github.io/libnvidia-container/stable/deb/nvidia-container-toolkit.list | \
        sed 's#deb https://#deb [signed-by=/usr/share/keyrings/nvidia-container-toolkit-keyring.gpg] https://#g' | \
        sudo tee /etc/apt/sources.list.d/nvidia-container-toolkit.list
Update the packages list from the repository & Install the Nvidia Container Toolkit Packages:
sudo apt-get update
Install the NVIDIA Container Toolkit packages:
export NVIDIA_CONTAINER_TOOLKIT_VERSION=1.19.0-1
sudo apt-get install -y \
    nvidia-container-toolkit=${NVIDIA_CONTAINER_TOOLKIT_VERSION} \
    nvidia-container-toolkit-base=${NVIDIA_CONTAINER_TOOLKIT_VERSION} \
    libnvidia-container-tools=${NVIDIA_CONTAINER_TOOLKIT_VERSION} \
    libnvidia-container1=${NVIDIA_CONTAINER_TOOLKIT_VERSION}
[Optional] Install CUDA (in WSL):
Do NOT install NVIDIA Linux display drivers inside WSL. Since NVIDIA drivers are already working on the native Windows 11 host, they are automatically "mapped" into your WSL 2 environment through a process called GPU Paravirtualization.
On the CUDA download page, select Linux->x86_64->WSL->2.0->local runfile which then provides the following instructions:
wget https://developer.download.nvidia.com/compute/cuda/12.8.1/local_installers/cuda_12.8.1_570.124.06_linux.run
sudo sh cuda_12.8.1_570.124.06_linux.run
On running sudo sh cuda_12.8.1_570.124.06_linux.run, a text-based menu will appear in your terminal. Follow these steps:
The wsl cmd may blank out when trying to select driver options, and pressing enter after a while may show Segmentation fault (core dumped)
That Segmentation fault is a common headache with the CUDA .run file in WSL. It usually happens because the installer's "ncurses" UI (the interactive menu) crashes when trying to render in the WSL terminal.
Bypass this by running in silent mode:
sudo sh cuda_12.8.1_570.124.06_linux.run --silent --toolkit --no-opengl-libs
Once it finishes (it might take a minute and won't show a progress bar), check if the directory exists:
ls /usr/local/cuda-12.8
Now, add these new paths to ~/.bashrc automatically so nvcc starts working:
echo 'export PATH=/usr/local/cuda-12.8/bin${PATH:+:${PATH}}' >> ~/.bashrc
echo 'export LD_LIBRARY_PATH=/usr/local/cuda-12.8/lib64${LD_LIBRARY_PATH:+:${LD_LIBRARY_PATH}}' >> ~/.bashrc
And restart to apply changes:
source ~/.bashrc
Test:
nvcc --version
nvidia-smi
Now your Ubuntu setup is complete, time to complete the WSL and Docker Integrations:
Open a new PowerShell window and set this Ubuntu installation as the WSL default:
wsl --list
wsl --set-default Ubuntu-22.04 # if not already marked as Default
Navigate to Docker Desktop -> Settings -> Resources -> WSL Integration -> Check Default & Ubuntu 22.04 integrations. Refer to the screenshot below:
Now if everything has been done correctly, you're ready to build and run the container!
In a Command Prompt / Terminal, execute the following commands:
git clone https://github.com/abgulati/LARS  # skip if already done

cd LARS # skip if already done

cd dockerized_nvidia_cuda_gpu

docker build -t lars-nvcuda .

# Once the build is complete, run the container:

docker run --gpus all -p 5000:5000 -p 8080:8080 -v lars_storage:/app/storage lars-nvcuda
Once done, navigate to http://localhost:5000/ in your browser and follow the remainder of the First Run Steps and User Guide
The Troubleshooting sections applies to Container-LARS as well
In case you encounter Network-related errors, especially pertaining to unavailable package repositories when building the container, this is a networking issue at your end often pertaining to Firewall issues
On Windows, navigate to Control Panel\System and Security\Windows Defender Firewall\Allowed apps, or search Firewall in the Start-Menu and head to Allow an app through the firewall and ensure ```Docker Desktop Backend`` is allowed through
The first time you run LARS, the sentence-transformers embedding model will be downloaded
In the containerized environment, this download can sometimes be problematic and result in errors when you ask a query
If this occurs, simply head to the LARS Settings menu: Settings->VectorDB & Embedding Models and change the Embedding Model to either BGE-Base or BGE-Large, this will force a reload and redownload
Once done, proceed to ask questions again and the response should generate as normal
You can switch back to the sentence-transformers embedding model and the issue should be resolved
As stated in the Troubleshooting section above, embedding models are downloaded the first time LARS runs
It's best to save the state of the container before shutting it down so this download step need-not be repeated every subsequent time the container is launched
To do so, open another Command Prompt / Terminal and commit changes BEFORE shutting the running LARS container:
docker ps # note the container_id here

docker commit <container_ID> <new_image_name>   # for new_image_name, I simply add 'pfr', for 'post-first-run' to the current image name, example: lars-nvcuda-pfr
This will create an updated image that you can use on subsequent runs:
docker run --gpus all -p 5000:5000 -p 8080:8080 -v lars_storage:/app/storage lars-nvcuda-pfr
NOTE: Having done the above, if you check the space used by images with docker images, you'll notice a lot of space used. BUT, don’t take the sizes here literally! The size shown for each image includes the total size of all its layers, but many of those layers are shared between images, especially if those images are based on the same base image or if one image is a committed version of another. To see how much disk space your Docker images are actually using, use:
docker system df



