PenX Open-source Windows-first security reconnaissance with 12 scanner options, local AI, and HTML/PDF/SARIF reports.
Python
2
49 commits
updated Oct 15, 2026
AI-Powered Security Reconnaissance & Penetration Testing Assistant for Windows
One terminal. Six reconnaissance tools. Your own local AI model.





Windows Releases • Features • Installation • Local AI • Usage • Source • Contributing
PenX is an open-source, Windows-first security reconnaissance assistant that combines Nmap, WHOIS, WhatWeb, HTTP header checks, DNS lookups, and Nikto in a single CLI. It collects tool output, sends relevant evidence to a locally hosted language model for analysis, and makes it easier to review, correct, and export findings.
Use PenX for authorized penetration testing, security assessments, home labs, and learning. It is especially useful if you want a consolidated recon workflow on Windows without relying on WSL, a cloud AI subscription, or a mandatory MariaDB server.
PenX is built on the MIT-licensed METATRON project by sooryathejas. This project adapts that workflow for Windows and adds Windows-specific setup, diagnostics, and local-first storage. It is not an official release of the upstream project.
Important: PenX does not magically verify vulnerabilities. Scanner output is evidence; AI-generated findings are leads that require independent validation. Network scans contact the selected targets, and optional web-search features contact external services.
| Feature | What it does | |
|---|---|---|
| 🔍 | Integrated reconnaissance | Run Nmap, WHOIS, WhatWeb, HTTP header inspection, DNS lookups, and Nikto from one menu. |
| 🤖 | Local AI analysis | Connect LM Studio, Ollama or llama.cpp (GGUF); no paid AI API is required for local inference. |
| 🧩 | CPE-driven CVE discovery | Look up version-qualified NVD candidates from Nmap XML, plus OSV/GitHub advisories for explicit package URLs. |
| ✅ | CVE source checks | Check CVE identifiers with NVD and CISA KEV while distinguishing a catalog entry from host exploitability. |
| 📋 | Validated JSON findings | Schema-validated results with explicit compatibility fallback for older local model servers. |
| 🔁 | AI-assisted tool workflow | The analysis loop can request additional supported tool or search operations as part of its review. |
| 🧠 | Review and correction feedback | Record false positives, corrections, and verified findings; reuse saved review rules in later analyses. |
| 🗄️ | Local scan history | Store sessions and results in SQLite by default, or connect an existing MariaDB instance. |
| 📄 | Shareable reports | Export selected findings to HTML and PDF; export corrected data as JSONL for separate training workflows. |
| 🧪 | Evaluation workflow | Export scan-review packages, import external evaluations, and import externally distilled rules. |
| 🪟 | Windows-focused setup | Batch installers, scanner diagnostics, Python environment repair, offline tests, and optional EXE builds. |
| Tool | Purpose | Windows implementation |
|---|---|---|
| Nmap | Discover hosts, ports, and services | Original Nmap executable; Npcap may be needed for some scan modes |
| WHOIS | Inspect domain registration information | Python python-whois |
| WhatWeb | Fingerprint web technologies | Original Ruby-based scanner; a limited Python fallback is clearly identified |
| HTTP headers | Inspect HTTP responses and security headers | Python requests |
| DNS | Resolve and inspect DNS records | Python dnspython |
| Nikto | Perform web-server checks | Original Perl-based Nikto, installed separately |
From the scanner menu, choose a to run all standard tools except Nikto, or n to include Nikto. Availability depends on the target, installed tools, and required permissions. PenX does not bundle those upstream scanner binaries in its source repository.
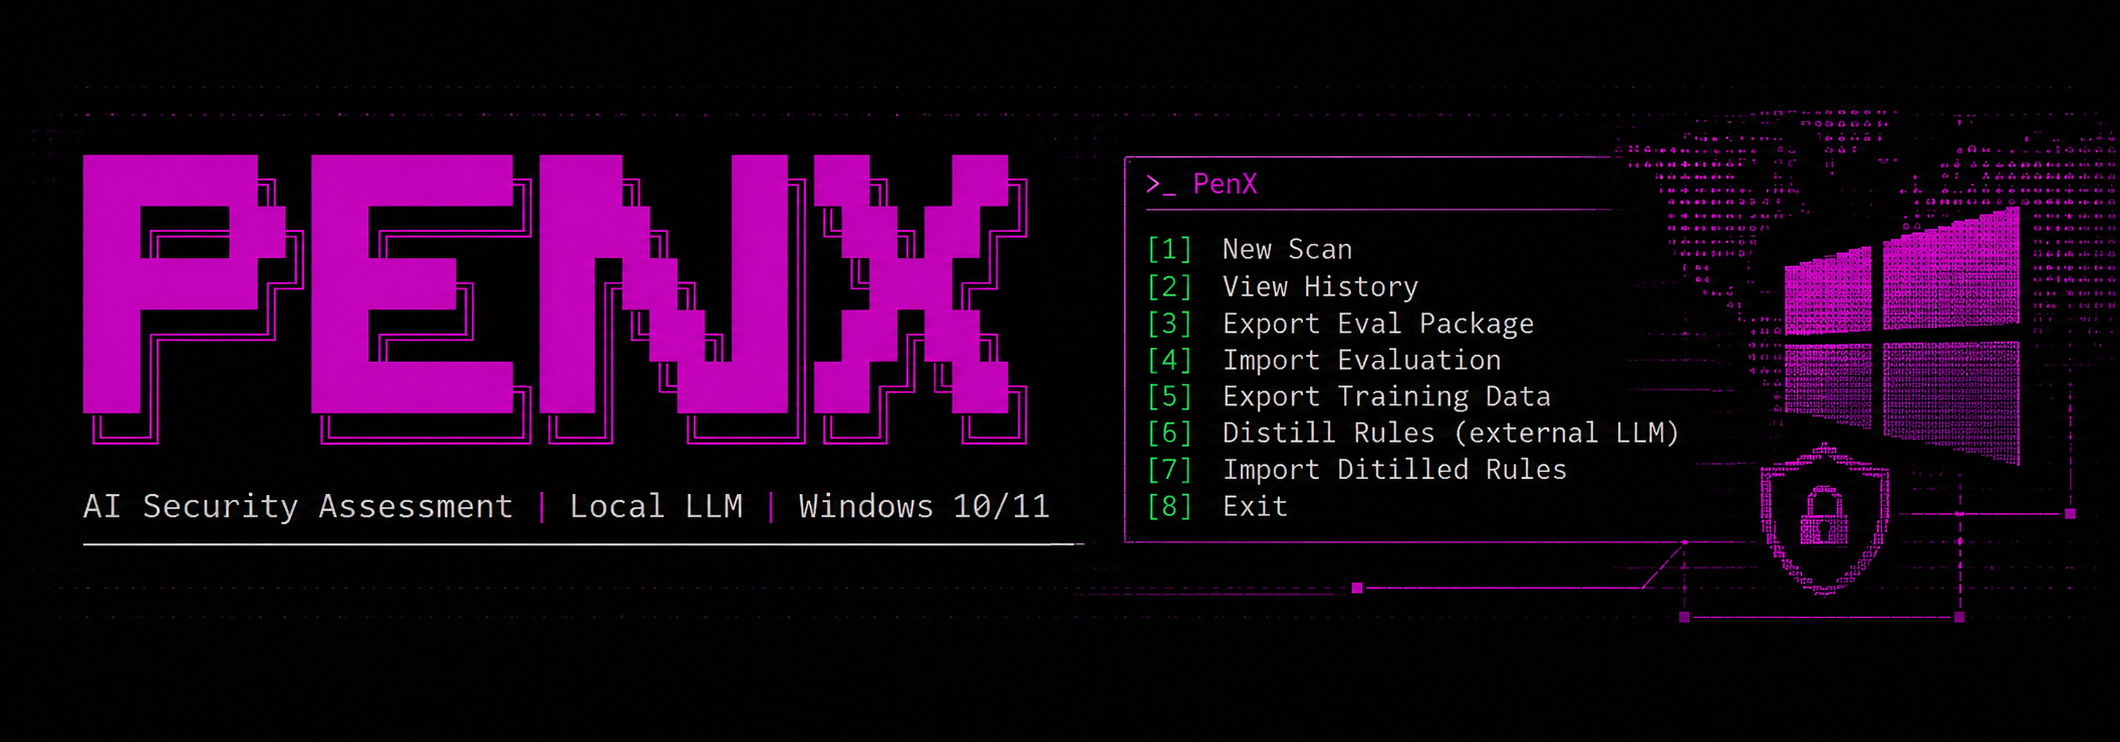
The following is an excerpt of the actual main menu (shown here as text, not as a Windows screenshot):
    ██████╗ ███████╗███╗   ██╗██╗  ██╗
    ██╔══██╗██╔════╝████╗  ██║╚██╗██╔╝
    ██████╔╝█████╗  ██╔██╗ ██║ ╚███╔╝
    ██╔═══╝ ██╔══╝  ██║╚██╗██║ ██╔██╗
    ██║     ███████╗██║ ╚████║██╔╝ ██╗
    ╚═╝     ╚══════╝╚═╝  ╚═══╝╚═╝  ╚═╝

    PenX | AI Security Assessment | Local LLM | Windows 10/11

    [1]  New Scan
    [2]  View History
    [3]  Export Eval Package
    [4]  Import Evaluation
    [5]  Export Training Data
    [6]  Distill Rules (external LLM)
    [7]  Import Distilled Rules
    [8]  Exit

    penx>
The UI runs in a terminal. No browser dashboard or GUI is required.
| Component | Technology |
|---|---|
| Platform | Windows 10 / Windows 11 |
| Language | Python 3.10–3.13 (3.13 recommended) |
| Recon scanners | Nmap, WHOIS, WhatWeb, Nikto, HTTP, DNS |
| AI | Locally hosted, OpenAI-compatible model API |
| LLM runners | LM Studio, Ollama, llama.cpp |
| Database | SQLite by default; MariaDB optional |
| Search | Optional DuckDuckGo-based lookups |
| Exports | HTML, PDF, JSONL, review packages |
| Packaging | PyInstaller, folder-based Windows executable |
| Automation | Windows batch scripts and offline GitHub Actions tests |
Local-first does not mean every operation is offline: initial installation downloads dependencies, scanners connect to the targets you authorize, and optional web searches use the network.
The installer can use winget to set up Ruby (for WhatWeb) and Strawberry Perl (for Nikto). If either runtime cannot be installed, its scanner may be unavailable.
git clone https://github.com/SLP-DEV1/PenX.git
cd PenX
Alternatively, use Code → Download ZIP on GitHub and extract the archive.
Double-click install-windows.bat from the extracted project folder.
It prepares a Python .venv, installs Python dependencies, creates .env from .env.example if needed, and attempts to install the external scanner components from their upstream sources. The Nmap/Npcap setup may open a separate official installer.
Then run check-windows.bat to inspect the installed components. This diagnostic does not scan a remote target.
See Local AI setup below. You can select a model already available through your local server.
Double-click start-windows.bat or PenX.bat, and choose an option from the terminal menu.
Installation problems? See WINDOWS.md. If an incompatible Python version or a
charset_normalizer/requestsimport error breaks the environment, userepair-python.bat. The repair workflow is designed to preserve your configuration and local data.
PenX works with a compatible local AI endpoint. You supply the model; PenX does not ship or automatically train a proprietary security model.
.env file in the PenX project directory.PENX_LLM_URL=http://127.0.0.1:1234
PENX_MODEL=your-local-model
PENX_DB_ENGINE=sqlite
PENX_LLM_URL=http://127.0.0.1:11434
PENX_MODEL=your-local-model
PENX_DB_ENGINE=sqlite
The model name above is a placeholder, not a downloadable model called your-local-model. Replace it with your own model ID. Model quality, latency, and hardware requirements depend on the model you choose.
Local inference does not require a commercial LLM API key. If you explicitly use optional external search or review workflows, those are not private, offline inference.
PenX now performs automated candidate discovery, rather than only checking CVE IDs already named by a model:
pkg:pypi/requests@2.31.0). It does not guess a package ecosystem from HTTP headers or generic service banners.Example configuration:
PENX_CVE_DISCOVERY=on
PENX_CVE_MAX_SERVICES=3
PENX_CVE_MAX_PACKAGES=4
PENX_CVE_MAX_RESULTS=15
# Optional; never commit secrets:
# PENX_NVD_API_KEY=
# PENX_GITHUB_ADVISORY_TOKEN=
All discovery happens against public catalog APIs, not by scanning unrelated hosts. NVD receives CPE vendor/product/version, OSV receives explicit package URLs, and GitHub receives package/version. No scan target, credentials or raw scanner text is sent by the engine. Internet access and API availability are required; offline failures are called out as unavailable, not interpreted as no vulnerabilities. Set PENX_CVE_DISCOVERY=off to disable it.
CPE strings can be incorrect, NVD CPE criteria can have complex platform relationships, and many Linux distributions backport fixes. These limitations require manual verification against vendor and distribution advisories. The engine limits API requests to avoid excessive latency and rate limiting.
The discovery engine also enriches candidates with NVD CVSS, FIRST EPSS (a 30-day exploit probability), and CISA KEV (known exploitation in the wild). The output distinguishes unavailable lookups from low scores. These values prioritize investigation; they do not prove a scanned machine is vulnerable.
A more conservative NVD evaluator interprets nested AND/OR criteria and negated conditions using unknown when the scanner lacks a complete platform inventory. Vendor-specific version schemes remain uncertain instead of being compared as generic Python package versions.
For systems where you already know the OS distribution, set the corresponding hint to enable official advisory lookups. Example:
PENX_CVE_PRIORITY=on
PENX_CVE_MAX_VERIFY=20
# Set only if independently known (never inferred from an SSH banner):
# PENX_CVE_DISTRO_HINT=ubuntu:jammy
# PENX_CVE_DISTRO_HINT=debian:bookworm
# PENX_CVE_DISTRO_HINT=rhel:9
PenX also re-runs candidate discovery after additional model-requested tool scans, preserving their raw output so newly observed CPEs are not lost in the summarization step. Catalogue queries never grant the model permission to scan outside its authorized target.
PenX can request schema-constrained JSON findings from LM Studio, Ollama and llama.cpp, then validate field types and required values before saving. It first tries a JSON Schema response format, then JSON-object mode if needed. The default mode warns and falls back to legacy text parsing if a model cannot produce valid JSON. Enable strict mode to fail instead of falling back.
CVE identifiers are checked through the official NVD CVE API and the CISA Known Exploited Vulnerabilities catalog. Reference statuses, exact scanner-evidence matching and source URLs are added to each finding and included in exported reports. A CVE being listed does not establish that your target uses an affected version or is exploitable. This requires separate manual verification.
PENX_STRUCTURED_OUTPUT=auto
PENX_VERIFY_SOURCES=on
# Optional private NVD API key
# PENX_NVD_API_KEY=
auto (default), strict (reject invalid JSON) or off (legacy text).on (default), or off for offline analysis. NVD receives public CVE IDs, not your scan target or raw scan output. CISA KEV is downloaded separately.unavailable. PENX_CVE_MAX_VERIFY (default 20, maximum 30) caps individual CVE checks; installed-package status still requires vendor package evidence.Download releases · Windows release workflow
When a version tag such as v0.1.0 is pushed, GitHub Actions runs the offline tests, builds a portable Windows folder with PyInstaller, smoke-tests the EXE and publishes PenX-Windows-x64.zip plus SHA256SUMS.txt in GitHub Releases. The workflow can also be started manually, generating an Actions artifact without creating a public release.
The ZIP includes the first-run Windows scanner setup wizard, but it does not redistribute Nmap/Npcap, Ruby/WhatWeb, or Perl/Nikto. On the first launch of PenX.exe, PenX checks for these components and asks for permission to install missing tools from their upstream sources. This requires internet access and may require UAC approval, winget, and interaction with the official Nmap installer. You can skip the setup and use available features; rerun it later with PenX.exe --setup. Nothing is downloaded without consent.
The EXE also creates .env from the bundled .env.example only if no .env already exists. Edit your private .env to configure your local LM Studio, Ollama or llama.cpp model; PenX does not download or install an LLM. Use PenX.exe --setup-status to inspect component presence without downloads or scans. Release downloads only appear after the tag-triggered workflow succeeds.
Launch PenX and choose [1] New Scan. Enter a domain or IP address that you own or are expressly authorized to assess.
[1] New Scan
[?] Enter target IP or domain: 192.0.2.10
The example address belongs to a documentation-only range; substitute an authorized, reachable target for real testing.
[1] Nmap
[2] WHOIS
[3] WhatWeb
[4] HTTP headers
[5] DNS
[6] Nikto
[a] All except Nikto
[n] All including Nikto
Select individual tools or a group. Some operations can take longer, especially a Nikto-inclusive scan.
PenX collects scanner output and can pass the evidence to a local language model. Its analysis workflow can propose potential security findings, suggested remediation, and further supported checks.
Always review the underlying scanner evidence before calling a finding verified.
Choose [2] View History to return to an earlier scan. From the history workflow, you can inspect results, make corrections, and export readable reports.
Additional main-menu options support external evaluation packages, importing review results, JSONL exports of corrected sessions, and separately distilled analysis rules. These are review and data-management features; PenX does not automatically fine-tune a model when you correct a finding.
From the main menu choose [10] Scan Diff & Trends, enter an existing target, then compare any two saved sessions of that exact target. PenX reports:
Each newly saved scan of a previously assessed target also prints a regression comparison against the previous session. This is an on-scan check, not a scheduler. PenX does not initiate periodic scans. Not observed does not mean fixed: filters, errors and missing scanner coverage can explain differences.
Choose [9] Passive-Only Recon. It queries third-party DNS resolvers, registry WHOIS, Certificate Transparency (crt.sh) and RDAP; on public IPs it can optionally read Shodan and Censys data if you supply their credentials. It does not contact the target via HTTP, TLS or a port scanner, and model-requested TOOL and SEARCH dispatch is blocked during this scan mode.
Third-party services do receive the target name or IP. This is not an anonymity mode. HTTP-header and live TLS checks are intentionally not part of passive-only reconnaissance.
Optional private .env settings:
PENX_SHODAN_API_KEY=
PENX_CENSYS_API_ID=
PENX_CENSYS_API_SECRET=
These lookups can be unavailable or rate-limited; absent data is not proof that a target does not expose a service. Only use targets you are authorized to assess.
Choose [11] Risk + MITRE ATT&CK Review for a saved session. PenX calculates an explainable 0–100 internal prioritization score from recorded severity and finding confidence. It does not pretend to know missing CVSS, EPSS, CISA KEV membership or real external exposure. A small, documented set of behavior-oriented text indicators may suggest candidate ATT&CK techniques; a CVE by itself is not evidence of a particular ATT&CK technique.
Override the score, ATT&CK IDs or quick-win/planned classification interactively.
These human overrides are kept privately under
data/risk_overrides.json and included when exporting the per-session
reports/risk_SL<id>.json file. Reopen the view to check applied changes.
Choose [12] Terminal Output to toggle between QUIET and LIVE for
the current session. LIVE streams subprocess lines and compatible local LLM
SSE tokens as they arrive. Nmap receives progress flags in live mode.
The equivalent startup setting is PENX_LIVE_OUTPUT=1 in your private .env
or process environment. The default remains QUIET for compatibility.
Percentage completion is not fabricated: scanners that do not emit progress
will show text only. The final saved scan report is identical in either mode.
Windows without WSL remains supported. No Docker / Lab Mode / Offline Replay or nonstandard UI dependency was added.
  Authorized IP / domain
           |
           v
    Reconnaissance
 Nmap / WHOIS / WhatWeb
  HTTP / DNS / Nikto
           |
           v
   Evidence collection
           |
           v
   Local LLM analysis
   + optional tool loop
           |
           v
 Review / verify / correct
           |
           v
    Local scan history
     SQLite / MariaDB
           |
           v
  HTML / PDF / JSONL
.env if preferred..env, database files, scan output, exports, and model-evaluation packages as potentially sensitive. Do not commit them to a public repository.See .env.example for supported configuration variables and .gitignore for excluded local artifacts.
To create a Windows executable after installing the project, run:
build-exe.bat
PyInstaller creates a folder-based application:
dist\PenX\PenX.exe
Keep the entire dist\\PenX folder when moving the build. This is not a single-file executable. Nmap/Npcap, Ruby, Perl, WhatWeb and Nikto are installed separately after approval at first EXE launch, not bundled into the EXE. Public prebuilt ZIPs are available on the Releases page after a successful tagged release; the source tree itself does not contain a prebuilt EXE.
The executable needs to be built and checked on Windows; Linux CI does not establish that the packaged EXE works on every Windows installation.
PenX/
├── penx.py                    # CLI and scan/session menus
├── tools.py                   # Recon tool integration
├── scanner_runtime.py         # Scanner availability and execution helpers
├── first_run_setup.py         # Consent-based portable EXE dependency wizard
├── llm.py                     # Local LLM requests and analysis loop
├── search.py                  # Optional web search integration
├── prompts.py                 # Analysis and review prompts
├── db.py / db_backend.py      # History, corrections, data backends
├── export.py                  # HTML/PDF and other exports
├── .env.example               # Example local configuration
├── install-windows.bat        # Initial Windows setup
├── install-scanners.bat       # Scanner installation retry
├── check-windows.bat          # Dependency diagnostics
├── repair-python.bat          # Python environment repair
├── start-windows.bat          # CLI launcher
├── build-exe.bat              # PyInstaller build
├── WINDOWS.md                 # Detailed installation help
├── CONTRIBUTING.md            # Contribution guidelines
├── SECURITY.md                # Responsible disclosure
└── .github/workflows/ci.yml   # Offline test workflow
PenX includes offline automated tests for data management, export workflows, scanner dispatch, and Windows setup helpers. GitHub Actions runs tests on Windows and Ubuntu. They intentionally do not scan public targets.
| Action | Command / document |
|---|---|
| Check dependencies | check-windows.bat |
| Run local offline tests | run-tests.bat |
| Retry external scanner setup | install-scanners.bat |
| Repair Python dependencies | repair-python.bat |
| Build Windows executable | build-exe.bat |
| Installation help | WINDOWS.md |
An automated test passing does not prove that all third-party scanner installations, scan modes, or local AI models have been verified in every environment. PenX is actively developed; bug reports and Windows compatibility reports are welcome.
Pull requests and issue reports are welcome, especially for Windows compatibility, scanner integrations, model compatibility, documentation, and reproducible tests. Before opening an issue, remove API keys, personal data, private IP inventories, and sensitive target output.
If PenX is useful to you, consider starring the repository — it helps other Windows security enthusiasts find the project.
Use PenX only against systems you own or have explicit authorization to test. Unauthorized reconnaissance may violate laws, policies, or agreements. PenX is intended for defensive research, authorized penetration testing, and education, not covert access or exploitation of third-party systems.
AI-generated vulnerability descriptions, severities, or fixes can be wrong. Verify important findings using primary evidence and qualified human review.
PenX builds upon METATRON by Soorya Thejas, which is licensed under the MIT License. The original copyright notice is retained in LICENSE.
Thanks to the developers and maintainers of Nmap, Npcap, WhatWeb, Nikto, Ollama, LM Studio, and the underlying Python libraries. Integrated third-party tools retain their own licenses and are installed separately.
PenX is an independent Windows adaptation of METATRON, not an official upstream distribution.
PenX Open-source Windows-first security reconnaissance with 12 scanner options, local AI, and HTML/PDF/SARIF reports.
Python
2
49 commits
updated Oct 15, 2026
AI-Powered Security Reconnaissance & Penetration Testing Assistant for Windows
One terminal. Six reconnaissance tools. Your own local AI model.
Windows Releases • Features • Installation • Local AI • Usage • Source • Contributing
PenX is an open-source, Windows-first security reconnaissance assistant that combines Nmap, WHOIS, WhatWeb, HTTP header checks, DNS lookups, and Nikto in a single CLI. It collects tool output, sends relevant evidence to a locally hosted language model for analysis, and makes it easier to review, correct, and export findings.
Use PenX for authorized penetration testing, security assessments, home labs, and learning. It is especially useful if you want a consolidated recon workflow on Windows without relying on WSL, a cloud AI subscription, or a mandatory MariaDB server.
PenX is built on the MIT-licensed METATRON project by sooryathejas. This project adapts that workflow for Windows and adds Windows-specific setup, diagnostics, and local-first storage. It is not an official release of the upstream project.
Important: PenX does not magically verify vulnerabilities. Scanner output is evidence; AI-generated findings are leads that require independent validation. Network scans contact the selected targets, and optional web-search features contact external services.
| Feature | What it does | |
|---|---|---|
| 🔍 | Integrated reconnaissance | Run Nmap, WHOIS, WhatWeb, HTTP header inspection, DNS lookups, and Nikto from one menu. |
| 🤖 | Local AI analysis | Connect LM Studio, Ollama or llama.cpp (GGUF); no paid AI API is required for local inference. |
| 🧩 | CPE-driven CVE discovery | Look up version-qualified NVD candidates from Nmap XML, plus OSV/GitHub advisories for explicit package URLs. |
| ✅ | CVE source checks | Check CVE identifiers with NVD and CISA KEV while distinguishing a catalog entry from host exploitability. |
| 📋 | Validated JSON findings | Schema-validated results with explicit compatibility fallback for older local model servers. |
| 🔁 | AI-assisted tool workflow | The analysis loop can request additional supported tool or search operations as part of its review. |
| 🧠 | Review and correction feedback | Record false positives, corrections, and verified findings; reuse saved review rules in later analyses. |
| 🗄️ | Local scan history | Store sessions and results in SQLite by default, or connect an existing MariaDB instance. |
| 📄 | Shareable reports | Export selected findings to HTML and PDF; export corrected data as JSONL for separate training workflows. |
| 🧪 | Evaluation workflow | Export scan-review packages, import external evaluations, and import externally distilled rules. |
| 🪟 | Windows-focused setup | Batch installers, scanner diagnostics, Python environment repair, offline tests, and optional EXE builds. |
| Tool | Purpose | Windows implementation |
|---|---|---|
| Nmap | Discover hosts, ports, and services | Original Nmap executable; Npcap may be needed for some scan modes |
| WHOIS | Inspect domain registration information | Python python-whois |
| WhatWeb | Fingerprint web technologies | Original Ruby-based scanner; a limited Python fallback is clearly identified |
| HTTP headers | Inspect HTTP responses and security headers | Python requests |
| DNS | Resolve and inspect DNS records | Python dnspython |
| Nikto | Perform web-server checks | Original Perl-based Nikto, installed separately |
From the scanner menu, choose a to run all standard tools except Nikto, or n to include Nikto. Availability depends on the target, installed tools, and required permissions. PenX does not bundle those upstream scanner binaries in its source repository.
The following is an excerpt of the actual main menu (shown here as text, not as a Windows screenshot):
    ██████╗ ███████╗███╗   ██╗██╗  ██╗
    ██╔══██╗██╔════╝████╗  ██║╚██╗██╔╝
    ██████╔╝█████╗  ██╔██╗ ██║ ╚███╔╝
    ██╔═══╝ ██╔══╝  ██║╚██╗██║ ██╔██╗
    ██║     ███████╗██║ ╚████║██╔╝ ██╗
    ╚═╝     ╚══════╝╚═╝  ╚═══╝╚═╝  ╚═╝

    PenX | AI Security Assessment | Local LLM | Windows 10/11

    [1]  New Scan
    [2]  View History
    [3]  Export Eval Package
    [4]  Import Evaluation
    [5]  Export Training Data
    [6]  Distill Rules (external LLM)
    [7]  Import Distilled Rules
    [8]  Exit

    penx>
The UI runs in a terminal. No browser dashboard or GUI is required.
| Component | Technology |
|---|---|
| Platform | Windows 10 / Windows 11 |
| Language | Python 3.10–3.13 (3.13 recommended) |
| Recon scanners | Nmap, WHOIS, WhatWeb, Nikto, HTTP, DNS |
| AI | Locally hosted, OpenAI-compatible model API |
| LLM runners | LM Studio, Ollama, llama.cpp |
| Database | SQLite by default; MariaDB optional |
| Search | Optional DuckDuckGo-based lookups |
| Exports | HTML, PDF, JSONL, review packages |
| Packaging | PyInstaller, folder-based Windows executable |
| Automation | Windows batch scripts and offline GitHub Actions tests |
Local-first does not mean every operation is offline: initial installation downloads dependencies, scanners connect to the targets you authorize, and optional web searches use the network.
The installer can use winget to set up Ruby (for WhatWeb) and Strawberry Perl (for Nikto). If either runtime cannot be installed, its scanner may be unavailable.
git clone https://github.com/SLP-DEV1/PenX.git
cd PenX
Alternatively, use Code → Download ZIP on GitHub and extract the archive.
Double-click install-windows.bat from the extracted project folder.
It prepares a Python .venv, installs Python dependencies, creates .env from .env.example if needed, and attempts to install the external scanner components from their upstream sources. The Nmap/Npcap setup may open a separate official installer.
Then run check-windows.bat to inspect the installed components. This diagnostic does not scan a remote target.
See Local AI setup below. You can select a model already available through your local server.
Double-click start-windows.bat or PenX.bat, and choose an option from the terminal menu.
Installation problems? See WINDOWS.md. If an incompatible Python version or a
charset_normalizer/requestsimport error breaks the environment, userepair-python.bat. The repair workflow is designed to preserve your configuration and local data.
PenX works with a compatible local AI endpoint. You supply the model; PenX does not ship or automatically train a proprietary security model.
.env file in the PenX project directory.PENX_LLM_URL=http://127.0.0.1:1234
PENX_MODEL=your-local-model
PENX_DB_ENGINE=sqlite
PENX_LLM_URL=http://127.0.0.1:11434
PENX_MODEL=your-local-model
PENX_DB_ENGINE=sqlite
The model name above is a placeholder, not a downloadable model called your-local-model. Replace it with your own model ID. Model quality, latency, and hardware requirements depend on the model you choose.
Local inference does not require a commercial LLM API key. If you explicitly use optional external search or review workflows, those are not private, offline inference.
PenX now performs automated candidate discovery, rather than only checking CVE IDs already named by a model:
pkg:pypi/requests@2.31.0). It does not guess a package ecosystem from HTTP headers or generic service banners.Example configuration:
PENX_CVE_DISCOVERY=on
PENX_CVE_MAX_SERVICES=3
PENX_CVE_MAX_PACKAGES=4
PENX_CVE_MAX_RESULTS=15
# Optional; never commit secrets:
# PENX_NVD_API_KEY=
# PENX_GITHUB_ADVISORY_TOKEN=
All discovery happens against public catalog APIs, not by scanning unrelated hosts. NVD receives CPE vendor/product/version, OSV receives explicit package URLs, and GitHub receives package/version. No scan target, credentials or raw scanner text is sent by the engine. Internet access and API availability are required; offline failures are called out as unavailable, not interpreted as no vulnerabilities. Set PENX_CVE_DISCOVERY=off to disable it.
CPE strings can be incorrect, NVD CPE criteria can have complex platform relationships, and many Linux distributions backport fixes. These limitations require manual verification against vendor and distribution advisories. The engine limits API requests to avoid excessive latency and rate limiting.
The discovery engine also enriches candidates with NVD CVSS, FIRST EPSS (a 30-day exploit probability), and CISA KEV (known exploitation in the wild). The output distinguishes unavailable lookups from low scores. These values prioritize investigation; they do not prove a scanned machine is vulnerable.
A more conservative NVD evaluator interprets nested AND/OR criteria and negated conditions using unknown when the scanner lacks a complete platform inventory. Vendor-specific version schemes remain uncertain instead of being compared as generic Python package versions.
For systems where you already know the OS distribution, set the corresponding hint to enable official advisory lookups. Example:
PENX_CVE_PRIORITY=on
PENX_CVE_MAX_VERIFY=20
# Set only if independently known (never inferred from an SSH banner):
# PENX_CVE_DISTRO_HINT=ubuntu:jammy
# PENX_CVE_DISTRO_HINT=debian:bookworm
# PENX_CVE_DISTRO_HINT=rhel:9
PenX also re-runs candidate discovery after additional model-requested tool scans, preserving their raw output so newly observed CPEs are not lost in the summarization step. Catalogue queries never grant the model permission to scan outside its authorized target.
PenX can request schema-constrained JSON findings from LM Studio, Ollama and llama.cpp, then validate field types and required values before saving. It first tries a JSON Schema response format, then JSON-object mode if needed. The default mode warns and falls back to legacy text parsing if a model cannot produce valid JSON. Enable strict mode to fail instead of falling back.
CVE identifiers are checked through the official NVD CVE API and the CISA Known Exploited Vulnerabilities catalog. Reference statuses, exact scanner-evidence matching and source URLs are added to each finding and included in exported reports. A CVE being listed does not establish that your target uses an affected version or is exploitable. This requires separate manual verification.
PENX_STRUCTURED_OUTPUT=auto
PENX_VERIFY_SOURCES=on
# Optional private NVD API key
# PENX_NVD_API_KEY=
auto (default), strict (reject invalid JSON) or off (legacy text).on (default), or off for offline analysis. NVD receives public CVE IDs, not your scan target or raw scan output. CISA KEV is downloaded separately.unavailable. PENX_CVE_MAX_VERIFY (default 20, maximum 30) caps individual CVE checks; installed-package status still requires vendor package evidence.Download releases · Windows release workflow
When a version tag such as v0.1.0 is pushed, GitHub Actions runs the offline tests, builds a portable Windows folder with PyInstaller, smoke-tests the EXE and publishes PenX-Windows-x64.zip plus SHA256SUMS.txt in GitHub Releases. The workflow can also be started manually, generating an Actions artifact without creating a public release.
The ZIP includes the first-run Windows scanner setup wizard, but it does not redistribute Nmap/Npcap, Ruby/WhatWeb, or Perl/Nikto. On the first launch of PenX.exe, PenX checks for these components and asks for permission to install missing tools from their upstream sources. This requires internet access and may require UAC approval, winget, and interaction with the official Nmap installer. You can skip the setup and use available features; rerun it later with PenX.exe --setup. Nothing is downloaded without consent.
The EXE also creates .env from the bundled .env.example only if no .env already exists. Edit your private .env to configure your local LM Studio, Ollama or llama.cpp model; PenX does not download or install an LLM. Use PenX.exe --setup-status to inspect component presence without downloads or scans. Release downloads only appear after the tag-triggered workflow succeeds.
Launch PenX and choose [1] New Scan. Enter a domain or IP address that you own or are expressly authorized to assess.
[1] New Scan
[?] Enter target IP or domain: 192.0.2.10
The example address belongs to a documentation-only range; substitute an authorized, reachable target for real testing.
[1] Nmap
[2] WHOIS
[3] WhatWeb
[4] HTTP headers
[5] DNS
[6] Nikto
[a] All except Nikto
[n] All including Nikto
Select individual tools or a group. Some operations can take longer, especially a Nikto-inclusive scan.
PenX collects scanner output and can pass the evidence to a local language model. Its analysis workflow can propose potential security findings, suggested remediation, and further supported checks.
Always review the underlying scanner evidence before calling a finding verified.
Choose [2] View History to return to an earlier scan. From the history workflow, you can inspect results, make corrections, and export readable reports.
Additional main-menu options support external evaluation packages, importing review results, JSONL exports of corrected sessions, and separately distilled analysis rules. These are review and data-management features; PenX does not automatically fine-tune a model when you correct a finding.
From the main menu choose [10] Scan Diff & Trends, enter an existing target, then compare any two saved sessions of that exact target. PenX reports:
Each newly saved scan of a previously assessed target also prints a regression comparison against the previous session. This is an on-scan check, not a scheduler. PenX does not initiate periodic scans. Not observed does not mean fixed: filters, errors and missing scanner coverage can explain differences.
Choose [9] Passive-Only Recon. It queries third-party DNS resolvers, registry WHOIS, Certificate Transparency (crt.sh) and RDAP; on public IPs it can optionally read Shodan and Censys data if you supply their credentials. It does not contact the target via HTTP, TLS or a port scanner, and model-requested TOOL and SEARCH dispatch is blocked during this scan mode.
Third-party services do receive the target name or IP. This is not an anonymity mode. HTTP-header and live TLS checks are intentionally not part of passive-only reconnaissance.
Optional private .env settings:
PENX_SHODAN_API_KEY=
PENX_CENSYS_API_ID=
PENX_CENSYS_API_SECRET=
These lookups can be unavailable or rate-limited; absent data is not proof that a target does not expose a service. Only use targets you are authorized to assess.
Choose [11] Risk + MITRE ATT&CK Review for a saved session. PenX calculates an explainable 0–100 internal prioritization score from recorded severity and finding confidence. It does not pretend to know missing CVSS, EPSS, CISA KEV membership or real external exposure. A small, documented set of behavior-oriented text indicators may suggest candidate ATT&CK techniques; a CVE by itself is not evidence of a particular ATT&CK technique.
Override the score, ATT&CK IDs or quick-win/planned classification interactively.
These human overrides are kept privately under
data/risk_overrides.json and included when exporting the per-session
reports/risk_SL<id>.json file. Reopen the view to check applied changes.
Choose [12] Terminal Output to toggle between QUIET and LIVE for
the current session. LIVE streams subprocess lines and compatible local LLM
SSE tokens as they arrive. Nmap receives progress flags in live mode.
The equivalent startup setting is PENX_LIVE_OUTPUT=1 in your private .env
or process environment. The default remains QUIET for compatibility.
Percentage completion is not fabricated: scanners that do not emit progress
will show text only. The final saved scan report is identical in either mode.
Windows without WSL remains supported. No Docker / Lab Mode / Offline Replay or nonstandard UI dependency was added.
  Authorized IP / domain
           |
           v
    Reconnaissance
 Nmap / WHOIS / WhatWeb
  HTTP / DNS / Nikto
           |
           v
   Evidence collection
           |
           v
   Local LLM analysis
   + optional tool loop
           |
           v
 Review / verify / correct
           |
           v
    Local scan history
     SQLite / MariaDB
           |
           v
  HTML / PDF / JSONL
.env if preferred..env, database files, scan output, exports, and model-evaluation packages as potentially sensitive. Do not commit them to a public repository.See .env.example for supported configuration variables and .gitignore for excluded local artifacts.
To create a Windows executable after installing the project, run:
build-exe.bat
PyInstaller creates a folder-based application:
dist\PenX\PenX.exe
Keep the entire dist\\PenX folder when moving the build. This is not a single-file executable. Nmap/Npcap, Ruby, Perl, WhatWeb and Nikto are installed separately after approval at first EXE launch, not bundled into the EXE. Public prebuilt ZIPs are available on the Releases page after a successful tagged release; the source tree itself does not contain a prebuilt EXE.
The executable needs to be built and checked on Windows; Linux CI does not establish that the packaged EXE works on every Windows installation.
PenX/
├── penx.py                    # CLI and scan/session menus
├── tools.py                   # Recon tool integration
├── scanner_runtime.py         # Scanner availability and execution helpers
├── first_run_setup.py         # Consent-based portable EXE dependency wizard
├── llm.py                     # Local LLM requests and analysis loop
├── search.py                  # Optional web search integration
├── prompts.py                 # Analysis and review prompts
├── db.py / db_backend.py      # History, corrections, data backends
├── export.py                  # HTML/PDF and other exports
├── .env.example               # Example local configuration
├── install-windows.bat        # Initial Windows setup
├── install-scanners.bat       # Scanner installation retry
├── check-windows.bat          # Dependency diagnostics
├── repair-python.bat          # Python environment repair
├── start-windows.bat          # CLI launcher
├── build-exe.bat              # PyInstaller build
├── WINDOWS.md                 # Detailed installation help
├── CONTRIBUTING.md            # Contribution guidelines
├── SECURITY.md                # Responsible disclosure
└── .github/workflows/ci.yml   # Offline test workflow
PenX includes offline automated tests for data management, export workflows, scanner dispatch, and Windows setup helpers. GitHub Actions runs tests on Windows and Ubuntu. They intentionally do not scan public targets.
| Action | Command / document |
|---|---|
| Check dependencies | check-windows.bat |
| Run local offline tests | run-tests.bat |
| Retry external scanner setup | install-scanners.bat |
| Repair Python dependencies | repair-python.bat |
| Build Windows executable | build-exe.bat |
| Installation help | WINDOWS.md |
An automated test passing does not prove that all third-party scanner installations, scan modes, or local AI models have been verified in every environment. PenX is actively developed; bug reports and Windows compatibility reports are welcome.
Pull requests and issue reports are welcome, especially for Windows compatibility, scanner integrations, model compatibility, documentation, and reproducible tests. Before opening an issue, remove API keys, personal data, private IP inventories, and sensitive target output.
If PenX is useful to you, consider starring the repository — it helps other Windows security enthusiasts find the project.
Use PenX only against systems you own or have explicit authorization to test. Unauthorized reconnaissance may violate laws, policies, or agreements. PenX is intended for defensive research, authorized penetration testing, and education, not covert access or exploitation of third-party systems.
AI-generated vulnerability descriptions, severities, or fixes can be wrong. Verify important findings using primary evidence and qualified human review.
PenX builds upon METATRON by Soorya Thejas, which is licensed under the MIT License. The original copyright notice is retained in LICENSE.
Thanks to the developers and maintainers of Nmap, Npcap, WhatWeb, Nikto, Ollama, LM Studio, and the underlying Python libraries. Integrated third-party tools retain their own licenses and are installed separately.
PenX is an independent Windows adaptation of METATRON, not an official upstream distribution.



